
AWS EventBridge is a serverless event bus that lets your applications, AWS services, and supported SaaS partners publish and react to events in near real-time.
In this guide, you’ll use Terraform and Spacelift to create event buses, define rules with event patterns, build scheduled rules with both aws_cloudwatch_event_rule and the dedicated EventBridge Scheduler, wire up Lambda, SQS, CloudWatch Logs, and API Destination targets, transform event payloads, and set up retries, dead-letter queues, and archives, with working code at every step.
- What is AWS EventBridge?
- Prerequisites
- Setting up Terraform for AWS
- Managing Event Buses with Terraform
- Configuring EventBridge rules in Terraform
- Using schedulers with Terraform
- Event targets in EventBridge using Terraform
- Monitoring EventBridge with Terraform
- Best practices for Terraform and EventBridge integration
What is AWS EventBridge?
AWS EventBridge is a serverless event bus service that allows you to listen to events from your applications, supported third-party applications, and AWS services. It simplifies building event-driven architectures by serving as the central event hub and enabling applications to publish, subscribe to, and react to events in near real-time.
AWS EventBridge also provides built-in support for creating schedulers that emit events at scheduled times. It enables developers to decouple their systems and build scalable asynchronous event-driven applications.
How does EventBridge work?
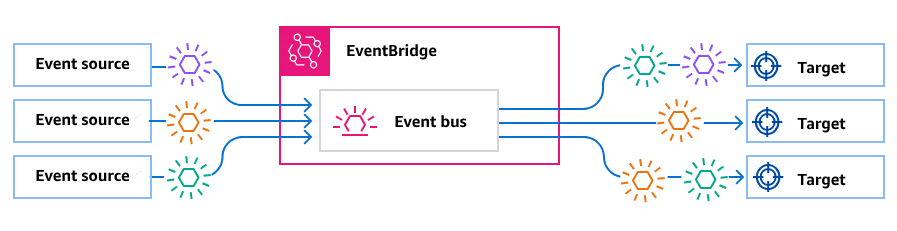
Amazon EventBridge operates using four main concepts:
- Events – Events are the messages that describe a change or an occurrence, like a file being uploaded to an S3 bucket or a DynamoDB record change.
- Event sources – Event sources are the systems that emit an event, like an AWS service, a supported third-party application, or your API/application. You can publish custom events to the event bus via the EventBridge API or SDK.
- Event buses – Event buses are the central hub for events. Each event bus receives events from specific sources and forwards them to the appropriate targets. EventBridge already has a default event bus available.
- Targets – Targets are the destination of the event. AWS Services (Lambda, SQS, SNS, other Event Buses), HTTP Endpoints, or third-party services.
Source: AWS EventBridge User Guide
The EventBridge process can be described in three steps:
- Step 1: Event generation – An event source emits an event to an EventBridge Bus, or a scheduled rule is triggered.
- Step 2: Matching event rules – Rules allow you to define conditions for matching events. For example, you might only want to act on events triggered by a specific AWS region or event type. The event will be matched to any event rules that were defined.
This step also performs Input Transformation if defined in the rule, you can specify how to change the event using JSON paths that will extract information from the original event in a template you provide.
- Step 3: Event delivery (Targets) – Matched events are sent to targets, which can be AWS services (e.g., Lambda, SQS, SNS) or HTTP endpoints via API destinations.
For instance, you can use a Lambda function to process events or send messages to an SQS queue for asynchronous handling.
Learn more: What is Amazon (AWS) EventBridge & How Does It Work?
Prerequisites
In this article, we’ll do hands-on work to demonstrate and learn how we can use EventBridge and Terraform with Spacelift to provision Buses, Rules, and other features. To follow this tutorial, you’ll need:
- AWS Account
- Spacelift account
- Your favorite code editor
Note that all services we’ll use here are under the free tier, so you don’t have to worry about AWS costs.
Setting up Terraform for AWS
Let’s get started by setting up our Terraform configuration to use AWS. If you have Terraform set up already, you can move along to the next step.
In your project root folder, create a new file, terraform.tf, which we’ll be using to add our Terraform initial configuration. There, you can add the following code to the file:
terraform {
  required_providers {
    aws = {
      source  = "hashicorp/aws"
      version = "~> 6.0"
    }
  }

  backend "s3" {
    bucket = "YOUR_S3_BUCKET"
    key = "state.tfstate"
  }
}

provider "aws" {}
Check the latest hashicorp/aws provider version on the Terraform Registry and adjust the version constraint if needed, especially as new major versions are released.
Here, we define this configuration as requiring the provider hashicorp/aws and add the provider configuration for AWS.
This is not required if you are not using a custom configuration or an alias because Terraform is smart enough to understand which provider is used for each resource as long as you add the provider to the required_providers list. We just add it as a best practice to keep our configuration clear of which providers we are using.
Inside the terraform block, we also define the backend that we’d like to use to store our Terraform state. Here, we are defining an S3 bucket as our backend. If you don’t set the environment variable AWS_DEFAULT_REGION, you must set your backend’s region property.
Note: If you are using Spacelift, you can also use it to manage your state, which makes it much more straightforward. Here, we are using an S3 bucket for demonstration purposes.
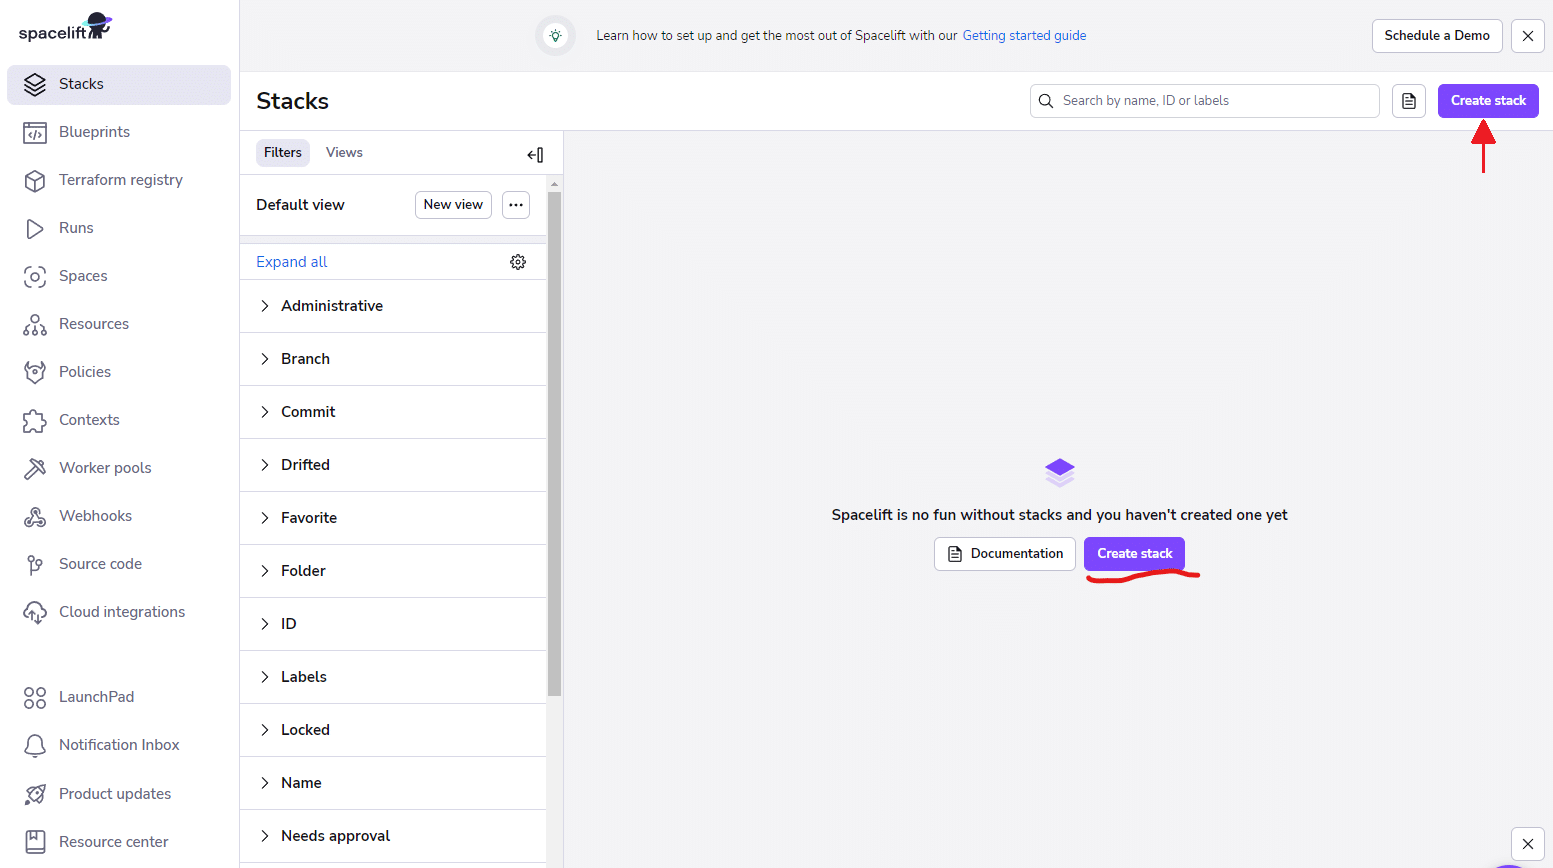
Now, let’s set up Spacelift to automate our infrastructure deployment. Log in to Spacelift and click on Create Stack to create a stack.
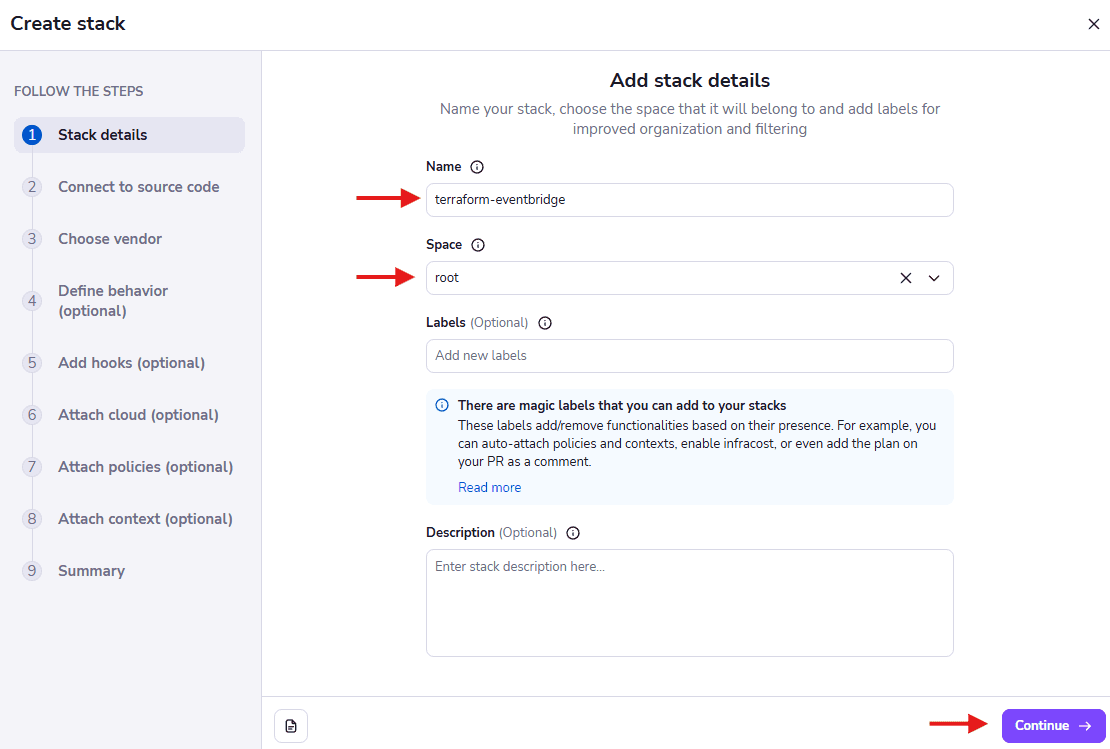
Enter your stack name, the space, label, and description, and click on Continue.
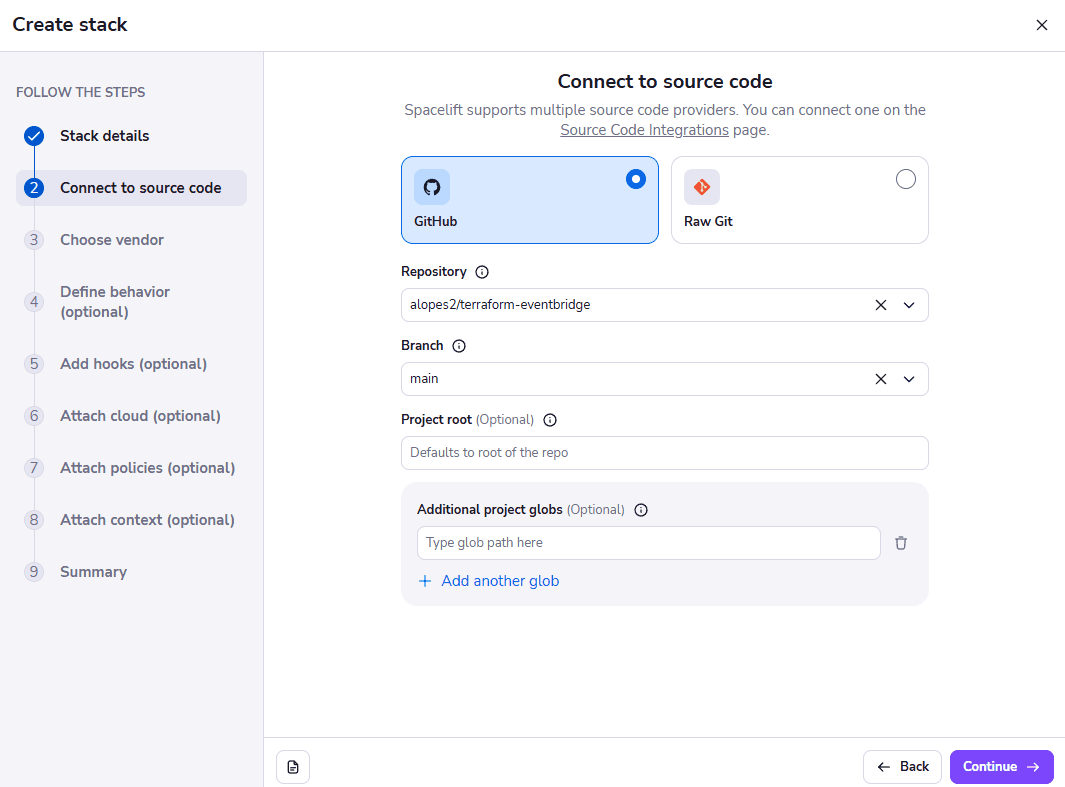
Now, select the source code integration where your code is hosted. Here, we selected GitHub. Then select the repository and the branch, and specify the Project root.
Note that the Project root is your Terraform code’s folder/working directory. So, if it is in the root folder, you don’t need to specify anything. As all our configurations will be at the root of our project, we’ll let this field empty.
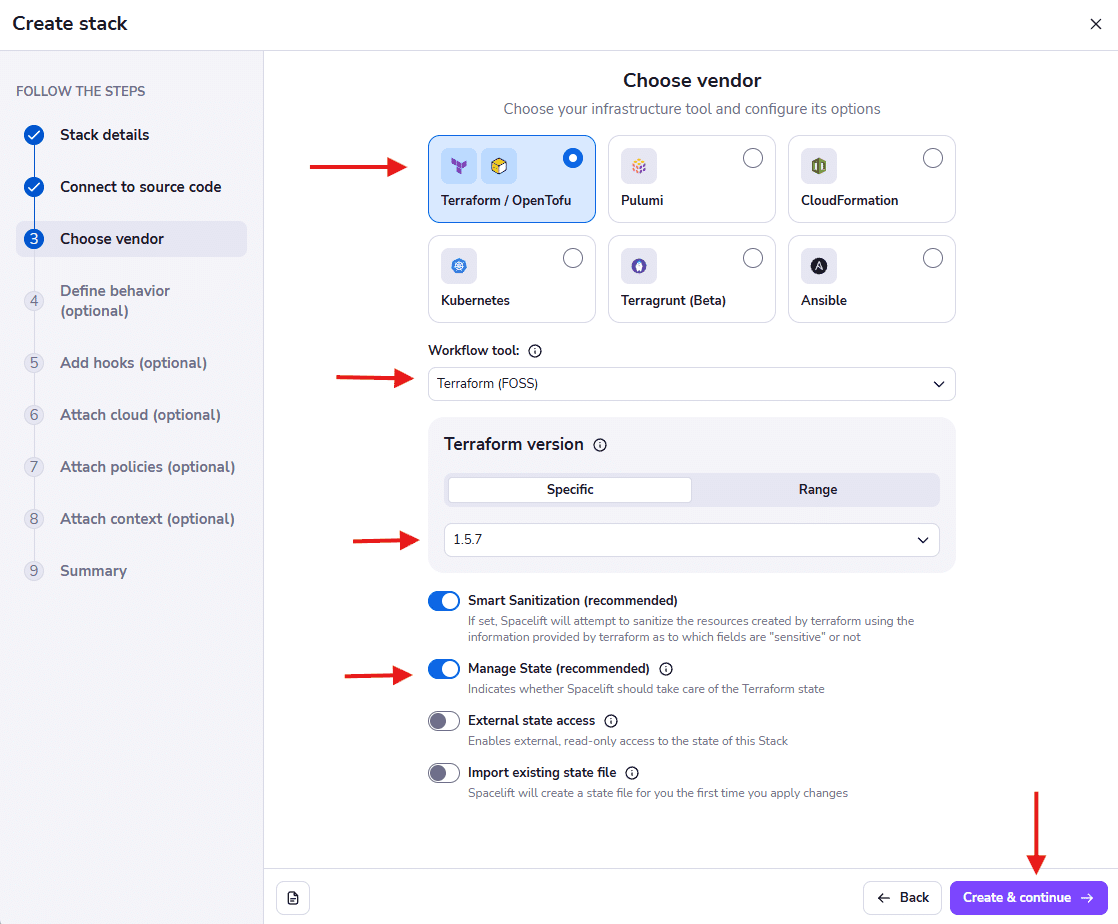
On the next page, we select Terraform as our vendor and then Terraform (FOSS) as the workflow. Specify the Terraform version you want to use.
You are also asked whether you want to set up your own backend or use Spacelift to manage your state.
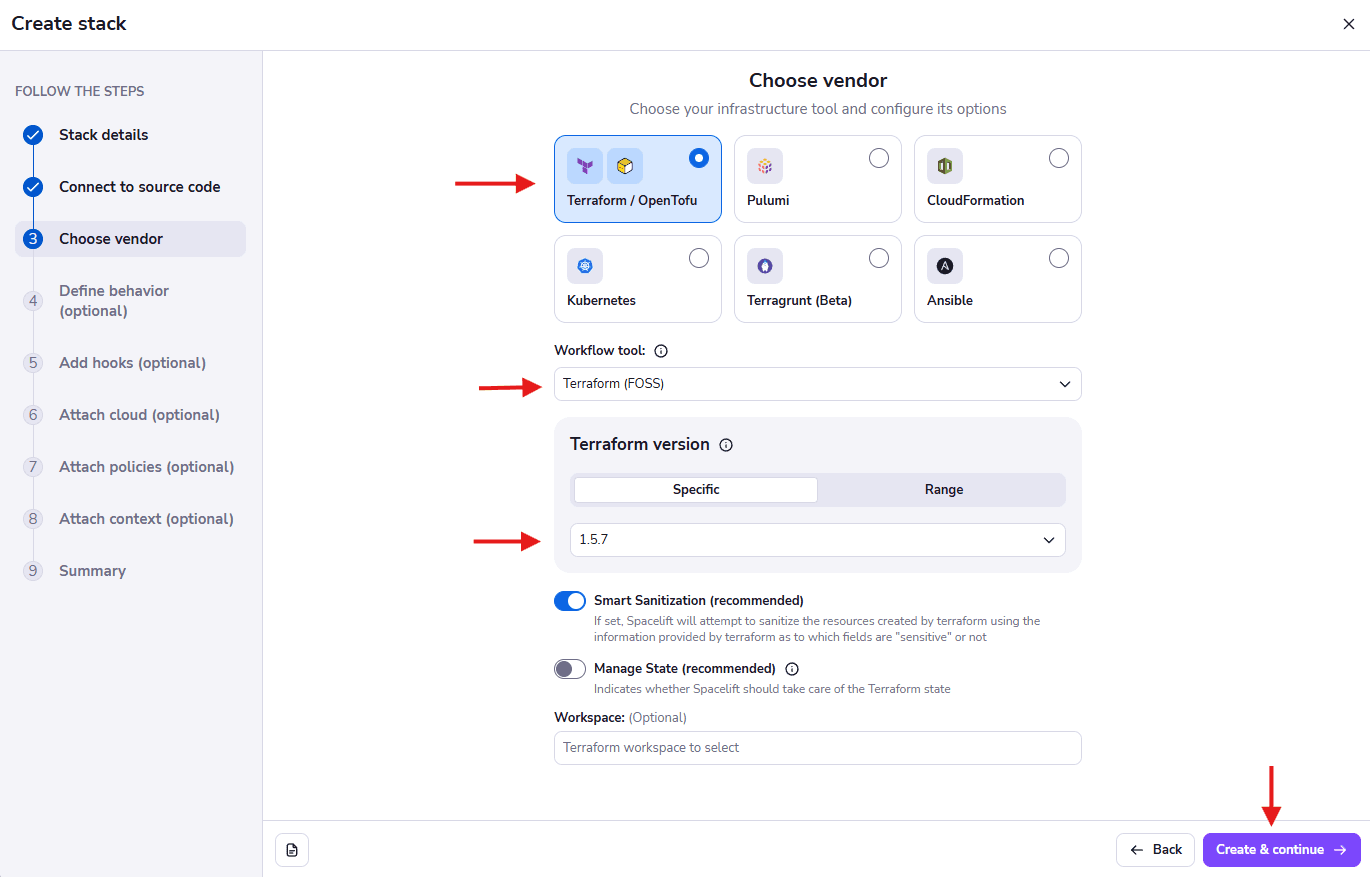
If you’d like Spacelift to manage your state, select the Manage State option. By selecting this option, you are enabling Spacelift as your backend, and it will generate and manage your state for you out of the box.
Note: This is the only chance you’ll have to enable Spacelift as your backend. Once you create your stack, this option cannot be changed.
The option External state access enables your state managed by Spacelift to be accessed from external sources. But only other stacks with administrative access or a user with write permissions with this stack can access the state.
Here, we deselect the Manage State option because we are using an S3 bucket as our backend. Then, we click on Create and Continue.
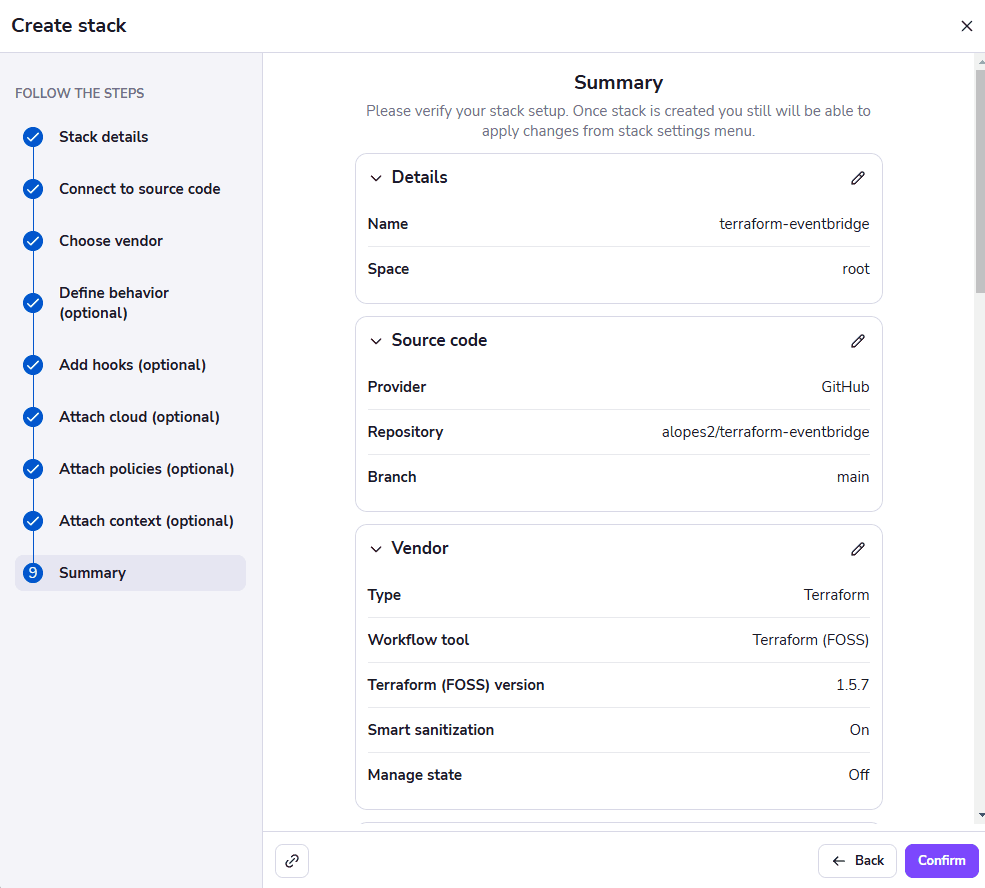
On the next page, you can click on Skip to the summary.

Review your Spacelift configuration. If everything is good, just click on Confirm.
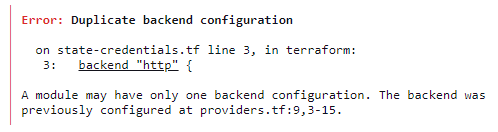
With the Manage State option enabled, Spacelift already has an http backend configured to manage your state. If you manually specify a backend in your Terraform project, you’ll get the following error during initialization.
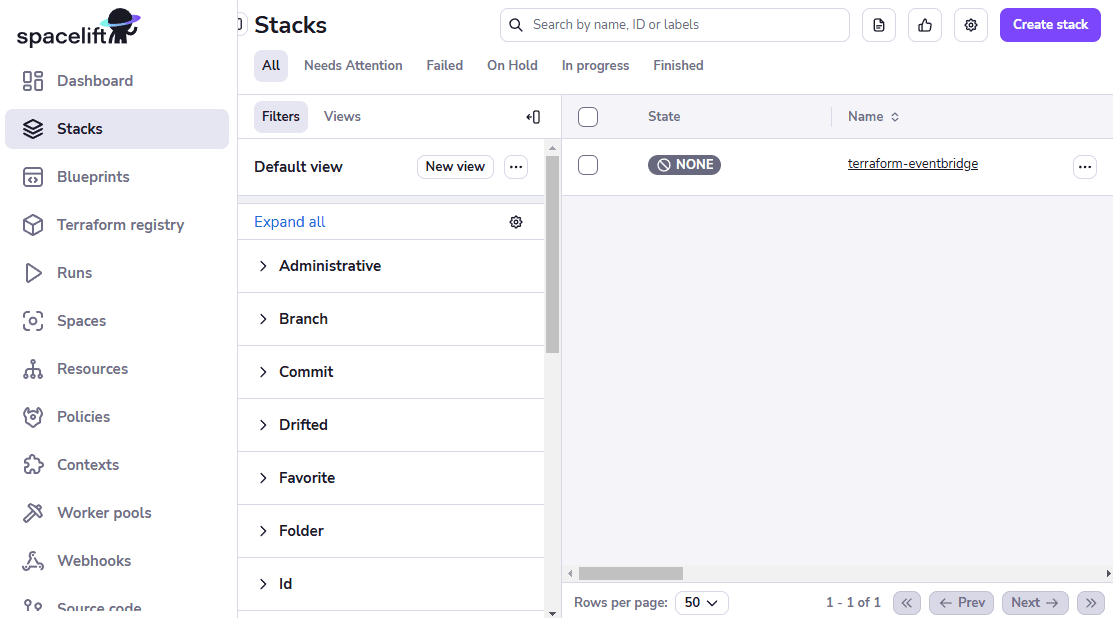
You should see your stack in the Stacks section.
Now, you need to add the credentials for your cloud provider as environment variables.
For that, we have two possibilities:
Manually add the credentials to the environment variables
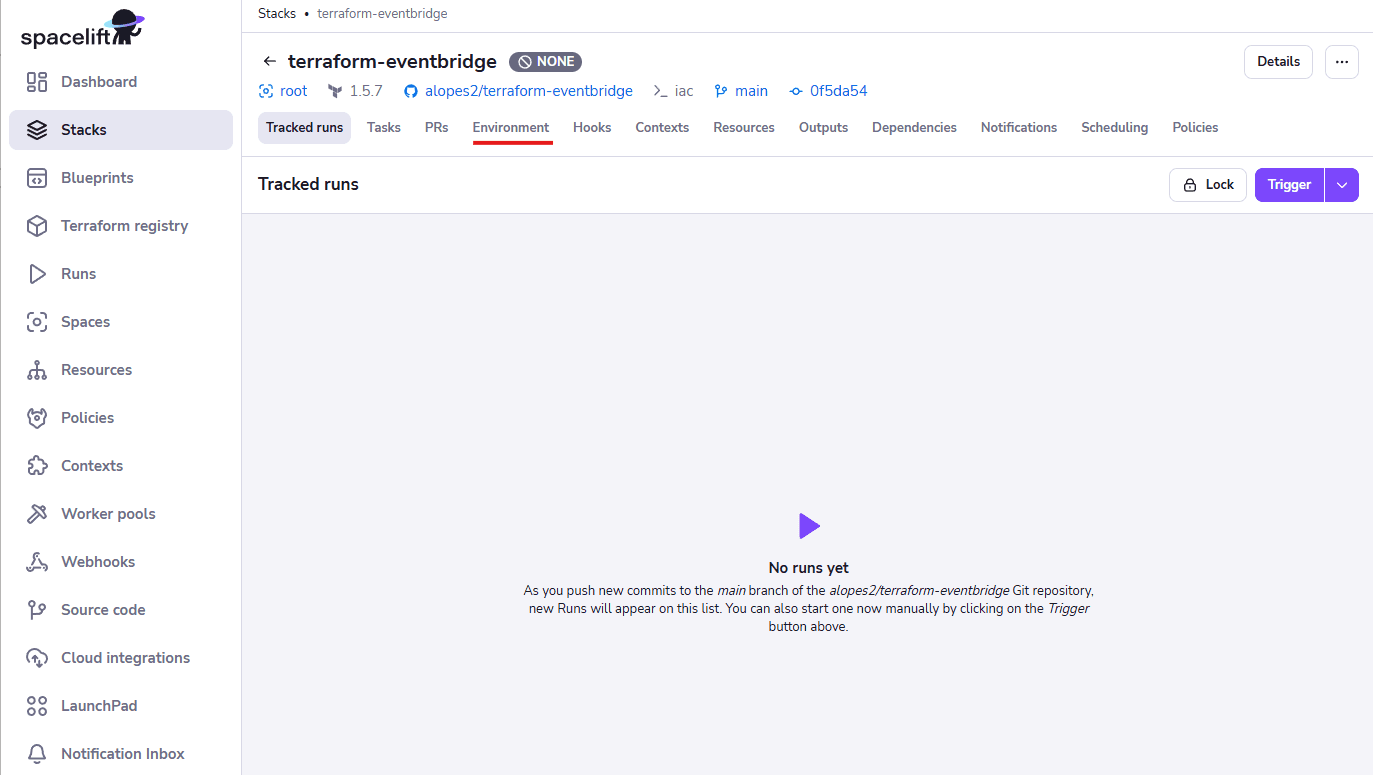
Go to your recently created stack and then go to the Environment section in your stack:
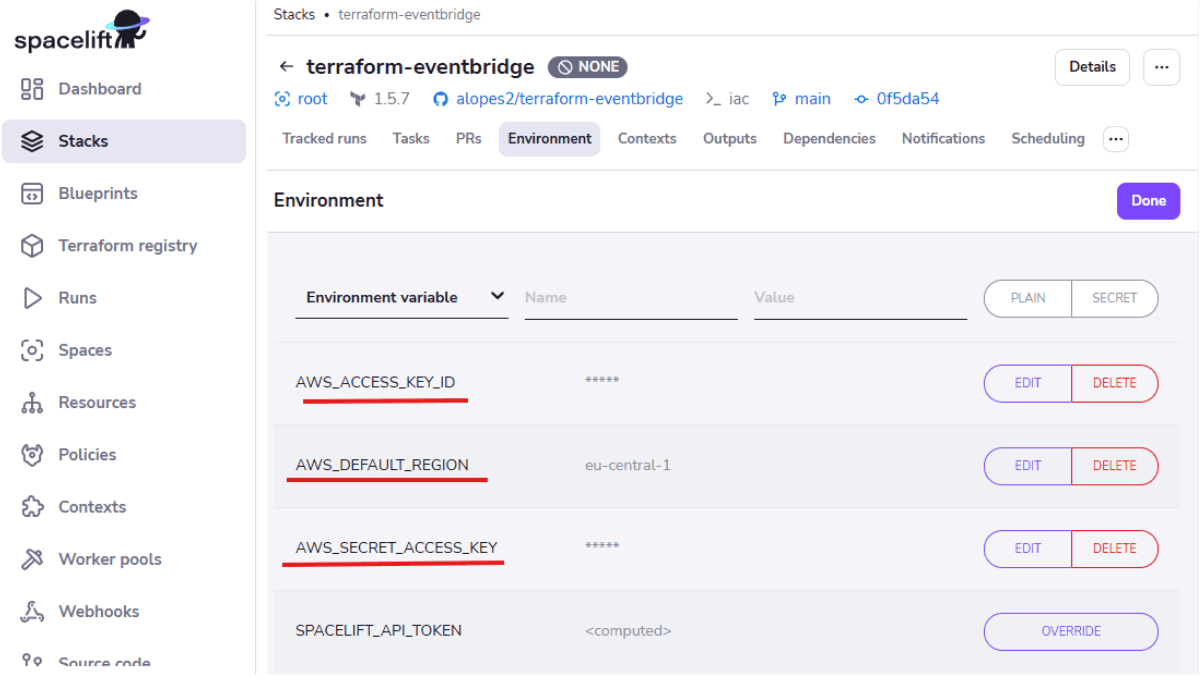
And add the credentials as environment variables. We added AWS credentials:
Use Spacelift cloud integration
With this approach, we let Spacelift integrate directly with our cloud provider without needing to create static keys. For example, you would create a new role for AWS and grant access to Spacelift through an IAM policy. This is a more recommended approach, as it reduces the risk of exposing access keys.
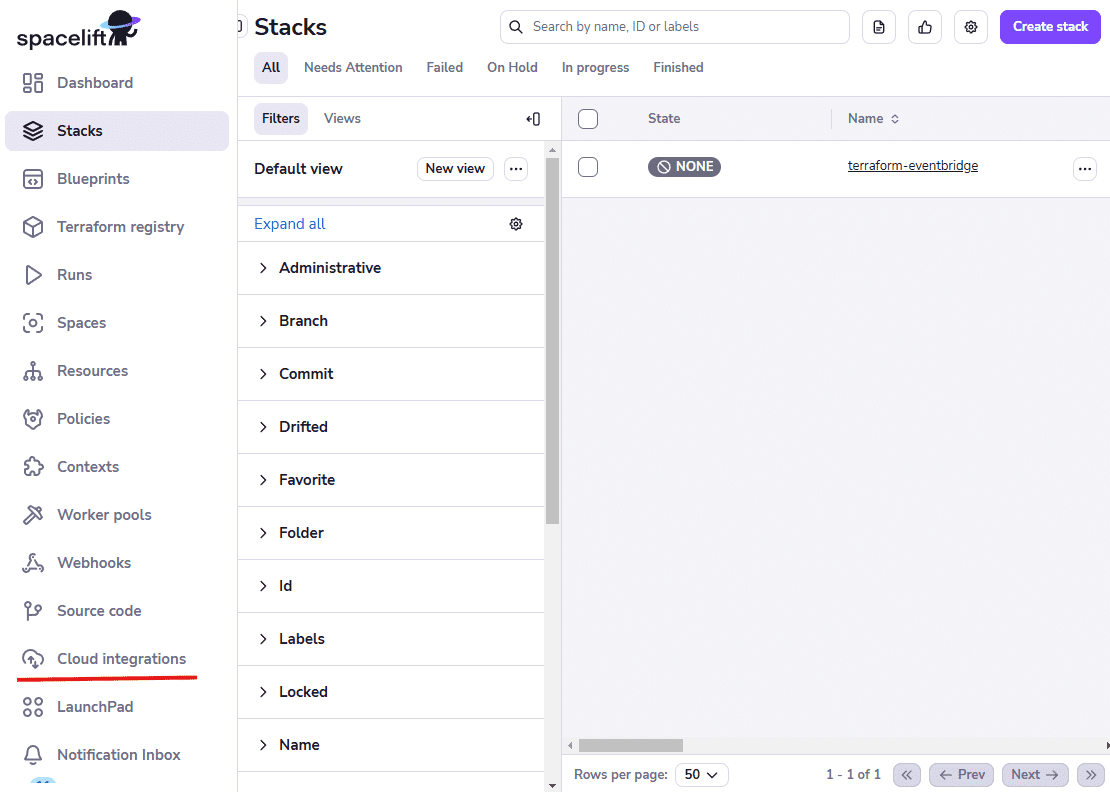
To integrate with a cloud provider, click on the Cloud integrations button on the left menu:
Then, select your cloud provider from AWS, Azure, or GCP and click on Add your first integration.

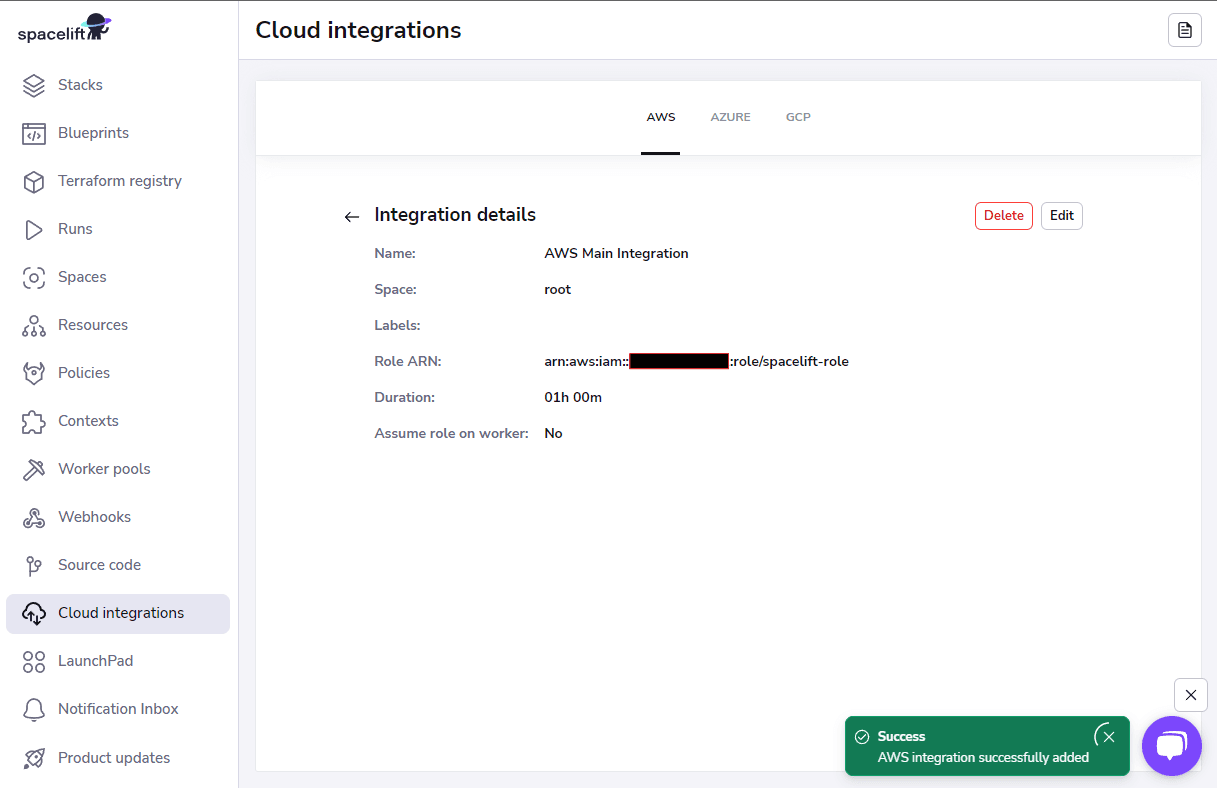
Add a name to your integration, and then add the role ARN that Spacelift will use to assume and perform Terraform actions in your AWS account. This role requires a policy attached to it for Spacelift to assume it.
The role ARN is always in the format arn:aws:iam::<ACCOUNT_ID>:role/<ROLE_NAME>. Here our role name will be spacelift-role.

Click on Create Integration to create it.
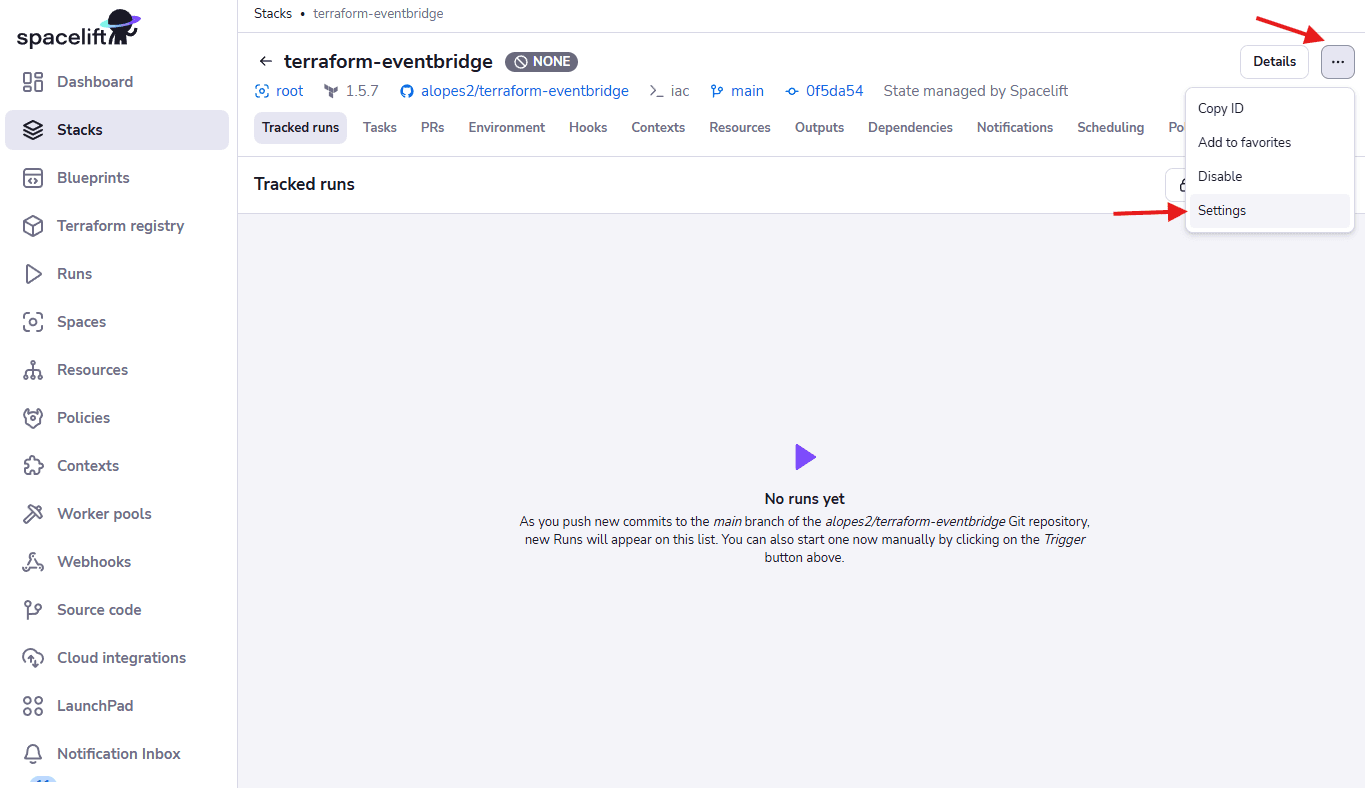
Now, we need to add this integration to our stack so it can use it.
Go to your stack, click on the … button, and then click on the Settings button.
Then, go to the Integrations tab on the left menu panel.
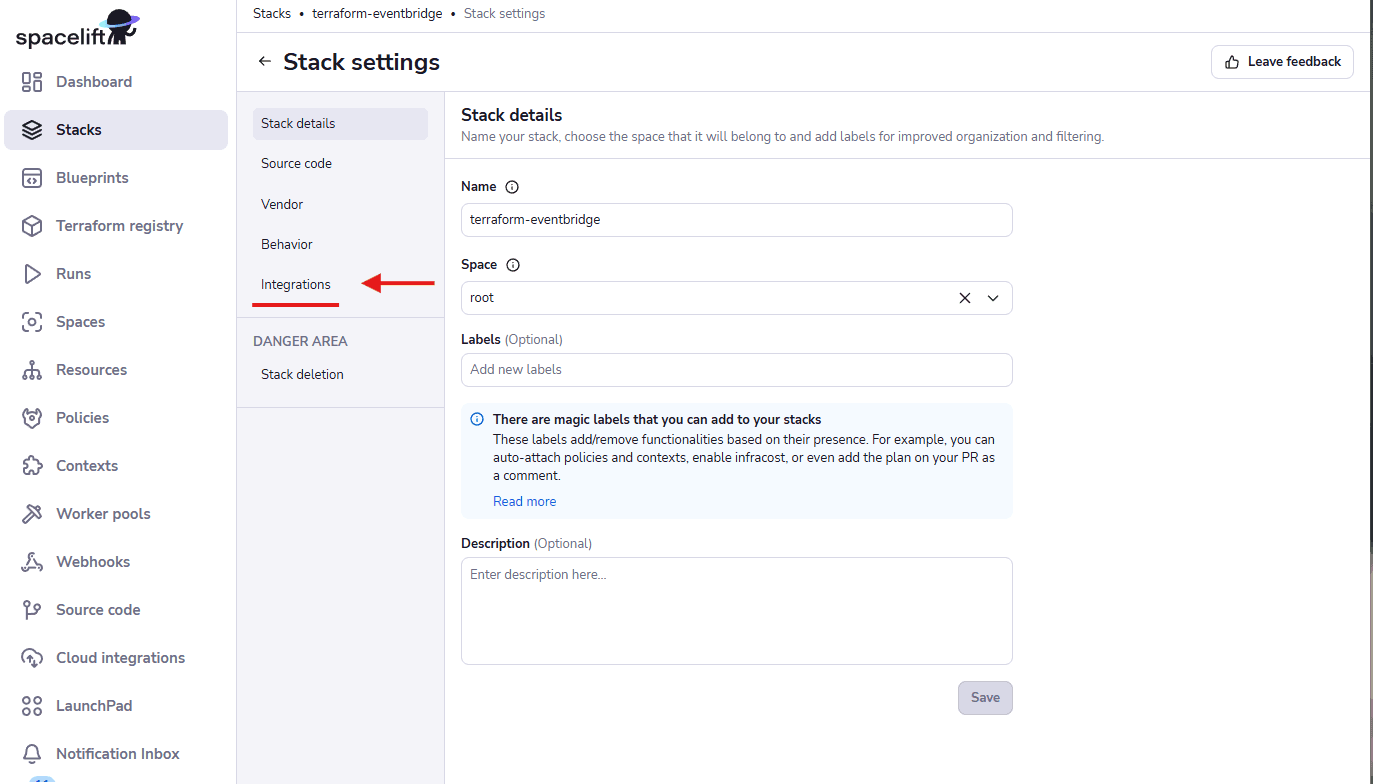
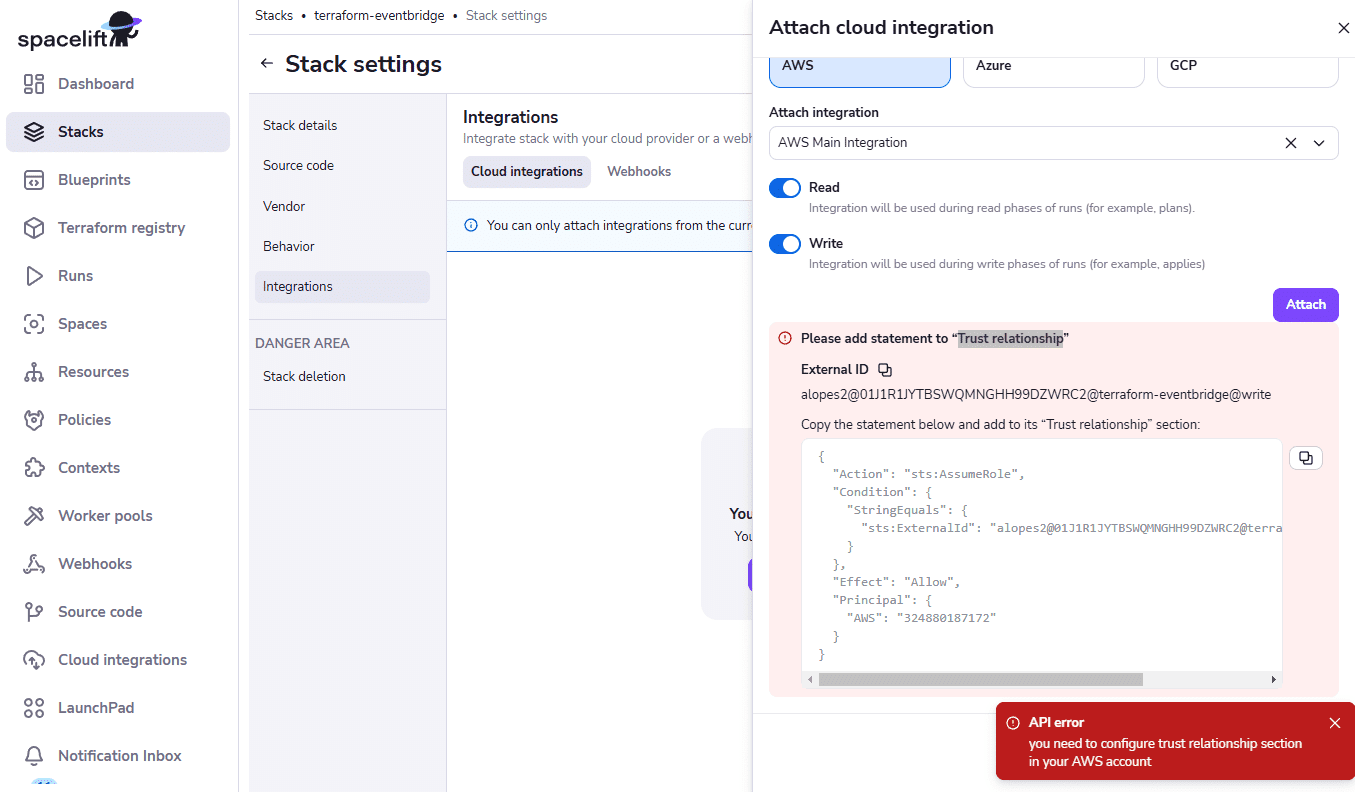
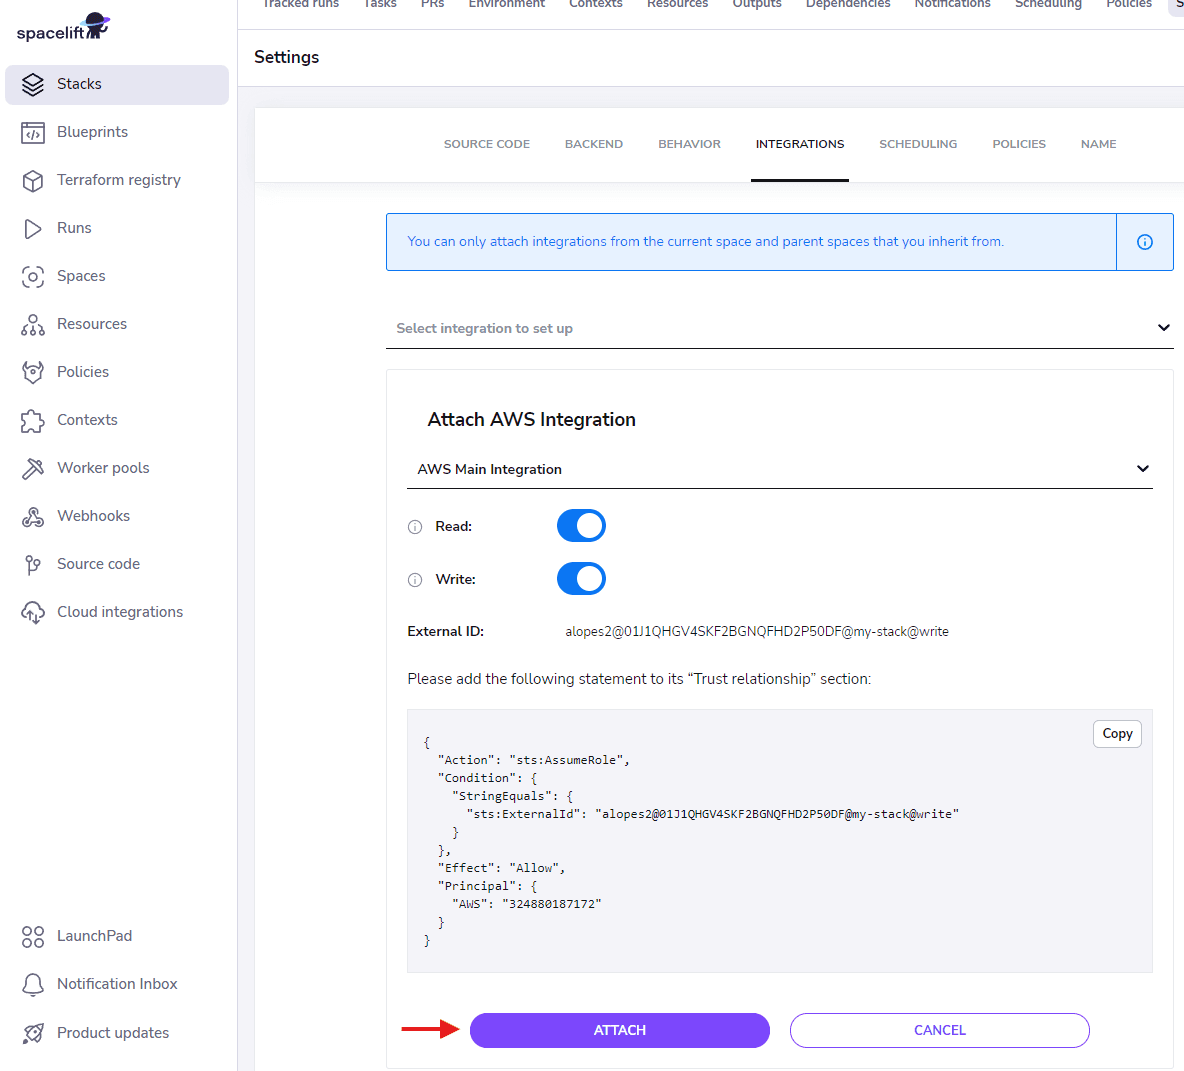
Then click on Attach cloud integration.

On the right, a side panel will appear where you can select your cloud integration and integration rights. Here, we select AWS and Read and Write.
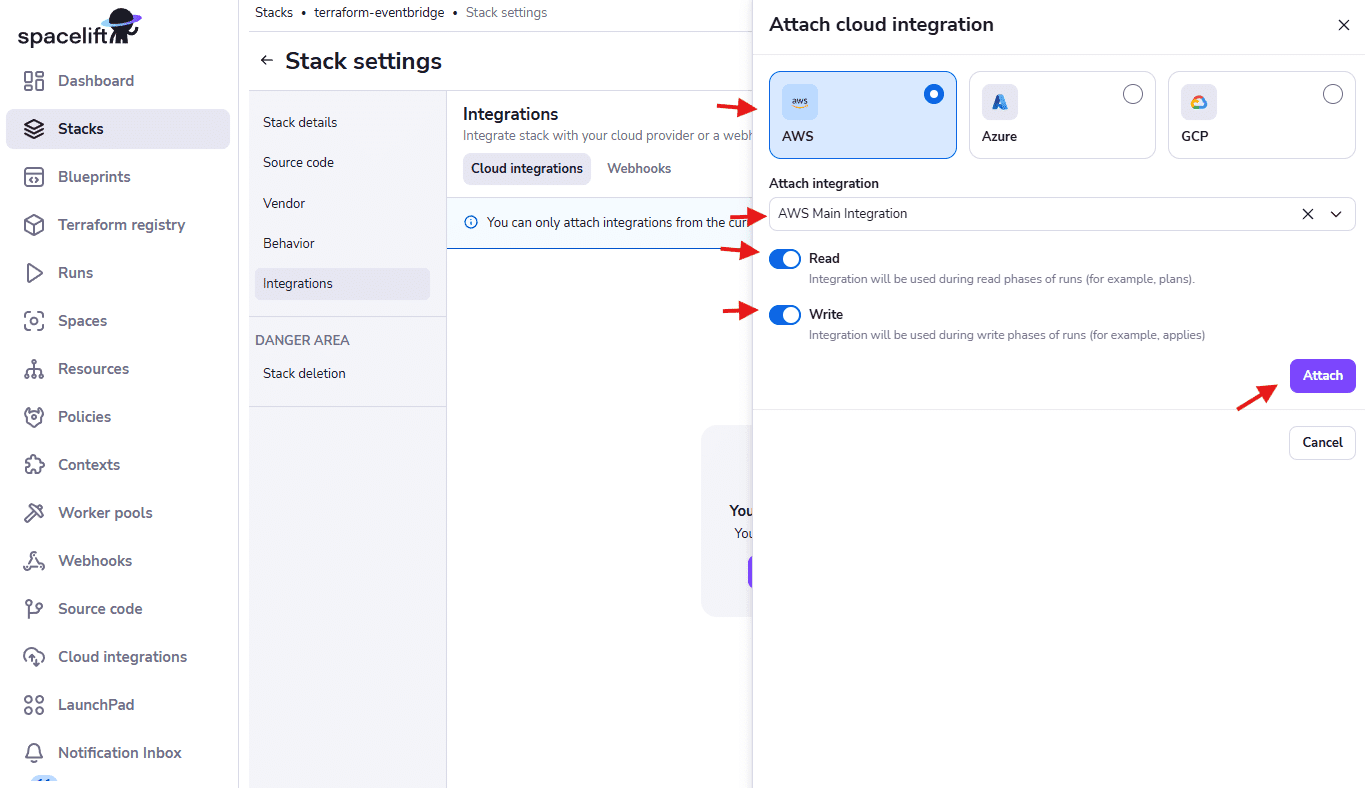
- Read – Required for the plan phase when Terraform requires reading information.
- Write – Required for the apply phase when Terraform will create resources.
If your integration role doesn’t exist in your AWS account or if it doesn’t have the necessary permission, Spacelift will show a prompt with the correct Trust relationship that you need to attach to your role and an API error stating that your role needs to configure the trust relationship.
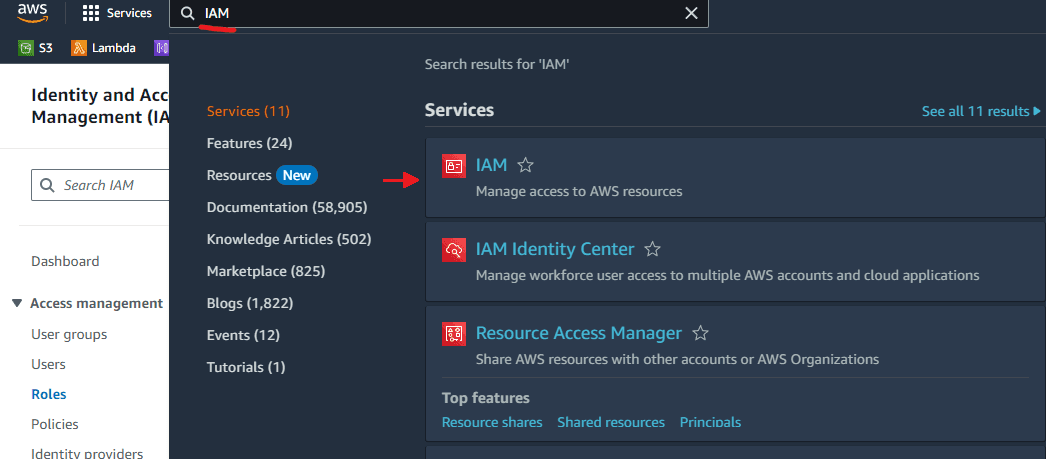
So, let’s create our role and add the required permissions. Go to your AWS account in the IAM console.
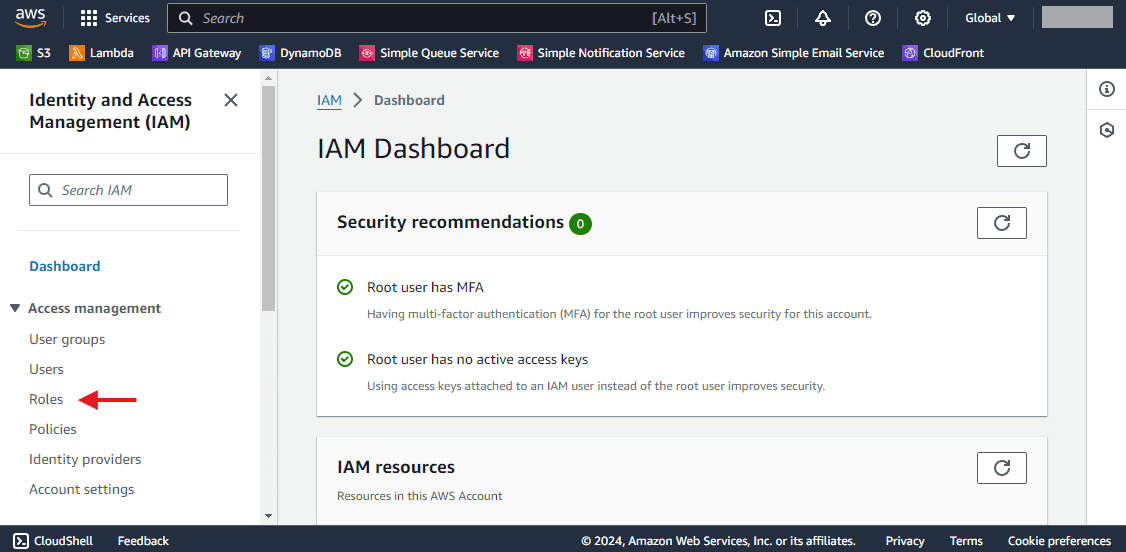
Then go to the Roles section.
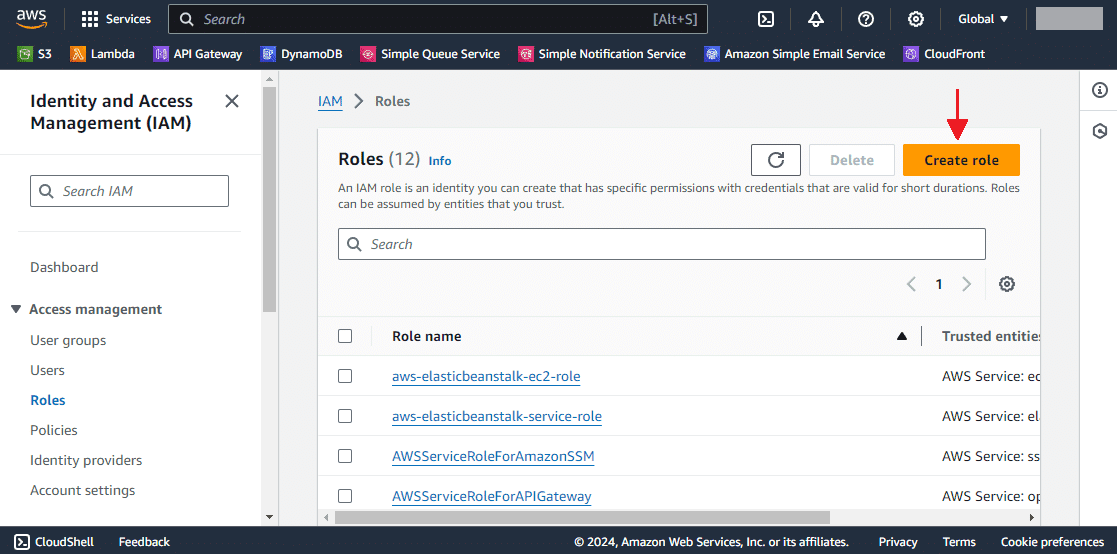
Then click on Create role.
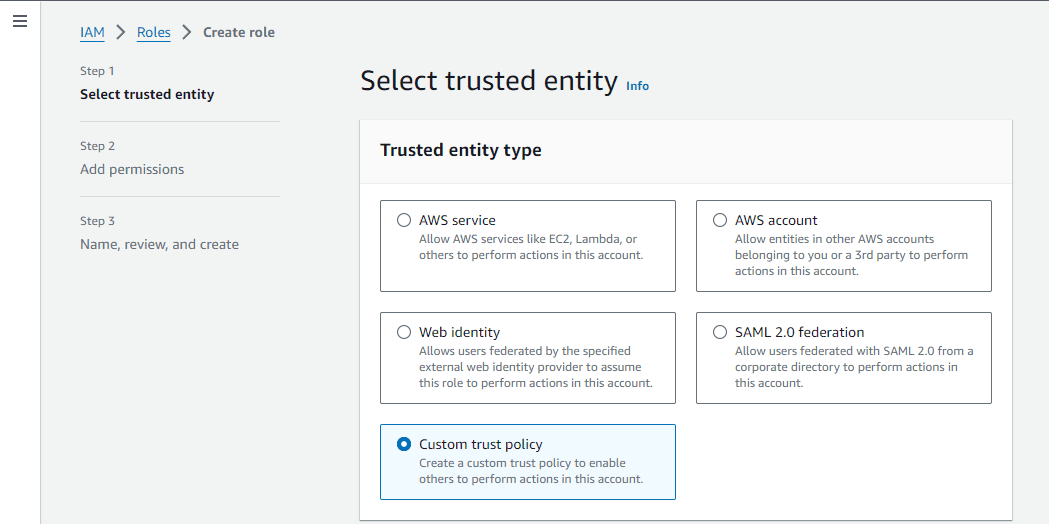
Select Custom trust policy.
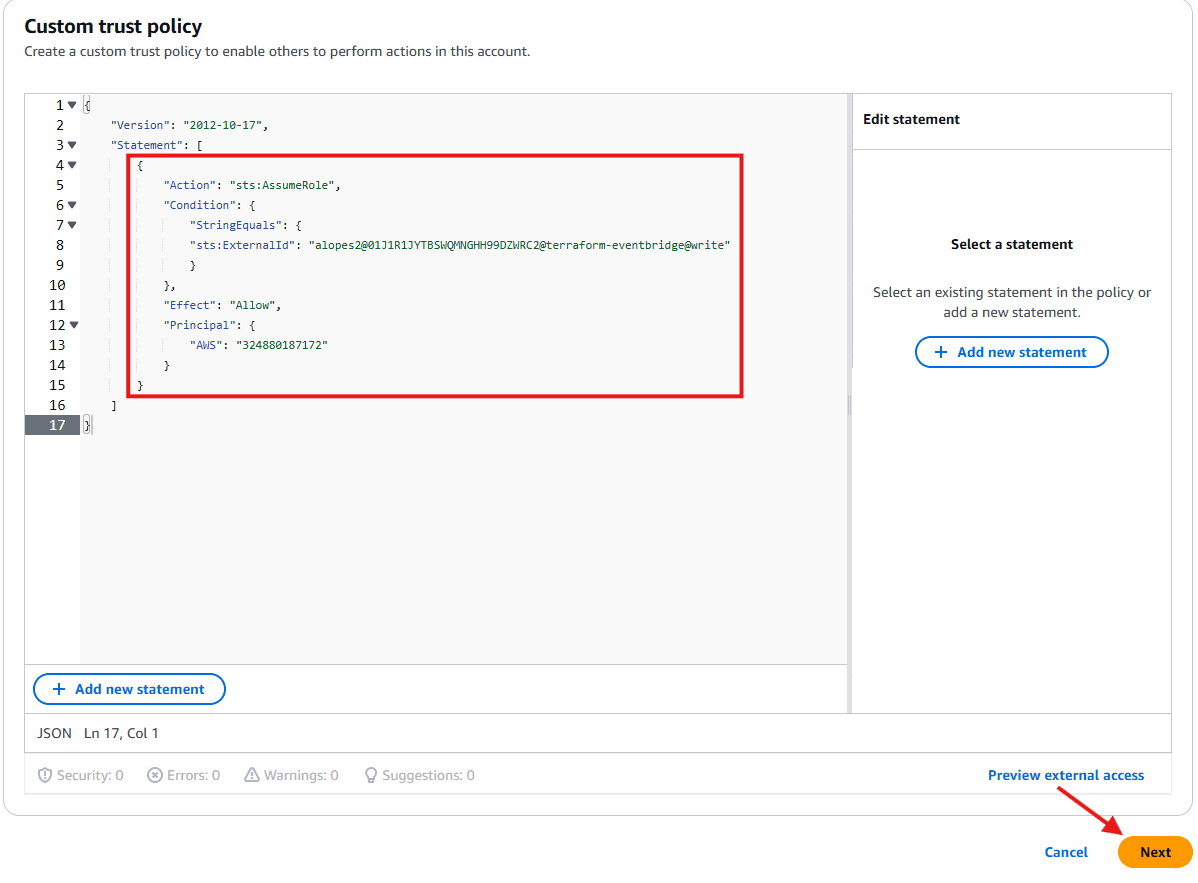
Then, below, you’ll see a section where you can add your own policy. Copy the policy given by Spacelift, paste it inside the Statement array, and click on Next.
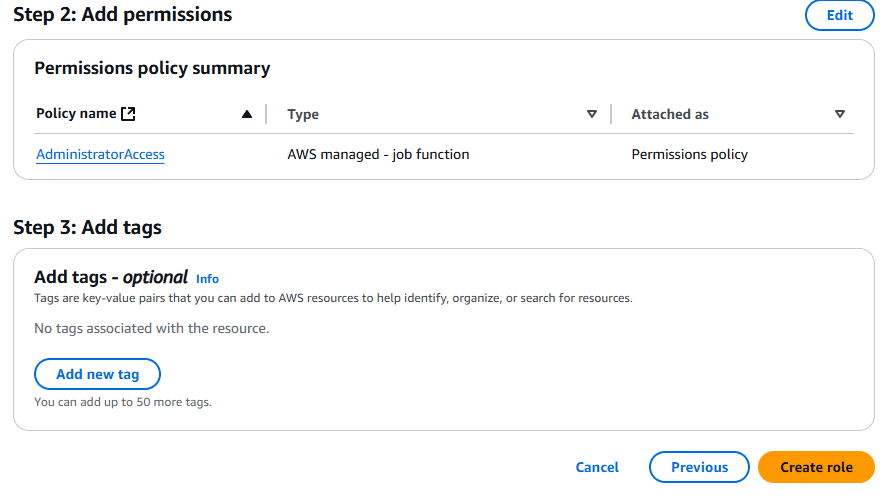
In the next section, you can select the minimum permissions your Terraform role will require to manage your infrastructure. If you don’t need to manage users or groups, select AdministratorAccess and click Next.
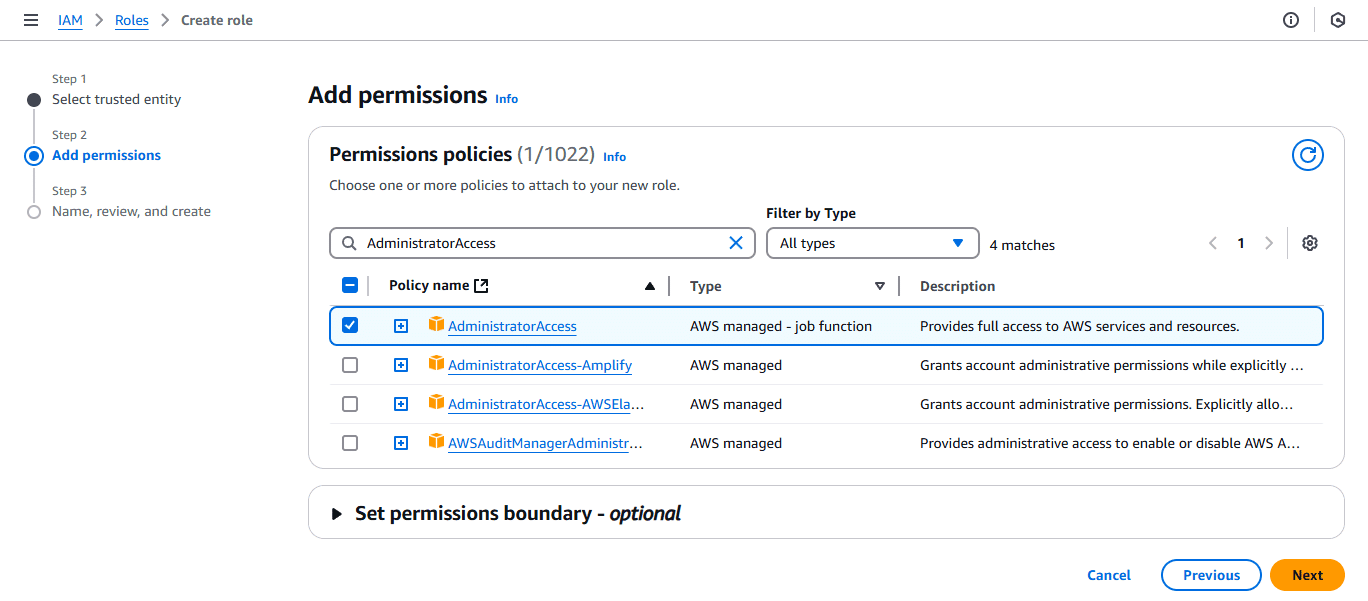
Note: We are assigning AdministratorAccess here for convenience, but you should always use the least privilege principle and assign granular access for the actions that you will require.
Give your role a name and a description. The name must be the same as the one used in your AWS Integration in Spacelift.
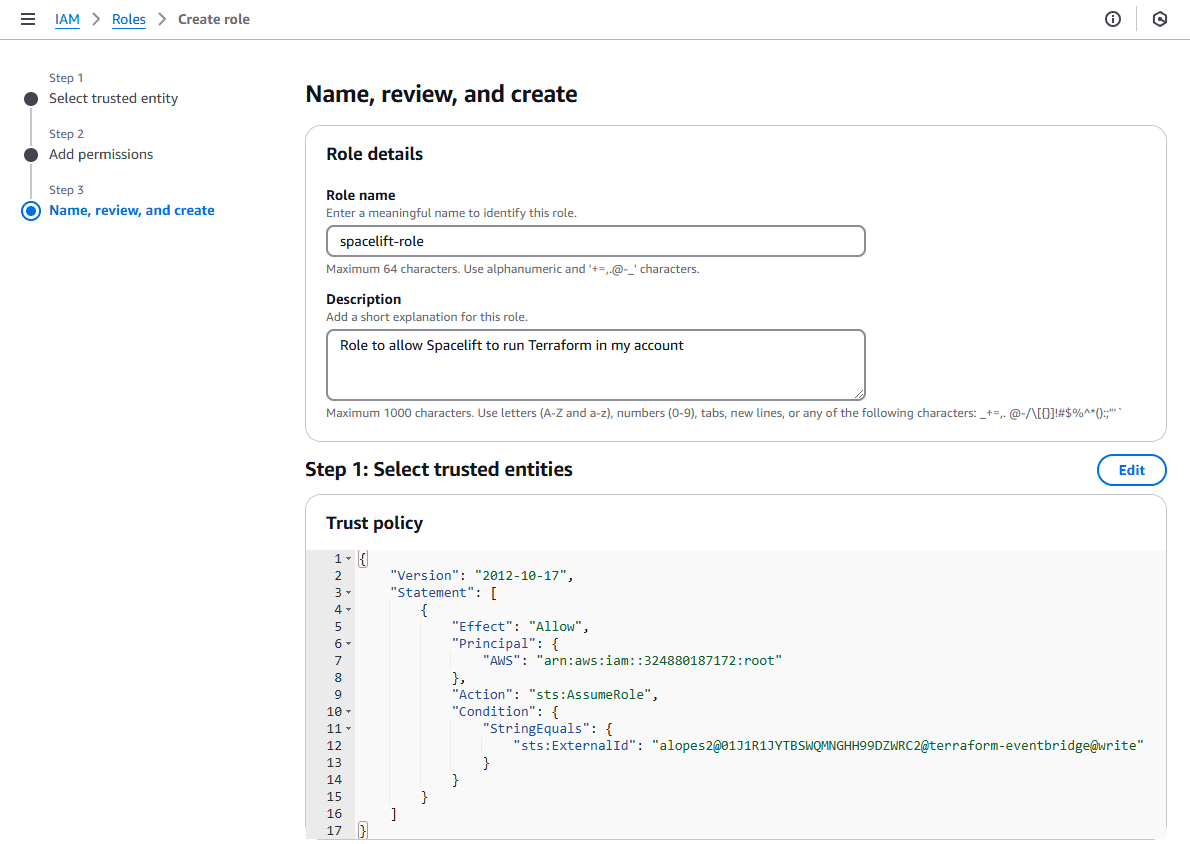
Review your role permissions and add tags if you’d like, then click on Create role.
Now you can go back to the AWS integration attachment window and click on Attach.
You should then see a similar view stating that the attachment was successful.
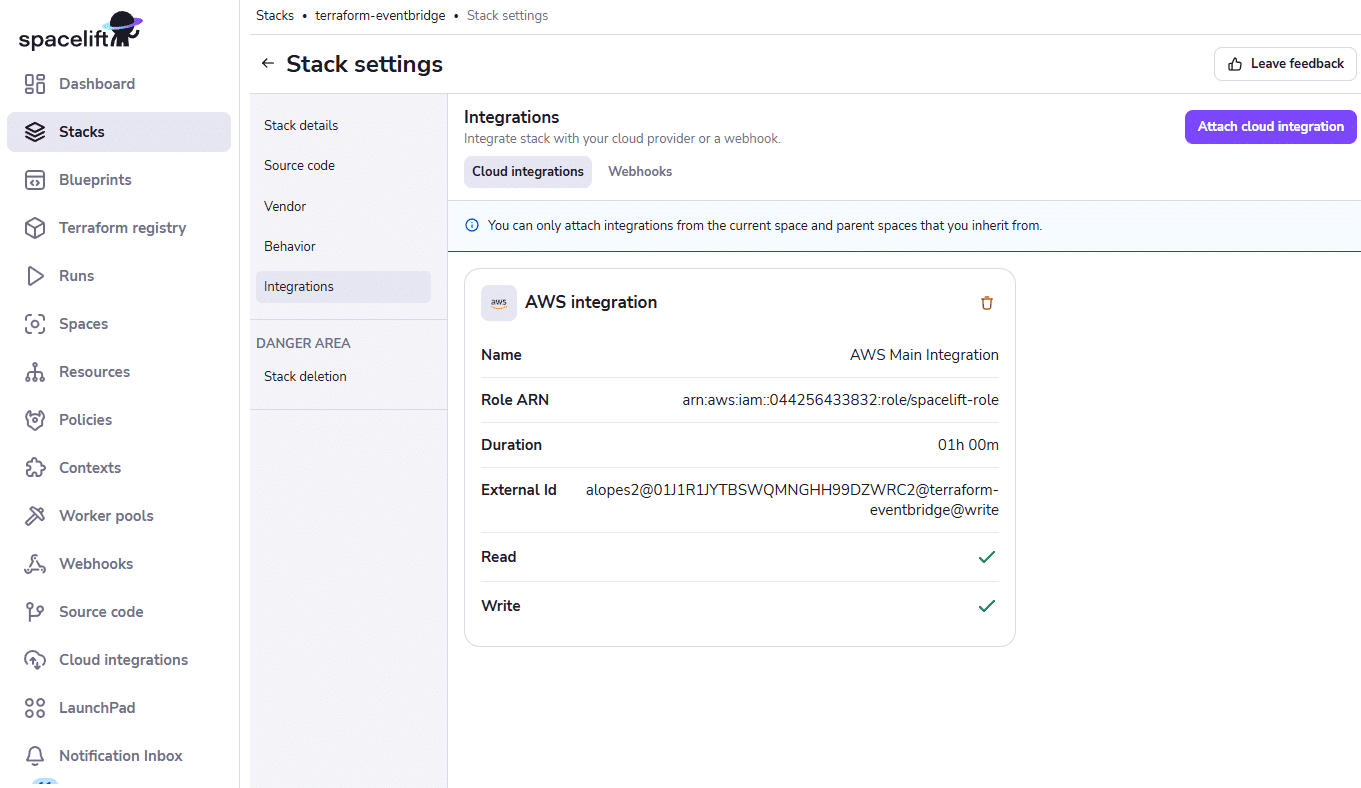
Note that this method doesn’t automatically set the desired region. So you’ll need to set it either in the AWS Terraform provider or through the environment variables AWS_DEFAULT_REGION OR AWS_REGION.
Go to your stack and click on Trigger if you already have Terraform code in your repository. If you don’t have one, Spacelift has a hook that triggers a new run and plan every time you push code to the working directory you specified during the stack creation. (But don’t worry; it will ask for your confirmation before making any changes.)
Once you trigger a new run, you can see in the Initializing step that Spacelift has added an http backend.
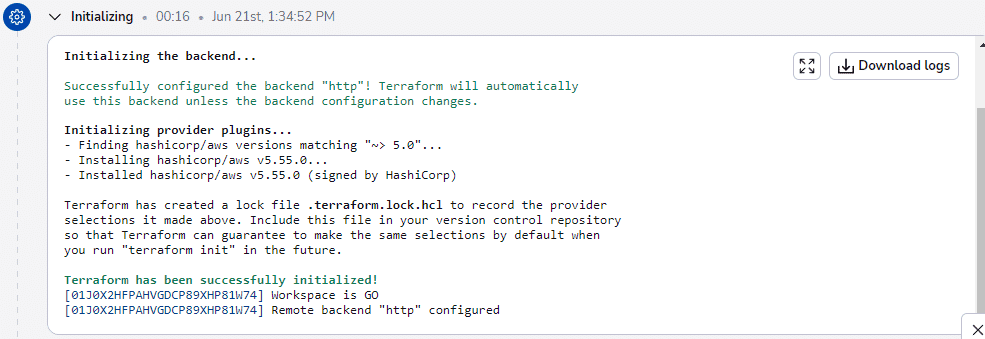
Amazing! We have our Terraform configured and ready to be deployed with Spacelift. Now, let’s get started configuring EventBridge.
Managing Event Buses with Terraform
AWS EventBridge already includes a default event bus for every account. This event bus is automatically configured to receive events from AWS services, like S3:PutObject, which is the event emitted from S3 when an object is created.
Here’s a sample of the event:
{
  "version": "0",
  "id": "17793124-05d4-b198-2fde-7ededc63b103",
  "detail-type": "Object Created",
  "source": "aws.s3",
  "account": "123456789012",
  "time": "2021-11-12T00:00:00Z",
  "region": "ca-central-1",
  "resources": ["arn:aws:s3:::example-bucket"],
  "detail": {
    "version": "0",
    "bucket": {
      "name": "example-bucket"
    },
    "object": {
      "key": "example-key",
      "size": 5,
      "etag": "b1946ac92492d2347c6235b4d2611184",
      "version-id": "IYV3p45BT0ac8hjHg1houSdS1a.Mro8e",
      "sequencer": "00617F08299329D189"
    },
    "request-id": "N4N7GDK58NMKJ12R",
    "requester": "123456789012",
    "source-ip-address": "1.2.3.4",
    "reason": "PutObject"
  }
}
To use the default bus with Terraform, we need to declare a data block pointing to the event bus name:
data "aws_cloudwatch_event_bus" "default" {
  name = "default"
}
By default, every event bus can have up to 300 configured rules. You can contact AWS support to increase this quota.
But if you need a new event bus, you can configure one with:
resource "aws_cloudwatch_event_bus" "test_bus" {
  name = "test_bus"
}
We’ll keep this article simple and use the default event bus throughout the data block.
Configuring EventBridge rules in Terraform
EventBridge rules are how EventBridge matches events sent to it and directs them to the target. It can match events through:
- Event patterns – This is how you set EventBridge to match data with event properties, like
detail,bucket, andname, for anS3:PutObjectevent. - Scheduler – You can define scheduled events sent to EventBridge at a specific time or regularly.
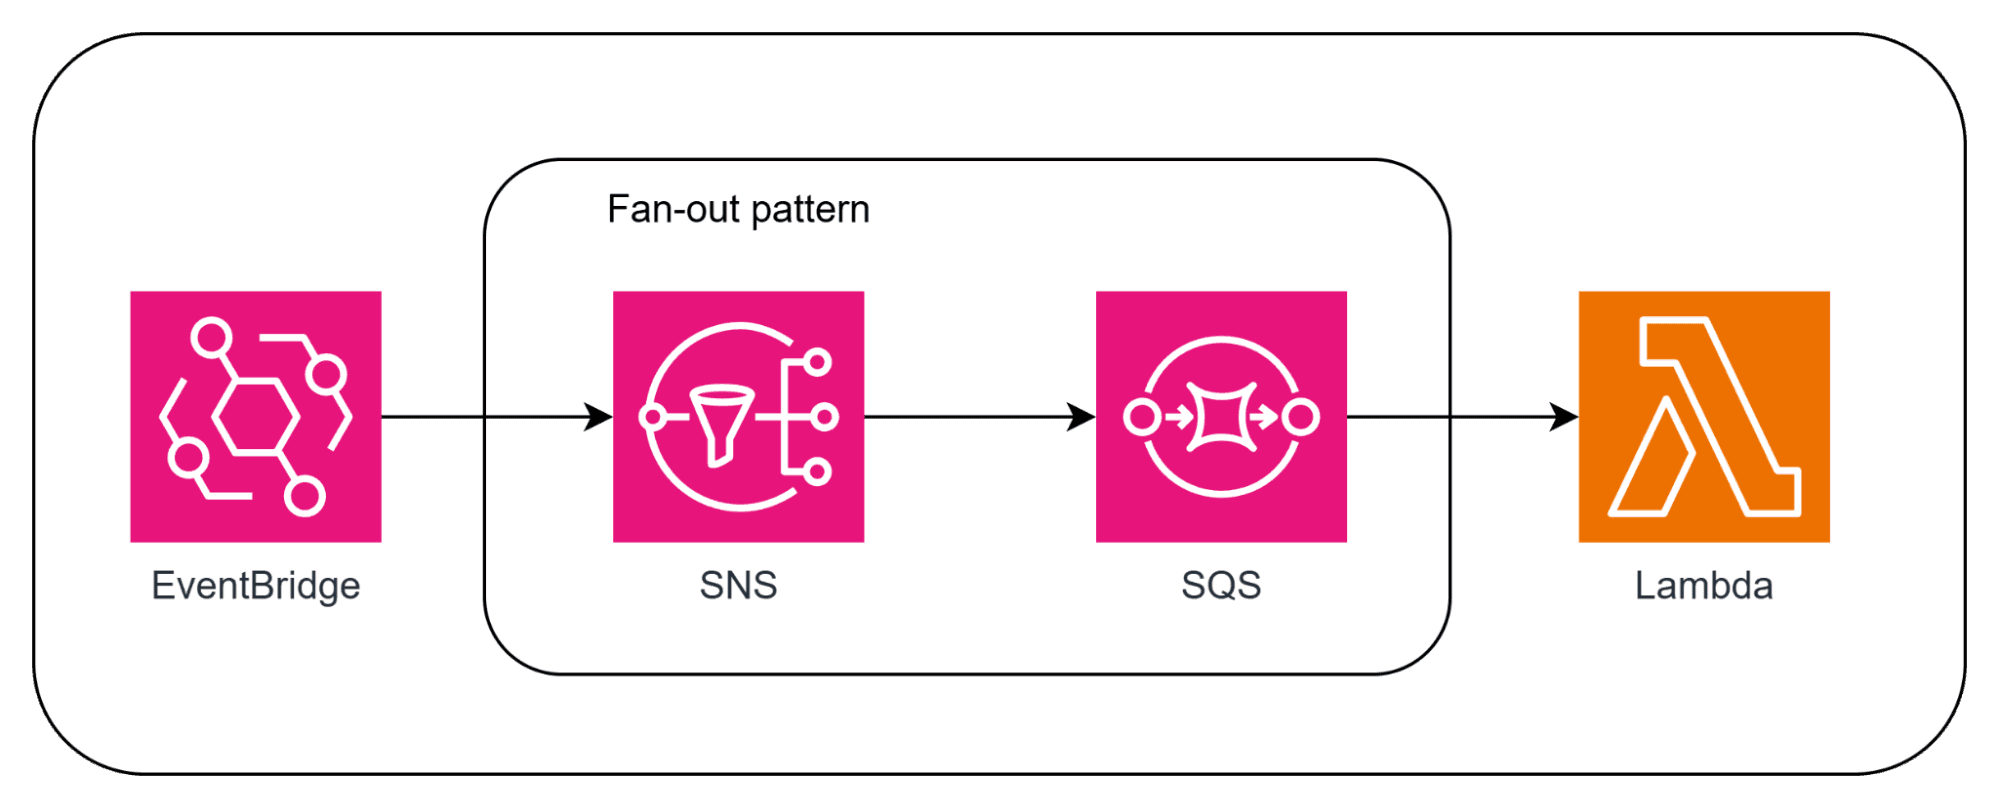
One limitation of rules is that a rule can only send an event to up to five targets. So, if you want to send an event to more than five targets, you’ll need to create multiple rules with the same pattern/scheduler. You can also always target an SNS topic and fan out your event to various subscribers.
Terraform comes with a considerable advantage: You can easily leverage Terraform variables and locals to pass the same event pattern to multiple rules.
To create a new rule with Terraform, you can use the resource aws_cloudwatch_event_rule.
Note: Older examples often use is_enabled = true/false to toggle a rule on or off. That argument is now deprecated — use state = "ENABLED" or state = "DISABLED" instead. state also supports "ENABLED_WITH_ALL_CLOUDTRAIL_MANAGEMENT_EVENTS" for rules that need to match CloudTrail management events.
Using Event patterns with Terraform
A rule can be configured with event patterns, which is when EventBridge will search in the event data it received for keywords you defined. An example is if you want only to match events that originated from S3 and from an S3 bucket.
An event pattern is a JSON-formatted message that EventBridge will use to match its properties with the event data properties. Here’s an example of an event pattern:
{
  "source": ["aws.s3"],
  "detail-type": ["Object Created"],
  "detail": {
    "bucket": {
      "name": ["my-bucket"]
    }
  }
}
This event pattern will match every event Object Created sent from S3, which is the event for the action S3:PutObject, that came from the bucket my-bucket.
To find all available detail-type, you can use the documentation. Or you can use the AWS Console:
- Go to the EventBridge Console.
- Select Rules from the left-hand menu.
- Click Create Rule.
- In the Event Source section, select the service you are interested in (e.g., AWS services or partner services).
- When configuring the event pattern, the pattern configuration wizard will list the available detail-types for the selected event source.
You should also note that detail-type is one way to match events in EventBridge. Depending on the service you want to handle events for, you might find more information under the detail property, like the System Manager event for EC2 Automation Step Status-change Notification, which can have a detail.Status property with multiple values.
Now, let’s use Terraform to create our first rule. Create a file name main.tf in our root folder and then add a data source for the default event bus. Then, create a simple S3 bucket and add a rule to our default event bus to match all Object Created events that come from this bucket:
data "aws_cloudwatch_event_bus" "default" {
  name = "default"
}


resource "aws_s3_bucket" "eventbridge" {
  bucket = "YOUR_UNIQUE_BUCKET_NAME"
}


resource "aws_s3_bucket_notification" "s3_eventbridge" {
  bucket      = aws_s3_bucket.eventbridge.bucket
  eventbridge = true
}


resource "aws_cloudwatch_event_rule" "s3_createobject" {
  name           = "s3_createobject"
  description    = "Rule to trigger when an object is created in the S3 bucket"
  event_bus_name = data.aws_cloudwatch_event_bus.default.name


  event_pattern = jsonencode({
    source      = ["aws.s3"],
    detail-type = ["Object Created"],
    detail = {
      bucket = {
        name = ["${aws_s3_bucket.eventbridge.bucket}"]
      }
    }
  })
}
Note: You must enable the S3 bucket to send event notifications to EventBridge. Turning it on will send all events to EventBridge.
You can now push the code to your repository and confirm the Terraform plan in Spacelift.
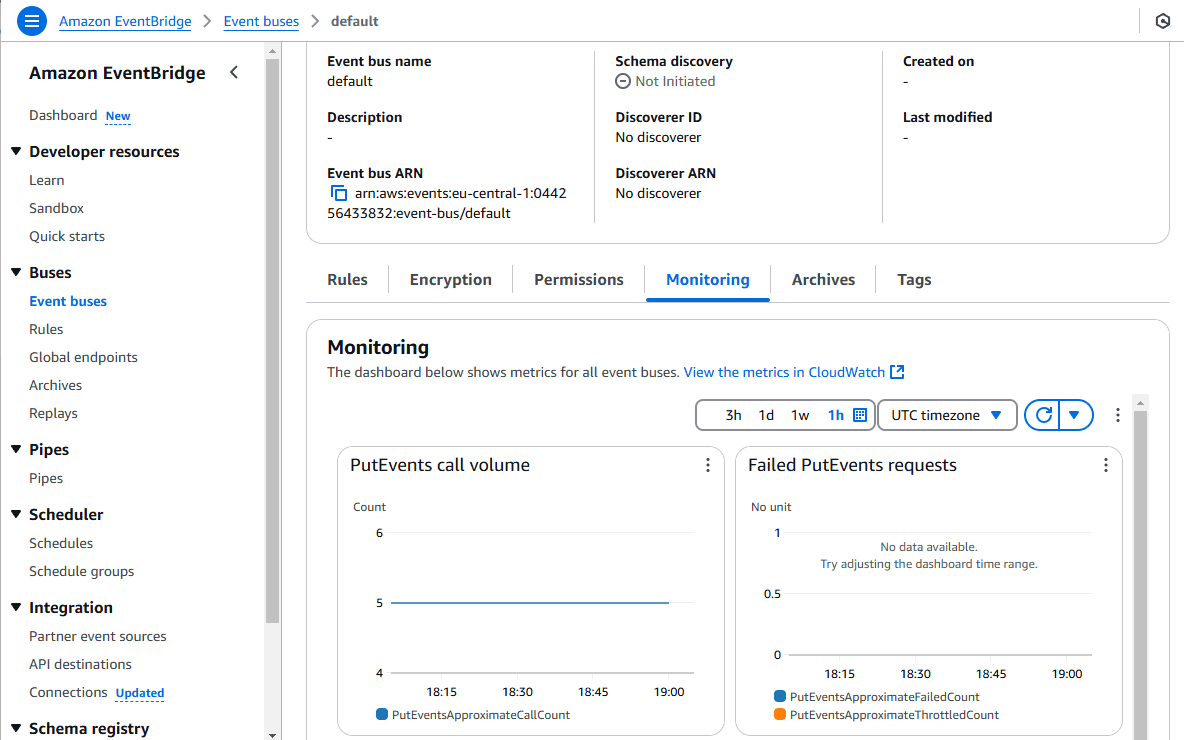
To test, you can add a new file to your S3 bucket and then go to the rule monitoring to see if an event was matched for that rule.
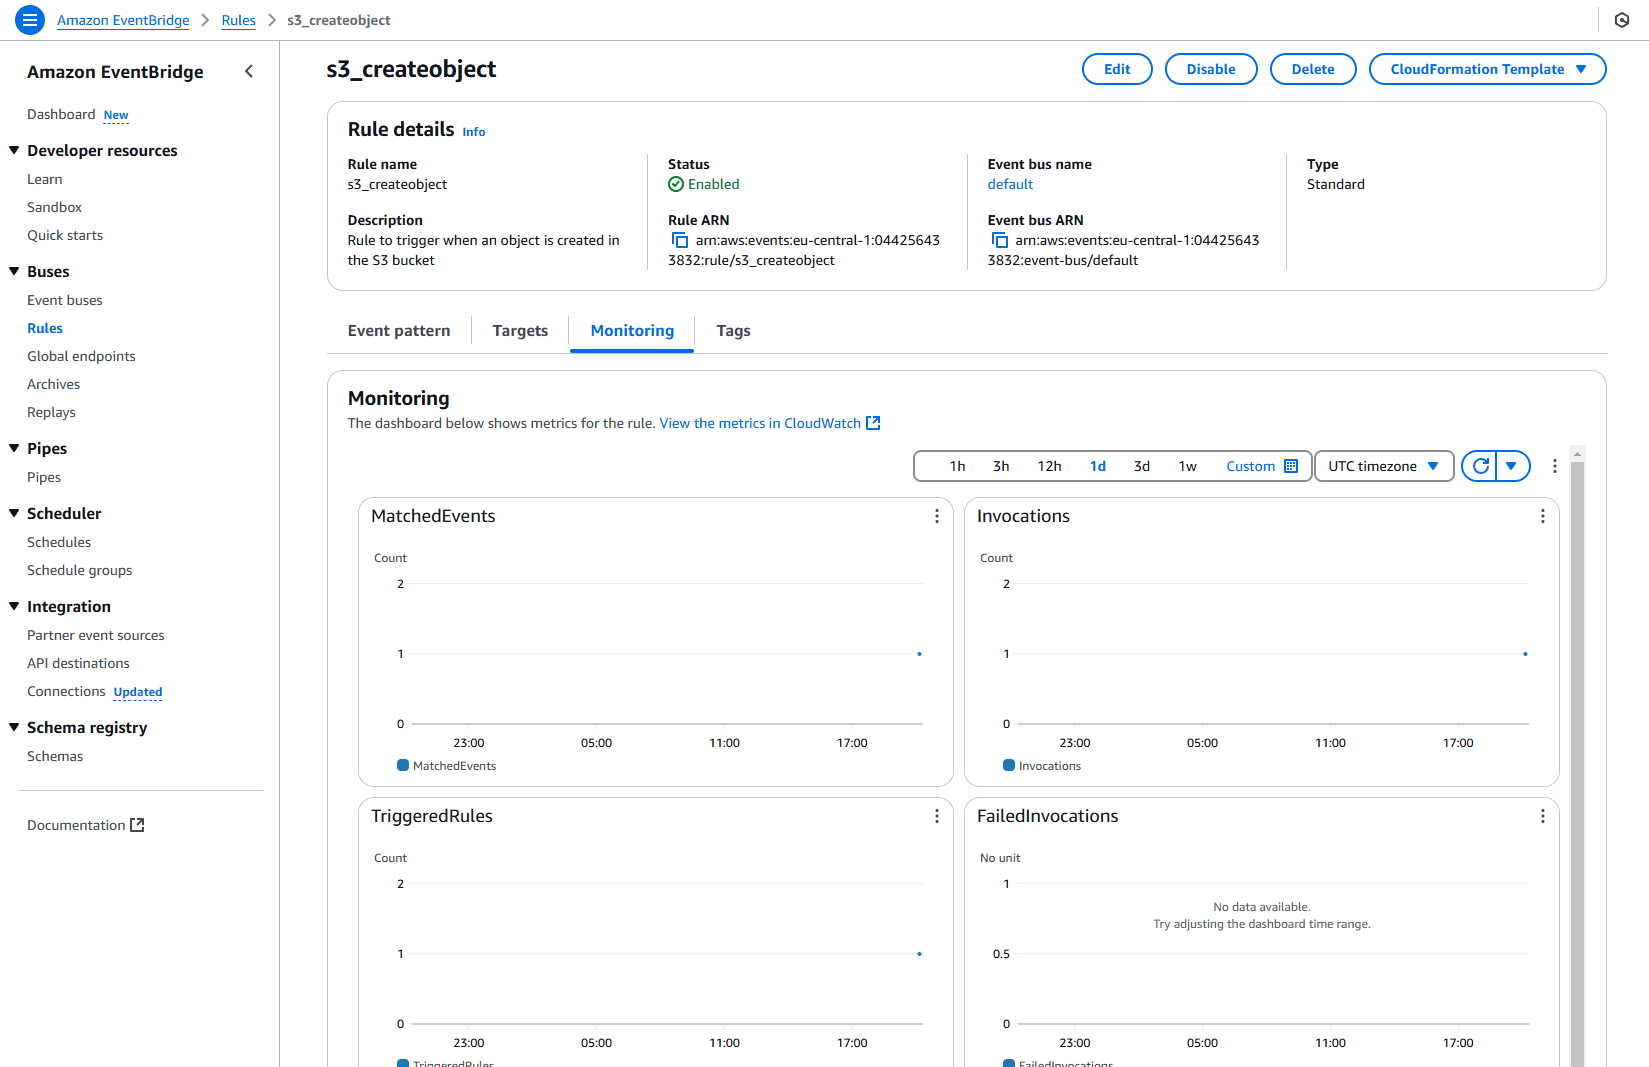
The metrics can take a few minutes to show on CloudWatch or the monitoring tab.
Using schedulers with Terraform
A big feature of EventBridge is the ability to create task scheduler rules. These rules trigger custom events to EventBridge at a specific time or periodically.
Let’s say you need to back up your data storage every week. To do that, you can set up a scheduler rule with a cron expression to be triggered every week. This event will be sent to a target responsible for backing up your data storage weekly at the designated time.
EventBridge Scheduler is now available in all AWS Regions, so the examples here work consistently across your environments (including GovCloud and most new regions).
We can use the same aws_cloudwatch_event_rule resource to define a scheduled rule, but we’ll use the property schedule_expression instead of the event_pattern.
Here, we pass a string with a cron expression, an expression in a pattern to define the minute, hour, day of the month, month, day of the week, and year of execution.
For example, the expression 0 12 * * ? * will run every day at 12:00 PM UTC. Find out more about how to build cron expressions for AWS EventBridge.
Alternatively, you can define it as rate by passing rate(value unit), like rate(1 minute) for every minute or rate(5 minutes) for every five minutes.
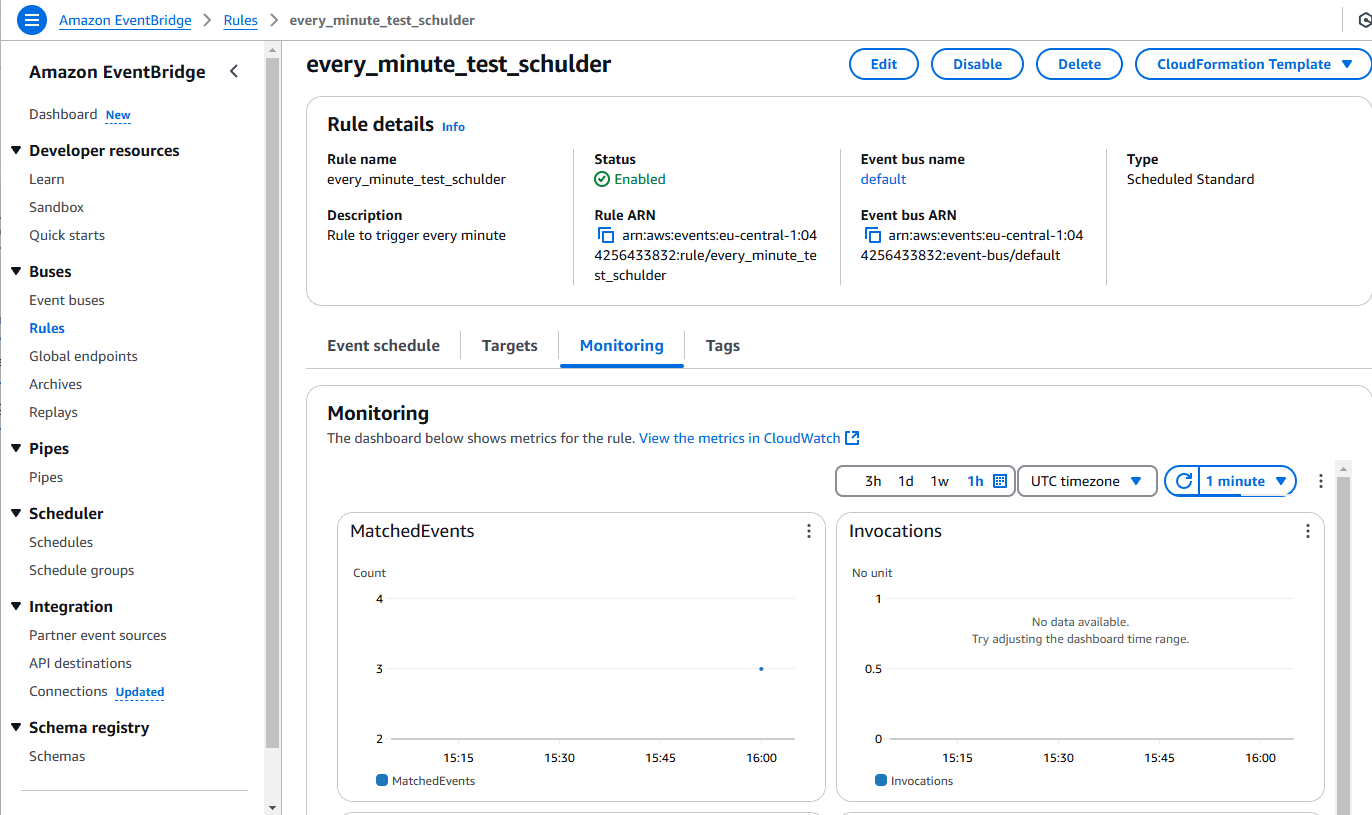
Now, let’s define our scheduler rule to trigger every minute. In the main.tf file, add the following:
resource "aws_cloudwatch_event_rule" "scheduler" {
  name                = "every_minute_test_scheduler"
  description         = "Rule to trigger every minute"
  event_bus_name      = data.aws_cloudwatch_event_bus.default.name
  schedule_expression = "rate(1 minute)"
}
Once you deploy it, you can find the metrics in CloudWatch or the Monitoring tab in the rule details after a couple of minutes in the MatchedEvents table:
EventBridge Scheduler (recommended for new workloads)
AWS now recommends using the dedicated EventBridge Scheduler to invoke targets on a schedule, rather than scheduled rules on an event bus. Scheduler is purpose-built for scheduling — it offers much higher quotas, broader target support, and one-time schedules that scheduled rules don’t.
It supports:
- Higher quotas (1 million schedules per account)
- Higher throughput (1000 TPS)
- Supports one-time schedules
- Additional function
at()for defining time
One big difference here is that you cannot define a Scheduler without a target, so we’ll target the default event bus for now, but we’ll go through Event Targets in the next session.
Schedulers have many supported targets, such as CodeCommit, to trigger builds, invoke Lambda functions, start a Step Function execution, and many others. Learn more about the targets of a Scheduler.
To define a new schedule using EventBridge Scheduler, we can use the aws_scheduler_schedule resource. So, in the main.tf file, add the following:
resource "aws_scheduler_schedule" "better_scheduler" {
  name = "better_scheduler"
  flexible_time_window {
    mode = "OFF"
  }
  target {
    arn      = data.aws_cloudwatch_event_bus.default.arn
    role_arn = aws_iam_role.scheduler.arn
    eventbridge_parameters {
      detail_type = "My Scheduler"
      source      = "Custom Scheduler"
    }

    // Event Payload (if required)
    input = jsonencode({
      Message = "Super Schedule"
    })
  }

  schedule_expression = "rate(1 minute)"
}

resource "aws_iam_role" "scheduler" {
  name               = "scheduler_role"
  assume_role_policy = data.aws_iam_policy_document.eventbridge_assume_policy.json
}

data "aws_iam_policy_document" "eventbridge_assume_policy" {
  statement {
    effect  = "Allow"
    actions = ["sts:AssumeRole"]
    principals {
      type        = "Service"
      identifiers = ["scheduler.amazonaws.com"]
    }
  }
}

data "aws_iam_policy_document" "scheduler_policies" {
  statement {
    effect  = "Allow"
    actions = ["events:PutEvents"]

    resources = [
      data.aws_cloudwatch_event_bus.default.arn
    ]
  }
}

resource "aws_iam_role_policy" "scheduler_role_policy" {
  role   = aws_iam_role.scheduler.name
  policy = data.aws_iam_policy_document.scheduler_policies.json
}
Note that we create an IAM role for the scheduler because AWS requires that the Schedule have a role to access AWS services.
That is required because the scheduler needs to assume a role to have access to publish to trigger AWS services, like putting events to an event bus, publishing to an SNS topic, or an SQS queue.
Now, push the code to your repository and confirm the build in Spacelift. Once the build is complete, go to the Scheduler -> Schedules tab and see your new schedule.
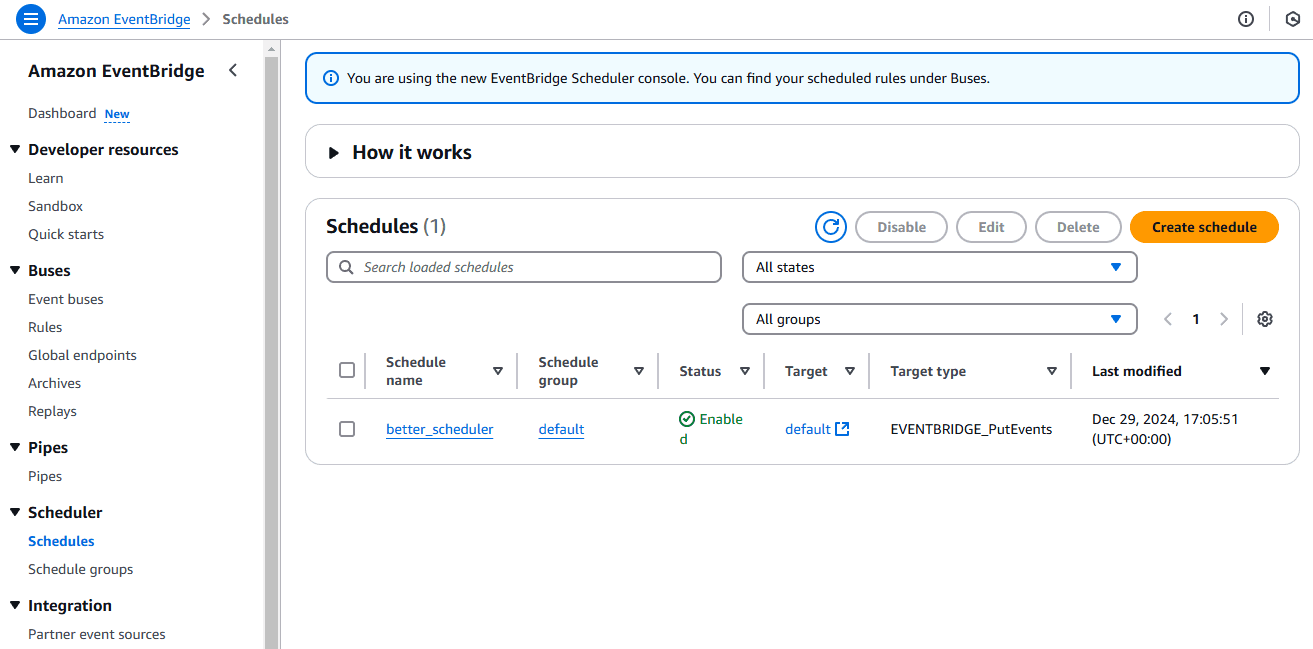
If you wait a few minutes, the metrics will appear in the Monitoring tab of the default Schedule group.
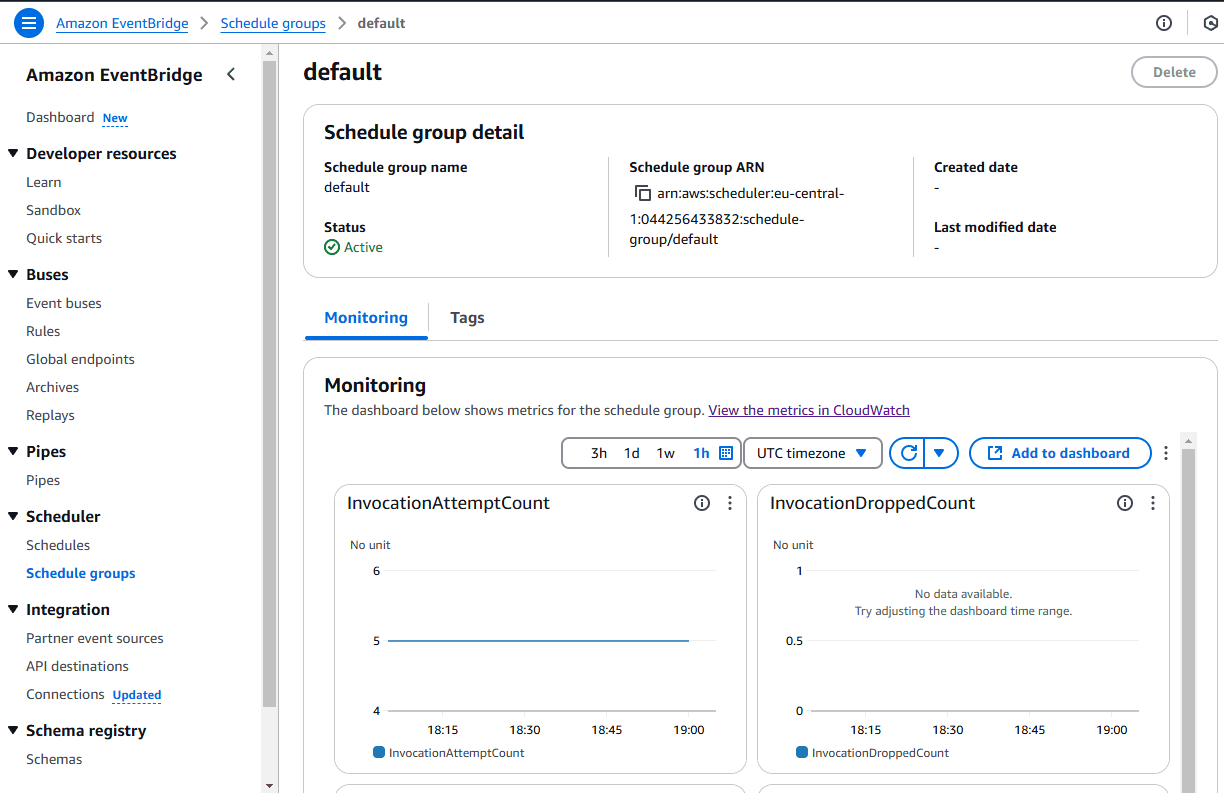
If nothing is published to the default event bus, the monitoring tab will show PutEvent metrics.
Event targets in EventBridge using Terraform
We defined what and how event rules work, and now we’ll move on to the last step of the event journey in EventBridge, the event delivery to a target.
As mentioned before, event targets are the destination of an event for a rule. These targets can be:
- AWS Services: You can deliver events to supported AWS services, like SNS and SQS. You can also trigger specific actions in supported AWS Services, like triggering a Lambda function or triggering a CodeCommit build.
- Event Bus: You can deliver events from one bus to another. One scenario is if you need to send events from one account to another.
- API Destination: You can also send events to external API destinations through the event bridge.
Let’s start by reviewing the most common case: targeting AWS services.
1. AWS Services
AWS EventBridge supports multiple AWS services as a target for its rules. You can find a full list here.
For demo purposes, let’s build this pattern and work on it:
Let’s set up a small lambda function that logs the incoming event and returns a positive response. Create an index.js file in the root folder and add the following code:
exports.handler = async (event) => {
  console.log(event);

  const response = {
    statusCode: 200,
    body: JSON.stringify('Hello from Lambda!!!'),
  };

  return response;
};
Now, let’s create a lambda function with Terraform in a lambda.tf file in our root folder:
locals {
  function_name = "process-data"
}

data "archive_file" "lambda" {
  type        = "zip"
  source_file = "./index.js"
  output_path = "${local.function_name}_lambda_function_payload.zip"
}


resource "aws_lambda_function" "lambda" {
  filename      = data.archive_file.lambda.output_path
  function_name = "process-data"
  role          = aws_iam_role.iam_for_lambda.arn
  handler       = "index.handler"
  runtime       = "nodejs22.x" # nodejs24.x is also supported
}

resource "aws_iam_role" "iam_for_lambda" {
  name               = "${local.function_name}-lambda-role"
  assume_role_policy = data.aws_iam_policy_document.assume_role.json
}

resource "aws_iam_role_policy" "lambda_logs" {
  role   = aws_iam_role.iam_for_lambda.name
  policy = data.aws_iam_policy_document.lambda_policies.json
}

data "aws_iam_policy_document" "assume_role" {

  statement {
    effect = "Allow"

    principals {
      type        = "Service"
      identifiers = ["lambda.amazonaws.com"]
    }

    actions = ["sts:AssumeRole"]

  }
}

data "aws_iam_policy_document" "lambda_policies" {
  statement {
    effect = "Allow"

    actions = [
      "logs:CreateLogGroup",
      "logs:CreateLogStream",
      "logs:PutLogEvents",
    ]

    resources = ["arn:aws:logs:*:*:*"]
  }
}

resource "aws_lambda_permission" "eventbridge" {
  action        = "lambda:InvokeFunction"
  function_name = aws_lambda_function.lambda.function_name
  source_arn    = aws_cloudwatch_event_rule.s3_createobject.arn
  principal     = "events.amazonaws.com"
}
One important thing is that a rule needs the proper permissions to call the desired AWS service. For example, we must set the appropriate resource-based policies for Lambda, SNS, SQS, and CloudWatch. You can find out more about the permissions.
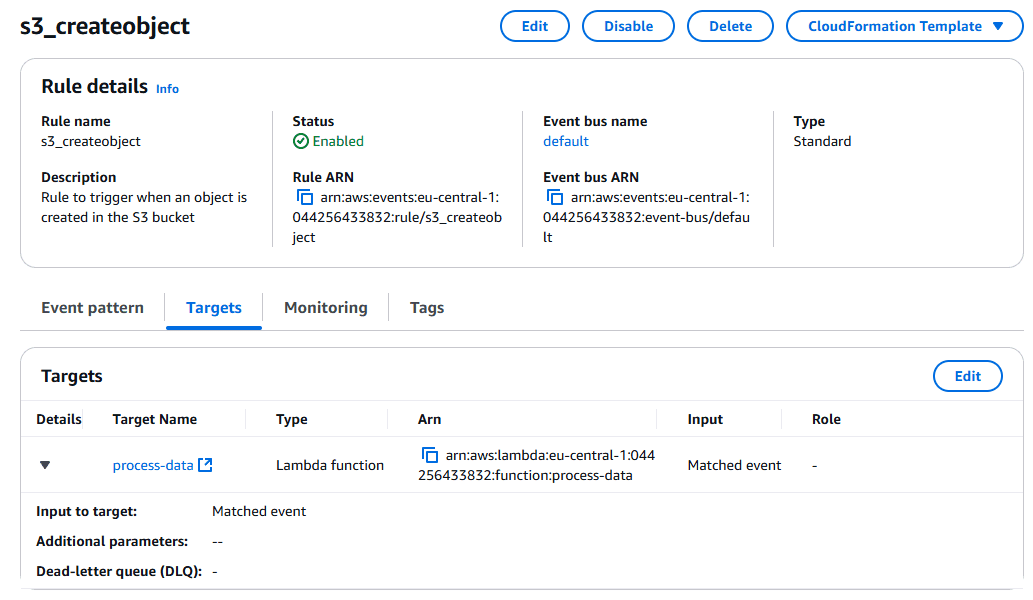
In the lambda.tf file, we gave permissions to the s3_createobject rule to invoke our lambda function. Now, we create a rule that will trigger our lambda function when an S3 object is published to our bucket.
Let’s separate our code and create an event_targets.tf file:
resource "aws_cloudwatch_event_target" "target" {
  arn  = aws_lambda_function.lambda.arn
  rule = aws_cloudwatch_event_rule.s3_createobject.name
}
Push the code to your repository and confirm the build-in Spacelift.
After the build is complete, you can see that EventBridge was added as a trigger to the Lambda function in the Lambda console.
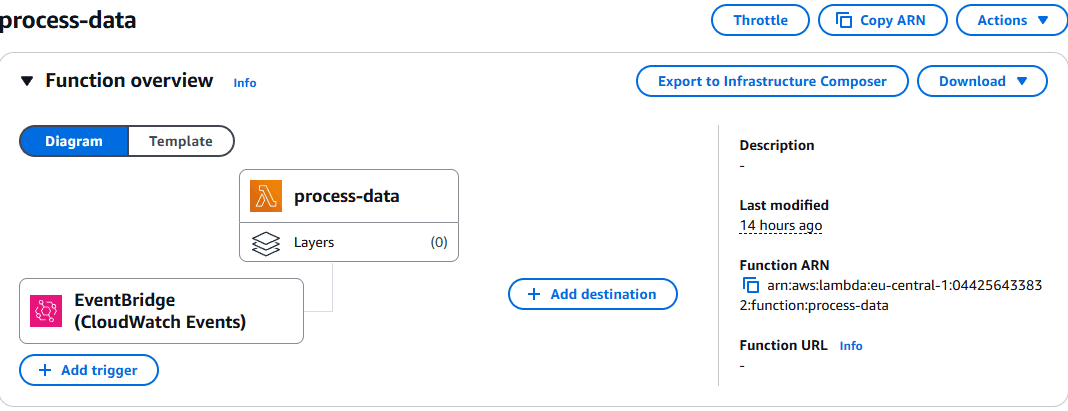
The target in the s3_createobject rule is now the Lambda function:
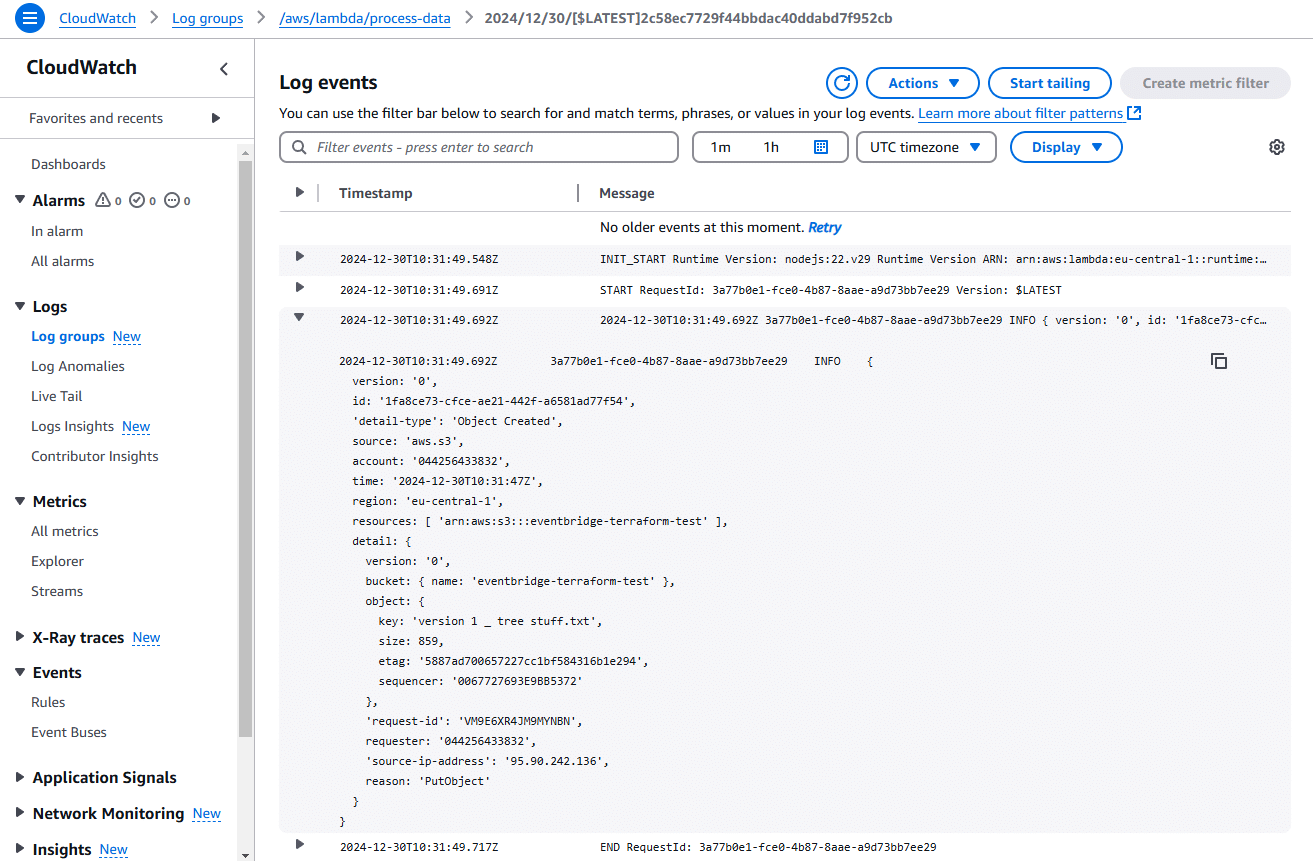
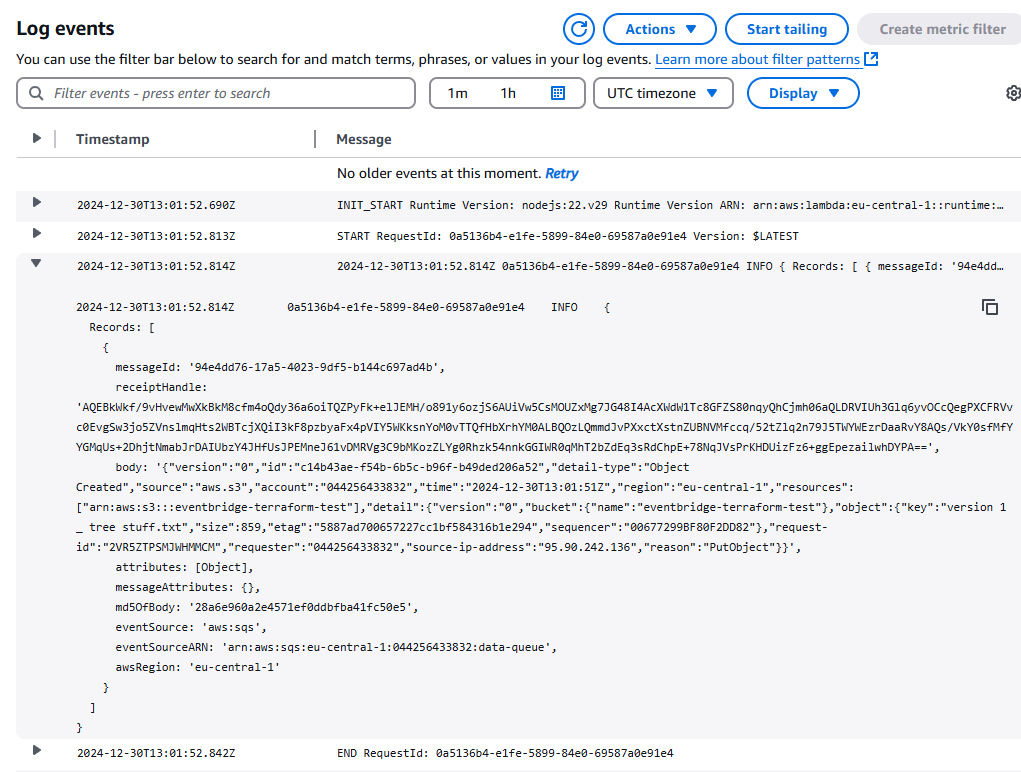
And now, when uploading any file to your S3 bucket, you can check the Lambda logs for the event log.
A new log group was created for the Lambda.
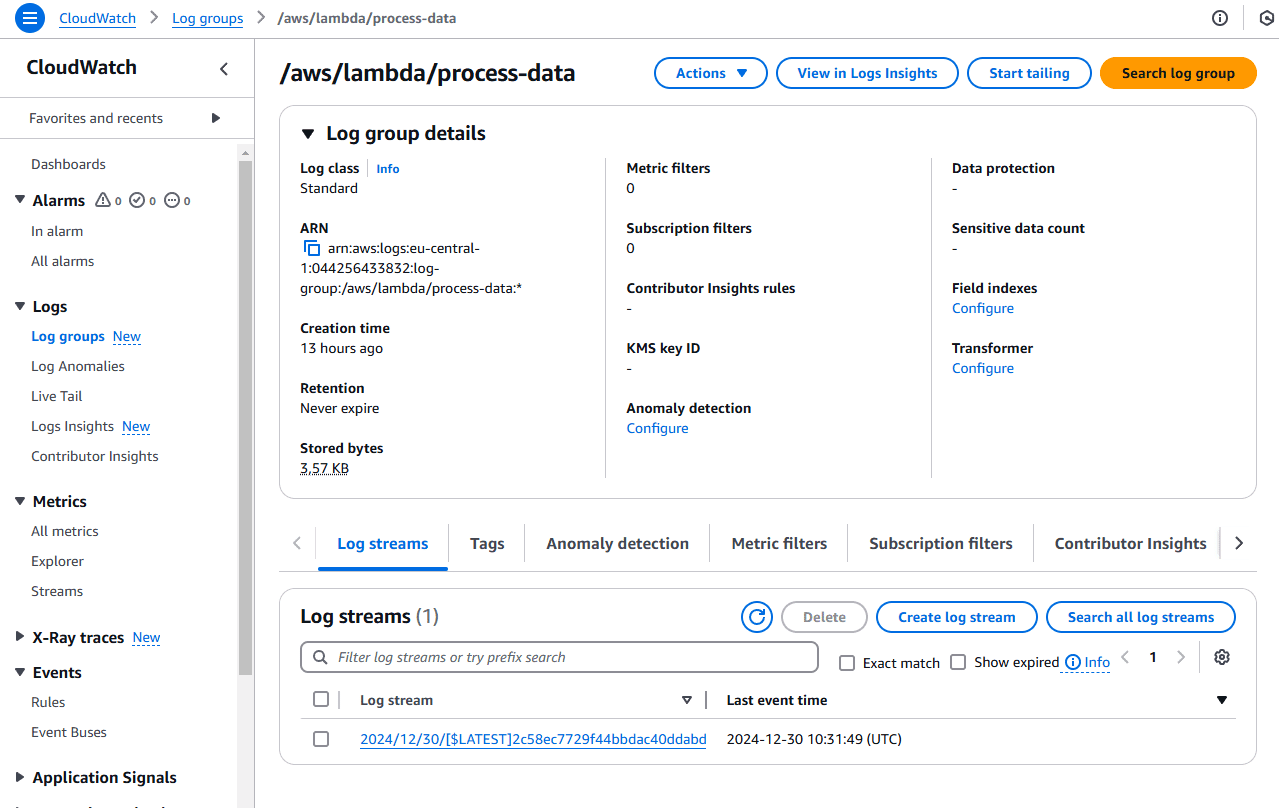
The log stream contains the log for the event sent from EventBridge.
Now, let’s say that you want EventBridge to send the event to an SQS queue, and that queue will call the Lambda. First, let’s create an SQS queue in a messaging.tf file:
resource "aws_sqs_queue" "data_queue" {
  name = "data-queue"
}

resource "aws_sqs_queue_policy" "queue_policy" {
  queue_url = aws_sqs_queue.data_queue.url
  policy    = data.aws_iam_policy_document.sqs-queue-policy.json
}

data "aws_iam_policy_document" "sqs-queue-policy" {
  policy_id = "__default_policy_ID"

  statement {
    sid    = "data-sns-topic"
    effect = "Allow"

    principals {
      type        = "Service"
      identifiers = ["events.amazonaws.com"]
    }

    actions = [
      "SQS:SendMessage",
    ]

    resources = [
      "arn:aws:sqs:YOUR_REGION:YOUR_ACCOUNT_ID:data-queue",
    ]

    condition {
      test     = "ArnEquals"
      variable = "aws:SourceArn"

      values = [
        aws_cloudwatch_event_rule.s3_createobject.arn
,
      ]
    }
  }
}
Don’t forget to change YOUR_REGION and YOUR_ACCOUNT_ID references for your desired region and AWS account ID. With this, we created a queue and gave EventBridge permission to send messages to it.
Now, let’s modify our target in event_targets.tf to target the SQS queue instead of our lambda function:
resource "aws_cloudwatch_event_target" "target" {
  arn  = aws_sqs_queue.data_queue.arn
  rule = aws_cloudwatch_event_rule.s3_createobject.name
}
In the lambdas.tf file, let’s give it permission to receive messages from SQS. Modify the lambda_policies resource, add an aws_lambda_event_source_mapping, and remove the aws_lambda_permission:
resource "aws_lambda_event_source_mapping" "example" {
  event_source_arn = aws_sqs_queue.data_queue.arn
  function_name    = aws_lambda_function.lambda.function_name
}

data "aws_iam_policy_document" "lambda_policies" {
  statement {
    effect = "Allow"

    actions = [
      "logs:CreateLogGroup",
      "logs:CreateLogStream",
      "logs:PutLogEvents",
    ]

    resources = ["arn:aws:logs:*:*:*"]
  }

  statement {
    effect = "Allow"

    actions = [
      "sqs:ReceiveMessage",
      "sqs:DeleteMessage",
      "sqs:GetQueueAttributes",
    ]

    resources = [
      aws_sqs_queue.data_queue.arn
    ]
  }
}
Push the code to your repository and confirm the build in Spacelift. After it completes, you can see in the lambda console that the trigger changed from EventBridge to SQS:
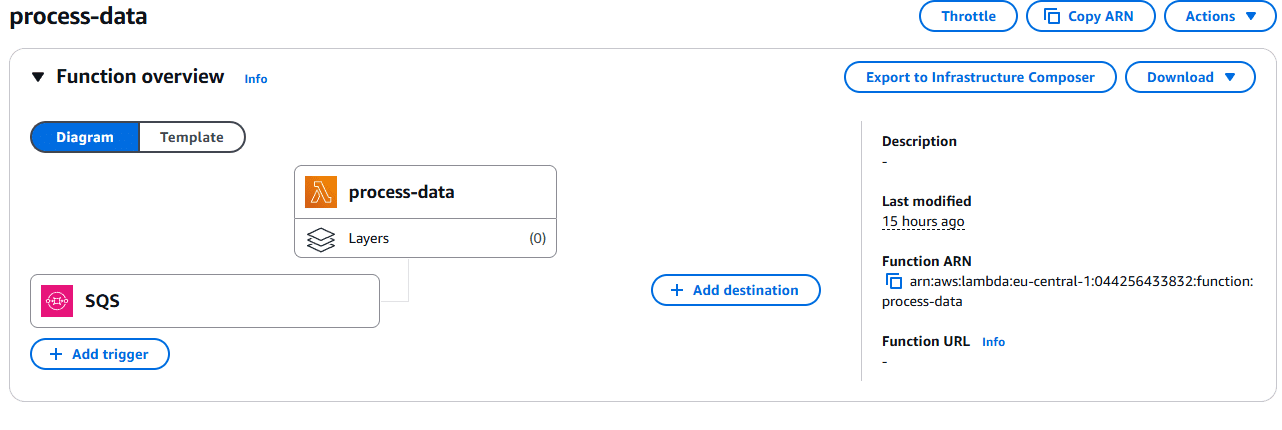
And the target in the s3_createobject rule is now the SQS queue:
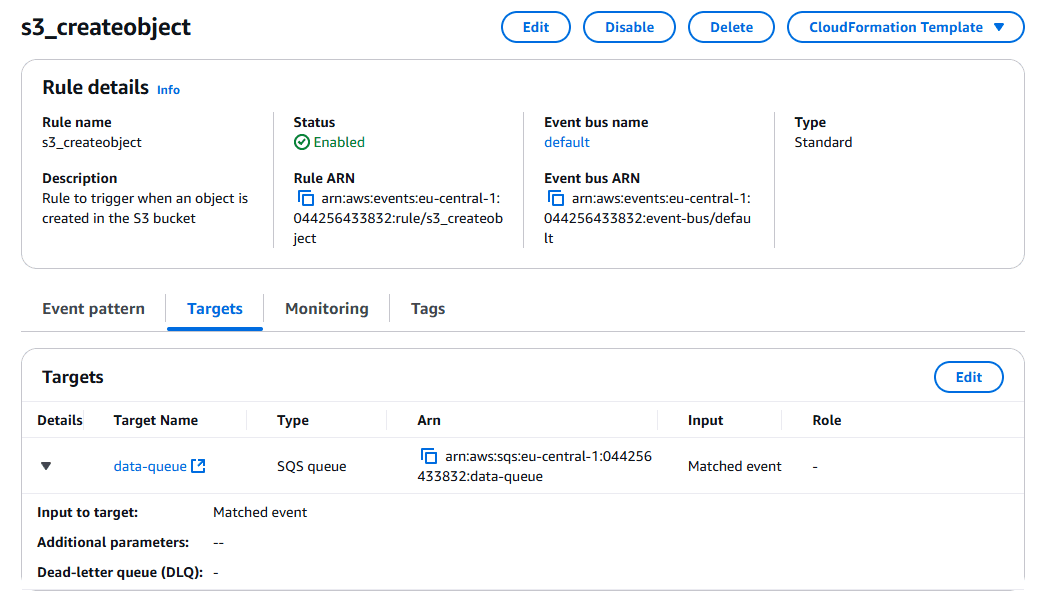
When uploading any file to your S3 bucket, you should have the same execution flow as before, but now with an event from the SQS queue.
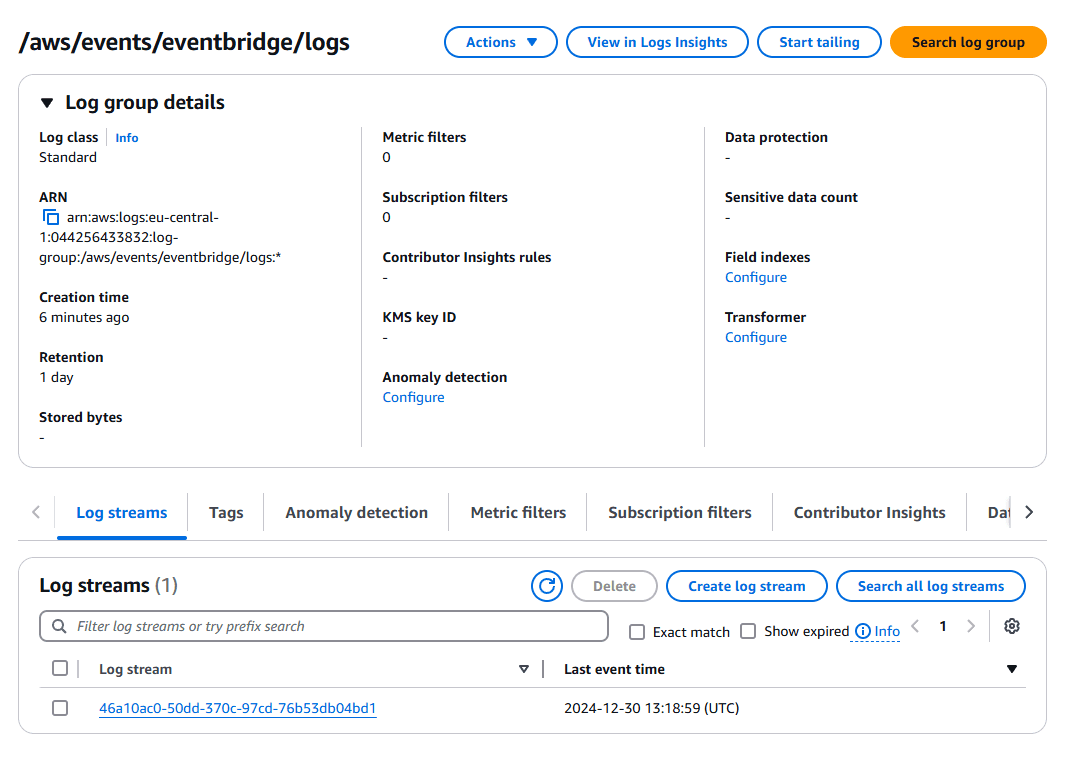
Let’s now add one last target to our rule to publish directly to CloudWatch logs.
resource "aws_cloudwatch_event_target" "logs" {
  rule = aws_cloudwatch_event_rule.s3_createobject.name
  arn  = aws_cloudwatch_log_group.eventbridge.arn
}

resource "aws_cloudwatch_log_group" "eventbridge" {
  name              = "/aws/events/eventbridge/logs"
  retention_in_days = 1
}

resource "aws_cloudwatch_log_resource_policy" "logs" {
  policy_document = data.aws_iam_policy_document.eventbridge_log_policy.json
  policy_name     = "eventbridge_log_publishing-policy"
}

data "aws_iam_policy_document" "eventbridge_log_policy" {
  statement {
    effect = "Allow"
    actions = [
      "logs:CreateLogStream"
    ]

    resources = [
      "${aws_cloudwatch_log_group.eventbridge.arn}:*"
    ]

    principals {
      type = "Service"
      identifiers = [
        "events.amazonaws.com",
        "delivery.logs.amazonaws.com"
      ]
    }
  }

  statement {
    effect = "Allow"
    actions = [
      "logs:PutLogEvents"
    ]

    resources = [
      "${aws_cloudwatch_log_group.eventbridge.arn}:*:*"
    ]

    principals {
      type = "Service"
      identifiers = [
        "events.amazonaws.com",
        "delivery.logs.amazonaws.com"
      ]
    }

    condition {
      test     = "ArnEquals"
      values   = [aws_cloudwatch_event_rule.s3_createobject.arn]
      variable = "aws:SourceArn"
    }
  }
}
Here, we are creating a new EventBridge target and a new CloudWatch log group and then giving permissions to allow EventBridge to generate this log group and the rule to publish logs to the log group.
Push this code to your repository and confirm the build in Spacelift.
After completing it, you can see in the rule console that a new target to logs was added.

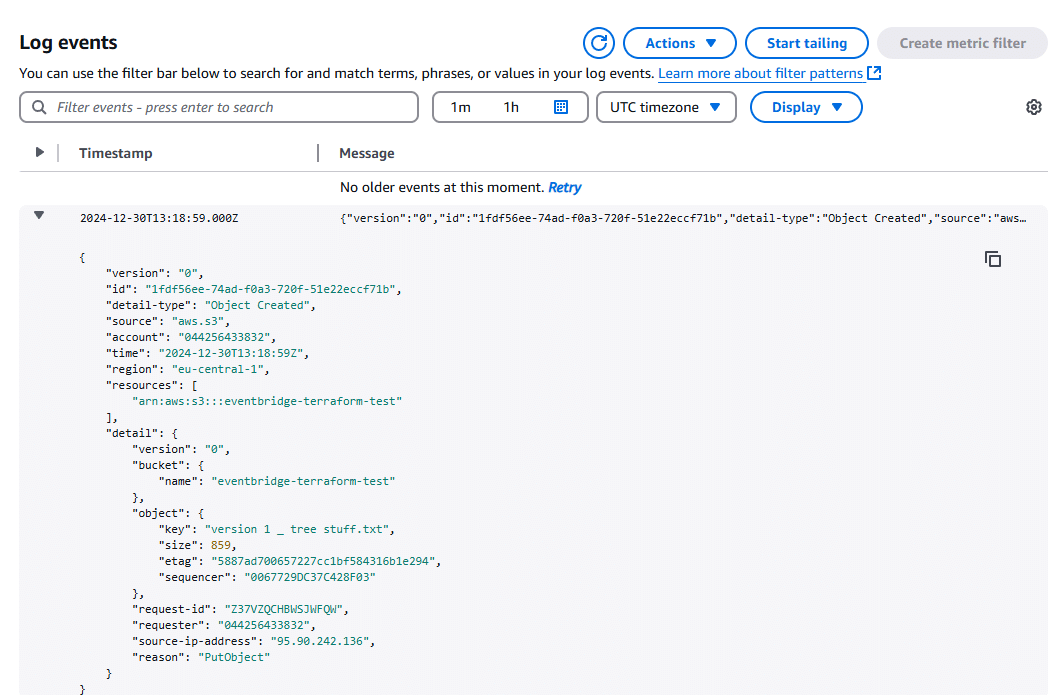
You can upload a new file to the S3 bucket again and then check the eventbridge log group in CloudWatch for the direct logs published by EventBridge. The log group should have entries.
The log should be about the S3 event.
2. Input transformation
During the event target definition, you can also define an input transformation rule to write the property selected using JSON Path to a new input event.
Let’s add an input transformation to our targets:
resource "aws_cloudwatch_event_target" "target" {
  arn  = aws_sqs_queue.data_queue.arn
  rule = aws_cloudwatch_event_rule.s3_createobject.name
  input_transformer {
    input_paths = {
      bucket    = "$.detail.bucket.name"
      objectKey = "$.detail.object.key",
      action    = "$.detail.reason"
    }

    input_template = <<EOF
    {
      "bucket" : <bucket>,
      "action": <action>,
      "key": <objectKey>
    }
    EOF
  }
}

resource "aws_cloudwatch_event_target" "logs" {
  rule = aws_cloudwatch_event_rule.s3_createobject.name
  arn  = aws_cloudwatch_log_group.eventbridge.arn
  input_transformer {
    input_paths = {
      timestamp = "$.time"
      bucket    = "$.detail.bucket.name"
      objectKey = "$.detail.object.key"
    }

    input_template = <<EOF
      {
        "timestamp": <timestamp>,
        "message": "Bucket \"<bucket>\" has a new file added <objectKey>"
      }
    EOF
  }
}
Note that some targets, like CloudWatch, require a unique template to publish the event.
Now, if you want the target to receive a static input every time, you can pass a string value to the input property, like:
resource "aws_cloudwatch_event_target" "target" {
  arn  = aws_sqs_queue.data_queue.arn
  rule = aws_cloudwatch_event_rule.s3_createobject.name
  input = "I'm a constant event"
}
3. API Destinations
AWS EventBridge also allows APIs to be called targets, public or private (inside VPCs). EventBridge will make an HTTP call to an API endpoint when the rules match the desired event.
To enable an API Destination, we need to follow a few steps.
Create a connection
First, we must create a connection so EventBridge knows how to authorize with the API.
It supports three types of authentication
- Basic
- OAuth
- API Key
If the target API doesn’t require authentication, you can define an API Key connection with dummy values.
Let’s create an api_destination_targets.tf file and add a new connection:
resource "aws_cloudwatch_event_connection" "api" {
  name               = "TestConnection"
  authorization_type = "API_KEY"
  auth_parameters {
    api_key {
      key   = "X-API-Key"
      value = "DummyValue"
    }
  }
}
With this, we have an API Key connection that will attach the header X-API-Key: DummyValue to all API calls made through this connection.
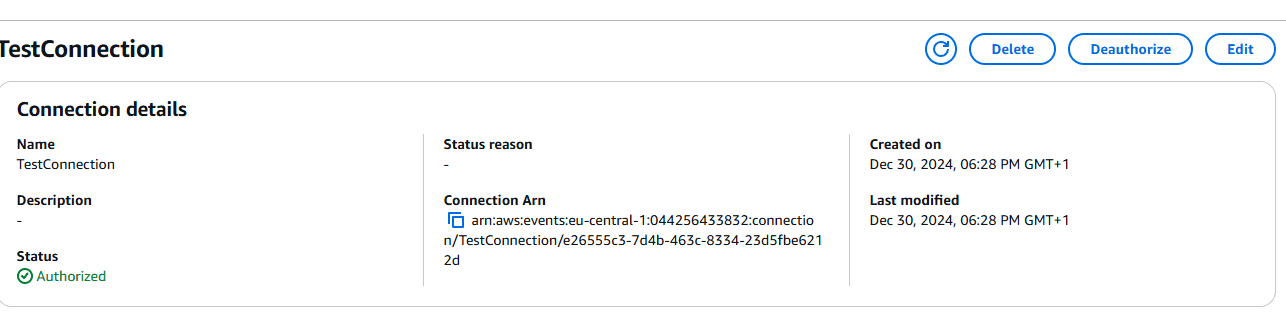
You can know that the connect successfully authorized by seeing the Authorized status in the console:
AWS also has a complete guide on how to integrate with supported partners.
Create an API Destination
API Destination is the target endpoint, the actual URL, and the method that EventBridge will use to send the event.
It also has a default retry mechanism according to the status code returned by the endpoint.
- Retries – 401, 407, 409, 429, and 5xx.
- Don’t retry – 1xx, 2xx, 3xx, and 4xx that are not mentioned above.
API destination has some limitations by default
- It only supports HTTPS endpoints
- It has a default timeout of 5 seconds. If the target endpoint takes more than 5 seconds to return a response, then EventBridge will consider it a failed event and retry it.
In the api_destination_targets.tf, let’s add our API destination:
resource "aws_cloudwatch_event_api_destination" "api" {
name = "TestAPIDestination"
connection_arn = aws_cloudwatch_event_connection.api.arn
http_method = "GET"
invocation_endpoint = "https://example.com"
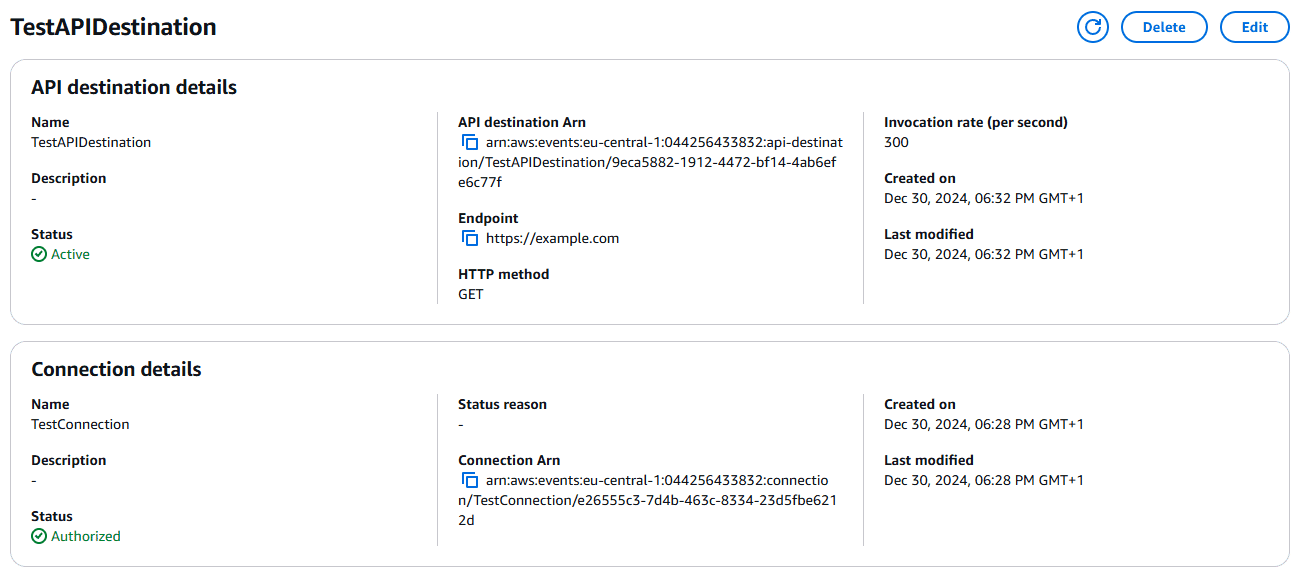
}You can know that your API Destination is available by checking the status.
And now there’s only the last step left.
Create a target in your rule
Now, we just need to create a new target in our rule.
To create a target to an API destination, we also need to specify or create a role with events:InvokeApiDestination permissions.
We can do that in the api_destination_targets.tf file:
resource "aws_cloudwatch_event_target" "api" {
  rule     = aws_cloudwatch_event_rule.s3_createobject.name
  arn      = aws_cloudwatch_event_api_destination.api.arn
  role_arn = aws_iam_role.iam_for_api_destination.arn
  # If you need custom static input, define here
  # input = jsonencode({})
}

resource "aws_iam_role" "iam_for_api_destination" {
  name               = "api-destination-role"
  assume_role_policy = data.aws_iam_policy_document.api_destination_assume_role.json
}

resource "aws_iam_role_policy" "policies_api_destination" {
  role   = aws_iam_role.iam_for_api_destination.name
  policy = data.aws_iam_policy_document.api_destination_policies.json
}

data "aws_iam_policy_document" "api_destination_assume_role" {

  statement {
    effect = "Allow"

    principals {
      type        = "Service"
      identifiers = ["events.amazonaws.com"]
    }

    actions = ["sts:AssumeRole"]

  }
}

data "aws_iam_policy_document" "api_destination_policies" {
  statement {
    effect = "Allow"

    actions = ["events:InvokeApiDestination"]

    resources = [aws_cloudwatch_event_api_destination.api.arn]
  }
}
Monitoring EventBridge with Terraform
One of the challenging parts of EventBridge integration is how you can monitor it.
You can take a couple of actions to ensure that you can monitor and react to EventBridge events. Let’s examine a few measures we can take to properly monitor an EventBridge event bus in Terraform.
AWS EventBridge publishes key metrics to CloudWatch, enabling you to monitor performance and set up alarms. The most critical metrics include:
- Invocations: Number of times a rule is triggered.
- FailedInvocations: Number of failed rule invocations.
- ThrottledRules: Number of rules that were throttled due to rate limits.
- TriggeredRules: Number of rules triggered by events.
- DeadLetterInvocations: Number of events sent to a Dead Letter Queue (DLQ) due to failure.
If these metrics are not sufficient, you can always set custom metrics.
With metrics, we can:
- Set CloudWatch alarms to trigger when metrics are above or below a certain threshold. For example, a high number of failed invocations
- Create a custom dashboard to monitor it.
- Send these metrics to a third-party monitoring tool, like Datadog.
1. Set a retry policy
It is possible to set a retry policy in case of a failed event. You can set how long EventBridge will keep trying and how many attempts it will try.
You can add it to a target with:
resource "aws_cloudwatch_event_target" "target" {
  arn  = aws_sqs_queue.data_queue.arn
  rule = aws_cloudwatch_event_rule.s3_createobject.name
  retry_policy {
    maximum_event_age_in_seconds = 3600 // 3600 seconds = 1 hour
    maximum_retry_attempts       = 20
  }
}
Note that only some events, such as those that fail due to a throttling or timeout error, are retried. Events that fail due to an error such as access being denied to a resource or a target resource that no longer exists, are not retried.
2. Send failed events to SQS Dead-letter Queue
In case we have failed events, we can set up a dead-letter queue where these failed events will be sent so they are not dropped, and we can replay them later.
We can easily do it by setting it in the target:
resource "aws_cloudwatch_event_target" "target" {
  arn  = aws_sqs_queue.data_queue.arn
  rule = aws_cloudwatch_event_rule.s3_createobject.name

  dead_letter_config {
    arn = aws_sqs_queue.dead_letter_queue.arn
  }
}
3. Use EventBridge Archives
Another solution is to use EventBridge Archives to store events published in the event bus so we can analyze and replay them if needed.
The difference is that a dead-letter queue is set at the target level, and only failed events are sent to the queue.
The archive is configured at the event bus level, and all events sent to the event bus are stored in the archive by default unless you set an event pattern.
| Dead-letter queue | Archive | |
| Configuration level | Target | Event Bus |
| Events stored | Failed events | All events |
| Retention period | 1 minute to 14 days | Up to 2 billion days |
We can easily set up an Archive with the following:
resource "aws_cloudwatch_event_archive" "archive" {
  name             = "default"
  event_source_arn = data.aws_cloudwatch_event_bus.default.arn
}
4. Add CloudWatch as a target
If you need more logging, you can always set a CloudWatch target to your rules. As we saw, we can do it with the following:
resource "aws_cloudwatch_event_target" "logs" {
  rule = aws_cloudwatch_event_rule.s3_createobject.name
  arn  = aws_cloudwatch_log_group.eventbridge.arn
}

resource "aws_cloudwatch_log_group" "eventbridge" {
  name              = "/aws/events/eventbridge/logs"
  retention_in_days = 1
}

resource "aws_cloudwatch_log_resource_policy" "logs" {
  policy_document = data.aws_iam_policy_document.eventbridge_log_policy.json
  policy_name     = "eventbridge_log_publishing-policy"
}

data "aws_iam_policy_document" "eventbridge_log_policy" {
  statement {
    effect = "Allow"
    actions = [
      "logs:CreateLogStream"
    ]

    resources = [
      "${aws_cloudwatch_log_group.eventbridge.arn}:*"
    ]

    principals {
      type = "Service"
      identifiers = [
        "events.amazonaws.com",
        "delivery.logs.amazonaws.com"
      ]
    }
  }

  statement {
    effect = "Allow"
    actions = [
      "logs:PutLogEvents"
    ]

    resources = [
      "${aws_cloudwatch_log_group.eventbridge.arn}:*:*"
    ]

    principals {
      type = "Service"
      identifiers = [
        "events.amazonaws.com",
        "delivery.logs.amazonaws.com"
      ]
    }

    condition {
      test     = "ArnEquals"
      values   = [aws_cloudwatch_event_rule.s3_createobject.arn]
      variable = "aws:SourceArn"
    }
  }
}
Best practices for Terraform and EventBridge integration
Here are best practices to ensure robust, secure, and maintainable integration between Terraform and EventBridge:
- Use module abstraction for EventBridge configuration – Create Terraform modules specifically for EventBridge setups, such as event buses, rules, and targets. This makes it easier to replicate configurations, apply updates, and maintain consistency across projects without manually duplicating code.
- Tag everything for clarity – Assign clear and meaningful tags (e.g., environment, owner, purpose) to EventBridge resources. These tags make it easier to identify which event buses or rules belong to specific teams or applications, especially in environments with hundreds of resources.
- Lock down IAM policies for EventBridge targets – When defining IAM roles for EventBridge targets limit permissions to only the actions required by specific targets (e.g., publishing to an SNS topic or invoking a Lambda function). Overly broad permissions can create unnecessary security risks.
- Use variables for environment-specific configurations – Use Terraform variables to dynamically control environment-specific settings like event patterns or rule schedules. This reduces the need for separate configurations for staging, production, or test environments, making your setup more manageable.
- Always enable Dead Letter Queues (DLQs) – When setting up EventBridge rules, configure DLQs (e.g., SQS or SNS) to catch undeliverable events. This provides a safety net for debugging and ensures no event data is silently dropped if processing fails.
Security and multi-account hygiene best practices
- Harden cross-account event buses – When sending events between accounts or organizations, keep your event bus resource policies as narrow as possible. Limit principals to specific AWS accounts or IAM roles, and scope allowed actions to only the EventBridge APIs you actually need.
- Apply least-privilege IAM for EventBridge and targets – Avoid broad roles such as
AdministratorAccessfor anything beyond quick experiments. Give EventBridge only the permissions it needs to invoke its targets (Lambda, SQS, Step Functions, API Destinations, etc.), and keep those roles separate per environment (dev/stage/prod). - Secure API Destinations and secrets – If you use API Destinations, store credentials (API keys, OAuth tokens) in a dedicated secrets manager or connection resource, not inline in Terraform. Restrict which EventBridge connections a given role can use, and prefer private connectivity (VPC endpoints) for sensitive internal services.
- Log and audit configuration changes – Treat EventBridge like any other critical control plane. Enable logging for rule, target, and connection changes through CloudTrail and EventBridge bus logging, and surface those logs in whatever SIEM or monitoring stack you already use so you can detect unexpected changes.
- Review cross-account and multi-region setups regularly – For multi-account or multi-region topologies, schedule periodic reviews of bus policies, routing rules, and failover paths. Use Terraform to keep these patterns consistent and to prevent “drifted” permissions from becoming a long-term security hole.
Why should you manage Terraform projects with Spacelift?
Terraform is really powerful, but to achieve an end-to-end secure GitOps approach, you need a platform that can orchestrate your Terraform workflows. Spacelift is the infrastructure orchestration platform built for the AI-accelerated software era.
It manages the full lifecycle for both traditional infrastructure as code (IaC) and AI-provisioned infrastructure, giving you access to a powerful CI/CD workflow and unlocking features such as:
- Policies (based on Open Policy Agent) – You can control how many approvals you need for runs, what kind of resources you can create, and what kind of parameters these resources can have, and you can also control the behavior when a pull request is open or merged.
- Multi-IaC workflows – Combine Terraform with Kubernetes, Ansible, and other IaC tools such as OpenTofu, Pulumi, and CloudFormation, create dependencies among them, and share outputs.
- Build self-service infrastructure – You can use Templates and Blueprints to build self-service infrastructure; simply complete a form to provision infrastructure based on Terraform and other supported tools.
- AI-powered provisioning and diagnostics – Spacelift Intelligence adds an AI-powered layer for natural language provisioning, diagnostics, and operational insight across your infrastructure workflows.
- Integrations with any third-party tools – You can integrate with your favorite third-party tools and even build policies for them. For example, see how to integrate security tools in your workflows using Custom Inputs.
Spacelift enables you to create private workers inside your infrastructure, which helps you execute Spacelift-related workflows on your end. Read the documentation for more information on configuring private workers.
You can check it for free by creating a trial account or requesting a demo with one of our engineers.
Key points
This article explored AWS EventBridge, its benefits, and usage. We set up Terraform with Spacelift to trigger builds and deploy to AWS, managed event buses, rules, and targets, and handled errors with monitoring tools like dead-letter queues.
The code for this article can be found in the GitHub repository here.
Note: New versions of Terraform are placed under the BUSL license, but everything created before version 1.5.x stays open-source. OpenTofu is an open-source version of Terraform that expands on Terraform’s existing concepts and offerings. It is a viable alternative to HashiCorp’s Terraform, being forked from Terraform version 1.5.6.
Orchestrate Terraform deployments with Spacelift
Orchestrate your Terraform workflows and build governed pipelines using policy as code, programmatic configuration, context sharing, drift detection, resource visualization, and many more.
Frequently asked questions
What's the difference between EventBridge Rules, Scheduler, and Pipes?
Rules route events from an event bus to targets based on event patterns or basic schedules. Scheduler is a standalone serverless service for managing scheduled tasks at scale with time zones, one-time invocations, and flexible windows. Pipes creates point-to-point integrations between a source like SQS or DynamoDB Streams and a target, with optional filtering and enrichment.
What's the difference between EventBridge rules and EventBridge Scheduler?
EventBridge rules trigger targets either by matching event patterns on a bus or running on a basic cron or rate schedule. Scheduler is a dedicated service built specifically for time-based tasks, offering time zone support, one-time invocations, higher scalability, retries, and a broader set of target APIs.
Can a single EventBridge rule have multiple targets?
Yes, a single rule can route the same event to up to five targets, which run in parallel. If you need more than five, create additional rules with the same pattern or fan out through SNS or Step Functions.
How do I create a Lambda target for EventBridge in Terraform?
Define aws_cloudwatch_event_rule with a pattern or schedule, attach aws_cloudwatch_event_target pointing to the Lambda ARN, and grant aws_lambda_permission so EventBridge can invoke the function.
