
In the Infrastructure as Code world, estimating costs can be a nightmare for many enterprises. I’ve seen many companies doing extensive research between Cloud Vendors to find out which has the better prices and also to see what their bills would look like at the end of the month.
This process is very time-consuming, so there was a need for change. With Terraform, you can easily estimate cloud costs by leveraging Infracost and compare potential bills between different vendors.
What we will cover:
What is Infracost?
Infracost is a tool designed to estimate the cost of your infrastructure based on the infrastructure as code (IaC) configuration you have defined. It analyzes the resources defined in your IaC files. It provides a detailed overview of what costs you will have, making comparisons also between the current state of your infrastructure and the new version of it that you want to deploy.
As their website states, Infracost makes you love your cloud bill. With Infracost, you can easily see cost estimates for your resources and enable the engineering teams that are provisioning infrastructure to better understand their changes from a business perspective.
At the moment of writing this post, Infracost supports AWS, Azure, and GCP and works only with Terraform, but soon, they are going to release the integration with CloudFormation and Pulumi. Check here to see the status of this.
How does Infracost work?
Infracost is integrated with an Infrastructure as Code tool such as Terraform to provide cost estimates for your Infrastructure resources. It compares the current state against a Terraform plan and retrieves the cloud prices to calculate the costs. Then, it shows the cost estimate to the console by default.
This cost estimate can also be saved to a file, and you can compare your current costs with historical costs.
Infracost can be easily integrated into a CI/CD pipeline, and you can even take advantage of Open Policy Agent (OPA) policies to make decisions about deploying resources based on costs.
Infracost use cases
Infracost’s main purpose is to show users an estimate of what they will pay based on the defined infrastructure configuration. Based on this, you can implement the following use cases:
- Pre-deployment cost estimation – see what you will pay before deploying your infrastructure.
- Cost optimization – find out what resources are the most expensive and decide if you need them or not, or downgrade to a smaller shape (read more: IT Cost Optimization: Framework & 10 Strategies That Work).
- CI/CD integration – add cost estimation checks in the code review process.
- Cost decision-based deployments – take advantage of policies and set a monthly cost for your resource that can be compared with the cost estimates. Deny runs that pass the threshold.
- Reporting – generate detailed reports related to costs that can be shared with the key stakeholders.
- Multi-cloud cost management – compare costs across multiple cloud providers.
How to install Infracost and register for an API key?
Depending on your operating system, there are a couple of ways you can install Infracost.
To install Infracost on macOS, you can simply run:
$ brew install infracostAfter installing it, make sure it works by checking the version of it:
$ infracost –versionIn order to use it, you will need to register for a free API key. To do that, you will simply have to run:
$ infracost auth loginYou can either sign up using GitHub or Google, and after that you can retrieve your API key.
To be able to run Infracost locally, you will need to save the API key in an environment variable:
$ export INFRACOST_API_KEY=ico-SomethingNow you are good to go, and you can use Infracost to break down any charges you will have.
There is also VS Code Extension available for Infracost. It is a true game changer that lets you see a cost estimate while you are writing the code.
Of course, this really helps engineers, but there are also other people involved when making a decision when it comes to costs, so we will see how we can have an overview of this later in the article.
How to use Infracost with Terraform?
To use Infracost with Terraform for AWS cost estimation, we will follow the steps below.
Note: The same steps would apply to estimate Azure cost.
1. Prepare Terraform configuration
Let’s suppose you have the following Terraform code that creates multiple EC2 instances:
data "aws_ami" "ubuntu" {
 most_recent = true


 filter {
   name   = "name"
   values = ["ubuntu*"]
 }
}


locals {
 instances = {
   instance1 = {
     ami           = data.aws_ami.ubuntu.id
     instance_type = "t3.medium"
   }
   instance2 = {
     ami           = data.aws_ami.ubuntu.id
     instance_type = "t3.micro"
   }
 }
}


resource "aws_instance" "this" {
 for_each      = local.instances
 ami           = each.value.ami
 instance_type = each.value.instance_type
}
2. Run Infracost on the Terraform directory
We are just creating two AWS EC2 instances. Let’s see what the cost will look like for them. To do that, we must first go to the directory that holds our configuration files and run the following command:
$ infracost breakdown --path .

Evaluating Terraform directory at .
  ✔ Downloading Terraform modules
  ✔ Evaluating Terraform directory
  ✔ Retrieving cloud prices to calculate costs

Project: .

 Name                                                  Monthly Qty  Unit   Monthly Cost

 aws_instance.this["instance1"]
 ├─ Instance usage (Linux/UNIX, on-demand, t3.medium)          730  hours        $30.37
 └─ root_block_device
    └─ Storage (general purpose SSD, gp2)                        8  GB            $0.80

 aws_instance.this["instance2"]
 ├─ Instance usage (Linux/UNIX, on-demand, t3.micro)           730  hours         $7.59
 └─ root_block_device
    └─ Storage (general purpose SSD, gp2)                        8  GB            $0.80

 OVERALL TOTAL                                                                   $39.56
──────────────────────────────────
2 cloud resources were detected:
∙ 2 were estimated, all of which include usage-based costs, see https://infracost.io/usage-file
3. Modify your Terraform resources and rerun Infracost
If we modify the local variable instances, add another one, and re-run the command, the cost change will be reflected:
locals {
 instances = {
   instance1 = {
     ami           = data.aws_ami.ubuntu.id
     instance_type = "t3.medium"
   }
   instance2 = {
     ami           = data.aws_ami.ubuntu.id
     instance_type = "t3.micro"
   }
   instance3 = {
     ami           = data.aws_ami.ubuntu.id
     instance_type = "t3.micro"
   }
 }
}
$ infracost breakdown --path .
—--
OVERALL TOTAL $47.95
──────────────────────────────────To better understand how this works, InfraCost verifies Terraform’s current configuration through a Terraform Plan and compares it to the current Terraform State. But what it can also do is verify the Terraform Plan and Terraform State and compare them to an older Infracost configuration breakdown that you can save to a file.
This will allow you to see the cost difference between what is going to be deployed right now and what you had in the past.
4. Generate an Infracost report of the cost estimations
To export the Infracost JSON file from an older configuration, you will simply need to use the above command but with two other arguments:
$ infracost breakdown --path . --out-file old_config.json --format jsonLet’s suppose, as in the above example, that we’ve generated a file called old_config.json from the first configuration with two EC2 instances. To compare it to the current configuration we would run:
$ infracost diff --path . --compare-to old_config.json
—---
Monthly cost change for .
Amount:  +$8.39 ($39.56 → $47.95)
Percent: +21%
As you can see, because we’ve added another EC2 instance, Infracost is capturing that change from Terraform, and you see a cost in the monthly increase.
Using Infracost with Spacelift
When it comes to managing Terraform and achieving true GitOps around it, Spacelift comes into the picture as a powerful solution. Apart from doing GitOps deployments with Terraform, Spacelift enables you to:
- Integrate natively with AWS, Azure, and GCP;
- Easily do policy as code to manage different levels of access;
- Run different scripts before or after Terraform operations;
- Host your own worker pools;
- Share variables through contexts;
- Detect drifts in your infrastructure;
There are also other features available, and what’s even better is that you can test all of these for free, and you are good to go.
Enabling Infracost as part of your Spacelift stacks is much easier than installing it locally because the only thing you have to do is add an infracost label to your stack.
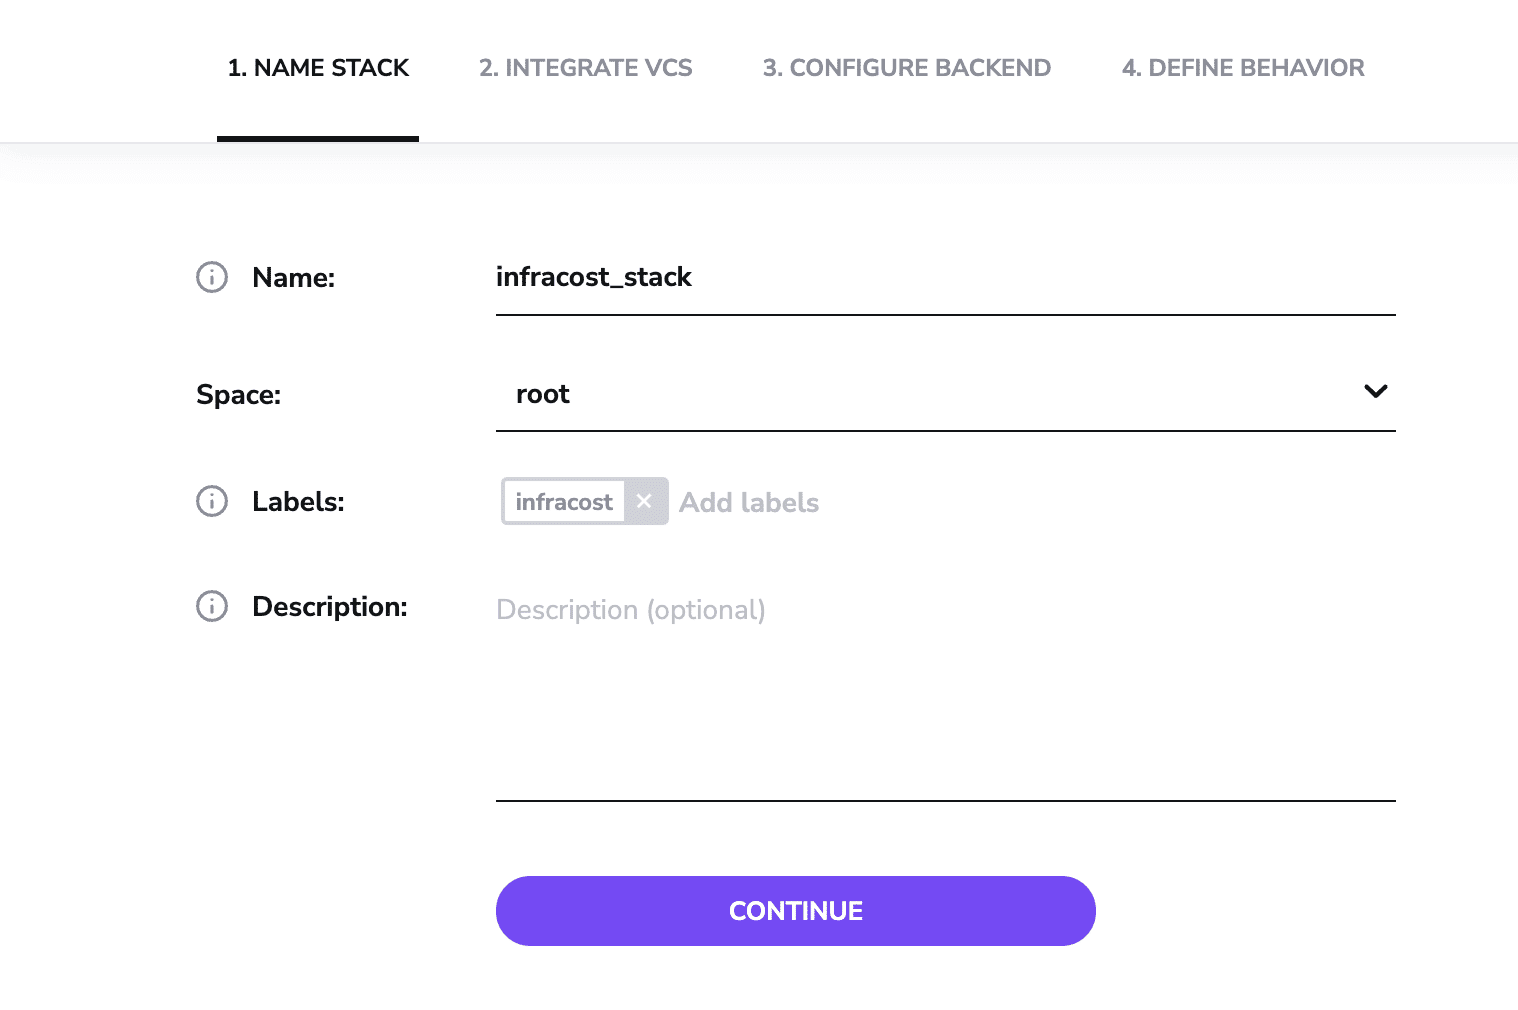
After making sure, you’ve added the infracost label, on the create stack tab, you will simply have to select your repository and you can accept all defaults.
Moving forward, we will need to provide the API key to the stack as an environment variable. Here’s the good part though: Spacelift has contexts and in a context, you can add environment variables. This means that you can easily attach the infracost context to all stacks for which you want to monitor your Infracost without much hassle.
Let’s see how we can do that for better reusability.
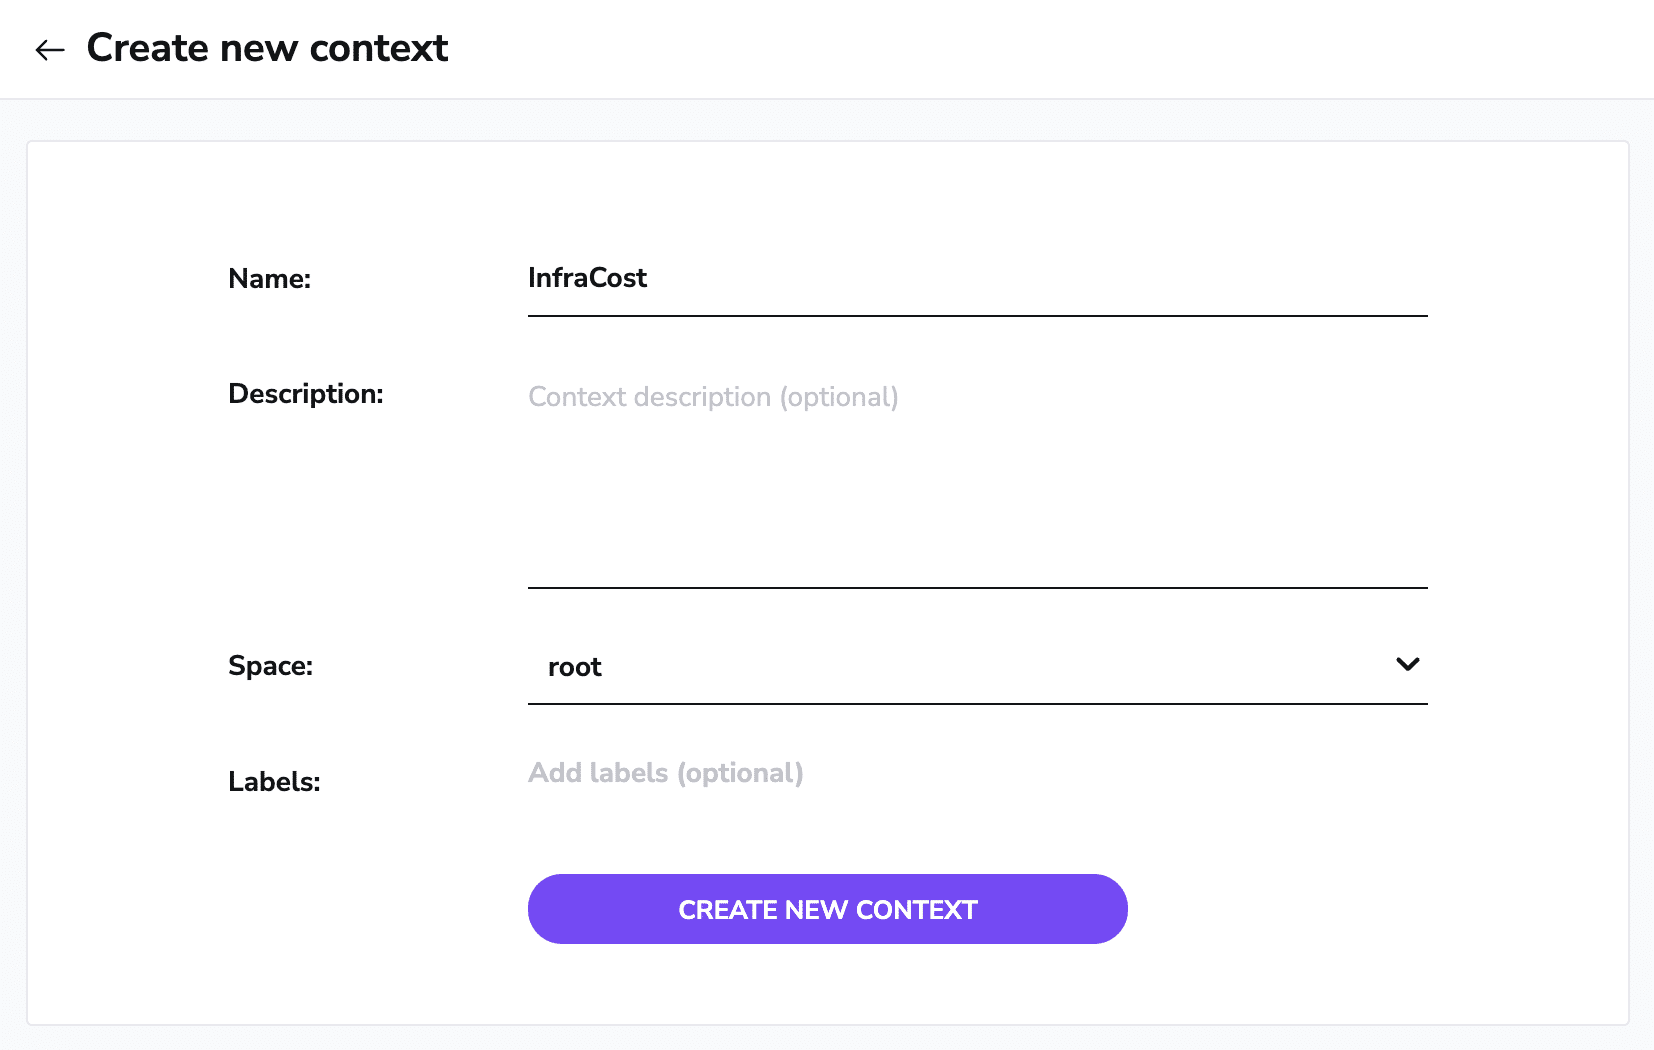
First, go to contexts and select “Add context”. Add a name for your context and click “Create new context” as in the screenshot below.
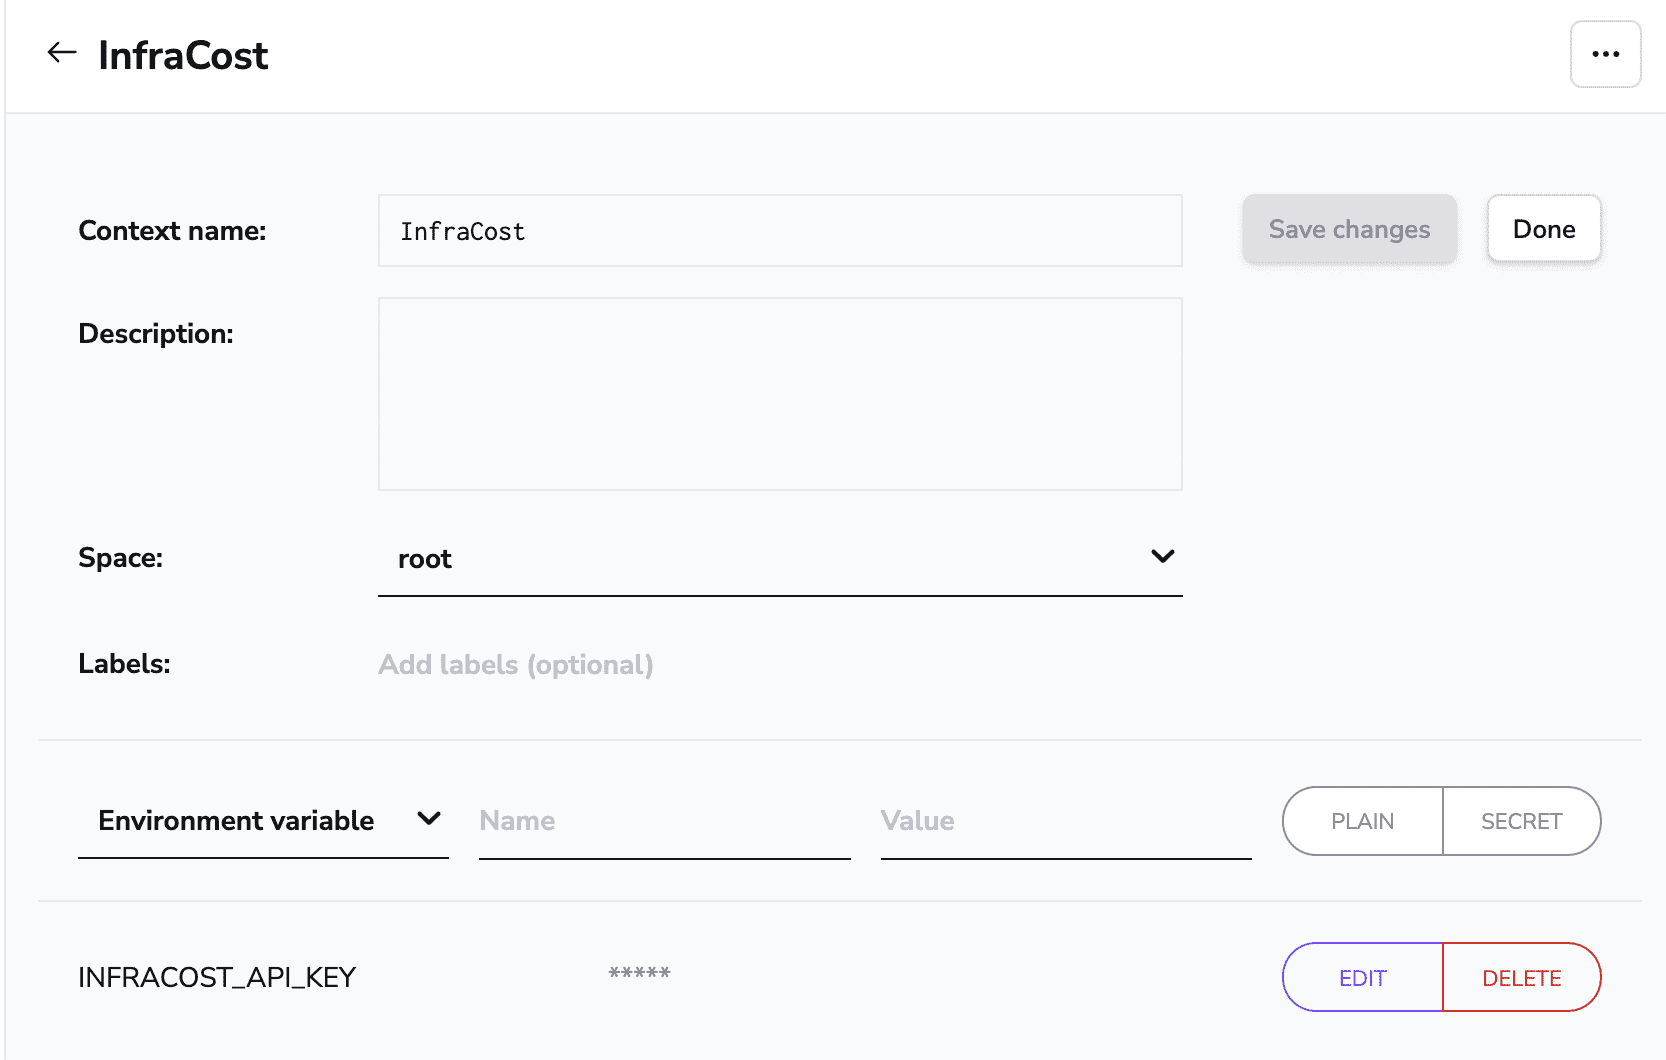
After you are done with this, you can go to your newly created context and add the environment variable like below:
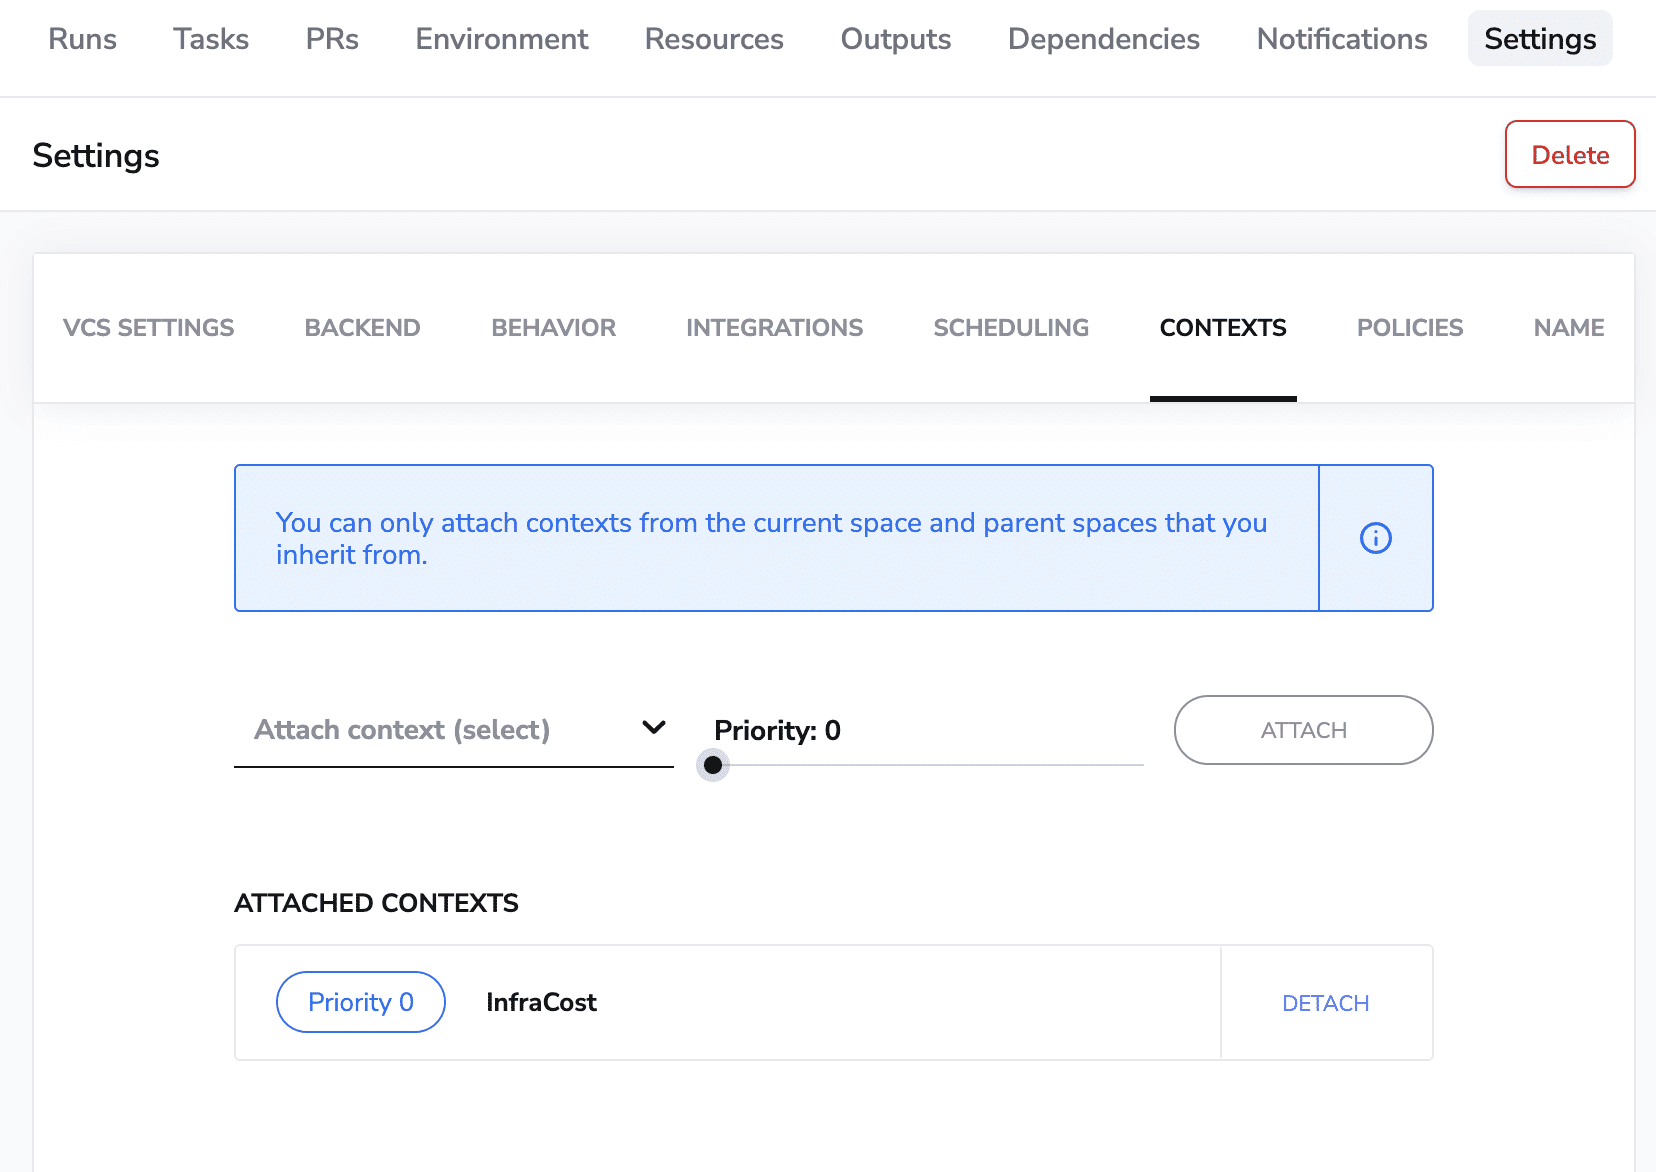
Return to your stack, go to Settings→Contexts and attach the newly created context to it:
Now, whenever you make a PR or push your code to the tracked branch, you will see the estimated cost done by Infracost directly in the VCS provider. You don’t have to worry about configuring anything else.
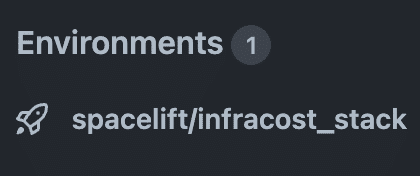
For GitHub, for example, if you go to the repository configured for the stack, you will see in the right-hand bottom corner what Environments are configured. Due to the fact that you’ve established the integration with Infracost, you will see it there.
In addition to this, you will see the latest runs that happened end to end. You can view all the runs by easily clicking on the green tick if the latest run was successful, the red x if the latest run failed, or the orange dot if the latest deploy is in progress.

By selecting one of the runs, you will see something similar to this:
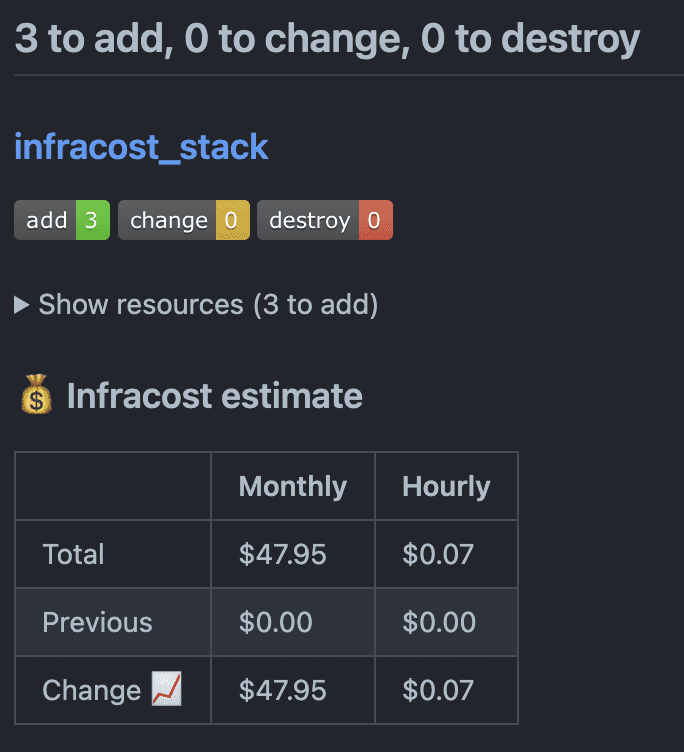
Of course, I wouldn’t recommend pushing the code directly into the main/master branch, but if you want to do something for demo purposes that doesn’t take any git flow into consideration, you can easily do so, as I’ve shown you above.
Let’s follow the correct process and do a PR. For this PR, I will remove one of the EC2 instances.
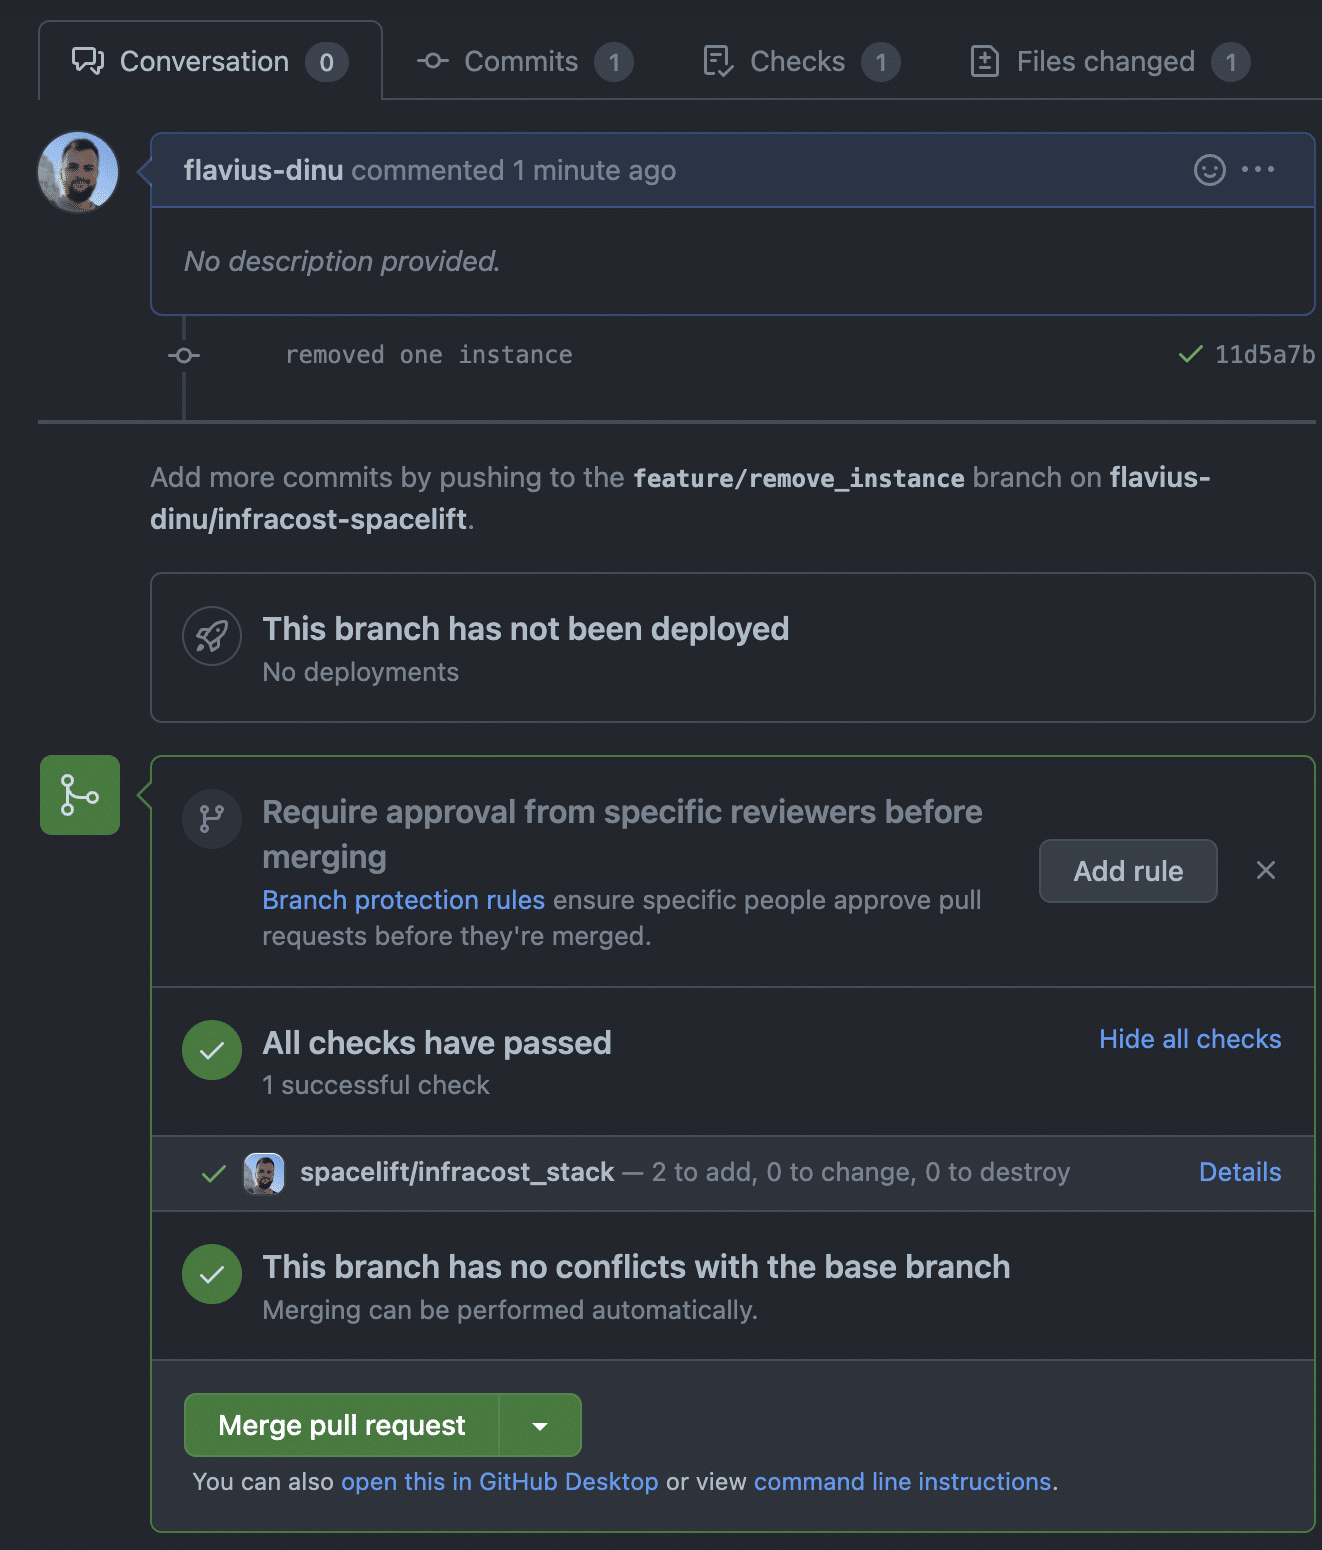
In the PR, you will see all the checks that are done and in our case it is just the infracost one. By clicking on the details button, you are going to see an estimate similar to the one we’ve seen before.
Spacelift plan policies on Infracost
Spacelift integrates with OPA, and you can define multiple types of policies. One type is plan policy, which we can leverage to integrate with InfraCost. More details about this can be found here.
For demo purposes, let’s build a policy that doesn’t permit hourly costs greater than $0.01 per stack resources.
To do that, we have to go to our Spacelift account, select policies from the left-hand side, and add a policy.

In the policy, we are going to add the following code:
package spacelift
# Prevent any changes that will cause the hourly cost to go above a certain threshold
deny[sprintf("hourly cost greater than $%.2f ($%.2f)", [threshold, hourly_cost])] {
threshold := 0.01
hourly_cost := to_number(input.third_party_metadata.infracost.projects[0].breakdown.totalHourlyCost)
hourly_cost > threshold
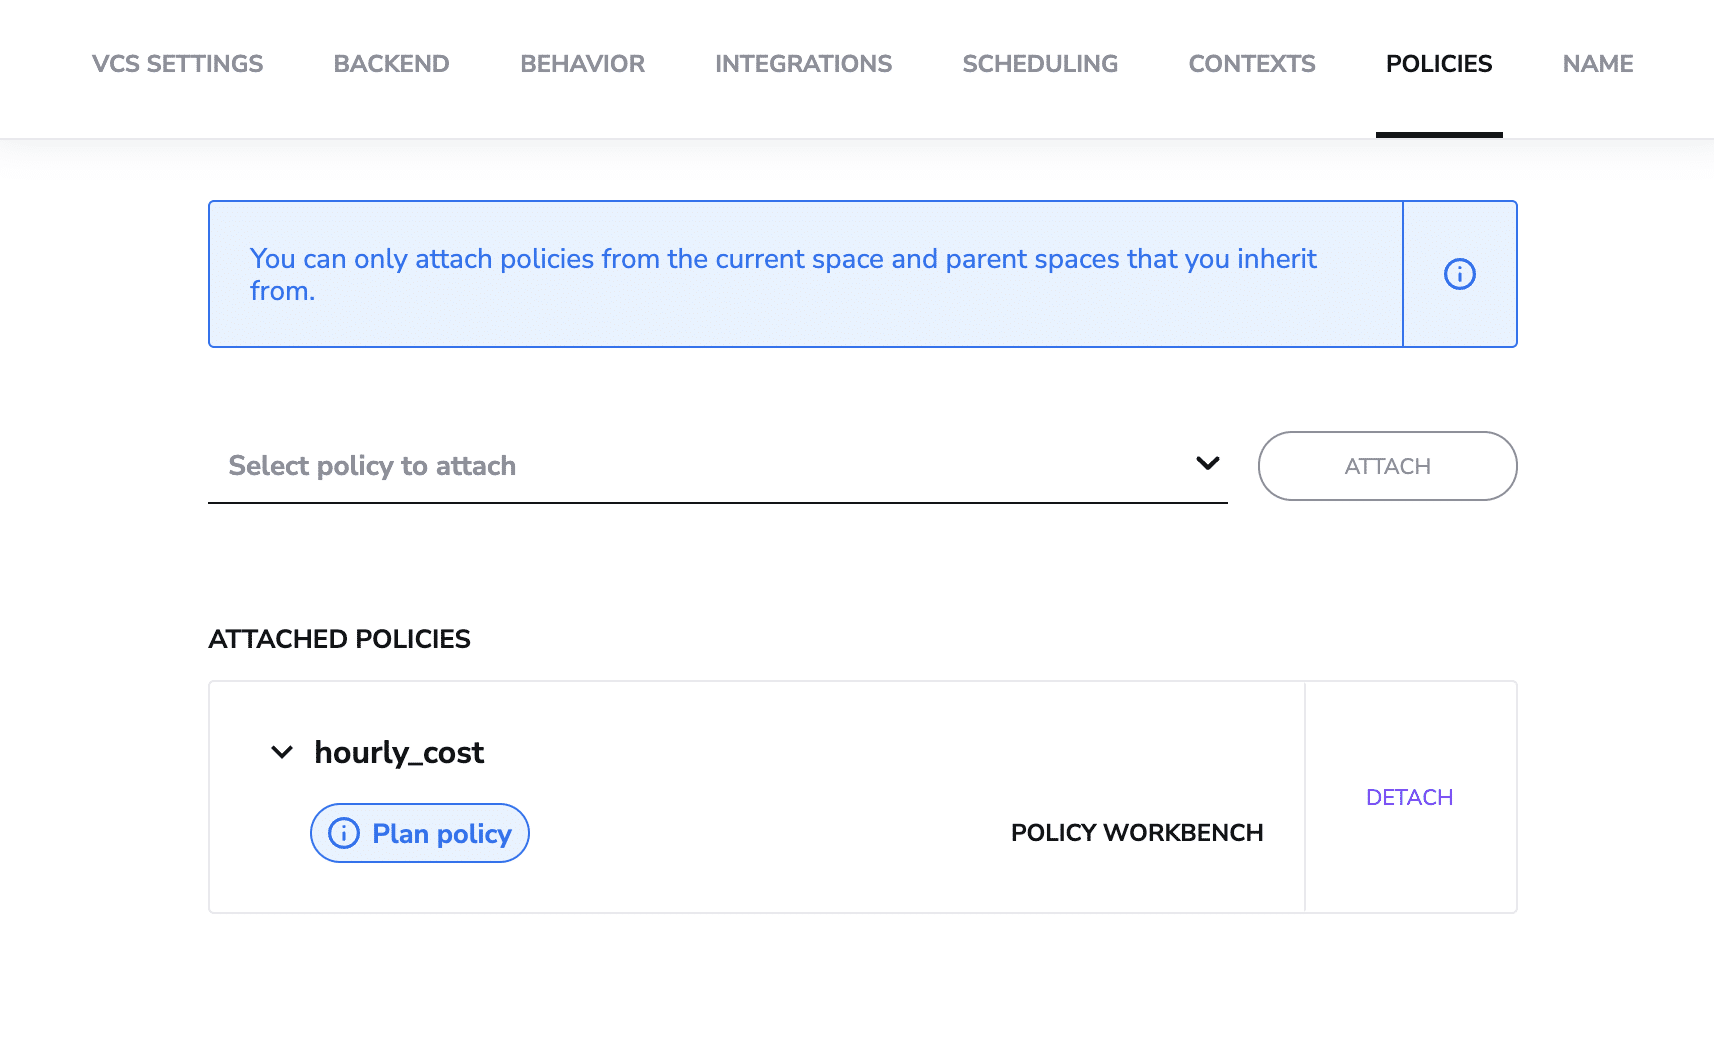
}Add a name to your policy, I’ve added hourly_cost, but it can be whatever you want.
To attach the policy to our stack, we will go to our Stack → Settings → Policies and attach the newly created policy similar to this:
Now, let’s simply trigger a run on the stack with the remaining two instances. After the plan finishes, if the hourly cost is greater than $0.01, you won’t be allowed to run your code.
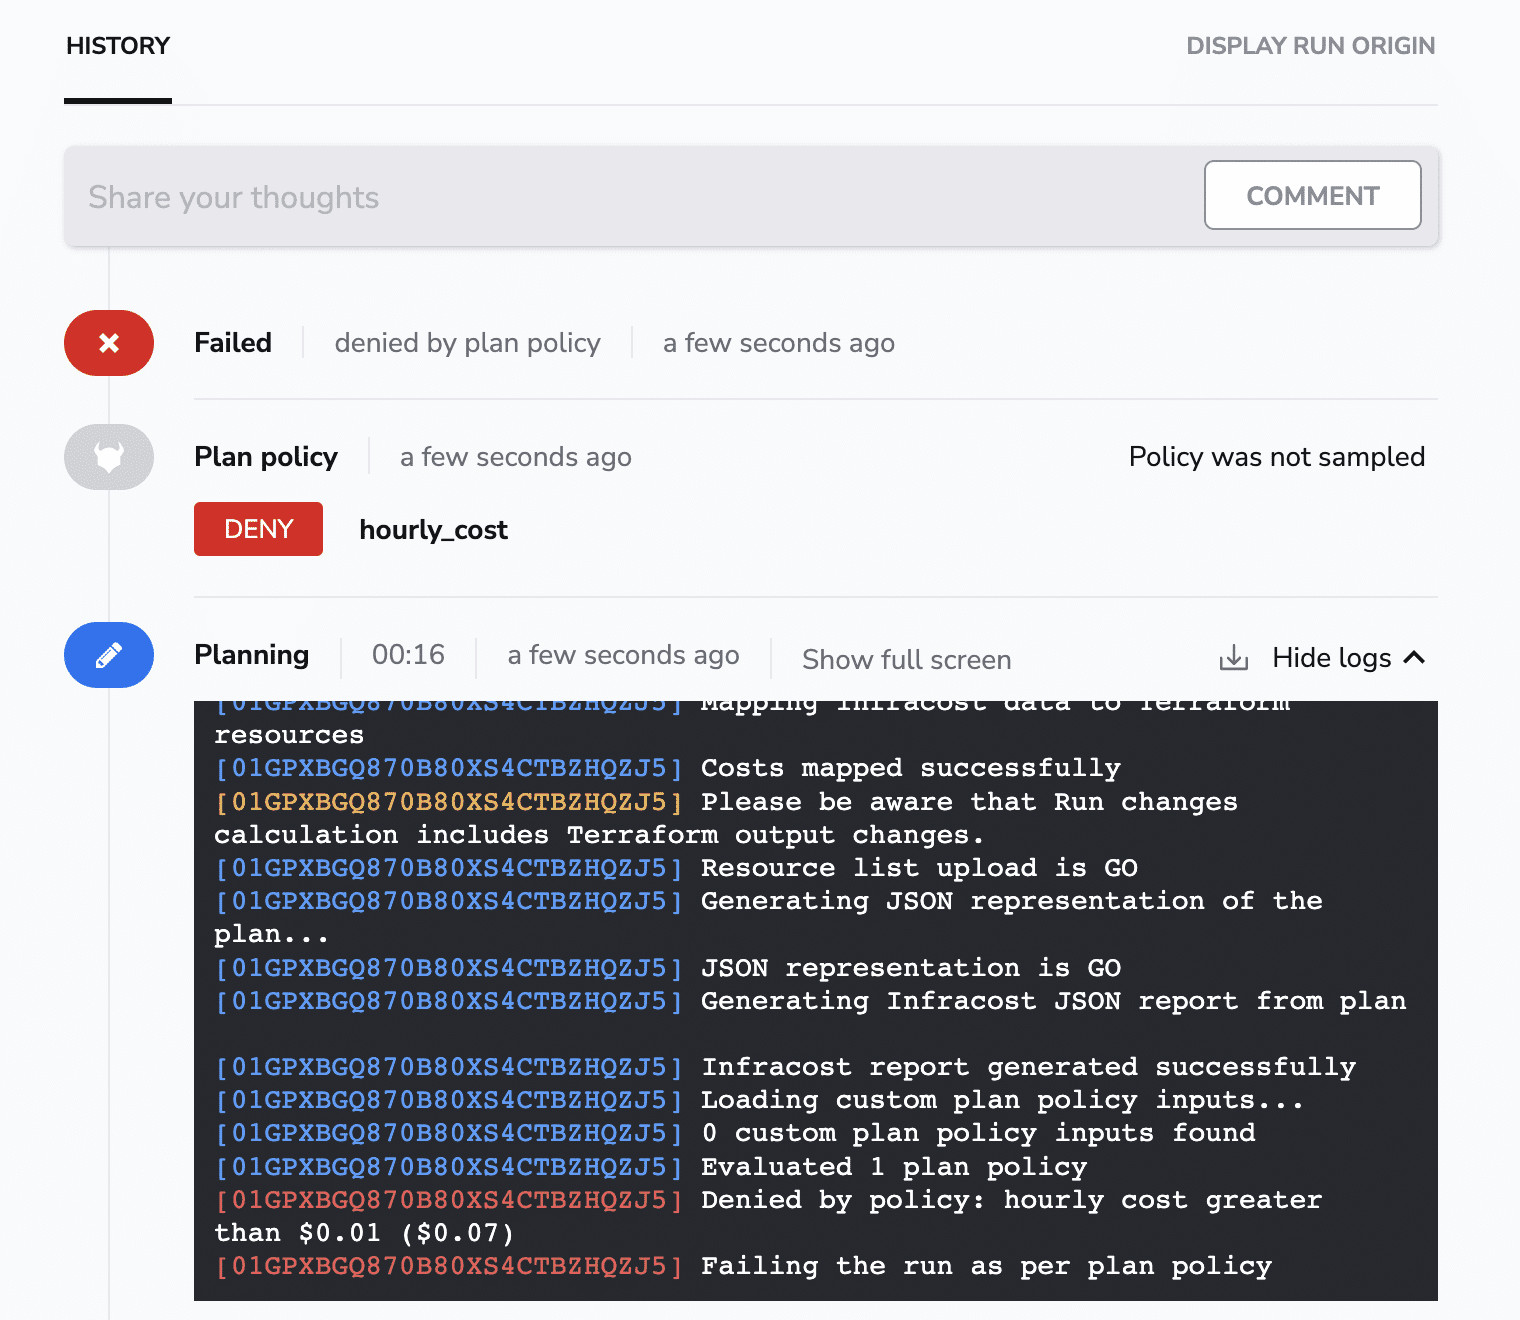
And that’s the case. The hourly cost is $0.07, so that’s greater than $0.01. You will not be allowed to continue deploying your code.
Of course, in a real-world scenario, you are most likely going to build monthly costs, but to do that, the only code changes per se that you will need to do to your policy is to modify all mentions to hourly_cost variable and put a more suggestive name for your use case (monthly_cost for example) and change the last argument of this variable assignment from totalHourlyCost to totalMonthlyCost.
Having Infracost as part of your IaC process and seeing the details in both Spacelift and the VCS PR will save costs because it will make everybody more aware of the impact of their changes.
Estimating cost using pre-commit with Infracost
You can also add InfraCost as part of the pre-commit. With pre-commit, you can define some hooks that you can easily run before you push your code. There are multiple ways to install pre-commit, and you can find examples here.
To leverage Infracost with pre-commit, you will need to save your configuration in a file called .pre-commit-config.yaml.
repos:
 - repo: https://github.com/pre-commit/pre-commit-hooks
   rev: v4.3.0
   hooks:
     - id: end-of-file-fixer
     - id: trailing-whitespace
 - repo: https://github.com/antonbabenko/pre-commit-terraform
   rev: v1.72.2
   hooks:
     - id: terraform_fmt
     - id: terraform_tflint
     - id: infracost_breakdown
       args:
         - --args=--path=./
       verbose: true # Always show costs
     - id: terraform_validate
In the above example, I’m using six hooks to get an Infracost breakdown and make sure my code is linted properly and valid. You may need to install some of these hooks separately before being able to use them in pre-commit.
In the above example, in addition to Infracost, which we’ve already installed, we need to install terraform_tflint. Instructions on how to do that are available here.
After defining the file above, we can run pre-commit with the following:
$ pre-commit run --all-filesThis is the output you are going to see for the code with two EC2 instances:
fix end of files.........................................................Passed
trim trailing whitespace.................................................Passed
Terraform fmt............................................................Passed
Terraform validate with tflint...........................................Passed
Infracost breakdown......................................................Passed
- hook id: infracost_breakdown
- duration: 2.25s

Evaluating Terraform directory at ./
  ✔ Downloading Terraform modules
  ✔ Evaluating Terraform directory
  ✔ Retrieving cloud prices to calculate costs


Running in null

Summary: {
  "totalDetectedResources": 2,
  "totalSupportedResources": 2,
  "totalUnsupportedResources": 0,
  "totalUsageBasedResources": 2,
  "totalNoPriceResources": 0,
  "unsupportedResourceCounts": {},
  "noPriceResourceCounts": {}
}

Total Monthly Cost:        16.784 USD
Total Monthly Cost (diff): 16.784 USD

Terraform validate.......................................................Passed
By making a habit of running pre-commit before you push your code, you can easily make sure that everything is working as expected and by having an overview of the cost you will be more thoughtful before pushing the code.
Not content with being one of Scandinavia’s largest fashion retailers, VARNER also aims to become the region’s leading data and tech-driven fashion company. This ambition hinges on finding an effective way to centralize growth in the cloud. Spacelift delivers the flexible infrastructure as code (IaC) they require to achieve that goal at a competitive cost.
Key points
Overall, InfraCost is a powerful tool that can help organizations better understand what their money is spent on. Its multi-cloud support, detailed cost breakdown, ability to easily see cost differences between iterations, and ability to integrate with other products make it a key player in the Infrastructure as Code world.
The Infracost integration with Spacelift works natively, and the only thing you have to do to enable it is add a label to your stack. Another feature that works really well in this integration is controlling how much you spend via policies.
It is important to note that InfraCost is not a silver bullet. You can use it as a guide, but it’s not a substitute for good resource governance.
Note: New versions of Terraform are placed under the BUSL license, but everything created before version 1.5.x stays open-source. OpenTofu is an open-source version of Terraform that expands on Terraform’s existing concepts and offerings. It is a viable alternative to HashiCorp’s Terraform, being forked from Terraform version 1.5.6.
Manage Terraform Better with Spacelift
Build more complex workflows based on Terraform using policy as code, programmatic configuration, context sharing, drift detection, resource visualization and many more.
