
Kubernetes (K8S) has a set of objects ready for use out of the box. But what if you want K8S to manage things other than Kubernetes itself and the containers it manages? This is where creating your own objects using custom resource definitions (CRDs) comes in.
CRDs make the possibilities of Kubernetes management almost limitless. Using CRDs, you can extend the base Kubernetes API with any object you like.
In this article, we will explore custom resource definitions (CRDs) in Kubernetes, possible use cases, and how to start creating your own CRDs.
What we’ll cover:
What is a custom resource definition (CRD) in Kubernetes?
A custom resource definition (CRD) in Kubernetes is a mechanism that allows users to extend the Kubernetes API by defining their own resource types. These custom resources behave like built-in Kubernetes objects (e.g., Pods, Deployments) but are user-defined.
With CRDs, developers can create custom objects that behave like built-in Kubernetes resources, enabling better management of specific application needs. For example, a team managing database instances could define a Database CRD to automate provisioning and scaling.
CRDs are essential for implementing Kubernetes Operators, which automate complex application lifecycle management. Unlike standard Kubernetes resources, CRDs require a controller to define their behavior and reconcile desired state changes.
What is the difference between an API and CRDs?
An API (application programming interface) in Kubernetes defines how different components interact programmatically. It allows users and controllers to manage resources using predefined endpoints. Kubernetes APIs follow a structured format and support built-in resources like Pods, Services, and Deployments.
A CRD extends the Kubernetes API by enabling users to define their own resource types beyond the built-in objects. CRDs allow developers to introduce new abstractions tailored to specific applications while maintaining compatibility with Kubernetes’ declarative management model.
Kubernetes API extensions provide deeper integration by modifying or extending the Kubernetes API server itself. These include Aggregated API Servers and Admission Webhooks, which allow custom logic to be enforced at the API level.
Although CRDs are easier to implement and maintain, API extensions offer greater flexibility and control, making them ideal for advanced use cases that require custom authentication, validation, or admission control logic.
What is the difference between ConfigMaps and CRDs?
ConfigMaps store non-sensitive configuration data as key-value pairs, allowing applications to separate configuration from code. They enable pods to consume external settings without modifying container images.
So, in short, ConfigMaps store externalized configuration data for applications, whereas CRDs expand Kubernetes’ API to support custom resources. This distinction makes ConfigMaps ideal for environment-specific settings, while CRDs are useful for defining reusable and extensible Kubernetes objects.
Common use cases for CRDs in Kubernetes
CRDs are essential for extending Kubernetes beyond built-in resources while maintaining declarative management. Here are the common use cases:
- Custom operators and controllers: CRDs help build operators that automate complex application lifecycle management, such as installation, upgrades, and scaling.
- Managing custom workloads: CRDs enable defining resources tailored to specific applications, such as
KafkaClusterorElasticSearchCluster, simplifying deployment and scaling. - Infrastructure automation: Tools like Crossplane use CRDs to represent cloud infrastructure (e.g., databases, storage, networking) within Kubernetes, allowing declarative infrastructure management.
- Policy enforcement: CRDs can be used with controllers to enforce policies, such as security rules or compliance standards, by automatically applying constraints across resources.
- CI/CD pipelines: Some Kubernetes-native CI/CD tools define CRDs to manage deployment workflows, ensuring consistent and automated release processes.
How to view the list of all existing CRDs
Because CRDs are created with most tool installations, you likely have some installed on your cluster already.
You can view a list of existing CRDs using the command:
kubectl get crd
To get detailed information about a specific CRD run:
kubectl describe crd <crd-name>Kubernetes tools with auto-installed CRDs
Some tools automatically install CRDs as part of their setup. These CRDs are not built into Kubernetes but are deployed when you install certain tools or operators. This is to enable them to provide functionality that is not provided in vanilla K8S.
Here are some common examples:
- Helm Charts – Many Helm charts include CRDs that are automatically installed when deploying an application (e.g.,
cert-manager,Istio,ArgoCD). - Operators – Kubernetes Operators (installed via OLM or manually) often create CRDs automatically (e.g., Prometheus Operator, FluxCD).
- Kubectl Apply/Manifests – Some installation scripts apply CRDs as part of a YAML manifest.
- Kustomize – This can be used to install CRDs along with other resources.
For example, if the monitoring tool Prometheus is installed on your cluster, it will include the installation of prometheusrules.monitoring.coreos.com CRDs. CRDs are listed in the format <object>.<group>.
Let’s say we try running the command below before the installation of Prometheus on our cluster:
kubectl get prometheusrules -n prometheus It will return an error:
error: the server doesn't have a resource type "prometheusrules"However, with Prometheus installed, the command shows a list of Prometheus rules:

How to create a Kubernetes CRD
To create a custom resource definition (CRD) in Kubernetes, define a YAML file specifying the custom resource’s API group, version, and schema.
Once the CRD is applied using the kubectl apply command, Kubernetes registers it, enabling users to create instances of the new resource using a corresponding custom resource (CR).
Example: Creating a CRD in Kubernetes for a Database resource
The example below defines a resource definition for switches in our data center that we will manage using K8S.
Note: Before we proceed, be aware that most scenarios do not require a new CRD to be created from scratch; there is an existing solution on the Internet.
1. Define the CRD YAML file
To create a CRD, we need to create a new YAML file.
switchcrd.yaml
apiVersion: apiextensions.k8s.io/v1
kind: CustomResourceDefinition
metadata:
  name: switches.datacenter.com  # name must match the spec fields below, and be in the form: <plural>.<group>
spec:
  group: datacenter.com  # group name to use for REST API: /apis/<group>/<version>
  versions:
    - name: v1
      served: true # Each version can be enabled/disabled by Served flag.
      storage: true # One and only one version must be marked as the storage version.
      schema:
        openAPIV3Schema:
          type: object
          properties:
            spec:
              type: object
              properties:
                dataCenter:
                  type: string
                rack:
                  type: integer
                type:
                  type: string
  scope: Cluster # either Namespaced or Cluster
  names:
    plural: switches # plural name to be used in the URL: /apis/<group>/<version>/<plural>
    singular: switch # singular name to be used as an alias on the CLI and for display
    kind: Switch # kind is normally the CamelCased singular type. Your resource manifests use this.
    shortNames: # shortNames allow shorter string to match your resource on the CLI
    - sw
2. Apply the CRD to Kubernetes
We can apply it using:
kubectl apply -f switchcrd.yaml3. Verify the CRD
We can see it added to the list of our CRDs by using the command:
kubectl get crd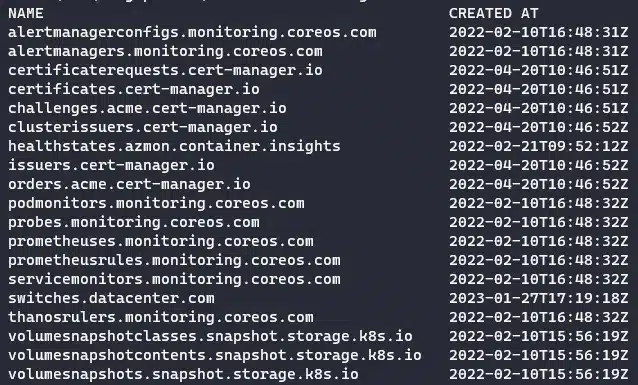
Now we can run:
kubectl get switchesThe output above happens because we have defined only the definition, not the actual switch device we want to manage.
4. Create a custom resource (CR)
We’ll create a device called Switch1. Create a new file called switch1.yaml:
apiVersion: datacenter.com/v1
kind: Switch
metadata:
  name: switch1
spec:
  dataCenter: uksouth
  rack: 280
  type: physical
Apply it using the command:
kubectl apply -f .\switch1.yaml5. Verify the custom resource
Now we can list our switches:
kubectl get switchesThis object is now a part of the Kubernetes API. As it stands, it is just a list with some specs, which doesn’t actually do anything other than serve as a data record.
To use the custom object we created, we can create a CustomController object to configure our switches, for example. Custom controllers are applications or scripts deployed on the cluster as pods, typically using Kubebuilder, Operator SDK, or custom Go code. Their job is to listen to the Kubernetes API and perform some actions based on defined logic.
The CustomController object could be configured to listen to the K8S API for any changes in our switch objects and make appropriate changes based on those, effectively introducing fully custom automation.
Managing Kubernetes CRDs
Managing CRDs effectively involves carefully handling updates, implementing proper versioning strategies, and ensuring safe deletion. Without a structured approach, CRD mismanagement can lead to schema conflicts, orphaned resources, or unexpected application failures.
1. Updating CRDs
Updating a CRD requires careful consideration to avoid breaking existing resources. If the changes are non-disruptive (e.g., adding new optional fields), updating the CRD directly is safe.
However, Kubernetes enforces structural schema validation, meaning that even non-breaking changes like modifying constraints or default values can cause issues if not tested properly.
Depending on the situation, you can use kubectl apply or kubectl replace commands. Before applying updates, use kubectl diff or kubectl apply --dry-run=client to preview changes and ensure backward compatibility. Perform schema validation using OpenAPI v3.
Let’s see an example:
apiVersion: apiextensions.k8s.io/v1
kind: CustomResourceDefinition
metadata:
  name: widgets.example.com
spec:
  group: example.com
  names:
    kind: Widget
    listKind: WidgetList
    plural: widgets
    singular: widget
  scope: Namespaced
  versions:
    - name: v1
      served: true
      storage: true
      schema:
        openAPIV3Schema:
          type: object
          properties:
            spec:
              type: object
              properties:
                size:
                  type: string
Apply the update:
kubectl apply -f widget-crd.yamlIf a structural schema change is required, consider using versioning instead of modifying an existing version.
Kubernetes does not allow destructive schema changes (e.g., removing fields) in an existing CRD version unless x-kubernetes-preserve-unknown-fields was enabled previously.
2. Versioning CRDs
Managing multiple versions helps maintain API stability while allowing incremental improvements. Kubernetes supports versioning within CRDs by defining multiple version entries in the versions field.
In the example below, we’ll be adding a new version (v2). Modify the versions field to include v2 while keeping v1:
 versions:
    - name: v1
      served: true
      storage: false
    - name: v2
      served: true
      storage: true
      schema:
        openAPIV3Schema:
          type: object
          properties:
            spec:
              type: object
              properties:
                size:
                  type: string
                color:  # New field in v2
                  type: string
Apply the version update:
kubectl apply -f widget-crd.yamlBefore deprecating a version, check which versions are currently in use:
kubectl get crd widgets.example.com -o yaml | grep versions -A 5Note: Set storage: false on deprecated versions but keep served: true temporarily for a smooth migration. Once all resources have migrated to the new version, the deprecated version can be removed entirely to reduce maintenance overhead.
3. Deleting CRDs
Deleting a CRD removes all associated resources, which can lead to data loss if not handled properly. As a best practice, ensure no critical workloads depend on the CRD before removal.
Kubernetes does not automatically back up CRDs, so if data persistence is required, export custom resource data before deletion:
kubectl get myresources.example.comIf instances exist, consider backing them up before deletion. Use finalizers to prevent unintended deletions by ensuring necessary cleanup.
apiVersion: example.com/v1
kind: MyResource
metadata:
  name: example-resource
  finalizers:
    - prevent-deletion
Now, to remove a CRD safely, run:
kubectl delete crd myresources.example.comIf CRD deletion hangs, first check why it is blocked:
kubectl describe crd myresources.example.com
kubectl get events --field-selector involvedObject.name=myresources.example.com
kubectl logs <controller-pod>
If necessary, forcefully remove finalizers as a last resort:
kubectl patch myresource example-resource -p '{"metadata":{"finalizers":[]}}' --type=mergeBest practices when using Kubernetes CRDs
Properly designing and managing CRDs ensures stability, maintainability, and scalability in Kubernetes environments. Below are the best practices for working with CRDs:
- Design for stability — Use API versioning (
v1alpha1,v1beta1, v1) to introduce changes without breaking existing functionality. Plan schema updates to ensure forward compatibility. - Validate with OpenAPI schema — Enforce required fields, data types, and constraints using OpenAPI validation. This prevents misconfigurations and enhances reliability.
- Follow Kubernetes API conventions — Structure CRDs with standard fields (
metadata,spec,status) to ensure compatibility with Kubernetes tools and best practices. - Manage lifecycle with controllers — Implement a controller to reconcile CRD objects and maintain the desired state automatically, ensuring smooth operations.
- Ensure role-based access control (RBAC) — Define RBAC policies to restrict access to CRD operations, preventing unauthorized changes and security risks.
- Enable status subresource — Use the
statussubresource to track CRD state separately fromspec, preventing conflicts and improving observability.
Managing Kubernetes with Spacelift
If you need assistance managing your Kubernetes projects, look at Spacelift. It brings with it a GitOps flow, so your Kubernetes Deployments are synced with your Kubernetes Stacks, and pull requests show you a preview of what they’re planning to change.
You can also use Spacelift to mix and match Terraform, Pulumi, AWS CloudFormation, and Kubernetes Stacks and have them talk to one another.
To take this one step further, you could add custom policies to reinforce the security and reliability of your configurations and deployments. Spacelift provides different types of policies and workflows that are easily customizable to fit every use case. For instance, you could add plan policies to restrict or warn about security or compliance violations or approval policies to add an approval step during deployments.
You can try Spacelift for free by creating a trial account or booking a demo with one of our engineers.
Key points
Custom resource definitions (CRDs) let you define and manage custom objects in Kubernetes, extending its built-in APIs. They are essential for building operator-based automation but require a strong grasp of Kubernetes fundamentals, including API resources, controllers, and declarative configurations.
Manage Kubernetes easier and faster
Spacelift allows you to automate, audit, secure, and continuously deliver your infrastructure. It helps overcome common state management issues and adds several must-have features for infrastructure management.
