
terraform apply is the command that turns your configuration into running infrastructure. It’s also the command most likely to surprise you.
Run it without thinking and you can create resources you didn’t intend, modify production by accident, or leave state in a partially-updated mess that takes the rest of your afternoon to clean up. The mechanics are simple. The edge cases are not.
In this article, you’ll learn what terraform apply does, when to reach for each flag (-auto-approve, -target, -replace, -destroy, -invoke, -json, and the rest), the difference between running it interactively and applying a saved plan in CI/CD, and what to do when an apply fails partway through.
What we will cover:
What is apply in Terraform?
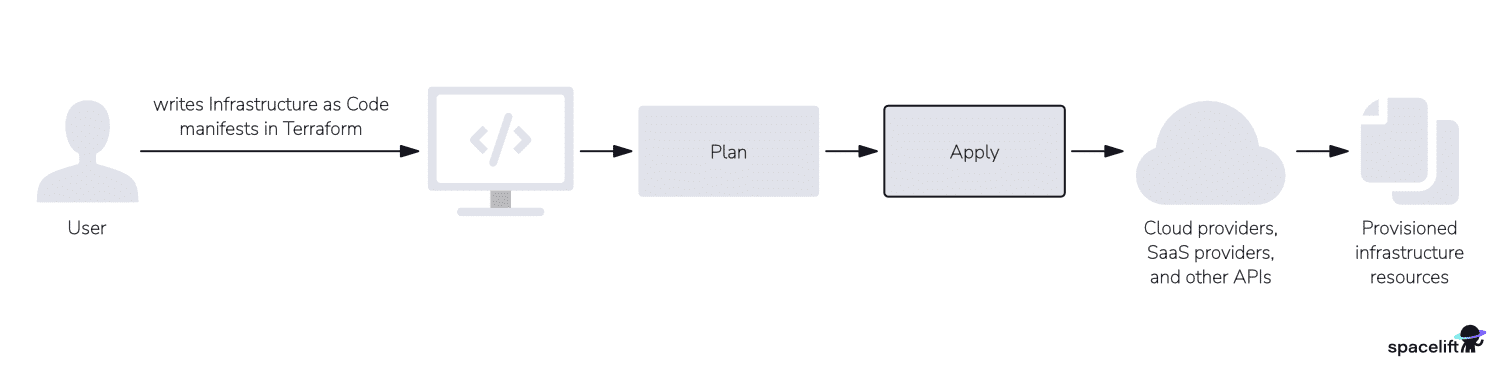
The terraform apply command is one of the core operations that you can do with Terraform. It updates your infrastructure to match the state described in your code. terraform apply assesses the current infrastructure state, identifies discrepancies, and adjusts resources by creating, updating, or deleting them as needed.
Terraform apply is one of the Terraform CLI commands — check out our Terraform Cheat Sheet to learn more!
What is terraform apply used for?
terraform apply command is used to execute the planned actions specified in your Terraform configuration files. It takes the planned changes, which are typically generated by the terraform plan command, and creates, updates, or deletes resources to align your infrastructure with the desired state described in the code. Before applying changes, it provides an execution plan for review, ensuring transparency and control over the modifications being made.
For example, if you define an AWS EC2 instance in your Terraform configuration, running terraform apply will create that instance in your AWS account.
What does the terraform apply command do?
The terraform apply command executes the actions proposed in a terraform plan. It is used to deploy your infrastructure. Typically apply should be run after terraform init and terraform plan.
The apply command can also be used with a previously generated plan file from the terraform plan -out=<path to file>.
What you should do before running terraform apply?
Before running terraform apply, you will need to:
- Define a Terraform configuration.
- Ensure you have defined the access to your cloud provider.
- Run a
terraform initto download all the necessary providers and modules. - Create an execution plan by running
terraform plan.
What happens after terraform apply?
After running terraform apply, Terraform will provision and create the resources defined in your configuration files on the specified provider(s). It’s important to review the apply output carefully, as it shows the real changes being made to your infrastructure.
If the terraform apply command is run without any options, it will run a terraform plan first, ask the user to confirm the planned actions and then execute those changes once confirmed.
By running terraform apply -auto-approve, all the infrastructure resources you have defined in your configuration will get created in your cloud provider/database/k8s cluster.
Examples: Terraform apply quick usage options
Here are some examples of options that you can use with the terraform apply command:
- terraform apply
- terraform apply -auto-approve
- terraform apply <planfilename>
- terraform apply -var=”my_variable=test”
- terraform apply -var-file=”varfile.tfvars”
- terraform apply -target=”module.appgw.0″
- terraform apply -lock=false
- terraform apply -parallelism=<n>
- terraform apply -compact-warnings
- terraform apply -input=false
- terraform apply -json
- terraform apply -lock-timeout=DURATION
- terraform apply -no-color
- terraform apply -refresh-only
- terraform apply -destroy
- terraform apply -replace=resource
- terraform apply -invoke=’action.TYPE.LABEL’
When terraform apply is run without a saved plan file, it inherits all the planning modes and options from terraform plan (such as -destroy, -refresh-only, -replace, -var, and –var-file). When you pass a saved plan file, Terraform ignores these planning options and only executes what’s in the plan.
1. terraform apply
Running terraform apply by itself creates or updates infrastructure depending on the configuration files. By default, a plan is generated first and needs to be approved before it is applied.
2. terraform apply -auto-approve
When you run terraform apply -auto-approve it automatically applies all changes without requiring manual confirmation.
Normally, terraform apply prompts the user to review and approve the planned changes before execution. The -auto-approve flag bypasses this prompt, making the process fully automated. It is useful in CI/CD pipelines or scripting scenarios where human intervention is not desired.
However, using -auto-approve should be done with caution, as it applies changes immediately, potentially leading to unintended modifications if not carefully reviewed beforehand.
Read more: How to Use Terraform Apply with -Auto-Approve Flag
3. terraform apply <planfilename>
The command terraform apply <planfilename> is used to apply a previously generated Terraform execution plan. Normally, terraform apply is run without arguments, prompting Terraform to create a plan and apply it in one step. When a <planfilename> is specified, Terraform applies the changes recorded in that saved plan instead of creating a new one.
4. terraform apply -var="my_variable=test"
You can use terraform apply -var="my_variable=test" option to pass in a variable value.
If my_variable is used to define an instance name in a Terraform configuration, this command ensures that Terraform provisions infrastructure with “test” as the instance name.
5. terraform apply -var-file="varfile.tfvars"
The -var-file="varfile.tfvars" option applies infrastructure changes while using variable values from a specified .tfvars file instead of requiring manual input or hardcoded values.
6. terraform apply -target=”module.appgw.0"
The -target=”module.appgw.0" flag lets you apply changes only to the targeted resource instead of applying all pending changes..
It’s generally recommended for troubleshooting or partial deployments rather than regular use in production workflows, since using -target can lead to dependencies being skipped, potentially causing inconsistencies in the infrastructure state.
Read more about the Terraform target option.
7. terraform apply -lock=false
If you need to disable the Terraform state locking feature during the apply operation you can run terraform apply with the -lock=false option. Remember to use it with caution as other engineers might run concurrent commands against the same workspace.
8. terraform apply -parallelism=<n>
terraform apply -parallelism=<n> lets you specify the number of operations run in parallel. The -parallelism option is useful when you want to limit the number of concurrent operations inside your cloud provider. Some cloud providers have rate limits, and you may receive throttling errors.
9. terraform apply -compact-warnings
When you want to improve the readability of Terraform output, you can use the terraform apply -compact-warnings option to condense the warnings into a more concise format.
The -compact-warnings option gives you clearer output when running terraform apply, as it minimizes the warnings you see when you do this operation.
10. terraform apply -input=false
When you run terraform apply -input=false, Terraform will not prompt for any input during the apply process. It will proceed using the existing values specified in your Terraform configuration, including values from .tfvars files, environment variables, or defaults set in the configuration.
If any required variable is missing, Terraform will fail instead of prompting for input. This flag is particularly useful for automating Terraform workflows, such as in CI/CD pipelines or scripted deployments, where manual intervention is not possible.
11. terraform apply -json
terraform apply -json provides a structured JSON output that includes the results of the operation, making it easier to parse and integrate into automated workflows or other tools.
To run terraform apply with the -json option, you need to either pass a plan file to the command or use -auto-approve option. Let’s see it in action.
Using a plan file, we will first need to create it:
terraform plan -out=myplan.tfplanNext, let’s run the apply command:
terraform apply -json myplan.tfplan{"@level":"info","@message":"Terraform 1.15.2","@module":"terraform.ui","@timestamp":"2026-05-13T11:15:45.491343+03:00","terraform":"1.15.2","type":"version","ui":"1.3"}
{"@level":"info","@message":"aws_s3_bucket.my_bucket: Plan to create","@module":"terraform.ui","@timestamp":"2024-05-14T11:15:46.415746+03:00","change":{"resource":{"addr":"aws_s3_bucket.my_bucket","module":"","resource":"aws_s3_bucket.my_bucket","implied_provider":"aws","resource_type":"aws_s3_bucket","resource_name":"my_bucket","resource_key":null},"action":"create"},"type":"planned_change"}
{"@level":"info","@message":"aws_s3_bucket.my_bucket: Creating...","@module":"terraform.ui","@timestamp":"2024-05-14T11:15:47.472327+03:00","hook":{"resource":{"addr":"aws_s3_bucket.my_bucket","module":"","resource":"aws_s3_bucket.my_bucket","implied_provider":"aws","resource_type":"aws_s3_bucket","resource_name":"my_bucket","resource_key":null},"action":"create"},"type":"apply_start"}
{"@level":"info","@message":"aws_s3_bucket.my_bucket: Creation complete after 3s [id=my-awesome-bucket-32209]","@module":"terraform.ui","@timestamp":"2024-05-14T11:15:50.350278+03:00","hook":{"resource":{"addr":"aws_s3_bucket.my_bucket","module":"","resource":"aws_s3_bucket.my_bucket","implied_provider":"aws","resource_type":"aws_s3_bucket","resource_name":"my_bucket","resource_key":null},"action":"create","id_key":"id","id_value":"my-awesome-bucket-32209","elapsed_seconds":3},"type":"apply_complete"}
{"@level":"info","@message":"Apply complete! Resources: 1 added, 0 changed, 0 destroyed.","@module":"terraform.ui","@timestamp":"2024-05-14T11:15:50.375979+03:00","changes":{"add":1,"change":0,"import":0,"remove":0,"operation":"apply"},"type":"change_summary"}
{"@level":"info","@message":"Outputs: 0","@module":"terraform.ui","@timestamp":"2024-05-14T11:15:50.376392+03:00","outputs":{},"type":"outputs"}Without the plan file, we could’ve simply ran:
terraform apply -json -auto-approve12. terraform apply -lock-timeout=DURATION
With -lock-timeout=DURATION option, you can set a duration for how long Terraform should wait to acquire a lock on the state file during an apply operation.
DURATION should be specified by a number with a time unit, such as “30s” (30 seconds), “5m” (5 minutes), or “1h” (1 hour).
13. terraform apply -no-color
The -no-color option lets you disable colorized output in the console. By default, Terraform outputs information with color codes for better readability and to distinguish different types of messages (e.g., changes, warnings, and errors) with colors. This is useful when you are working in an environment that does not support or handle color codes properly or when you prefer plain text output for your specific use case.
14. terraform apply -refresh-only
The terraform apply -refresh-only command updates the Terraform state file to reflect changes made to infrastructure outside of Terraform without modifying any resources.
This is useful when manual changes or external processes have altered infrastructure, as it ensures Terraform recognizes those updates without applying new changes.
Unlike a standard terraform apply, this command does not create, update, or destroy resources—it only synchronizes the state file with real-world infrastructure.
For configurations using the local backend only, terraform apply also accepts the legacy options -state, -state-out, and -backup.
15. terraform apply -destroy
Creates and applies a plan whose goal is to destroy all remote objects managed by the configuration, leaving an empty state. This is equivalent to running terraform destroy.
terraform apply -destroyThe -destroy flag was added to terraform apply in v0.15.2 (prior versions only supported it on terraform plan). Like a regular apply, it shows the plan and prompts for confirmation unless you also pass -auto-approve. It’s useful when you want to combine destroy planning with other planning options (-var, -var-file, -target) in a single command, or save a destroy plan with terraform plan -destroy -out=tfplan for a two-step approval workflow.
16. terraform apply -replace=resource
Forces Terraform to replace a specific resource instance instead of updating it in-place (for example, when a taint or forced recreation is required). For example, terraform apply -replace=aws_instance.example.
Best used sparingly and usually only while troubleshooting.
17. terraform apply -invoke='action.TYPE.LABEL'
Runs a specific provider action instead of applying the rest of the configuration.
Actions are a Terraform 1.14+ feature (introduced at HashiConf 2025) that let providers expose imperative operations outside the normal create/read/update/delete lifecycle. For example, invoking an AWS Lambda function, restarting an EC2 instance, or invalidating a CloudFront distribution.
You declare an action in your configuration using the new action block:
action "aws_lambda_invoke" "example" {
  config {
    function_name = aws_lambda_function.example.function_name
    payload       = jsonencode({ key1 = "value1" })
  }
}
Then invoke it from the CLI:
terraform apply -invoke=action.aws_lambda_invoke.exampleWhen invoked this way, Terraform skips the rest of the configuration and runs only the action — actions do not change resource state.
You can also bind actions to resource lifecycle events using an action_trigger block inside lifecycle, with events before_create, after_create, before_update, and after_update.
Available actions today include aws_lambda_invoke, aws_ec2_stop_instance, and aws_cloudfront_create_invalidation in the AWS provider, and azurerm_virtual_machine_power (beta) in the AzureRM provider. The catalog will grow as providers add support.
Tutorial: How to run Terraform apply
Let’s now take a look at the practical use of the terraform apply command.
- First, define a Terraform configuration – e.g.:
provider "aws" {
 region = "us-east-1"
}

resource "aws_s3_bucket" "my_bucket" {
 bucket = "my-awesome-bucket-710"
}- Ensure you have defined the access to your cloud provider (for AWS set up the AWS_ACCESS_KEY_ID and AWS_SECRET_ACCESS_KEY env vars or define them in the ~/.aws/credentials file).
- Run a
terraform initto download all the necessary providers, and modules and get things up and running in your environment. - Create an execution plan using
terraform plan:
Terraform used the selected providers to generate the following execution plan. Resource actions are indicated with the following symbols:
  + create

Terraform will perform the following actions:

  # aws_s3_bucket.my_bucket will be created
  + resource "aws_s3_bucket" "my_bucket" {
      + acceleration_status         = (known after apply)
      + acl                         = (known after apply)
      + arn                         = (known after apply)
      + bucket                      = "my-awesome-bucket-710"
      + bucket_domain_name          = (known after apply)
      + bucket_prefix               = (known after apply)
      + bucket_regional_domain_name = (known after apply)
      + force_destroy               = false
      + hosted_zone_id              = (known after apply)
      + id                          = (known after apply)
      + object_lock_enabled         = (known after apply)
      + policy                      = (known after apply)
      + region                      = (known after apply)
      + request_payer               = (known after apply)
      + tags_all                    = (known after apply)
      + website_domain              = (known after apply)
      + website_endpoint            = (known after apply)
    }

Plan: 1 to add, 0 to change, 0 to destroy.- Run
terraform apply -auto-approveand make the changes.
Plan: 1 to add, 0 to change, 0 to destroy.
aws_s3_bucket.my_bucket: Creating...
aws_s3_bucket.my_bucket: Creation complete after 3s [id=my-awesome-bucket-710]

Apply complete! Resources: 1 added, 0 changed, 0 destroyed
Running Terraform apply in automation
In automation terraform apply can be run after the plan stage, passing in the plan output file. If there is no plan stage prior to the apply stage (not recommended), then the terraform apply -auto-approve option can be used. Another useful option to avoid encoding issues when running pipelines in some CI/CD systems, i.e. Azure DevOps, is the terraform apply -no-color option, as the colored output is not handled correctly by the build agents.
For teams looking to move beyond scripts and CI/CD workarounds, Spacelift is an infrastructure orchestration platform that manages the full lifecycle of your Terraform, OpenTofu, CloudFormation, Pulumi, and Ansible workflows. Its flexible run workflow handles plans, applies, approvals, and policy checks so teams can collaborate safely at scale.
For non-critical workloads like tests and POCs, Spacelift Intelligence adds natural language provisioning and operational insight without the usual IaC ceremony. You can also use templates to standardize common patterns and give developers governed self-service.
Check out the documentation and start a free trial.
Common questions about the Terraform apply command
Now, we will answer some of the questions you may have about this command.
How to pass yes to Terraform apply?
Generally, when a CLI tool offers a mechanism for bypassing confirmation, it is recommended that you use that flag.
In Linux, the “yes” command helps you to bypass confirmation. You can generally use it like so: yes | rm -r directory.
This doesn’t work for Terraform, so you will need to use the mechanism for bypass confirmation. To pass “yes” to terraform apply and automatically confirm the changes without manual input, use the -auto-approve flag.
Is it safe to run terraform apply multiple times?
Terraform is a declarative language, so it is absolutely safe to run the apply command multiple times. If the configuration files have not changed compared to the current Terraform state, then the infrastructure will not be changed.
What happens if you run Terraform apply twice?
If you are running terraform apply twice, and you haven’t changed your configuration, Terraform will show you there are no changes to be done. However, if you make changes to your codebase, Terraform will just make those changes.
What is the difference between plan and apply Terraform?
A terraform plan shows you an execution plan of what Terraform will change in case of an apply. A terraform apply also does the actual execution of the code.
You can find more details about Terraform plan vs. apply in the comparison table below:
| Plan | Apply | |
| Primary purpose | Creates an execution plan showing all the actions that will be taken to your infrastructure (create/change/delete) without making any changes | Applies changes to your infrastructure (create/change/delete) |
| Output | Plan of proposed changes (create/change/delete) | Plan of proposed changes
Wait for confirmation [Optional] Modifies the infrastructure |
| Usage | Used to review and see the impact of changes before applying | Changes the infrastructure as specified in the configuration |
| State changes | No state changes | Changes according to the configuration |
| Common scenario | Run in a CI/CD pipeline after initialization to validate changes | Run in a CI/CD pipeline after validation to make changes to your infrastructure. |
| Safety | No changes are made to the infrastructure, so it is completely safe | It should be used with caution, as it makes changes to your infrastructure |
What is the difference between terraform apply and terraform destroy?
Terraform apply checks the configuration and your actual state and does changes to your infrastructure resources (create/modify/destroy). Terraform destroy checks your configuration and the actual state of your infrastructure and destroys all resources.
Should you run terraform apply before or after a merging?
As a best practice, you should always see a terraform plan on your pull request, and only apply the code after the pull request is merged.
What happens if terraform apply fails?
Depending on when a terraform apply command fails, some resources may have been successfully created, updated, or deleted, before the error was encountered. This means that your infrastructure reached a partially updated state, where some changes were applied and others have not been applied. The state file is updated to reflect the current state of the infrastructure with the partial updates.
Whenever you get an error, Terraform will let you know what failed and why, but sometimes, depending on how the error messages were defined inside of the providers you are using, these can be hard to debug.
Once you address the issues you’ve encountered, you can run terraform apply again to solve the issues.
Can you run terraform apply without plan?
You don’t need terraform plan to run terraform apply. If you don’t use the -auto-approve option, Terraform will generate a plan and prompt you to review it before taking action. This can be useful in local environments. As a best practice in CI/CD pipelines, you should first run terraform plan -out=tfplan, review the saved plan, and then run terraform apply tfplan to apply the exact reviewed plan.
What is the opposite of terraform apply?
The opposite of a terraform apply is terraform destroy, which destroys all the resources that are in the state. Some special resources, such as null_resources, can be created on destroy, but these are just exceptions.
How to stop terraform apply?
After you have started a terraform apply, and the requests are being sent, you cannot stop the apply without repercussions. You can send an interrupt signal (ctrl+c), and then you have the option to wait for a graceful shutdown or send another interrupt signal to force the shutdown. In both cases, some partial applies may happen, and in the force shutdown case, you may leave your infrastructure in an inconsistent state.
How long does terraform apply take?
It depends entirely on the provider, resource count, and dependency graph, so it can range from a few seconds for a small change to over an hour for large infrastructures with slow-provisioning resources like RDS clusters or Kubernetes clusters.
What exit codes does terraform apply return?
Terraform apply returns 0 on success and a non-zero exit code (typically 1) on failure, including configuration errors, provider errors, or interrupted runs. Unlike terraform plan, apply does not support the -detailed-exitcode flag.
Can you revert the changes made by terraform apply?
You can revert changes made by terraform apply, but Terraform does not have a built-in rollback mechanism like traditional deployment tools.
To revert changes, you can:
- Use
terraform destroy– This removes all resources defined in the configuration, but it is a full teardown, not a rollback. - Manually modify the configuration – Adjust the Terraform files to reflect the previous desired state and run
terraform applyagain. - Restore from a previous state file – If you have a backup of your
terraform.tfstatefile, you can manually restore it to revert the infrastructure.
Using remote state storage with versioning (e.g., S3 with versioning enabled) helps maintain historical state files, making it easier to restore a previous state if needed.
How to use terraform apply for dry run?
In Terraform, a dry run can be simulated using the terraform plan command instead of terraform apply. Terraform does not have a direct terraform apply --dry-run flag, but terraform plan serves the same purpose.
Can I use tofu apply instead of terraform apply?
Yes. If you’ve migrated to OpenTofu, run tofu apply instead of terraform apply. OpenTofu is a Linux Foundation / CNCF project forked from Terraform 1.5.6, designed as a drop-in replacement. The flags covered in this post: -auto-approve, -var, -var-file, -target, -replace, -refresh-only, -json, -parallelism, -lock, -lock-timeout, -no-color, -compact-warnings, -input all work identically in OpenTofu.
Two differences worth knowing:
- OpenTofu adds
-exclude=ADDRESS(since 1.9), which is the inverse of -target — it applies everything except the specified resource. Terraform does not have this flag. - OpenTofu does not yet support
-invokeor the broader Actions feature introduced in Terraform 1.14.
Best practices for running Terraform apply
When it comes to running terraform apply, a couple of things have to be taken into consideration:
- Always run a plan first and have multiple individuals review it.
- Use version control for your code — track changes and collaborate with others.
- Use a remote state with a locking mechanism in place — this will help you ensure that only one person can make changes at a time, hence reducing the chances of the state file getting corrupted.
- Use at least a CI/CD pipeline — ensure the changes are done through an automated system that has every measure in place to ensure the blast radius is kept to a minimum. A specialized IaC management platform such as Spacelift would be the best way for you to manage your infrastructure.
- Limit scope changes — break down large changes into smaller ones to ensure that you are not breaking your environments.
- Regularly review and refactor your code.
- Use OPA policies to ensure standardization and governance all around.
- Leverage security vulnerability scanning tools and liners to ensure your code is top-notch.
Key points
terraform apply is a core command in the Terraform workflow, used for deploying infrastructure as described in your configuration files. When executed, Terraform applies the planned actions to reach the desired state, such as creating virtual machines, databases, or networking components. Before making changes, it typically prompts for confirmation unless the -auto-approve flag is used.
Note: New versions of Terraform will be placed under the BUSL license, but everything created before version 1.5.x stays open-source. OpenTofu is an open-source version of Terraform that will expand on Terraform’s existing concepts and offerings. It is a viable alternative to HashiCorp’s Terraform, being forked from Terraform version 1.5.6.
Automate Terraform Deployments with Spacelift
Automate your infrastructure provisioning, and build more complex workflows based on Terraform using policy as code, programmatic configuration, context sharing, drift detection, resource visualization, and many more.
