Configuring a backend for any kind of Terraform project is always recommended. Backends are primarily meant to manage the information contained in the Terraform state files, which hold the mapping of the Terraform configuration with their real-world deployments. The state files are created at the very first execution of the Terraform configuration. All the runs after that will be validated with the same state files to make sure the intended changes are applied.
In this post, we will delve into using AWS S3 buckets as the remote backend for Terraform and explore the best practices around it. You have multiple options for managing the remote backend for Terraform configuration. Each remote backend provides an array of features to manage these state files very efficiently, but the core purpose remains the same.
When working with Terraform locally, the state files are created in the project’s root directory. This is known as the local backend and is the default.
These files cannot be part of the Git repository as every member may execute their version of Terraform config and modify the state files. Thus, there is a high chance of corrupting the state file or at least creating inconsistencies in the state files, which is equally dangerous. Managing the state files in a remote Git repository is also discouraged as the state files may contain sensitive information like credentials, etc.
Check out our Terraform at Scale Best Practices article to learn how to scale your Terraform projects.
Note: New versions of Terraform are placed under the BUSL license, but everything created before version 1.5.x stays open-source. OpenTofu is an open-source version of Terraform that expands on Terraform’s existing concepts and offerings. It is a viable alternative to HashiCorp’s Terraform, being forked from Terraform version 1.5.6.
Although every Terraform backend may offer platform-specific features, here are the two main features we look for:
Secure storage
State files need to be stored in a secured and remote location. Multiple developers working on the same set of Terraform configuration files can have validation access in their workflow with a remote location, avoiding the need to maintain multiple copies of state files at the same time and handle them manually.
These state files can potentially secure information and will be accessed multiple times, so we need to make sure the storage solution is secure from attack and that the files’ integrity is assured. Corrupted state files can incur high infrastructure costs.
File storage solutions like AWS S3 offer a secure and reliable way to store and access files within and outside the internal network.
Locking
Continuing with the integrity aspect, when multiple developers access the same state file multiple times to validate their changes to Terraform config, the race condition may cause the file to be corrupted. This rises the need for a locking mechanism.
When Terraform operations are performed (plan, apply, destroy), the state files are locked for the duration of the operation. If another developer tries to execute their operations during this time, the request is queued. The operation resumes when the current operation is completed, and the lock over the state file is released.
When using AWS S3 buckets as a remote state backend, DynamoDB is used to support this locking mechanism. It holds a single boolean attribute named “LockID” that indicates whether the operation on the state file can be performed or not.
It is fairly easy to configure remote backends using AWS S3 for any Terraform configuration. The steps are summarized below:
1. Create an S3 bucket
If you need help, see our creating S3 bucket with Terraform tutorial.
-
- Set bucket permissions
- Enable bucket versioning
- Enable encryption
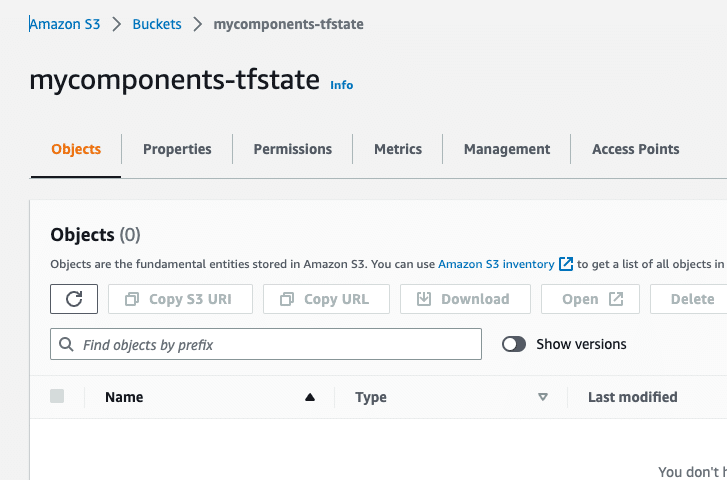
The screenshot below shows the S3 bucket created to be used as the Terraform state file storage. Please note that it is possible to choose any available name for the bucket.
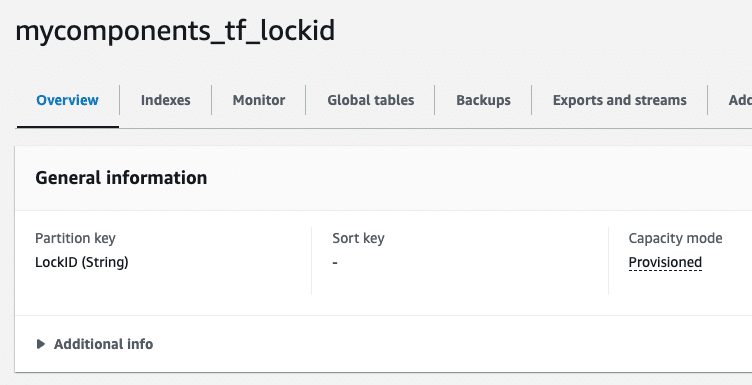
2. Create a DynamoDB table
See AWS Docs.
-
- Set the column name as “LockID”
The screenshot below shows the DynamoDB table created to hold the LockID for the Terraform operations.
3. Include the backend block in the Terraform configuration.
-
- Specify the bucket name created in Step 1.
- Specify the key attribute, which helps us create the state file with the same name as the provided value.
- Specify the DynamoDB table created in Step 2.
We have updated our Terraform provider configuration with the backend block, as shown below.
terraform {
  required_providers {
    aws = {
      source  = "hashicorp/aws"
      version = "~> 4.18.0"
    }
  }

  backend "s3" {
    bucket         	   = "mycomponents-tfstate"
    key              	   = "state/terraform.tfstate"
    region         	   = "eu-central-1"
    encrypt        	   = true
    dynamodb_table = "mycomponents_tf_lockid"
  }
}
As far as configuring the S3 backend is concerned, we have followed the manual steps by logging into the AWS console. It is possible to manage the S3 bucket and DynamoDB using a separate Terraform configuration as well, as described in the documentation.
However, as a best practice, these configurations should not be part of the project’s Terraform configs.
Once these configurations are done, few changes needed while we develop the config for other components. The backend is supposed to remain reliable and constant to serve the project’s purpose.
4. Initialize the S3 Backend
Our current Terraform configuration does not have much code. It only consists of the provider configuration with the backend. Before we can plan and apply any configuration, it is necessary to initialize the Terraform repository.
When we run terraform init, the backend is automatically configured with the S3 bucket details we provided before. The output below confirms that the S3 backend has been successfully configured.
tfstate-mycomponents % terraform init

Initializing the backend...

Successfully configured the backend "s3"! Terraform will automatically
use this backend unless the backend configuration changes.

Initializing provider plugins...
- Finding hashicorp/aws versions matching "~> 4.18.0"...
- Installing hashicorp/aws v4.18.0...
- Installed hashicorp/aws v4.18.0 (signed by HashiCorp)

Terraform has created a lock file .terraform.lock.hcl to record the provider
selections it made above. Include this file in your version control repository
so that Terraform can guarantee to make the same selections by default when
you run "terraform init" in the future.

Terraform has been successfully initialized!

You may now begin working with Terraform. Try running "terraform plan" to see
any changes that are required for your infrastructure. All Terraform commands
should now work.

If you ever set or change modules or backend configuration for Terraform,
rerun this command to reinitialize your working directory. If you forget, other
commands will detect it and remind you to do so if necessary.
If we now check the contents of the S3 bucket, it will still be empty. At this point, it is important to note that the backend is configured successfully, and we are ready to add more IaC components to our repository and create them using Terraform.
Let’s go ahead and create a simple EC2 instance and observe the command line output.
I have used the configuration block below in my main.tf file to do the same.
resource "aws_instance" "demo" {
ami = var.ami
instance_type = var.type
tags = {
name = "My VM"
}
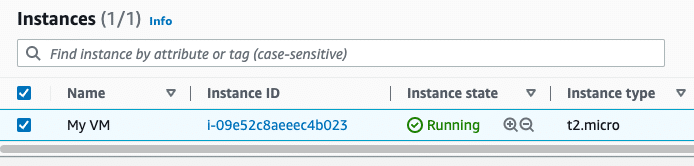
}Assuming everything went well, the EC2 instance should appear in the AWS console, as shown below.
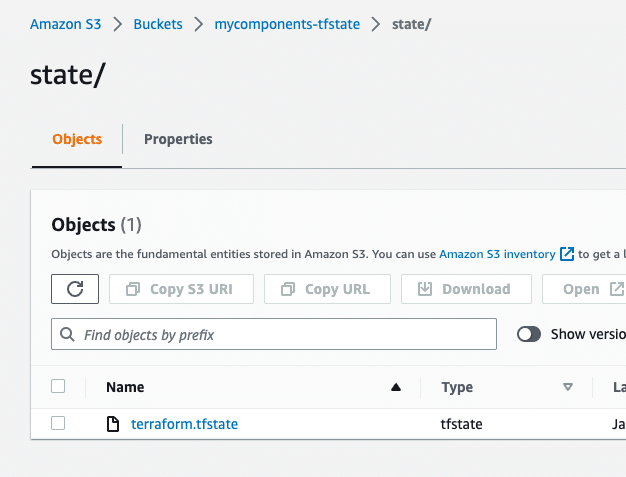
Going back to the S3 bucket used for the remote backend configuration, we can also confirm that the state file was created and is being managed here.
In some cases, the configuration development may have already begun, especially if a single developer is working on the Terraform repository. They may choose to develop Terraform config with local state file backends and worry about remote state later. When new members are added to the team, the first thing that needs to happen is to adopt a remote backend like AWS S3.
Similarly, if there is a need to migrate from another remote backend to AWS S3 remote backend for any unforeseen reason, Terraform is equipped to handle this migration gracefully. So irrespective of whether we want to migrate from a local backend to S3, or another remote backend to S3, the steps will be the same.
The Terraform backend configuration block is always part of the “terraform” provider configuration. Replace this backend block of code with the one that we defined for the S3 backend in the previous section. Once done, we need to reinitialize the Terraform repository using the terraform init command again.
Without reinitialization, none of the Terraform operations would work, as Terraform detects this change in the backend configuration.
The output below confirms this:
terraform plan
╷
│ Error: Backend initialization required, please run "terraform init"
│
│ Reason: Unsetting the previously set backend "s3"
│
│ The "backend" is the interface that Terraform uses to store state,
│ perform operations, etc. If this message is showing up, it means that the
│ Terraform configuration you're using is using a custom configuration for
│ the Terraform backend.
│
│ Changes to backend configurations require reinitialization. This allows
│ Terraform to set up the new configuration, copy existing state, etc. Please run
│ "terraform init" with either the "-reconfigure" or "-migrate-state" flags to
│ use the current configuration.
│
│ If the change reason above is incorrect, please verify your configuration
│ hasn't changed and try again. At this point, no changes to your existing
│ configuration or state have been made.
During reinitialization, all the information from the current state file is migrated to the newly configured S3 backend. Once this is done successfully, the development process can be continued.
In this section, we will take a look at some of the best practices to follow while using AWS S3 buckets as the choice of the remote backend for Terraform operations.
Some of the Terraform S3 backend best practices include:
- Encryption
- Access Control
- Versioning
- Locking
- Backend First
Most of these practices are easy to implement as they are readily supported by AWS S3 service.
1. Enable file encryption
Given the sensitive nature of Terraform state files, it makes sense to encrypt them in storage. AWS S3 buckets offer this functionality by default which makes it easy to implement encryption at the click of a button.

Organizations can choose to let AWS S3 manage these keys for their projects. It is also possible to take a more sophisticated approach where organizations take control of their keys using AWS KMS service.
2. Implement access control
Needless to say, public access should be strictly blocked for S3 buckets used for Terraform remote state management.
Most security threats arise from human errors, so it is important to control manual access to state files stored in these S3 buckets. This helps reduce accidental modifications and unauthorized actions.
Bucket policies provide a powerful and flexible way to manage access control for your S3 buckets. To leverage them, you need to first identify the IAM resources that should have access to your bucket. After that, you’ll need to determine the necessary permissions you want to grant. Generally, the required permissions would be actions like listing the bucket contents (s3:ListBucket), reading objects (s3:GetObject), and writing or deleting objects (s3:PutObject, s3:DeleteObject).
You will need to write a json policy similar to this:
 "Version": "2012-10-17",
   "Statement": [
     {
       "Effect": "Allow",
       "Principal": {
         "AWS": "arn:aws:iam::account_id:role/your_role"
       },
       "Action": [
         "s3:ListBucket",
         "s3:GetObject",
         "s3:PutObject",
         "s3:DeleteObject"
       ],
       "Resource": [
         "arn:aws:s3:::s3bucket",
         "arn:aws:s3:::s3bucket/*"
       ]
     }
   ]
}
You’ll need to replace the account_id, your_role, and s3bucket with values from your AWS account. When you have done this, you can easily go to the permissions tab on your S3 bucket, select bucket policy, and add the above policy there.
It is not the current best practice, but you can use ACLs in AWS S3 to implement strict access controls. As shown below, it is possible to grant various levels of access to the users/entities who are supposed to access the state files for taking designated actions.
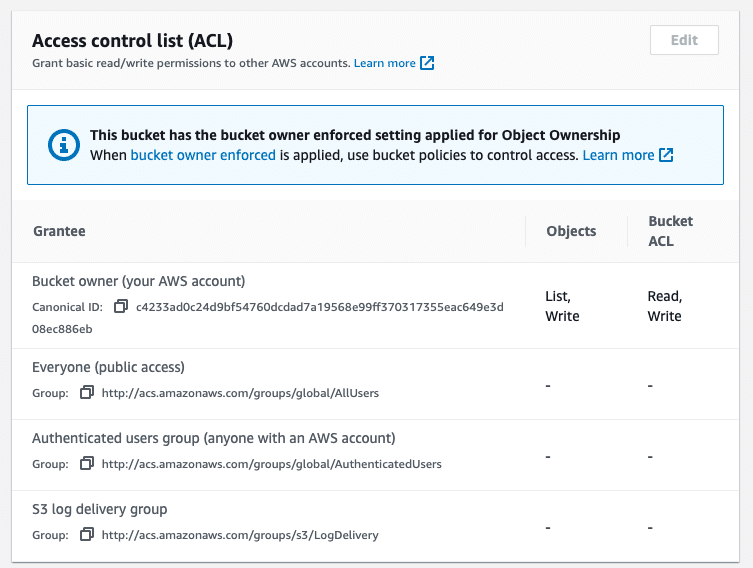
Ideally, the only entity with write access to the S3 buckets used as Terraform’s remote backend should be the user account assigned for Terraform operations. Organizations typically implement the concept of “tech users” or “service accounts” which are different from normal human user accounts.
Define ACLs that allow read and write access to the tech account responsible to lock and modify the state information and allow read access to selected users for verification purposes.
The principle of least privilege should be used in both cases.
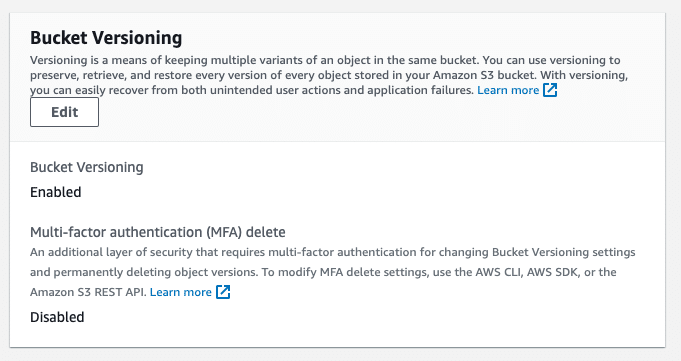
3. Enable bucket versioning
AWS S3 bucket versioning allows us to keep a historical record of all the modifications done to any of the files in the bucket. In the case of a disaster or file corruption, it is easier to recover the state file if previous versions are available.
Given the nature of state files, it is better to recover from a previous version than to rebuild the state files by importing existing infrastructure manually and individually. With versioning, only the delta needs to be imported, saving a lot of time and cost.
AWS S3 also provides versioning by default, and its capabilities are summarized in the text provided in the screenshot. As a next step, MFA should also be enabled, so that delete actions are either avoided or happen carefully.
4. Use file-locking
As discussed earlier, to avoid file corruption due to multiple simultaneous writes, it is important to have a file-locking feature in place.
When you use AWS S3 as a remote backend, always create a corresponding DynamoDB table as described in the Implementation section. When any developer wants to perform any operations that concern state files (plan, apply, destroy), Terraform first locks the file by updating the LockID column available in the given DynamoDB table.
This avoids race conditions. Thus DynamoDB is a very integral part of Terraform’s S3 backends.
5. Follow the backend-first rule
When initiating any Terraform project – especially when multiple developers are working on the same repo – a remote backend should be configured first. This is a general best practice and not specific to AWS S3 remote backend.
Configuring a remote backend is a one-time activity, and once done, we need not worry about the state file maintenance during the development process.
Previously, the Affinity team used Terraform both as their runner and for state management. Now, they use Amazon S3 for state management, but because this is connected to the Spacelift provider, state management is something they don’t have to worry about.
When you use the S3 backend in Terraform for storing state files, several common issues may arise.
Here are some frequent errors and their likely causes:
1. Initialization errors
Bucket doesn’t exist: Users must ensure the S3 bucket exists prior to running terraform init.
Access denied related errors: Your session may have expired, or the credentials you are using may not have enough privileges to access the S3 bucket.
2. State locking errors
LockID mismatch: If a process or user holds a lock, Terraform operations will fail until the lock is released. This prevents simultaneous changes to the infrastructure
DynamoDB table configuration: There may be issues with the Dynamo DB table configuration or with the credentials used to access it
3. Backend configuration errors
Invalid configuration data: There may be problems with one of the configurable parameters in the backend configuration (key, region, bucket_name, etc.).
4. Encryption errors
If you are using KMS and you have specified a custom KMS key, ensure your AWS credentials have enough permissions to use it.
5. Networking errors
Ensure the place from which you run your Terraform configuration has access to the S3 bucket or DynamoDB table.
6. S3 bucket policy issues
There may be policies in place that restrict certain IPs from accessing the bucket. Ensure you have enough permissions to access the S3 bucket.
This blog is a comprehensive guide to familiarizing yourself with Terraform and the S3 backend.
We encourage you also to explore how Spacelift makes it easy to work with Terraform. If you need any help managing your Terraform infrastructure, building more complex workflows based on Terraform, and managing AWS credentials per run, instead of using a static pair on your local machine, Spacelift is a fantastic tool for this. It supports Git workflows, policy as code, programmatic configuration, context sharing, drift detection, and many more great features right out of the box.
Terraform Management Made Easy
Spacelift effectively manages Terraform state, more complex workflows, supports policy as code, programmatic configuration, context sharing, drift detection, resource visualization and includes many more features.


Terraform CLI Commands Cheatsheet
Initialize/ plan/ apply your IaC, manage modules, state, and more.