In a prior post, we explored automated and manual code testing with DevSecOps and briefly touched on the importance of IaC scanning and policy as code. In this article, we’re going to take a much closer look with practical examples of running IaC security scans that check for Infrastructure as Code misconfigurations or policy violations.
We will cover:
What does IaC mean?
Infrastructure as Code (IaC) is the practice of defining and managing infrastructure resources, like servers, networks, and storage, using code-based templates or configuration files. By defining infrastructure through code, it becomes much easier for organizations to automate, scale, and achieve deployment and management consistency for their infrastructure.
What is IaC Scanning?
Infrastructure as code (IaC) scanning is the process of analyzing and evaluating the security and compliance of infrastructure code. It focuses on examining the code and configurations that define the infrastructure to identify potential security vulnerabilities, misconfigurations, and compliance violations. It helps organizations validate that their infrastructure deployments follow security best practices, industry standards, and regulatory requirements.
The IaC security scanning process works just like other types of static application security testing (SAST) tools but with a focus on IaC. The results of these scans provide actionable insights and recommendations to address issues, which gives engineers the chance to remediate potential security risks before the infrastructure gets deployed.
Why do you need IaC scanning?
Just like SAST is an important part of verifying application code security, IaC scanning is an important part of verifying infrastructure code security and quality. By integrating IaC scanning into the development and deployment pipelines, organizations can identify and address security issues very early in the process, reducing the chances of vulnerabilities being deployed to production environments and getting one step closer to achieving shift-left security.
Infrastructure as Code (IaC) scanning tools
Terraform, OpenTofu, Pulumi, AWS CloudFormation, Helm, and Ansible are all examples of modern Infrastructure as Code tools that many organizations use and that Spacelift supports. They provide a fantastic way of controlling environments and infrastructure that live in AWS, Azure, GCP, etc.
Because this infrastructure gets provisioned and managed through code instead of through manual processes, infrastructure specifications live in configuration files. This is wonderful because it makes it much easier to create, edit, and distribute those specifications. With that said, we can make mistakes as we are writing those specifications, and we may not realize it until the infrastructure has already been provisioned in production.
To significantly reduce the odds of a major mistake making it to production (think leaking secrets, opening up permissions, etc.), we can use static code analysis tools specifically created for Infrastructure as Code.
Examples of IaC scanning tools and solutions include Checkov, tfsec, TFLint, and Terrascan.
1. Checkov
Checkov is a static analysis tool specifically designed for IaC environments, particularly for cloud-native technologies. It helps identify and prevent misconfigurations, security risks, and compliance violations by scanning IaC files (ie, Terraform configurations), and providing detailed reports on potential issues.
2. tfsec
Tfsec is also an IaC security scanning tool that focuses on Terraform configurations to identify potential security risks and misconfigurations. It runs security checks and analyzes the Terraform configuration files providing actionable recommendations based on industry best practices and common security issues.
Read more in our What is tfsec? article.
3. TFLint
TFLint is a powerful linter for Terraform configurations. It analyzes Terraform config files to enforce best practices and coding standards and to find potential errors for the major cloud providers (AWS, Azure, and GCP). For example, it can help enforce consistent formatting and naming conventions and warn about unused declarations.
4. Terrascan
Terrascan is an open-source static code analyzer that identifies security and compliance violations in Infrastructure as Code (IaC) templates, such as Terraform and Kubernetes configurations. It integrates with various cloud platforms, including AWS, Azure, and Google Cloud, enabling organizations to automate the scanning process within CI/CD pipelines to catch potential issues early. Terrascan features a comprehensive library of predefined policies and allows for the creation of custom policies, ensuring that IaC remains secure and compliant throughout the development lifecycle.
For this article, we’ll be using and demonstrating the tool Checkov, but the concepts apply across the board.
Check out other most useful Terraform scanning tools.
IaC scanning process
The IaC scanning process can be done either locally or on a CI/CD pipeline, but to take advantage of this process properly, you should use the latter.
There are several stages involved in building a proper scanning process:
- Select the IaC tool you will use and write the code – Whether it’s Terraform, OpenTofu, Pulumi, or CloudFormation, you should build the necessary IaC automation that will be scanned.
- Choose the security vulnerability scanning tool(s) you want to use – Some examples are Checkov, Terrascan, tfsec, Kics, Trivy.
- Select the policies you are interested in checking – All security vulnerability scanning tools come with a series of policies that you can use to scan your code for vulnerabilities, so you have to choose the ones you are interested in (you could select all).
- Implement the CI process in your CI/CD tools to always check these policies before applying changes to your infrastructure
- Review the vulnerability report generated by the scanning tool – Based on this report, decide whether to proceed with applying the code as is or address the identified vulnerabilities. If you choose to apply the code, proceed to the final step; otherwise, move on to the next step.
- Fix the vulnerabilities and repush your code – Review the new results and again decide whether to proceed or fix additional issues.
- Once all critical vulnerabilities are resolved and the scan results are satisfactory, apply the infrastructure changes.
Policy as Code scanning
Another aspect of detecting issues with infrastructure is to use Policy as Code. Policy as Code expresses security policies and rules using code. This extends the IaC approach by also covering rules governing that infrastructure and the platform that manages it.
You can think of it as creating guardrails for your infrastructure and platforms.
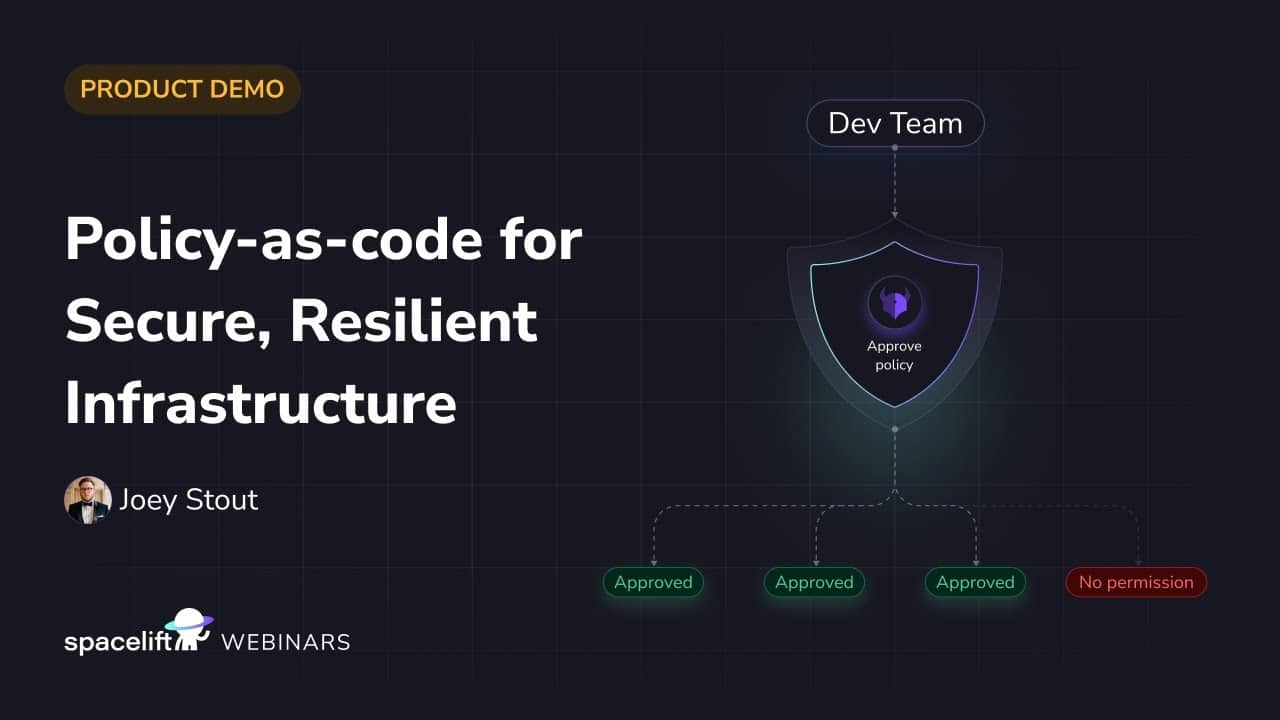
As an example of creating guardrails for platforms, with Spacelift, you can use policies to decide who can approve or reject a run and how a run can be approved.
We could also, for example, create a policy that prevents creating a public Access Control List (ACL) for Amazon S3 buckets, which would help prevent accidentally making buckets that contain sensitive information public. We’ll demonstrate how to do this in a moment.
Using both IaC and Policy as Code scanning can help you catch issues before they are committed to your repositories and before they reach production. So, let’s take a look at how this works.
Example: Running IaC and Policy as Code scans on Terraform
Let’s walk through hands-on demonstrations of how to scan Terraform configuration files for policy violations or potential security misconfigurations.
For this demo, you can use just about any Terraform configuration file you encounter, but we’ll be using one of MoreThanCertified’s projects.
To perform the scans, we’ll use an open-source tool called Checkov by Bridgecrew. Checkov offers IaC and Policy as Code scanning and will be perfect for our demo.
Let’s take a look at the directory titled 08-a_security_group in that repository, and let’s click on the main.tf file.
In this file, let’s focus our attention on lines 50 – 67:
resource "aws_security_group" "mtc_sg" {
  name        = "public_sg"
  description = "public security group"
  vpc_id      = aws_vpc.mtc_vpc.id
  ingress {
    from_port   = 22
    to_port     = 22
    protocol    = "tcp"
    cidr_blocks = ["0.0.0.0/0"]
  }

  egress {
    from_port   = 0
    to_port     = 0
    protocol    = "-1"
    cidr_blocks = ["0.0.0.0/0"]
  }
}
This part of the Terraform configuration creates a Security Group to allow access to AWS resources via SSH port 22 from all IP addresses (0.0.0.0/0). This is a common configuration used for demonstrations and teaching because everyone’s IP address is going to be different, and so that value would need to be modified based on your specific needs. That said, it’s a configuration that really shouldn’t be used in production.
Instead, if you have one specific IP address that will get used to SSH into an instance, you would want to specify that IP address. Or, if you have a range of IPs, you could specify that range…and so on.
We just outlined a scanning policy that we can create to prevent engineers from using 0.0.0.0/0 for CIDR blocks associated with SSH port 22 security groups.
When we run Checkov or any other scanner, we want it to find this issue and report it so we can fix it before pushing it to production. Let’s see if it does!
Step 1: Set up Checkov
There are a few ways that we can use, run, or install Checkov on our systems.
Pip install
The first method we’ll look at is using pip install, or more specifically:
pip3 install checkovThis requires having Python ≥ 3.7 installed
Homebrew install
If you are running a MacOS machine, then you can use homebrew:
brew install checkovDocker
If you prefer, you could also use Checkov with Docker:
docker pull bridgecrew/checkov
docker run --tty --rm --volume /user/tf:/tf --workdir /tf bridgecrew/checkov --directory /tf
Step 2: Set up Terraform
There are several ways to use, run, or install Terraform on our systems. If you already have it set up, feel free to skip forward to “Initializing our Terraform project.”
Linux (Debian-based Systems)
Ensure that your system is up to date and that you have installed the gnupg, software-properties-common, and curl packages. These packages verify HashiCorp’s GPG signature and install HashiCorp’s Debian package repository.
sudo apt-get update && sudo apt-get install -y gnupg software-properties-commonInstall the HashiCorp GPG key:
wget -O- https://apt.releases.hashicorp.com/gpg | \
gpg --dearmor | \
sudo tee /usr/share/keyrings/hashicorp-archive-keyring.gpg
Verify the fingerprint:
gpg --no-default-keyring \
--keyring /usr/share/keyrings/hashicorp-archive-keyring.gpg \
--fingerprint
The gpg command will report the fingerprint:
/usr/share/keyrings/hashicorp-archive-keyring.gpg
-------------------------------------------------
pub   rsa4096 XXXX-XX-XX [SC]
AAAA AAAA AAAA AAAA
uid           [ unknown] HashiCorp Security (HashiCorp Package Signing) <security+packaging@hashicorp.com>
sub   rsa4096 XXXX-XX-XX [E]
Refer to the Official Packaging Guide for the latest public signing key. You can also verify the key on Security at HashiCorp under Linux Package Checksum Verification.
As long as everything looks good, you can add the official HashiCorp repository to your system:
echo "deb [signed-by=/usr/share/keyrings/hashicorp-archive-keyring.gpg] \
https://apt.releases.hashicorp.com $(lsb_release -cs) main" | \
sudo tee /etc/apt/sources.list.d/hashicorp.list
Download the package information from HashiCorp:
sudo apt updateYou’re now ready to install Terraform:
sudo apt-get install terraformYou can make sure it installed successfully with the following:
terraform -helpOr, if you prefer a manual installation, you can view Terraform installation instructions.
Homebrew Terraform install
If you are running a MacOS machine, then you can use homebrew:
brew tap hashicorp/tap

brew install hashicorp/tap/terraform
You can make sure it installed successfully with the following:
terraform -helpStep 3: Initialize your Terraform project
Next, we’ll copy the code from this page and make a main.tf file to put that code in it.
After that, run the following command within that directory:
terraform initYou should see an output like the following:
Initializing the backend...

Initializing provider plugins...
- Finding latest version of hashicorp/aws...
- Installing hashicorp/aws v5.1.0...
- Installed hashicorp/aws v5.1.0 (signed by HashiCorp)

Terraform has created a lock file .terraform.lock.hcl to record the provider
selections it made above. Include this file in your version control repository
so that Terraform can guarantee to make the same selections by default when
you run "terraform init" in the future.

Terraform has been successfully initialized!

You may now begin working with Terraform. Try running "terraform plan" to see
any changes that are required for your infrastructure. All Terraform commands
should now work.

If you ever set or change modules or backend configuration for Terraform,
rerun this command to reinitialize your working directory. If you forget, other
commands will detect it and remind you to do so if necessary.
Being able to execute this Terraform file would require additional configuration, but we have everything we need to run Checkov, which is the purpose of this article. So let’s do that now.
Step 4: Run Checkov
Checkov can scan entire directories or individual files. In this case, we only have one file, so we can scan it like this:
checkov --file ./main.tfYour results should look similar to the following, although they may be a bit different depending on versions and other factors::
_               _
   ___| |__   ___  ___| | _______   __
  / __| '_ \\ / _ \\/ __| |/ / _ \\ \\ / /
 | (__| | | |  __/ (__|   < (_) \\ V /
  \\___|_| |_|\\___|\\___|_|\\_\\___/ \\_/

By bridgecrew.io | version: 2.3.270
Update available 2.3.270 -> 2.3.273
Run pip3 install -U checkov to update

terraform scan results:

Passed checks: 3, Failed checks: 3, Skipped checks: 0

Check: CKV_AWS_260: "Ensure no security groups allow ingress from 0.0.0.0:0 to port 80"
	PASSED for resource: aws_security_group.mtc_sg
	File: /main.tf:50-67
	Guide: https://docs.bridgecrew.io/docs/ensure-aws-security-groups-do-not-allow-ingress-from-00000-to-port-80
Check: CKV_AWS_277: "Ensure no security groups allow ingress from 0.0.0.0:0 to port -1"
	PASSED for resource: aws_security_group.mtc_sg
	File: /main.tf:50-67
	Guide: <https://docs.bridgecrew.io/docs/ensure-aws-security-group-does-not-allow-all-traffic-on-all-ports>
Check: CKV_AWS_25: "Ensure no security groups allow ingress from 0.0.0.0:0 to port 3389"
	PASSED for resource: aws_security_group.mtc_sg
	File: /main.tf:50-67
	Guide: <https://docs.bridgecrew.io/docs/networking_2>
Check: CKV_AWS_130: "Ensure VPC subnets do not assign public IP by default"
	FAILED for resource: aws_subnet.mtc_public_subnet
	File: /main.tf:11-20
	Guide: <https://docs.bridgecrew.io/docs/ensure-vpc-subnets-do-not-assign-public-ip-by-default>

		11 | resource "aws_subnet" "mtc_public_subnet" {
		12 |   vpc_id                  = aws_vpc.mtc_vpc.id
		13 |   cidr_block              = "10.123.1.0/24"
		14 |   map_public_ip_on_launch = true
		15 |   availability_zone       = "us-west-2a"
		16 |
		17 |   tags = {
		18 |     Name = "dev-public"
		19 |   }
		20 | }

Check: CKV_AWS_24: "Ensure no security groups allow ingress from 0.0.0.0:0 to port 22"
	FAILED for resource: aws_security_group.mtc_sg
	File: /main.tf:50-67
	Guide: <https://docs.bridgecrew.io/docs/networking_1-port-security>

		50 | resource "aws_security_group" "mtc_sg" {
		51 |   name        = "public_sg"
		52 |   description = "public security group"
		53 |   vpc_id      = aws_vpc.mtc_vpc.id
		54 |   ingress {
		55 |     from_port   = 22
		56 |     to_port     = 22
		57 |     protocol    = "tcp"
		58 |     cidr_blocks = ["0.0.0.0/0"]
		59 |   }
		60 |
		61 |   egress {
		62 |     from_port   = 0
		63 |     to_port     = 0
		64 |     protocol    = "-1"
		65 |     cidr_blocks = ["0.0.0.0/0"]
		66 |   }
		67 | }

Check: CKV_AWS_23: "Ensure every security groups rule has a description"
	FAILED for resource: aws_security_group.mtc_sg
	File: /main.tf:50-67
	Guide: <https://docs.bridgecrew.io/docs/networking_31>

		50 | resource "aws_security_group" "mtc_sg" {
		51 |   name        = "public_sg"
		52 |   description = "public security group"
		53 |   vpc_id      = aws_vpc.mtc_vpc.id
		54 |   ingress {
		55 |     from_port   = 22
		56 |     to_port     = 22
		57 |     protocol    = "tcp"
		58 |     cidr_blocks = ["0.0.0.0/0"]
		59 |   }
		60 |
		61 |   egress {
		62 |     from_port   = 0
		63 |     to_port     = 0
		64 |     protocol    = "-1"
		65 |     cidr_blocks = ["0.0.0.0/0"]
		66 |   }
		67 | }
Let’s break down what’s happening, starting with these lines:
Check: CKV_AWS_260: "Ensure no security groups allow ingress from 0.0.0.0:0 to port 80"
	PASSED for resource: aws_security_group.mtc_sg
	File: /main.tf:50-67
	Guide: <https://docs.bridgecrew.io/docs/ensure-aws-security-groups-do-not-allow-ingress-from-00000-to-port-80>
We can see that Checkov is checking CKV_AWS_260, which has a description of “Ensure no security groups allow ingress from 0.0.0.0:0 to port 80".
For more details about Checkov’s IDs (such as CKV_AWS_260)and what they mean, please refer to this documentation.
We can then see that the check PASSED for the resource aws_security_group.mtc_sg. Checkov even includes a reference guide that describes this check.
The next few checks were also successful, but then we came across our first failed check:
Check: CKV_AWS_130: "Ensure VPC subnets do not assign public IP by default"
	FAILED for resource: aws_subnet.mtc_public_subnet
	File: /main.tf:11-20
	Guide: <https://docs.bridgecrew.io/docs/ensure-vpc-subnets-do-not-assign-public-ip-by-default>

		11 | resource "aws_subnet" "mtc_public_subnet" {
		12 |   vpc_id                  = aws_vpc.mtc_vpc.id
		13 |   cidr_block              = "10.123.1.0/24"
		14 |   map_public_ip_on_launch = true
		15 |   availability_zone       = "us-west-2a"
		16 |
		17 |   tags = {
		18 |     Name = "dev-public"
		19 |   }
		20 | }
OK! So that was not one of the issues we mentioned above — and this is a great demonstration of why tools like these are helpful. A human being might give the configurations a quick look to find obvious issues, but they can just as easily miss them.
Here, Checkov is warning us that we are auto-assigning public IP addresses to resources being launched in that specific subnet. It even shows us exactly what code triggered this failure, and we can see the setting causing this issue:
map_public_ip_on_launch = trueThe next failure is:
Check: CKV_AWS_24: "Ensure no security groups allow ingress from 0.0.0.0:0 to port 22"
	FAILED for resource: aws_security_group.mtc_sg
	File: /main.tf:50-67
	Guide: <https://docs.bridgecrew.io/docs/networking_1-port-security>

		50 | resource "aws_security_group" "mtc_sg" {
		51 |   name        = "public_sg"
		52 |   description = "public security group"
		53 |   vpc_id      = aws_vpc.mtc_vpc.id
		54 |   ingress {
		55 |     from_port   = 22
		56 |     to_port     = 22
		57 |     protocol    = "tcp"
		58 |     cidr_blocks = ["0.0.0.0/0"]
		59 |   }
		60 |
		61 |   egress {
		62 |     from_port   = 0
		63 |     to_port     = 0
		64 |     protocol    = "-1"
		65 |     cidr_blocks = ["0.0.0.0/0"]
		66 |   }
		67 | }
Here, Checkov caught exactly what we were looking for: the overly permissive SSH security group rule. Perfect!
But wait, Checkov found something else:
Check: CKV_AWS_23: "Ensure every security groups rule has a description"
	FAILED for resource: aws_security_group.mtc_sg
	File: /main.tf:50-67
	Guide: <https://docs.bridgecrew.io/docs/networking_31>

		50 | resource "aws_security_group" "mtc_sg" {
		51 |   name        = "public_sg"
		52 |   description = "public security group"
		53 |   vpc_id      = aws_vpc.mtc_vpc.id
		54 |   ingress {
		55 |     from_port   = 22
		56 |     to_port     = 22
		57 |     protocol    = "tcp"
		58 |     cidr_blocks = ["0.0.0.0/0"]
		59 |   }
		60 |
		61 |   egress {
		62 |     from_port   = 0
		63 |     to_port     = 0
		64 |     protocol    = "-1"
		65 |     cidr_blocks = ["0.0.0.0/0"]
		66 |   }
		67 | }
Here, Checkov is recommending that we provide descriptions to every security group rule. Technically, descriptions are optional in Terraform and AWS, but practically, they should exist because they make maintaining resources much easier in the long term.
Step 5: Fix the issues
Now that we’ve identified three separate issues, let’s fix them so we can re-run the scans and see if our fix worked.
Open up the main.tf file and make your changes.
After making my changes of:
# Under resource "aws_subnet" "mtc_public_subnet"
map_public_ip_on_launch = false

# Under resource "aws_security_group" "mtc_sg" {
ingress {
    description = "SSH ingress"
    from_port   = 22
    to_port     = 22
    protocol    = "tcp"
    cidr_blocks = ["10.0.0.0/24"]
  }

  egress {
    description = "SSH egress"
    from_port   = 0
    to_port     = 0
    protocol    = "-1"
    cidr_blocks = ["0.0.0.0/0"]
  }
}
Let’s re-run the scan:
checkov --file ./main.tfWe’ll now get a clean bill of health!
_               _
   ___| |__   ___  ___| | _______   __
  / __| '_ \\ / _ \\/ __| |/ / _ \\ \\ / /
 | (__| | | |  __/ (__|   < (_) \\ V /
  \\___|_| |_|\\___|\\___|_|\\_\\___/ \\_/

By bridgecrew.io | version: 2.3.270
Update available 2.3.270 -> 2.3.273
Run pip3 install -U checkov to update

terraform scan results:

Passed checks: 6, Failed checks: 0, Skipped checks: 0

Check: CKV_AWS_130: "Ensure VPC subnets do not assign public IP by default"
	PASSED for resource: aws_subnet.mtc_public_subnet
	File: /main.tf:11-20
	Guide: <https://docs.bridgecrew.io/docs/ensure-vpc-subnets-do-not-assign-public-ip-by-default>
Check: CKV_AWS_260: "Ensure no security groups allow ingress from 0.0.0.0:0 to port 80"
	PASSED for resource: aws_security_group.mtc_sg
	File: /main.tf:50-69
	Guide: <https://docs.bridgecrew.io/docs/ensure-aws-security-groups-do-not-allow-ingress-from-00000-to-port-80>
Check: CKV_AWS_24: "Ensure no security groups allow ingress from 0.0.0.0:0 to port 22"
	PASSED for resource: aws_security_group.mtc_sg
	File: /main.tf:50-69
	Guide: <https://docs.bridgecrew.io/docs/networking_1-port-security>
Check: CKV_AWS_23: "Ensure every security groups rule has a description"
	PASSED for resource: aws_security_group.mtc_sg
	File: /main.tf:50-69
	Guide: <https://docs.bridgecrew.io/docs/networking_31>
Check: CKV_AWS_277: "Ensure no security groups allow ingress from 0.0.0.0:0 to port -1"
	PASSED for resource: aws_security_group.mtc_sg
	File: /main.tf:50-69
	Guide: <https://docs.bridgecrew.io/docs/ensure-aws-security-group-does-not-allow-all-traffic-on-all-ports>
Check: CKV_AWS_25: "Ensure no security groups allow ingress from 0.0.0.0:0 to port 3389"
	PASSED for resource: aws_security_group.mtc_sg
	File: /main.tf:50-69
	Guide: <https://docs.bridgecrew.io/docs/networking_2>
Creating custom policies
While Checkov includes, by default, many scanning policies pre-built by the Checkov team, you may need to create your own custom policies based on your organization’s needs. There are a few ways of creating custom policies:
- Using Python – to check for the status of configuration attributes
- Using YAML – to check for both the status of configuration attributes and to check the connection state between types of resources
For this demonstration, we’ll be using Python. Let’s create a new directory:
mkdir custom_policiesThen, in that directory, we need to set up a file named:
cd custom_policies

vim __init__.py
(If you’re not comfortable with vim, feel free to use your favorite text editor.)
In that file, we need to add the following:
from os.path import dirname, basename, isfile, join
import glob
modules = glob.glob(join(dirname(__file__), "*.py"))
__all__ = [ basename(f)[:-3] for f in modules if isfile(f) and not f.endswith('__init__.py')]
From there, we can add our custom checks by creating new files, like this:
Vim CustomVPCCIDRBlockCheck.pyIn that file, paste the following:
from typing import Any

from checkov.common.models.enums import CheckResult, CheckCategories
from checkov.terraform.checks.resource.base_resource_check import BaseResourceCheck

class CustomVPCCIDRBlockCheck(BaseResourceCheck):
    def __init__(self) -> None:
        name = "Ensure VPC CIDR block range is within the specified range"
        id = "CUSTOM_POLICY.AWS_VPC_CIDR_BLOCK"
        supported_resources = ("aws_vpc",)
        categories = (CheckCategories.NETWORKING,)
        super().__init__(name=name, id=id, categories=categories, supported_resources=supported_resources)

    def scan_resource_conf(self, conf: dict[str, Any]) -> CheckResult:
        if 'cidr_block' in conf.keys():
            cidr_block = conf['cidr_block'][0]
            if cidr_block.startswith(("10.0.")):
                return CheckResult.PASSED
        return CheckResult.FAILED

check = CustomVPCCIDRBlockCheck()
This basic check will ensure that VPCs are using a CIDR block range within a specific range. In this particular example, we’re looking to make sure it starts with 10.0.. Going back to our main.tf file, the VPC CIDR block range is configured as: 10.123.0.0/16 which should fail this check. Let’s see if it does!
First, change back to the parent directory:
cd ..Then run Checkov with this command:
checkov --file ./main.tf --external-checks-dir custom_policiesThe result:
Check: CUSTOM_POLICY.AWS_VPC_CIDR_BLOCK: "Ensure VPC CIDR block range is within the specified range"
	FAILED for resource: aws_vpc.mtc_vpc
	File: /main.tf:1-9

		1 | resource "aws_vpc" "mtc_vpc" {
		2 |   cidr_block           = "10.123.0.0/16"
		3 |   enable_dns_hostnames = true
		4 |   enable_dns_support   = true
		5 |
		6 |   tags = {
		7 |     Name = "dev"
		8 |   }
		9 | }
As we can see, Checkov failed this custom policy check just like it was supposed to.
Custom policy: Private ACLs for PCI S3 buckets
As another example, from Checkov’s documentation, we could use Checkov to check and make sure that any S3 bucket tagged with “PCI” has private ACLs.
vim custom_policies/S3PCIPrivateACL.pyfrom __future__ import annotations
from typing import Any
from checkov.terraform.checks.resource.base_resource_check import BaseResourceCheck
from checkov.common.models.enums import CheckResult, CheckCategories
class S3PCIPrivateACL(BaseResourceCheck):
def __init__(self) -> None:
name = "Ensure PCI Scope buckets has private ACL (enable public ACL for non-pci buckets)"
id = "CKV_AWS_999"
supported_resources = ("aws_s3_bucket",)
# CheckCategories are defined in models/enums.py
categories = (CheckCategories.BACKUP_AND_RECOVERY,)
guideline = "Follow the link to get more info <https://docs.bridgecrew.io/docs>"
super().__init__(name=name, id=id, categories=categories, supported_resources=supported_resources, guideline=guideline)
def scan_resource_conf(self, conf: dict[str, list[Any]]) -> CheckResult:
"""
Looks for ACL configuration at aws_s3_bucket and Tag values:
<https://www.terraform.io/docs/providers/aws/r/s3_bucket.html>
:param conf: aws_s3_bucket configuration
:return: <CheckResult>
"""
tags = conf.get("tags")
if tags and isinstance(tags, list):
tags = tags[0]
if tags.get("Scope") == "PCI":
acl_block = conf['acl']
if acl_block in [["public-read"], ["public-read-write"], ["website"]]:
return CheckResult.FAILED
return CheckResult.PASSED
check = S3PCIPrivateACL()This new policy we just created will check to make sure that any S3 bucket tagged as containing PCI is set to have a private ACL. If it has a public ACL, then Checkov should raise a red flag.
I won’t run it because our sample Terraform file doesn’t have any S3 resources, but if you did, this could be a valuable check.
Novibet team is convinced that any company considering an IaC migration should look at Spacelift. “It is an essential tool for any growing company that needs to govern its IaC with proper policy management and great visibility of potential changes in your infrastructure for both technical and non-technical teams,” concludes Novibet’s head of DevOps, Kurt Azzopardi.
Integrating scanning tools with a CI/CD pipeline
We’ve been running the tool manually, which your developers could also do, but what if they forget? What if we don’t have to add yet another task to their checklist?
We can integrate Checkov (or whatever other IaC scanning tool you’re using) into our pipeline using several different approaches. For example, it has a VSCode extension that you can use directly within your IDE so that developers don’t have to leave the tool they’re already in to run a scan.
As another example, we could have it run during a merge request review or even as part of our build process. This way, you have scans automatically and regularly running instead of having to rely on developers to remember.
You can use Spacelift and its Custom Inputs feature to integrate tfsec, Checkov, Terrascan, Kics, and others in your workflows. Security is one of Spacelift’s biggest priorities, so there are also state-of-the-art security solutions that are embedded inside the product, like Policy as Code, Encryption, Single Sign-On (SSO), MFA, and Private Worker Pools.
Check out this video where we dive into common use cases of Spacelift policies and how teams are using them to achieve security and cost control of their infrastructure:
Read more about integrating security tools with Spacelift. And if you want to learn more about Spacelift, create a free account or book a demo with one of our engineers.
Key points
We’ve now examined how we can use tools to run IaC scans for misconfigurations or common issues. As we learned, we can even create our own custom policies that look for issues based on our organization’s policies. This helps demonstrate just how powerful static code analysis tools can be, especially when they are custom-built for certain stages of the DevSecOps pipeline.
Terraform Management Made Easy
Spacelift effectively manages Terraform state, more complex workflows, supports policy as code, programmatic configuration, context sharing, drift detection, resource visualization and includes many more features.