Managing infrastructure with Terraform is straightforward when you’re working alone. But the moment a team gets involved, you need a repeatable, auditable process for running terraform plan and apply, one that doesn’t depend on whoever has the right credentials on their laptop that day.
Jenkins is a natural fit for teams that have already standardized on it for application CI/CD. Rather than introducing a new tool just for infrastructure, you can extend your existing Jenkins setup to manage Terraform workflows: pulling configs from source control, running plans, requiring human approval before changes go live, and logging every execution.
In this guide, we’ll build a Jenkins pipeline for Terraform from scratch, install the Terraform plugin, write a Groovy pipeline script with plan, approval, and apply stages, securely configure AWS credentials, and set up automatic triggering on code changes.
How to use Jenkins for Terraform management:
- Step 1: Install the Terraform plugin on Jenkins
- Step 2: Install Terraform binary
- Step 3: Prepare the Terraform configuration
- Step 4: Create a new Jenkins Pipeline
- Step 5: Write Jenkins Pipeline script
- Step 6: Configure access to AWS
- Step 7: Test the Jenkins Pipeline
- Step 8: Destroy the infrastructure using Jenkins
Prerequisites: a running Jenkins instance (v2.x or later), Terraform 1.x, and an AWS account with IAM credentials that have permissions to create EC2 resources.
What is Jenkins?
Jenkins is an open-source CI/CD automation tool developed in Java. It is one of the oldest automation tools, gaining popularity in the early days of mainstream DevOps. Used by many organizations and individuals today, it has active community support and a clear roadmap for future development.
However, Jenkins is not just a CI/CD automation tool. It is a framework capable of implementing various automation use cases, including automated release of updates, mobile applications, and embedded software and hardware systems.
Jenkins provides a wide range of plugins to support various automation scenarios. Terraform is one of the plugins we will use in this blog post to implement an end-to-end workflow, step by step.
Check out our CircleCi vs. Jenkins comparison.
The Spacelift ecosystem incorporates many of the custom tools and features teams usually need to build and integrate into a CI/CD pipeline, making the whole infrastructure delivery journey much easier and smoother. Spacelift provides a flexible, robust workflow and a native GitOps experience. We encourage you to explore how easy Spacelift makes it to work with Terraform.
Step 1: Install the Terraform plugin on Jenkins
Let’s assume the basic installation of the Jenkins server is available either locally or on one of the virtual machines. You can find the steps to install Jenkins here. In this blog post, we are using Jenkins installed locally on macOS.
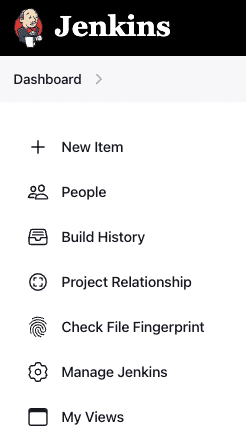
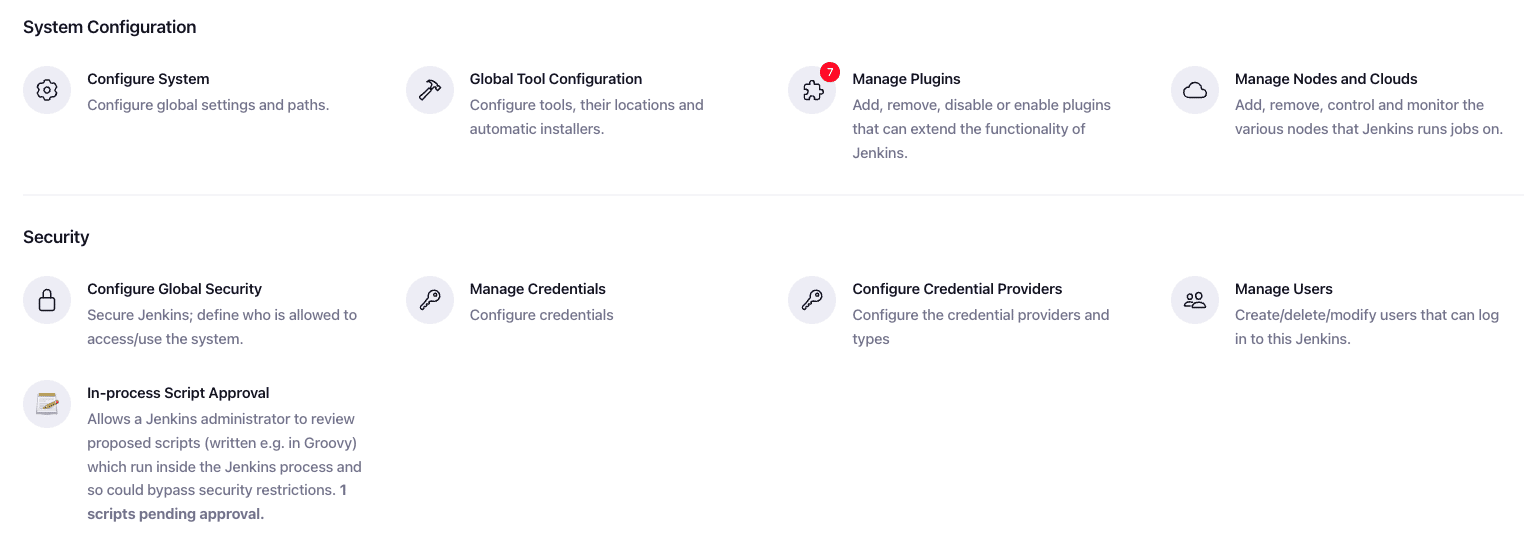
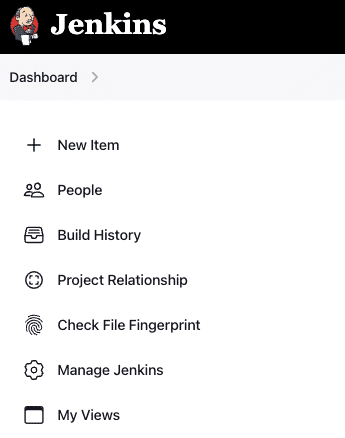
Once the installation is complete and administrator login is enabled, click on “Manage Jenkins” in the left navigation menu.
Next, click on the “Manage Plugins” icon to install the Terraform plugin.
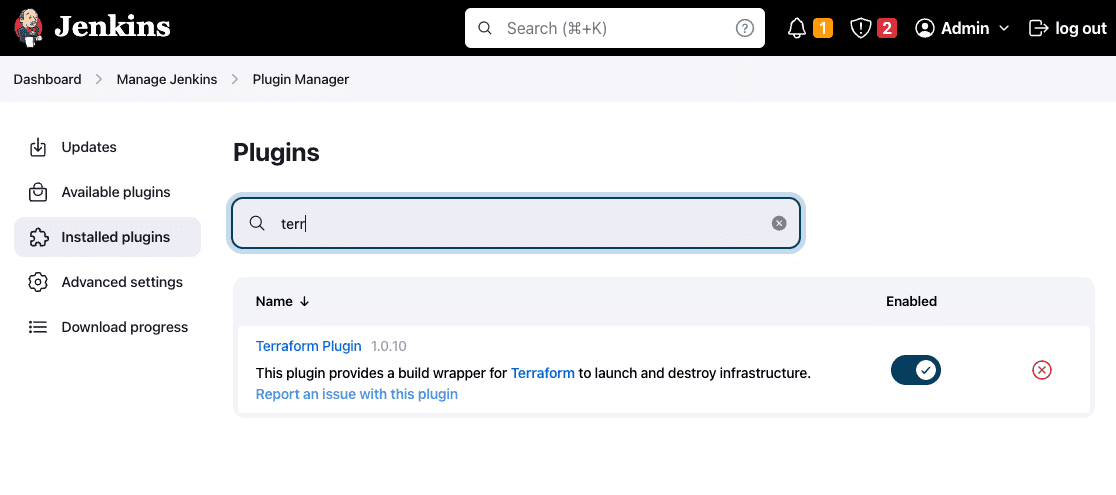
Click on the “Available plugins” tab in the left navigation menu, and enter “Terraform” in the search bar.
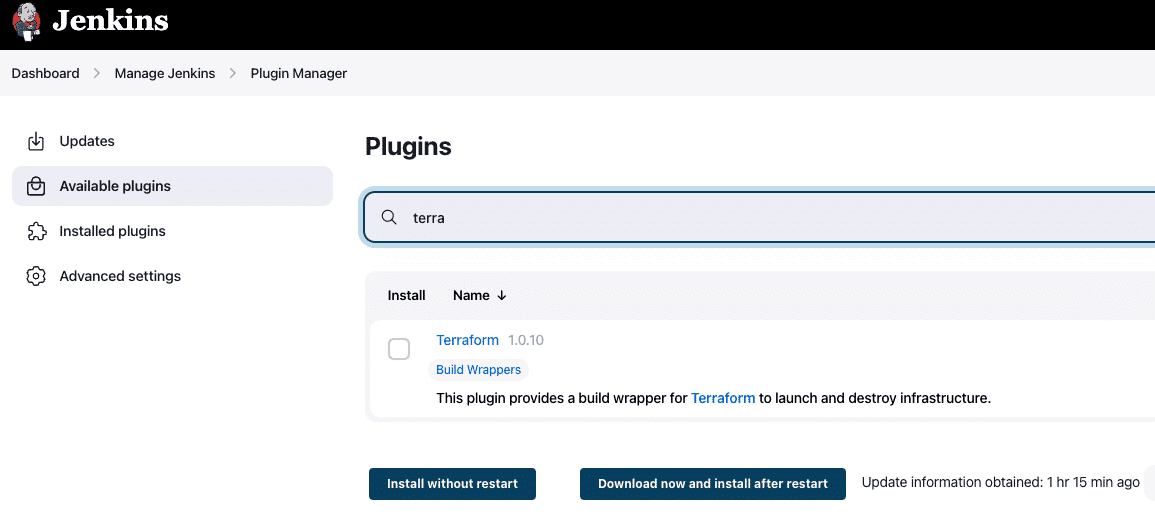
Mark the checkbox next to Terraform, and click on “Install without restart.”
Once the installation is successful, it is displayed on the progress screen, as shown below. We have the option to restart Jenkins after this step.
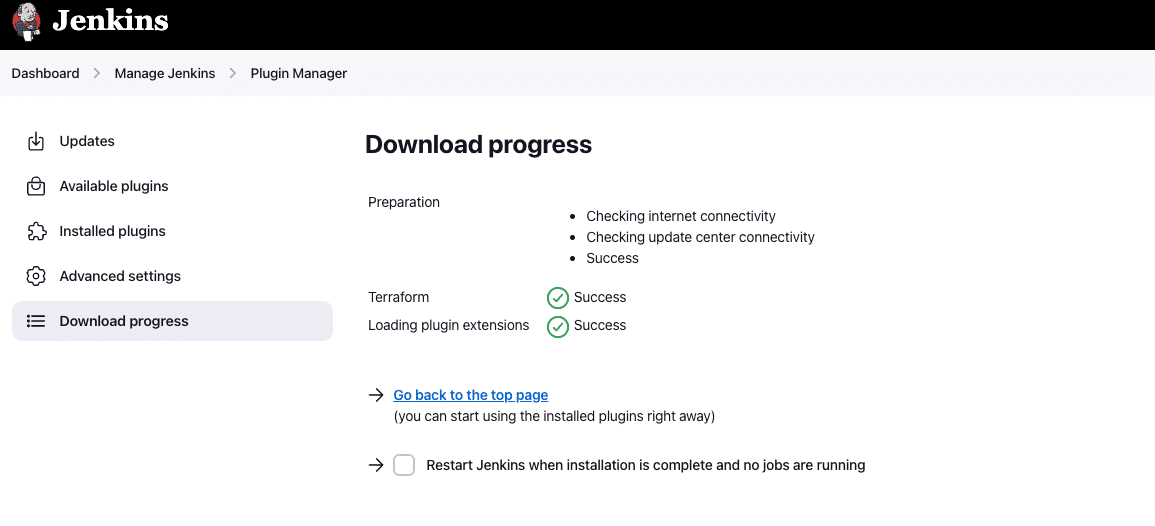
We have successfully installed the Terraform plugin in Jenkins.
To confirm the changes we made, navigate to the same path, and see if it is available and enabled in the “Installed plugin” section.
Step 2: Install Terraform binary
Before Jenkins can work with the Terraform plugin, we need to install the Terraform binary. You can do this in two ways, depending on whether the Terraform binary is installed separately (when it pre-exists), or if you are using Jenkins auto-installer.
Navigate to “Dashboard > Manage Jenkins > Global Tool Configuration” page, and scroll to the Terraform section.
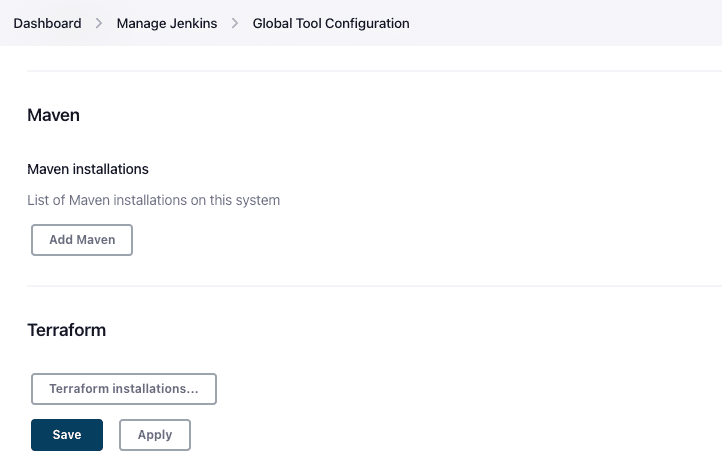
When you click on the “Terraform installations…” tab, you should see the following screen:
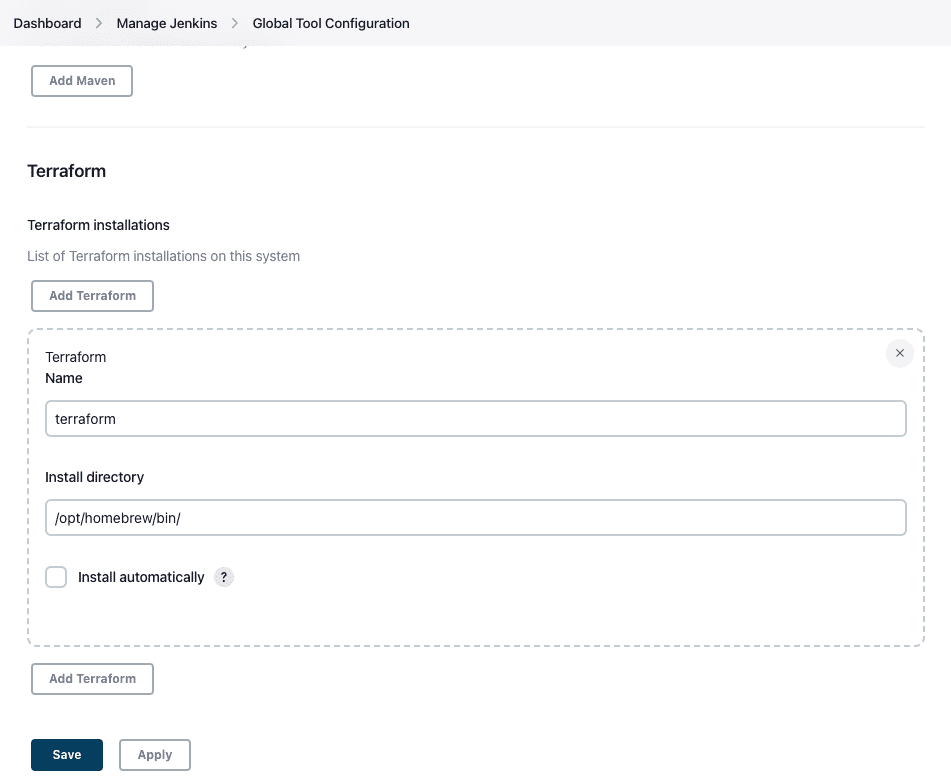
The form in the middle allows us to name and specify the location of the Terraform installation.
If Terraform was installed before Jenkins, we can specify the path to the Terraform binary in the “Installation directory” field above. If the Terraform is not installed on the host, we can click “Install automatically.” As mentioned in the help text in the screenshot below, with this option Jenkins will install a specific version from various sources.
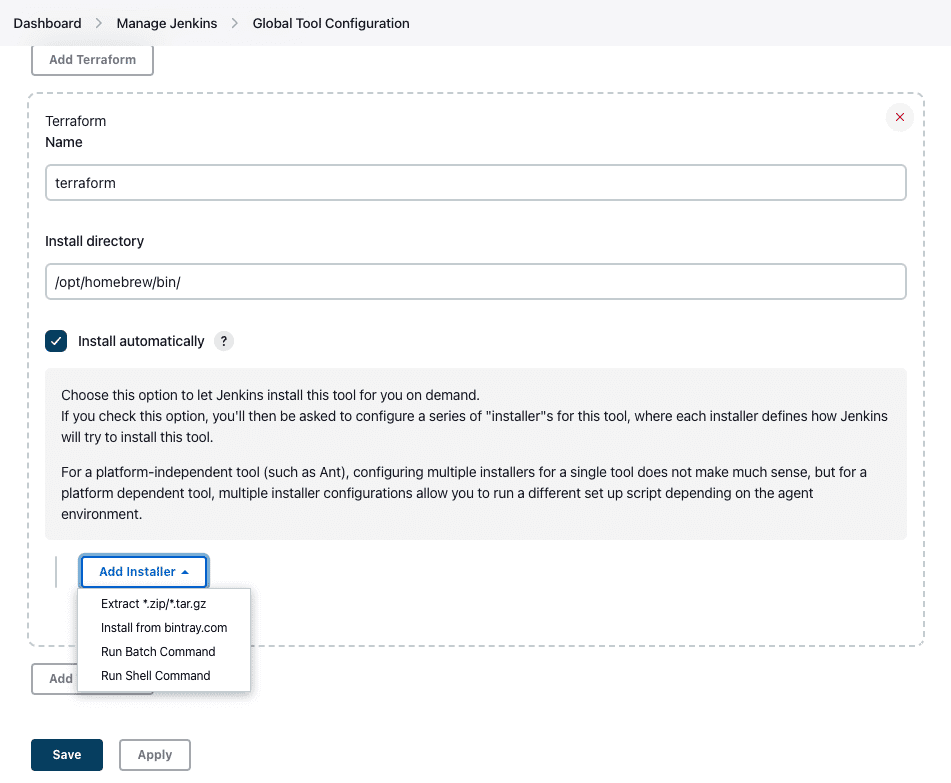
The automatic installation offers several ways to specify the installer. The easiest one is “Install from bintray.com.” If we want to avoid maintaining the Terraform installation separately, this is the easiest way to install Terraform via Jenkins.
The list also includes other options for controlling the installation process by specifying where to download the binary from, running custom shell commands to perform the Terraform installation, etc.
In the current example, we have installed Jenkins locally and already have Terraform installed, so simply specifying the path to the “Install directory” was enough.
The buttons marked “Add Terraform” provide forms to enable additional Terraform installations. If different versions of Terraform are used across multiple pipelines, this becomes a handy way to manage Terraform versions.
Click on “Save.” Now we can build our Jenkins pipeline.
Step 3: Prepare the Terraform configuration
We will be working with a simple Terraform configuration that creates a single EC2 instance in AWS. The config is hosted on GitHub.
The Jenkins pipeline we develop in the next steps will also consume this configuration from the same location.

Step 4: Create a new Jenkins Pipeline
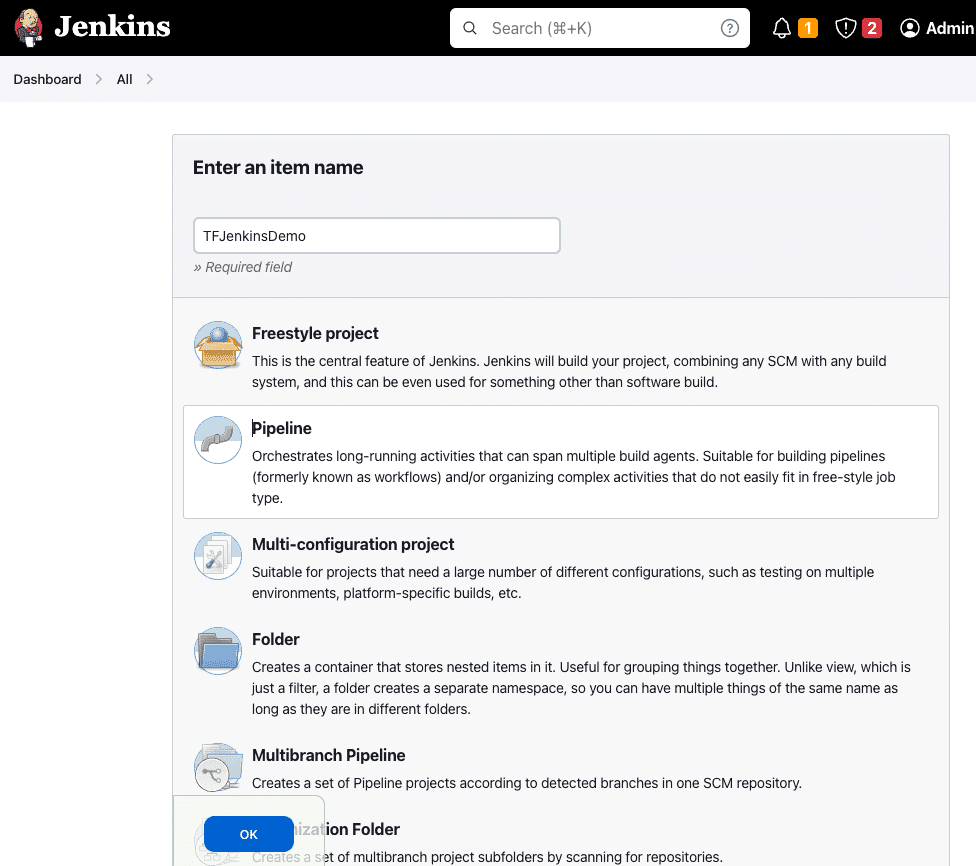
Navigate to “Dashboard” and click on “New Item”.
In the following screen, provide a valid name to the pipeline and select the “Pipeline” icon. Click on “OK” to save this pipeline.
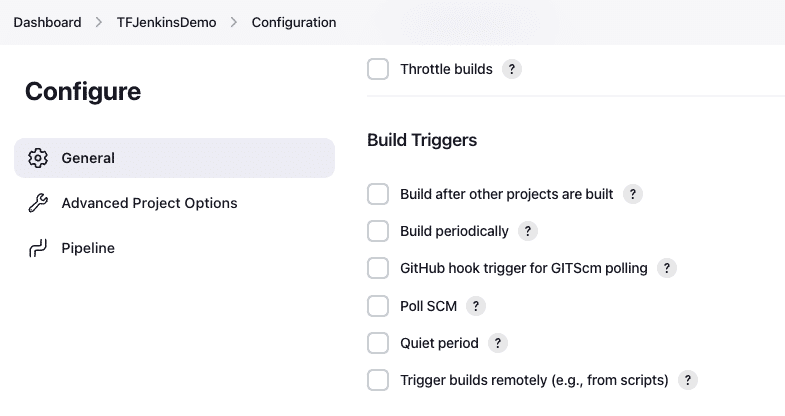
Once the pipeline is saved, we are sent to the Configuration page, and provided with multiple options to configure it.
Note: If you are new to Jenkins, please take some time to review the info messages hidden behind the question mark symbol for better understanding.
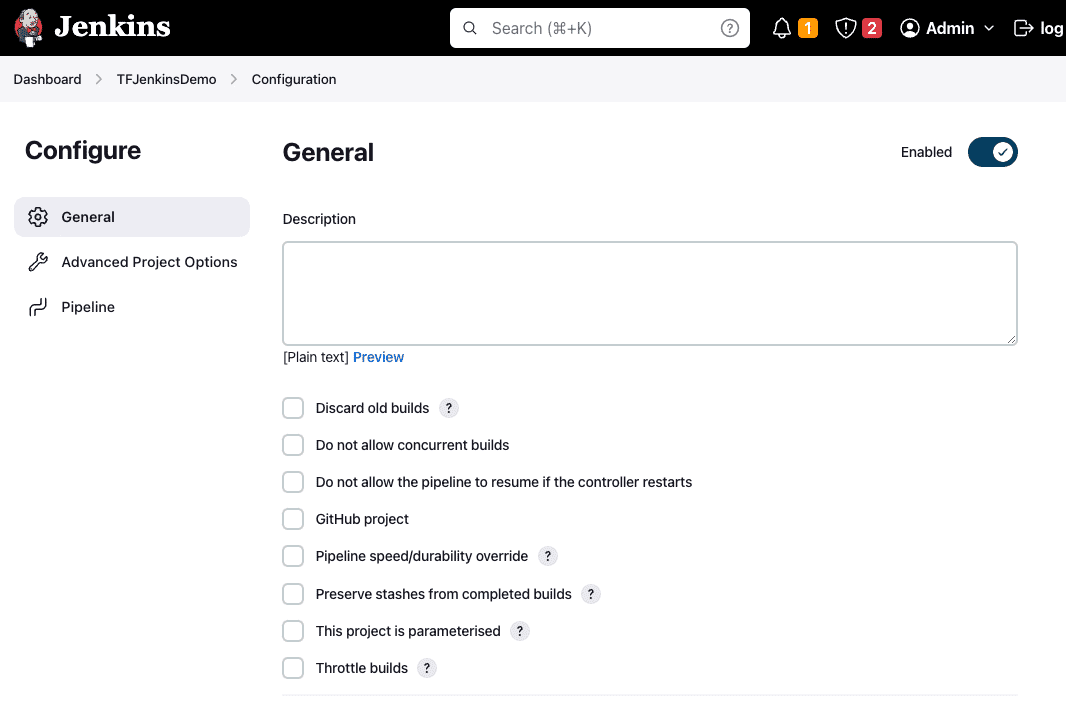
The general section of this page features several checkboxes for configuration. To begin, we will configure the essential details.
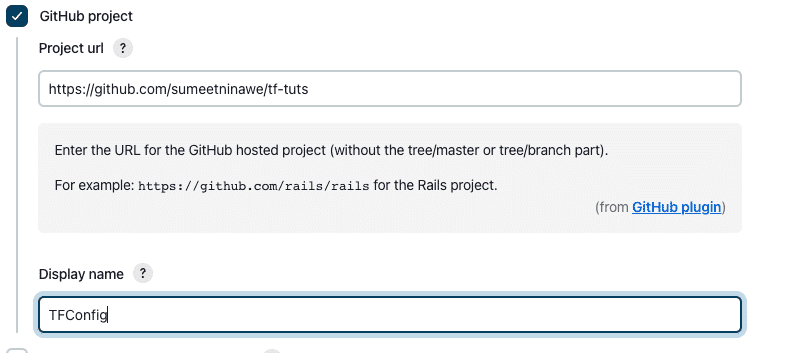
Since our Terraform configuration resides on GitHub, select the “GitHub project” checkbox. You will also be asked for the project URL.
For now, skip all other sections and details on this page, and click on “Save”.
Step 5: Write Jenkins Pipeline script
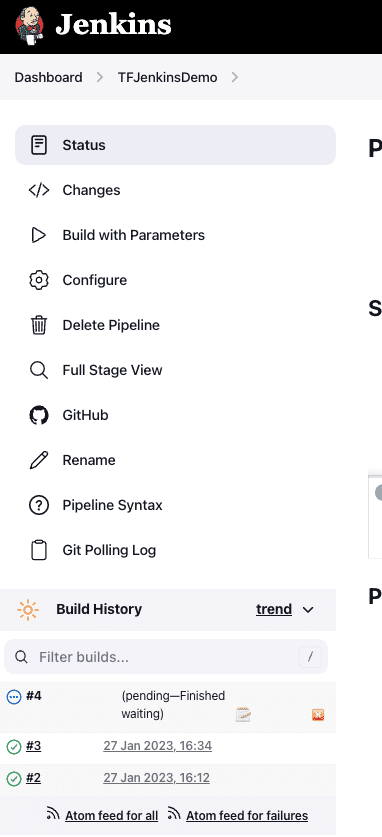
Jenkins pipelines are defined using Groovy scripting language. If you are unfamiliar with it, generate this script with the help of the “Pipeline Syntax” option provided by Jenkins. Navigate to “Dashboard > TFJenkinsDemo > Configuration” and scroll to the “Pipeline” section.
Note: We have named our project “TFJenkinsDemo”. It might be different for you, depending on the name you chose in the previous step.
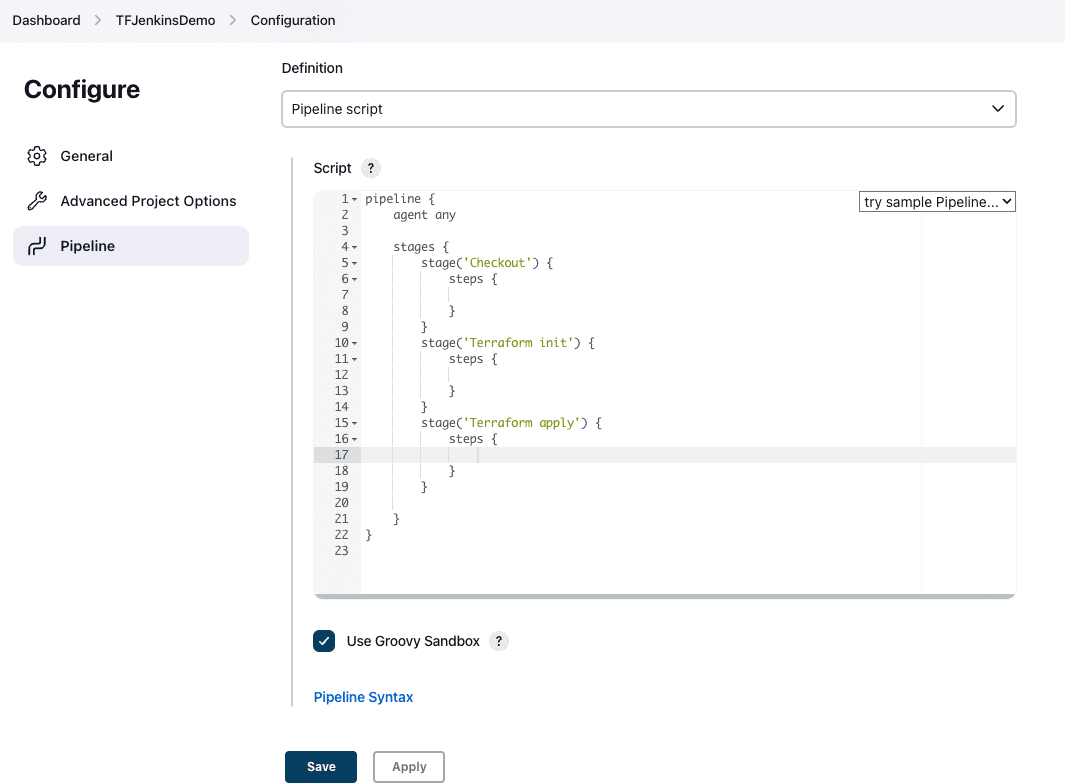
The script field is blank initially. We have added a generic syntax to define various stages of the pipeline with appropriate names and steps. To summarize:
- We ask the Jenkins pipeline to use “any” available agent to run the following jobs in stages.
- Each of the three stages contains steps to —
- Checkout: Check out the Terraform config from the GitHub repo to the agent.
- Terraform init: Initialize the Terraform config by downloading the appropriate providers required by the configuration.
- Terraform apply: Apply the configuration and create resources.
This is just an outline of the current script; the steps are not yet defined. This is where we can use the link to “Pipeline Syntax” provided above the “Save” button. Click and open the link in a new tab.
To generate the script required by the “Checkout” stage, we can select an appropriate Sample Step from the dropdown – in this case: git. Fill in the details in the form provided and click on “Generate Pipeline Script.” If this is the first time and the credentials are not configured, we can do so quickly.
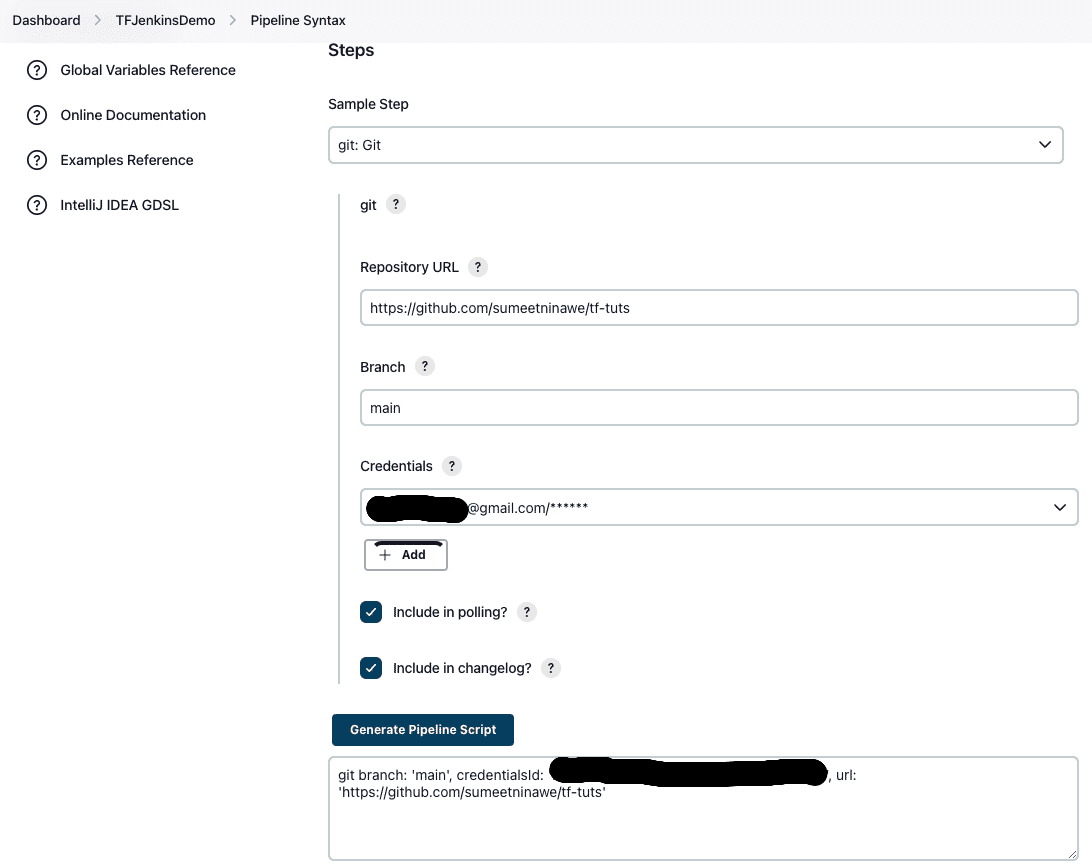
Copy the generated script and paste it into the “Steps” block of the “Checkout” stage.
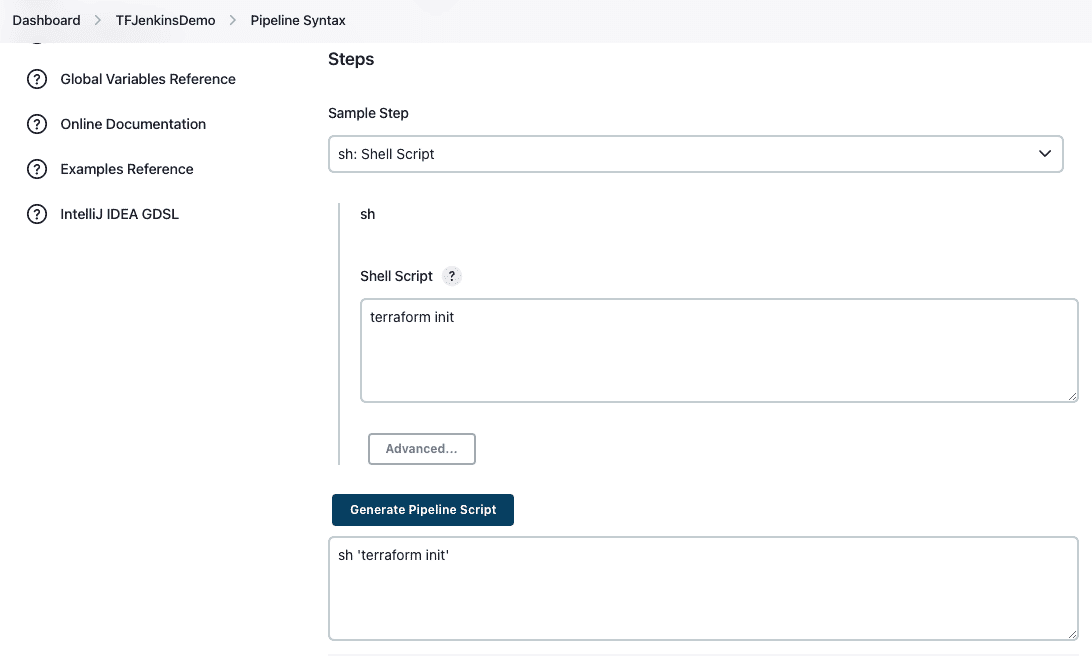
To create steps for the next two stages, follow the same process by selecting appropriate values in the dropdown, as shown in the screenshot below:
The final script should look like the one below. Compared to a basic three-stage pipeline, this version adds four important improvements: a format check (terraform fmt), a validation step (terraform validate), a dedicated Plan stage that saves its output to a file, and a human Approval gate before any changes are applied.
Note that the Apply stage uses the saved plan file (tfplan) rather than re-running planning, this guarantees that exactly what you reviewed is what gets executed.
pipeline {
    agent any


    stages {
        stage('Checkout') {
            steps {
                git branch: 'main', credentialsId: '<CREDS>', url: 'https://github.com/sumeetninawe/tf-tuts'
            }
        }


        stage('Terraform Format Check') {
            steps {
                sh 'terraform fmt -check -recursive'
            }
        }


        stage('Terraform Init') {
            steps {
                sh 'terraform init'
            }
        }


        stage('Terraform Validate') {
            steps {
                sh 'terraform validate'
            }
        }


        stage('Terraform Plan') {
            steps {
                sh 'terraform plan -out=tfplan'
            }
        }


        stage('Approval') {
            steps {
                input message: 'Review the plan output above. Proceed with apply?', ok: 'Apply'
            }
        }


        stage('Terraform Apply') {
            steps {
                sh 'terraform apply tfplan'
            }
        }
    }


    post {
        always {
            cleanWs()
        }
        success {
            echo 'Terraform workflow completed successfully.'
        }
        failure {
            echo 'Pipeline failed. Check the console output above for details.'
        }
    }
}
Click on Save.
Note: The Approval stage pauses the pipeline and displays a prompt in the Jenkins UI. Before clicking “Apply,” open the console output of the Terraform Plan stage to review exactly which resources will be created, changed, or destroyed.
Step 6: Configure access to AWS
We have configured the Terraform plugin on the Jenkins server, installed Terraform, and created a basic pipeline to execute the Terraform code. We have not yet tested the pipeline. Before we do that, a critical piece is missing — authentication between Jenkins/Terraform and AWS.
Let us explore our options:
- If Jenkins is hosted on an EC2 instance within AWS, an IAM role can be assigned. The IAM role assigned to the EC2 instance enables the Jenkins pipeline to perform appropriate actions on the AWS resources.
- If Jenkins is not hosted on AWS, you have multiple options. The first is to manually install AWS CLI and configure it with the IAM user’s access key and secret access key on the host machine. When Terraform AWS configurations are applied, these default credentials are automatically picked up by Terraform.
- Various plugins are available to manage AWS Keys using Jenkins Credential Manager API, where it is possible to define access scopes. For example:
- Plugins are also available to manage credentials for other major cloud provider platforms, for example:
We have followed the second approach for this example since we are dealing with a locally hosted Jenkins server. However, there are multiple ways and plugins to manage credentials in Jenkins.
Please note that, depending on the plugin being used, the steps required in the pipeline’s Groovy script will differ. The correct usage should be determined from the corresponding documentation.
Download the Build vs. Buy Guide to Scaling Infrastructure as Code

Step 7: Test the pipeline
Navigate to “Dashboard > TFJenkinsDemo.”
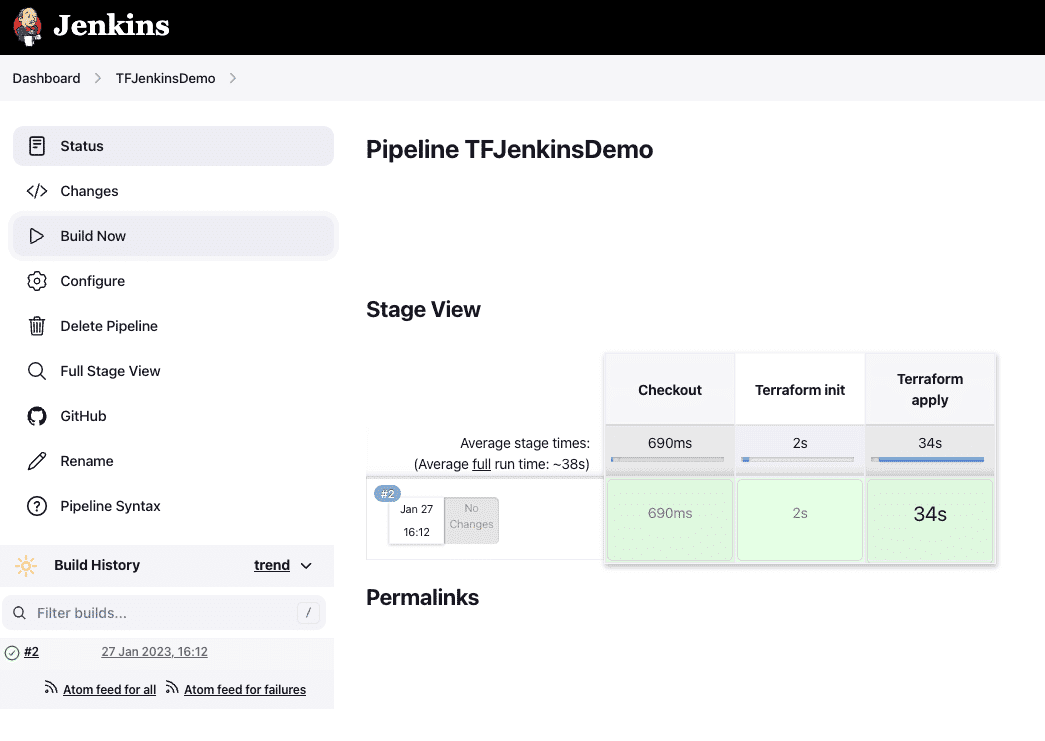
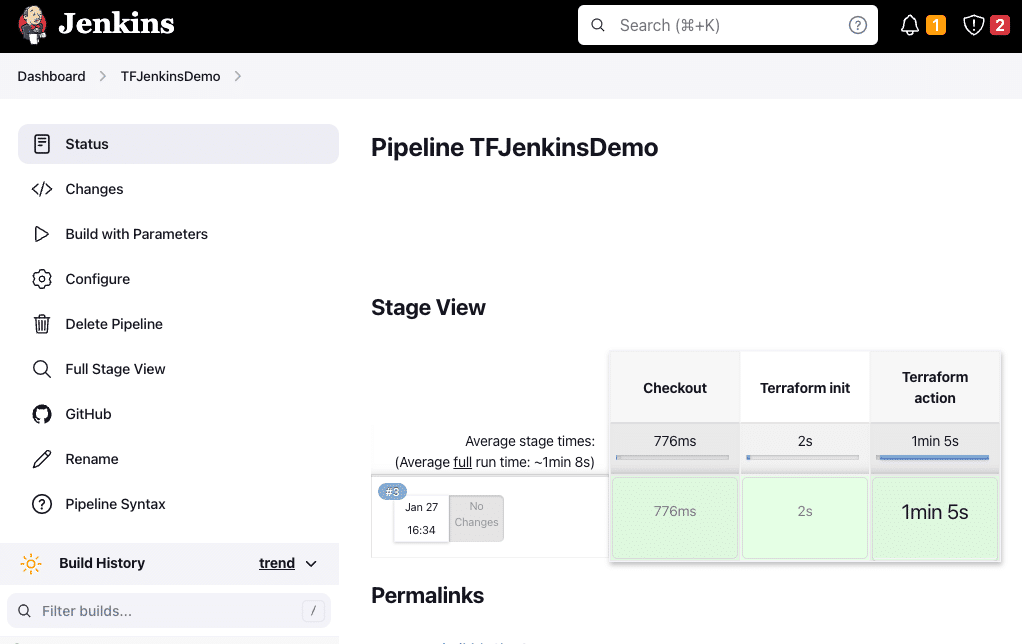
From the left navigation menu, click on “Build Now.” In the main panel on the screen, various stages of the pipelines will appear below “Stage View” as they are executed.
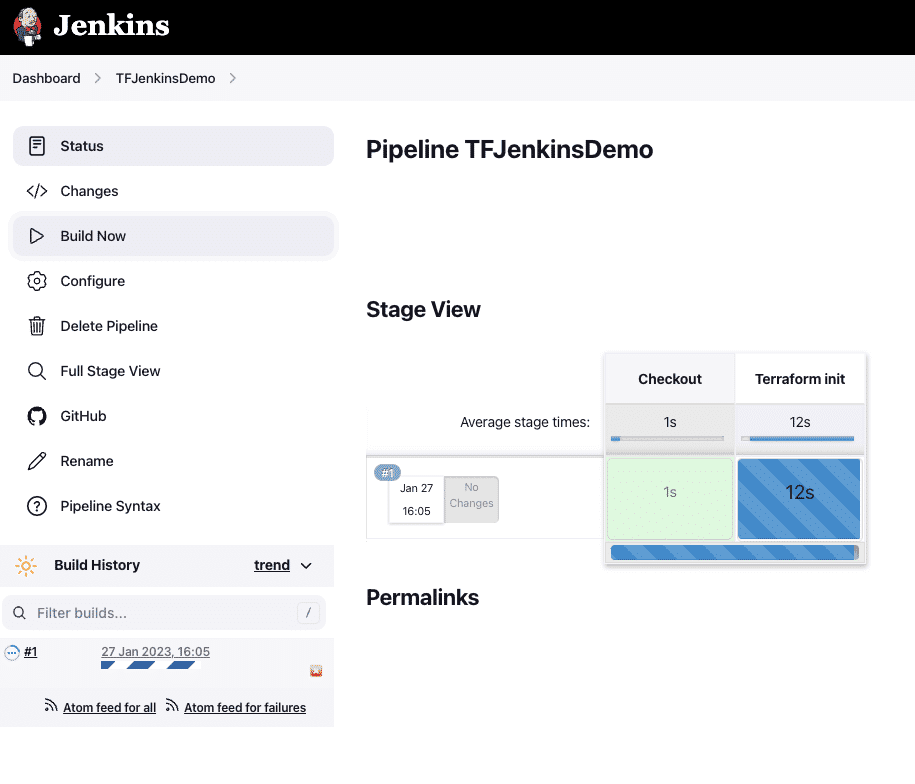
Once the build is completed, the summary below appears. It shows details including the date and time of this particular run, how much time each stage took to be executed successfully, etc.
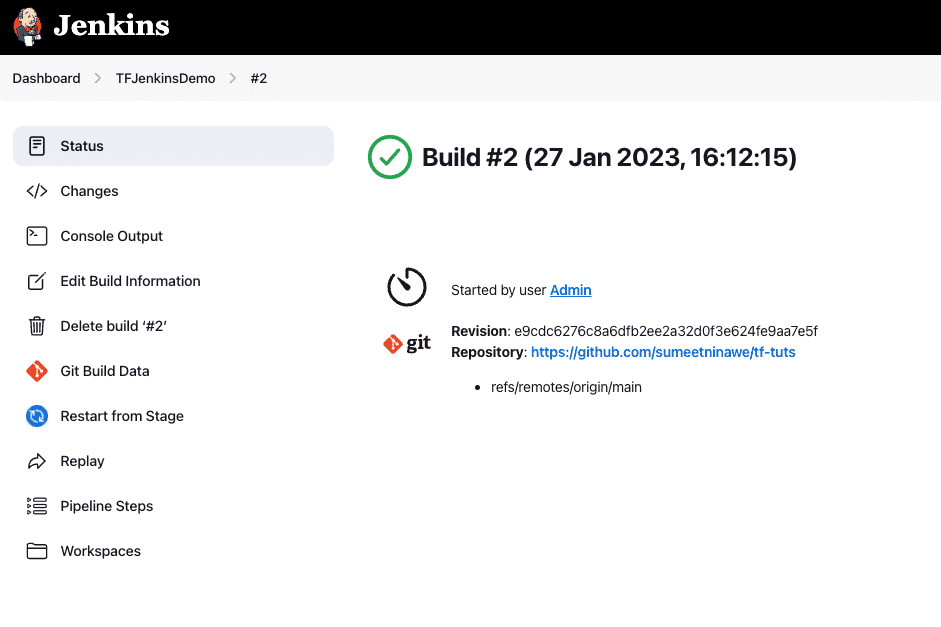
To learn more about the build, click on the sequence number of that particular run in the Build History. The display that appears shows various tabs on the left.
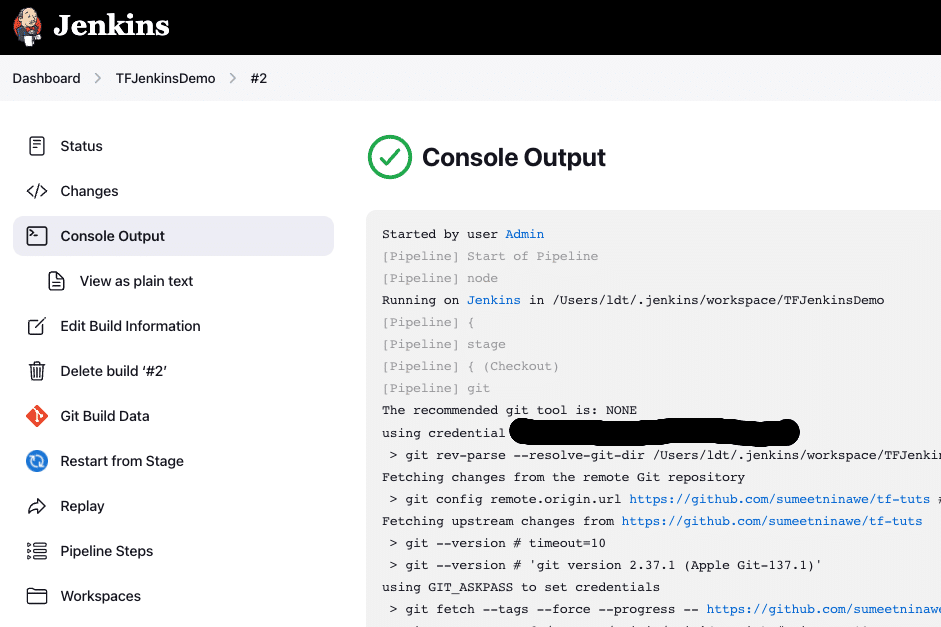
Click on the “Console Output” tab to view the complete log generated. If the build does not succeed, we can investigate the root cause, identify the solution, and determine the action to be taken on changing the pipeline configuration.
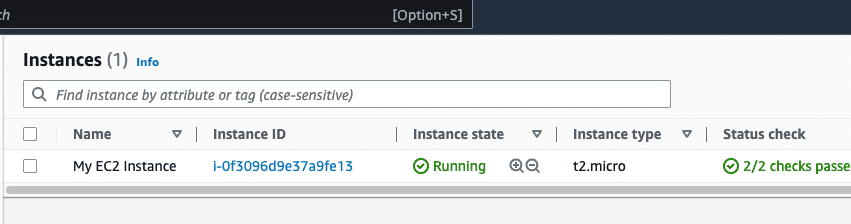
Since the build indicates success, it means Jenkins has successfully executed the Terraform configuration to create the infrastructure in AWS.
Verify whether the EC2 instance/intended infrastructure configured in IaC was created in AWS Console.
Step 8: Destroy the infrastructure using Jenkins
Our build pipeline is quite straightforward — it applies the given Terraform configuration. However, it is not possible to destroy it in the current configuration
To implement this function, we will use the build parameters feature in Jenkins. Build parameters are a way to accept user input before triggering any pipeline. This input is incorporated in the pipeline where it is required.
Our intention with build parameters is to provide an option to the users to select which “Action” they wish to perform — apply or destroy. Depending on the selection, the pipeline will either run the “apply” command or “destroy” the infrastructure.
Navigate to “Dashboard > TFJenkinsDemo > Configuration.” In the general section, click on the checkbox “This project is parameterized.” Take a moment to read through the information text.
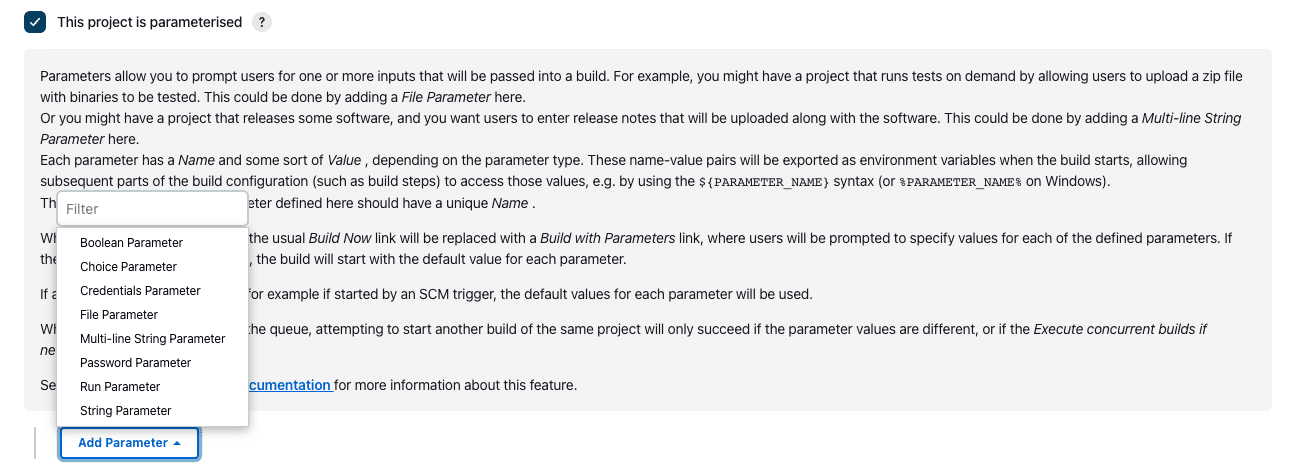
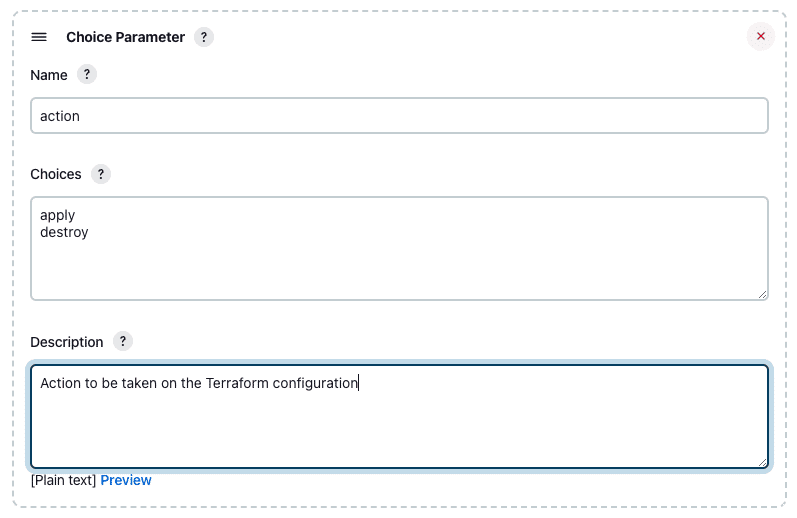
Select the “Choice Parameter” and fill in the form as shown below. The name represents the “variable” name we will use in our pipeline script to replace the variable with the selected value.
Each choice is listed on a separate line. Here, we have two choices – apply and destroy. These are potential values.
Scroll down to the Pipeline definition script, and use the action variable in the “Terraform apply” stage. Note that we have changed the name of this stage as well.
stage('Approval') {
    steps {
        input message: "You are about to run: terraform ${action}. Proceed?", ok: 'Confirm'
    }
}

stage('Terraform Action') {
    steps {
        sh "terraform ${action} ${action == 'destroy' ? '--auto-approve' : ''}"
    }
}
Click on “Save”. Let us retrigger the pipeline to destroy the resources created in our previous run.
This time we can select the action that should be performed on the given Terraform configuration. Select “destroy” and click on “Build”.
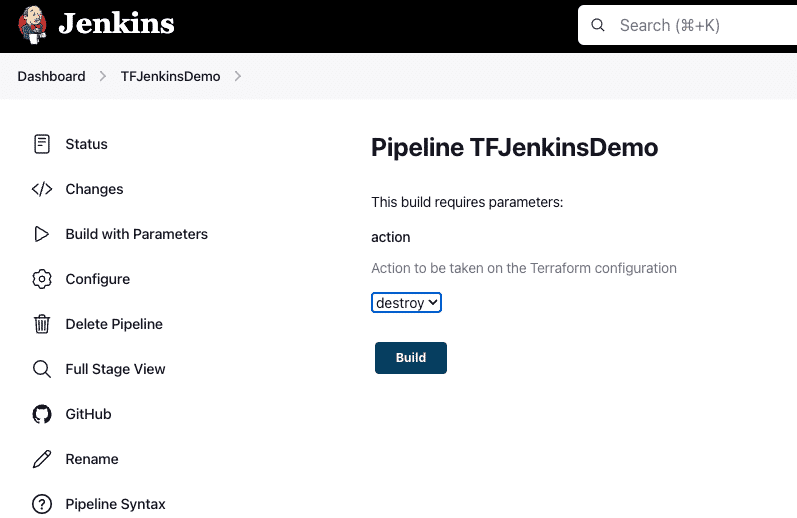
As the screenshot below shows, the pipeline was successfully completed.
To verify this, navigate to the AWS console and make sure the resources created using the Terraform config are deleted.

Why keep --auto-approve only for destroy? When destroying, the decision was already confirmed via the Approval gate, so a second CLI confirmation would be redundant. For apply, we removed --auto-approve in favor of applying the saved plan file, which is safer because it applies exactly what was reviewed, not a freshly recalculated plan.
Automatic triggering for Jenkins pipelines
We often want pipelines to be triggered automatically in response to an event.
For example, when a commit is made on a specific branch or a PR is merged to a specific branch, the changes introduced in the new commits are automatically applied.
There are two ways to achieve this:
- Triggering the events to Jenkins via a webhook.
- Configuring Jenkins to poll the source code at regular intervals to detect changes.
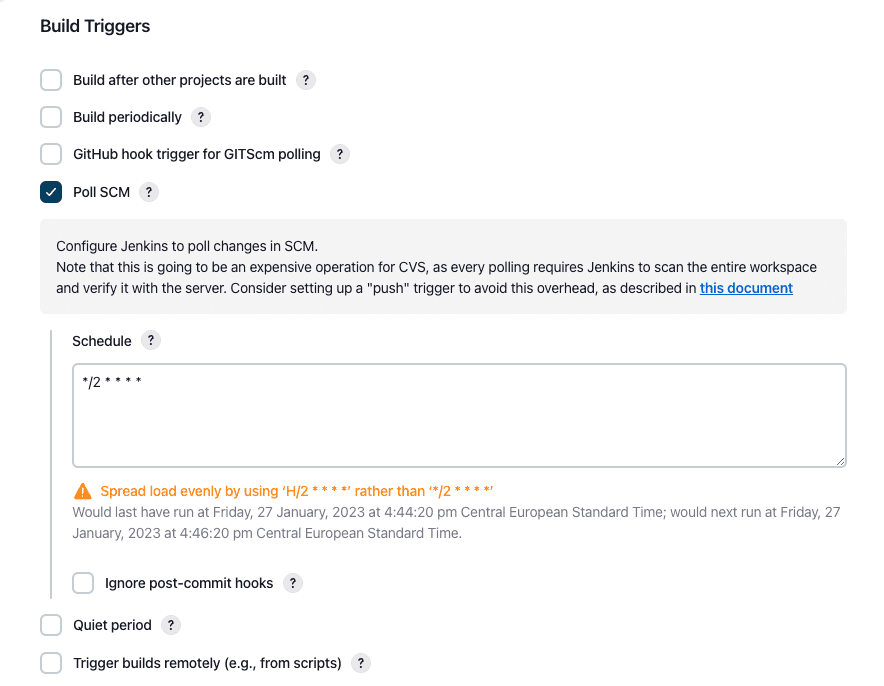
Apart from this, Jenkins provides many options to trigger the builds based on various conditions, as shown in the screenshot below.
As mentioned earlier, since this is a local installation of the Jenkins server, it would be impossible to configure a GitHub webhook. This could also be the case if Jenkins is placed behind a firewall and incoming webhook traffic is not allowed. In our case, we configure the polling SCM option.
Since we have already configured the connection to our GitHub repository while making it available for the pipeline, configuring the “Poll SCM” option is easy. We need to provide a schedule value in the cron job notation.
Here we are asking the pipeline to poll the SCM every two minutes.
Click on “Save”.
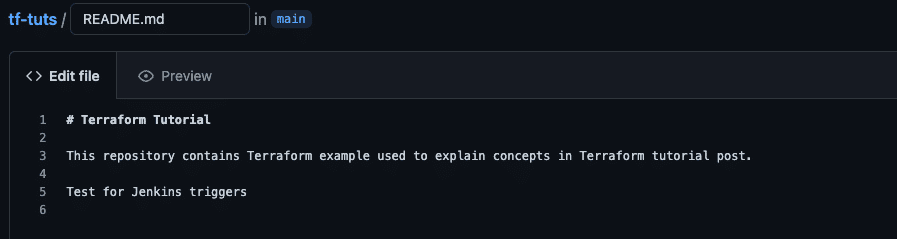
To see this trigger in action, commit a new change to the Terraform configuration repository. For this demo, we have just edited the README.md file.
When the “Poll SCM” trigger is configured, a new tab appears on the Pipeline’s home page named “Git Polling Log.”
This provides the logs of all the triggers detected by this polling mechanism which caused the pipeline to run.
Read more about how to manage GitHub with Terraform.
DevOps accelerator Cloud Posse had invested two years of effort trying to adopt tools like Atlantis, Jenkins, and Terraform Cloud, but those tools came nowhere near delivering what was needed. Then, a customer suggested they take a look at a new addition to the IaC CI/CD tools market that had caught their attention — Spacelift. Now, every customer IaC implementation they complete includes Spacelift as a key part of the final DevOps IaC environment they set up.
Key points
Jenkins is a great tool for implementing pipeline automation and covers a wide range of use cases. It can be used to customize the Terraform workflow pipelines in many different ways. For organizations that have adopted Jenkins for a wide range of tasks and for whom Terraform adoption is still in the nascent phase, implementing Terraform pipelines would make more sense.
However, the capability Jenkins delivers may be too generalized for specific requirements. As shown in this demonstration, various aspects listed below are managed in different places and may depend on more plugins.
- Credentials management depends on the plugin.
- Terraform plugins are required to manage installation and the execution environment.
- State management is inherently owned by Jenkins — this approach offers advantages and disadvantages.
- Pipelines may not offer much flexibility.
- The learning curve involved in Groovy Script is steeper than that of YAML, which is the standard today.
- Advanced analysis like drift detection, policy as code, costing, etc., are not available.
Managing infrastructure using Terraform is multifaceted. It starts with Terraform configuration files, but the next steps need a specialized approach. Spacelift is an infrastructure orchestration platform that covers end-to-end infrastructure management using Terraform, OpenTofu, CloudFormation, Pulumi, Ansible, and more.
As we can see from the list above, managing infrastructure is complicated. With a focused approach and advanced features, Spacelift makes it easy to manage infrastructure on any cloud using multiple infrastructure as code technologies.
- Workflow automation for end-to-end provisioning
- Drift detection and remediation
- Policy-as-code support
- Team collaboration
- Cost forecast
- Impact analysis
- Visualization tools
- Extensive provider and module resources
For teams looking to move even faster, Spacelift Intelligence adds an AI-powered layer for natural language provisioning, diagnostics, and operational insight across your infrastructure workflows.
If you want to learn more about Spacelift, create a free account today or book a demo with one of our engineers.
Note: New versions of Terraform are placed under the BUSL license, but everything created before version 1.5.x stays open-source. OpenTofu is an open-source version of Terraform that expands on Terraform’s existing concepts and offerings. It is a viable alternative to HashiCorp’s Terraform, being forked from Terraform version 1.5.6
Solve your infrastructure challenges
Spacelift is an alternative to using homegrown solutions on top of generic CI/CD tools. It helps overcome common state management issues and adds several must-have capabilities for infrastructure management.
Frequently asked questions
Does Jenkins support terraform plan before applying changes?
Yes. You can add a dedicated Plan stage to your pipeline that runs terraform plan -out=tfplan and saves the output to a file. A subsequent Apply stage then executes that exact saved plan, and an Approval stage in between lets a human review the changes before anything is applied.
How do I store Terraform state remotely when using Jenkins?
Configure a remote backend (such as S3 with DynamoDB for state locking) in your Terraform code before running the pipeline, as Jenkins itself does not manage state. This prevents state conflicts when multiple pipeline runs execute concurrently.
How do I manage multiple Terraform versions across Jenkins pipelines?
Use the “Add Terraform” button in the Global Tool Configuration page (covered in Step 2) to register multiple Terraform installations under different names, then reference the specific installation name in each pipeline’s tools block.
Can Jenkins automatically trigger a Terraform pipeline on a Git commit?
Yes. Either configure a GitHub webhook to notify Jenkins on push events, or use the Poll SCM option to have Jenkins check for changes at a regular interval, as shown in the Automatic Triggering section above.
What is the difference between using Jenkins for Terraform vs. a dedicated IaC tool like Spacelift?
Jenkins gives you full flexibility to build custom Terraform workflows but requires manual setup for things like drift detection, policy enforcement, and state management. Dedicated IaC tools handle these out of the box, which matters more as the number of stacks and teams grows.
Does Jenkins work with OpenTofu as a Terraform alternative?
Yes. Since OpenTofu is a drop-in compatible fork of Terraform, you can point the binary path in Jenkins’ Global Tool Configuration to an OpenTofu binary and use it in place of Terraform with no pipeline changes required.
