
In our previous article, we discussed the business reasons why there are better solutions than generic CI/CD tools for a complex infrastructure setup.
In this post, we look at how you would use three different tools (GitHub Actions, Azure DevOps and Jenkins) to create CI/CD pipelines solely for deploying Terraform code. We explore how these pipelines can be constructed and the limitations they present.
Terraform — a popular Infrastructure as Code (IaC) tool
What is the value of a specialized IaC tool? And why would you choose Terraform specifically? Putting it simply, IaC tools like Terraform focus on the infrastructure layer, whereas configuration management tools like Ansible and Puppet focus on operating system configuration and application layers.
Terraform’s popularity is down to its flexibility, particularly in the area of providers. It also offers the capacity to build modules, operate on state files, and create a configurable, multi-environmental setup. Add to this support from the Terraform community, and you have a versatile, powerful tool for infrastructure automation.
What we’ll cover:
- Designing the CI section of the pipeline
- Designing the CD section of the pipeline
- Implementing the pipeline with GitHub Actions
- Implementing the pipeline with Azure DevOps
- Implementing the pipeline with Jenkins
Managing Terraform with generic CI/CD tools
As with all pipelines, there are many different approaches to building a Terraform pipeline. Your choice will depend on the technology stack, business case, product complexity, and in-depth expertise in everything from deployment methods to security tools.
Bearing this in mind, we will work on a simple pipeline containing two parts: continuous integration (CI), where we collect committed code, perform some tests, and then build the plan file; and continuous deployment (CD), where we deploy the infrastructure into an AWS account.
Designing the CI section of the pipeline
The CI part of our pipeline contains five blocks:
- Collect code from VCS.
- Execute validation. We will run
terraform fmtandterraform validatecommands in this step. - Execute SAST test with tfsec.
- Create plan using
terraform plancommand. - Store plan as artifact in artifact storage.
This pipeline is visualized in the diagram below:
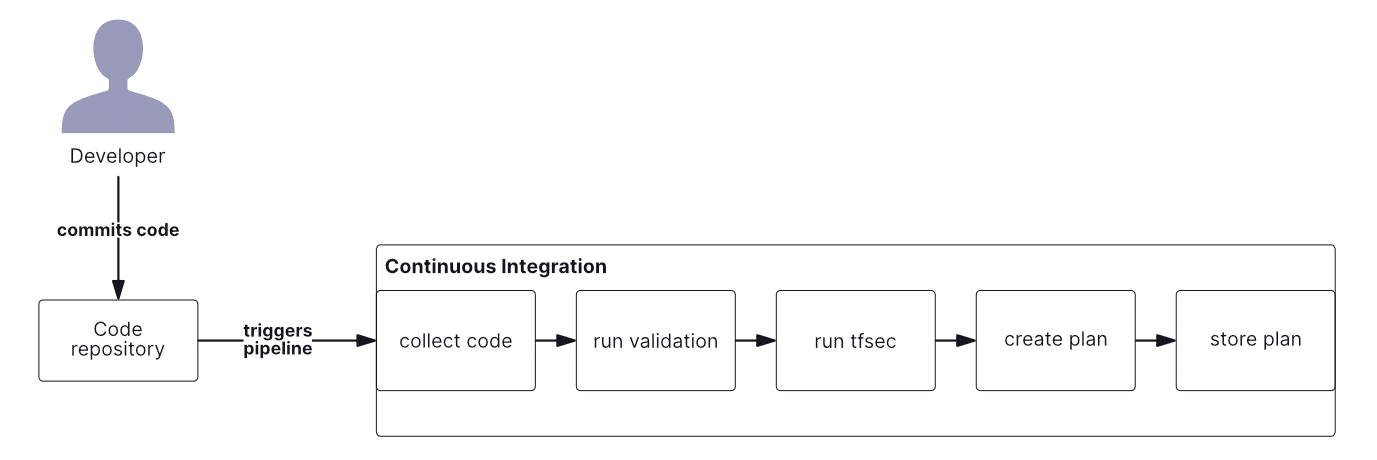
At this point, we see three external elements in our pipeline:
- We have to configure trigger from VCS.
- We have to download and install tfsec.
- We have to configure and manage artifact storage.
However, this diagram omits a crucial element for Terraform — Terraform state file. This file is already needed in this phase as we execute terraform plan.
Generic CI/CD tools are not designed to deal with state. This adds a fourth external component to our pipeline, requiring us to use a remote state file. We will need to add further resources — an S3 bucket and a Dynamo DB table in AWS, for example — and these may require another Terraform template for creation and management (not in this example, however).
Designing the CD section of the pipeline
Once we have finished the CI phase, we can proceed with the CD design. I selected this approach for our examples to show you how we can perform very simple tests on what we created.
Our CD will also contain five stages:
- Collect the plan from artifact storage
- Execute against the “preprod” environment
- Test if the deployment was successful
- Execute against the “prod” environment
- Test if the deployment was successful
The stages are outlined in the diagram below:
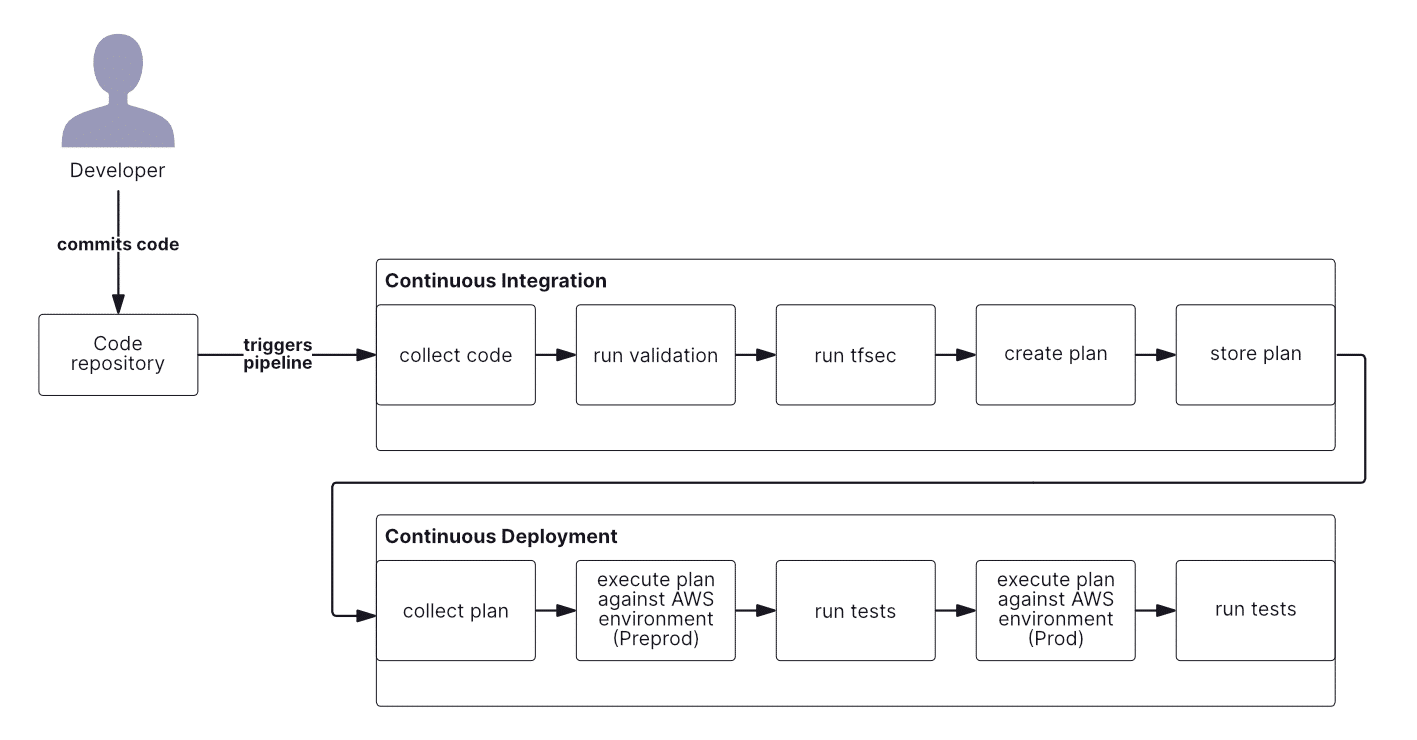
Here, we can see three external components. Artifact storage, which we already mentioned, and two environments — possibly two different AWS accounts.
Let’s look at the implementation, starting with GitHub Actions.
Implementing the pipeline with GitHub Actions
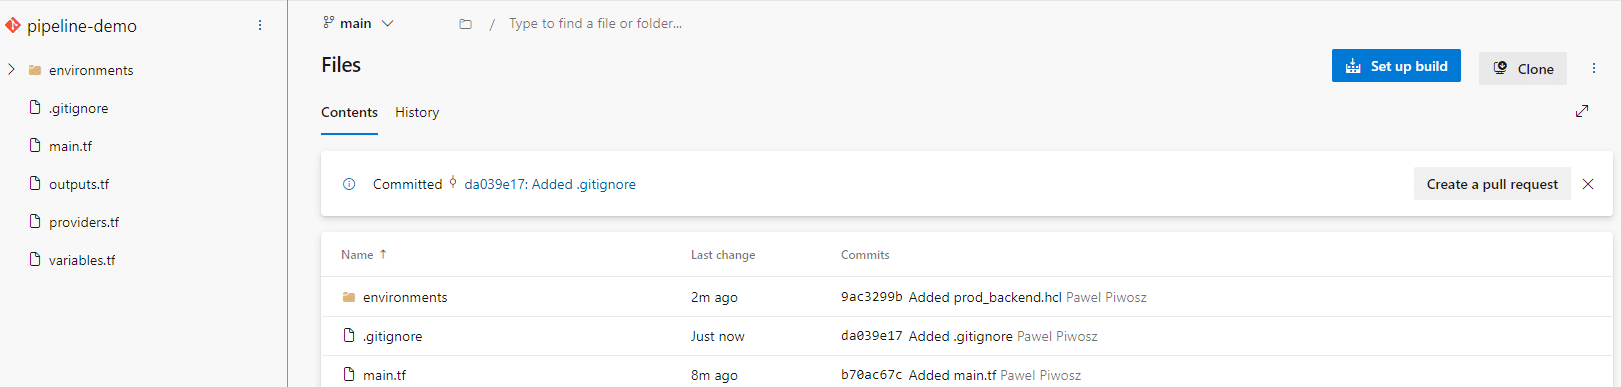
GitHub Actions is a CI/CD approach that is deeply integrated with GitHub. It is extremely easy to create and start a pipeline — simply create a proper file inside your repository.
In the root of your repository, create a .github/workflows directory and store your pipeline as code definitions there.
The power of GitHub Actions lies in its modularity. To run a specific task, you configure an Action. GitHub offers a marketplace with thousands of Actions, some officially maintained by companies (i.e., AWS, Aqua, etc.) and some by the community. There is an option to run CLI commands in Actions. We have Actions like run or script at our disposal.
Here we have an example of an Action maintained by HashiCorp to install Terraform:
- name: Setup Terraform
  uses: hashicorp/setup-terraform@v2
  with:
     terraform_version: 1.5.4
Let’s take a look at how GitHub Actions looks in the GUI.
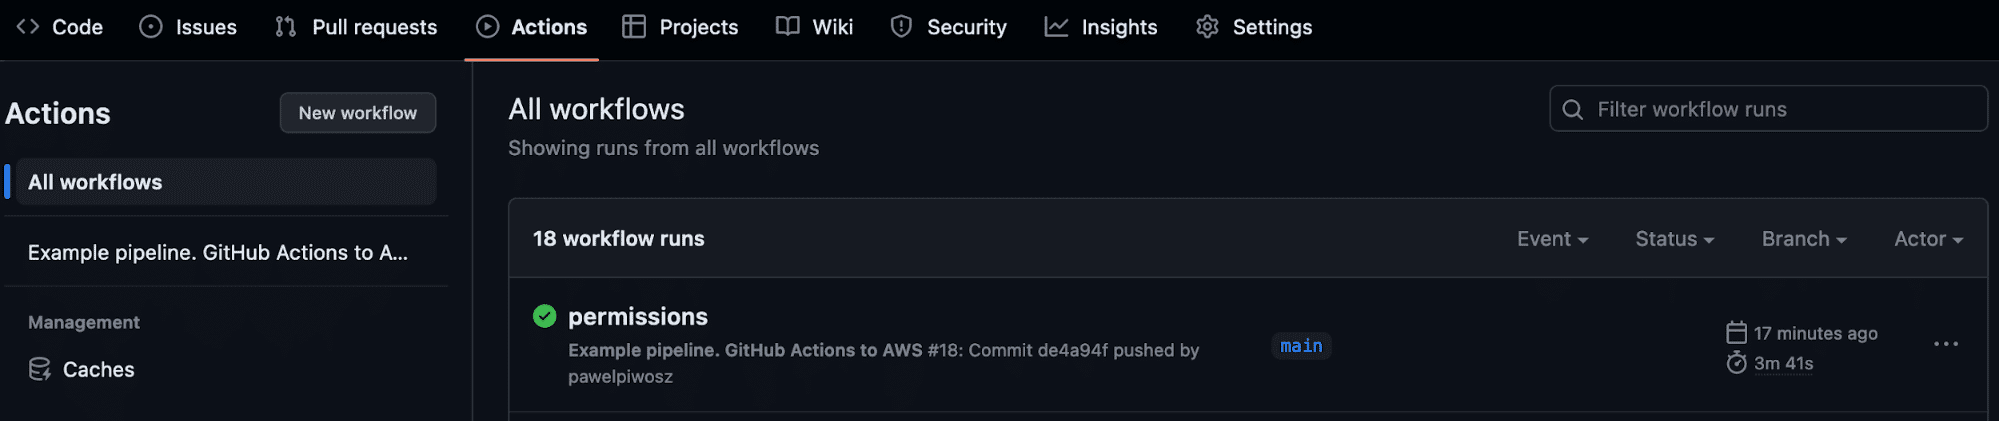
Each repository has enabled Actions, available from the menu. We have access to all pipelines and all runs completed in this repository.
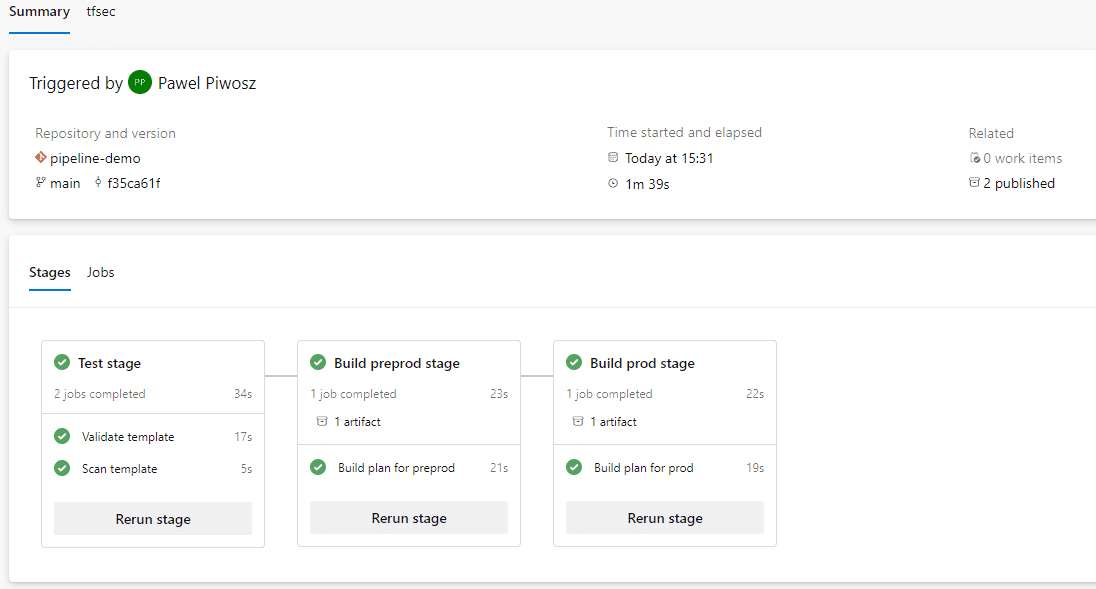
Let’s go to the run itself.
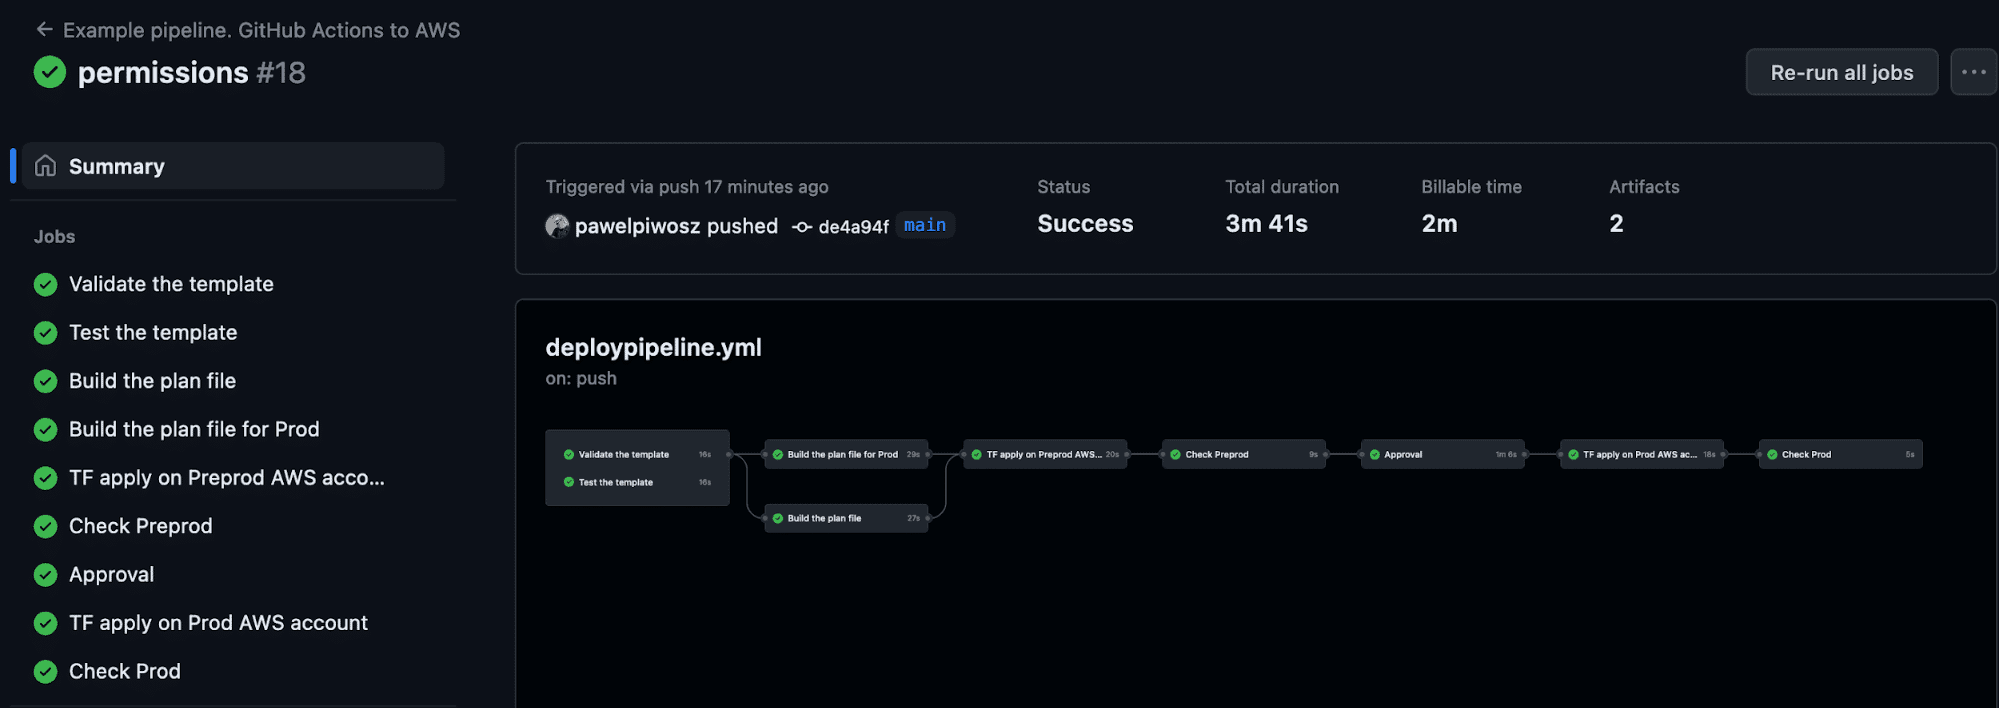
The screen above presents the run of the pipeline we designed earlier. I added one step — Approval. For a proper understanding of CI/CD workflows, this simple step changed the behavior and type of our process. With manual steps like this one, we have continuous delivery. We should have a fully automated process in continuous deployment.
The huge downside here (and it applies to all generic CI/CD tools) is how we need to manage different workflows.
Let’s take a look at this part of the code:
on:
  push:
    branches:
      - main
    paths-ignore:
      - "README.md"
This workflow is executed only when code is pushed to the main branch. Additionally, we don’t trigger a run if we push the README.md file only.
“Push” here means that the workflow will be triggered only when a commit to the main branch is executed by a developer or by merge. But what if I want to have a pull request–related workflow?
We have three options:
- Create another pipeline (let’s name it pullrequest.yml, for example), which will have proper trigger in section
on:. - Create a whole new section with another trigger in the existing workflow file.
- Trigger the workflow anyway and operate on conditionals inside the workflow.
And here is the point. With a growing scale, it is important to define an auditable and manageable process. The three options provided above will do the job, but the process’s management and measurement will be hard to understand and maintain.
Unfortunately, Hashicorp doesn’t provide actions for running Terraform (just setup). We need to use standard inline executions.
In the example below, I prepare the artifact:
- name: Prepare environment
  run: |
    terraform init -backend-config="environments/preprod_backend.hcl"
- name: Create Terraform plan for Preprod
  run: terraform plan -var-file="environments/preprod.tfvars" -out ${{env.preprod_artifact_name }}
And in one of the following steps, I deploy it:
- name: Prepare environment
  run: |
    terraform init -backend-config="environments/preprod_backend.hcl"
- name: Download artifact for deployment
  uses: actions/download-artifact@v3
  with:
    name: preprod-execution-plan
- name: Execute terraform apply
  run: terraform apply ${{ env.preprod_artifact_name }}
Best practices for building IaC suggest using layers as building blocks. It means that huge projects will have multiple templates that should be executed one after another. We don’t want to mess up the network layer with the serverless layer, for example.
As before, we have multiple options, from stacking the executions in one pipeline to triggering pipeline from pipeline. All these options work as designed, but again the process becomes unclear very quickly.
We will dive deeply into GitHub Actions pipelines and Spacelift in another blog post.
Download the Build vs. Buy Guide to Scaling Infrastructure as Code

Implementing the pipeline with Azure DevOps
Azure DevOps is a sophisticated platform for CI/CD, process control, testing, and artifact storage management. In this section, we will focus solely on its CI/CD capabilities.
Unlike GitHub Actions, Azure DevOps creates distinct boundaries between CI and CD.
I will use exactly the same code to replicate a similar pipeline using Azure DevOps. When the code is in the repository, the first step is to create a build pipeline. Azure-pipeline.yml file can be created from scratch by the developer, or this pipeline can be provided from available templates.
Both actions can be started by clicking Set up build, as shown on-screen below:
To build our pipelines, we can use the Azure Marketplace similarly to what we did in GitHub Actions.
- job: "Validation"
    displayName: "Validate template"
    steps:
    - task: TerraformInstaller@1
      displayName: "Use Terraform"
      inputs:
        terraformVersion: 'latest'
    - task: TerraformTaskV4@4
      displayName: Init Terraform
      inputs:
        provider: 'aws'
        command: 'init'
        backendServiceAWS: 'TFfromADO'
        backendAWSBucketName: 'spaceliftdemospp'
        backendAWSKey: 'adopreprod/terraform.tfstate'
    - task: TerraformTaskV4@4
      displayName: "Validate template"
      inputs:
        provider: 'aws'
        command: 'validate'
This is an example of the pipeline’s code with the implementation of tasks from Azure Marketplace.
The completed build pipeline (equivalent of CI) is shown in the image below:
We now have two options for the CD part: Create separate build and release pipelines or continue building the build pipeline and add a deployment phase.
The menu below illustrates the distinct approach to CI and CD in Azure DevOps:
Pipelines is where we defined the CI pipeline earlier. Releases is where we build our release.
Let’s have a look at the first option for CD. The downside of Azure DevOps is that whereas the build pipeline is fully codified and stored in VCS with the code, the release pipeline is not. It still requires managing the stages, etc., through the GUI.
The syntax of the yaml pipeline is very similar to the one we saw in GitHub Actions.
Here is an example of the triggers for the pipeline:
trigger:
  branches:
    include:
      - main
  paths:
    exclude:
      - README.md
The tasks can be created from scratch in a text editor or with templates. I installed Terraform modules to achieve repeatability. In this way, I can reuse tasks easily.
Here is an example of the task to create a plan:
- stage: "BuildPreprod"
  displayName: "Build preprod stage"
  dependsOn: ["Tests"]
  jobs:
  - job: "BuildPreprodplan"
    displayName: "Build plan for preprod"
    steps:
    - task: TerraformTaskV4@4
      displayName: "TF init for preprod"
      inputs:
        provider: 'aws'
        command: 'init'
        backendServiceAWS: 'TFfromADO'
        backendAWSBucketName: 'spaceliftdemospp'
        backendAWSKey: 'adopreprod/terraform.tfstate'
    - task: TerraformTaskV4@4
      displayName: "Create plan for prod"
      inputs:
        provider: 'aws'
        command: 'plan'
        commandOptions: '-var-file="environments/preprod.tfvars" -out $(preprod-artifact-name)'
        environmentServiceNameAWS: 'TFfromADO'
    - task: PublishPipelineArtifact@1
      displayName: "Publish preprod plan"
      inputs:
        targetPath: '$(preprod-artifact-name)'
        artifact: 'preprodPlan'
        publishLocation: 'pipeline'
In this example, we have a whole job with a few tasks, where I install Terraform and do the init and plan commands. Finally, I publish the artifact with a plan file into pipeline storage. This artifact is accessible for this run only.
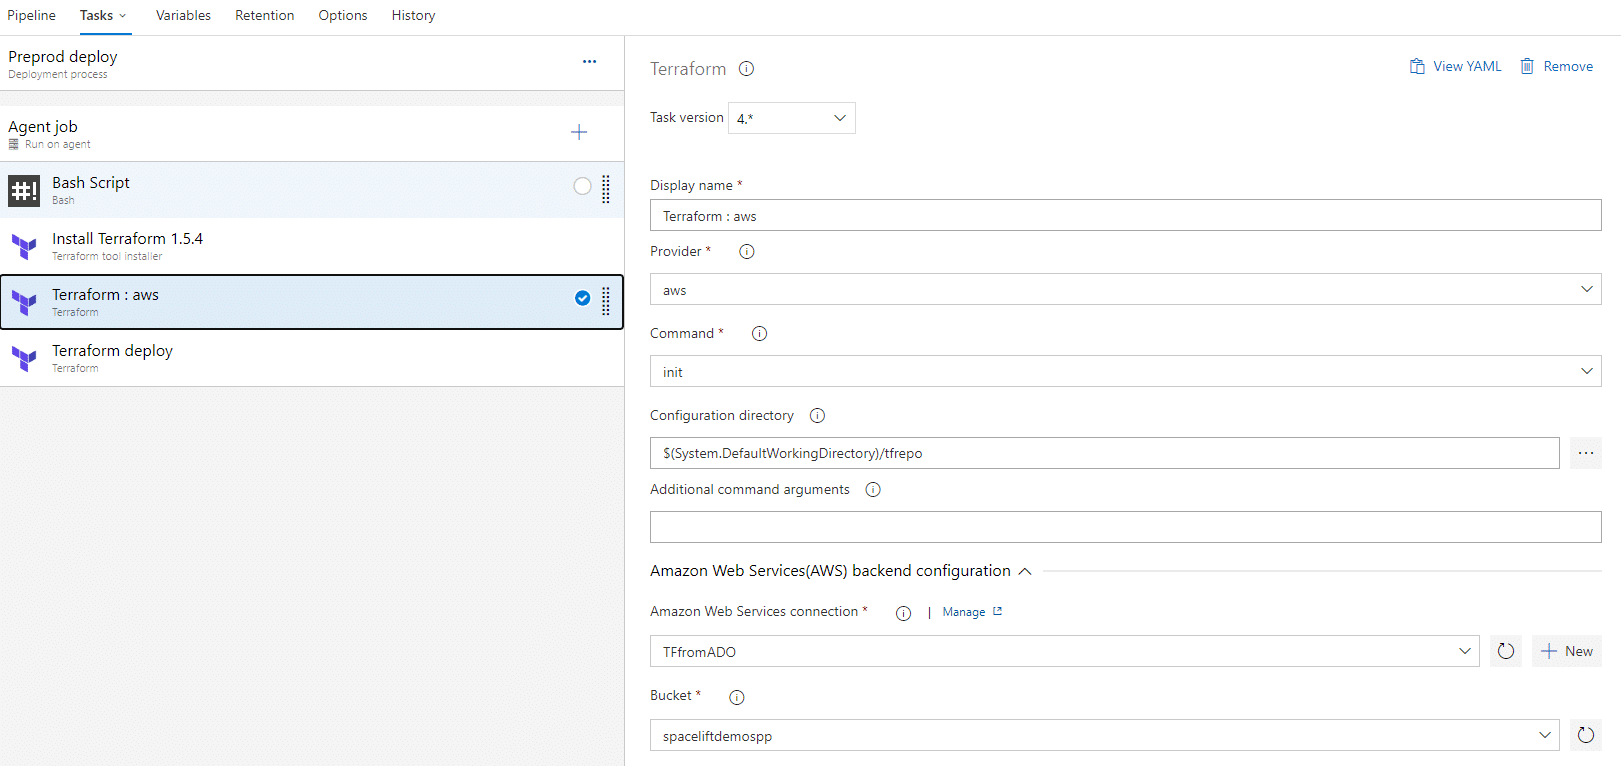
The second step for the pipeline in Azure DevOps is to create a release pipeline. In the image below, you can see the whole pipeline construction:
The next image provides insights into the details of the stage. There, we see all tasks (left side of the picture) and the configuration of one of the tasks (right side).
With Azure DevOps, we have the same issues we had with GitHub Actions. Furthermore, the approach I presented above creates a slight disconnection between the CI and CD parts. Of course, we have links between pipeline executions, so we can check what came from where, but we have lost the bigger picture, which becomes increasingly important with scale and complexity.
Another area for improvement is how the artifact is built and passed between stages.
As we saw, the artifact with the plan file was created in the build pipeline and shipped to another pipeline to be executed. These steps look like an intrusion into the workflow. Considering the execution of the whole CI/CD, why should I publish an artifact inside one run? In this case, this is the way how Azure DevOps works. We need to publish and pass an artifact between two distinct pipelines.
But if we look at the bigger picture of the process, publishing the artifact allows us to measure and audit it. That is why we should build the process of publishing artifacts into the SDLC.
A further downside of Azure DevOps is that if we use Release pipelines, we need to create them manually. There are options to store tasks as yaml files, but that is not an optimal solution.
Implementing the pipeline with Jenkins
Jenkins is still one of the most popular CI/CD tools. Organizations can host it internally, and it is very flexible and works with many plugins. Jenkins is often combined with tools like SonarQube and acts as a very sophisticated CI/CD service for the organization.
It has drawbacks, too. Jenkins is a self-hosted software, so you have to host and maintain it yourself, ensure that all versions of Jenkins and plugins are correct, and so on.
This is time-consuming, and the bigger the installation, the more effort is required to maintain it.
Check out the Top 10 Jenkins Alternatives.
To create the pipeline, we created a Jenkins installation at my “home lab” to simulate an in-house setup. Unlike the two previous examples, we now have our infrastructure to manage. One Jenkins server may not sound like much, but as usual, scale matters.
Even in a small setup, there is a lot to do:
- Manage underlying host.
- Manage Docker containers and Docker-compose.
- Manage all plugins in Jenkins.
- Manage configuration, security, and availability.
On a larger scale, we can have Jenkins plus a fleet of workers, SonarQube with its database, VCS (for example, Gitlab or Github Enterprise), and an artifacts system. The time and effort needed to manage such a setup will be significantly greater.
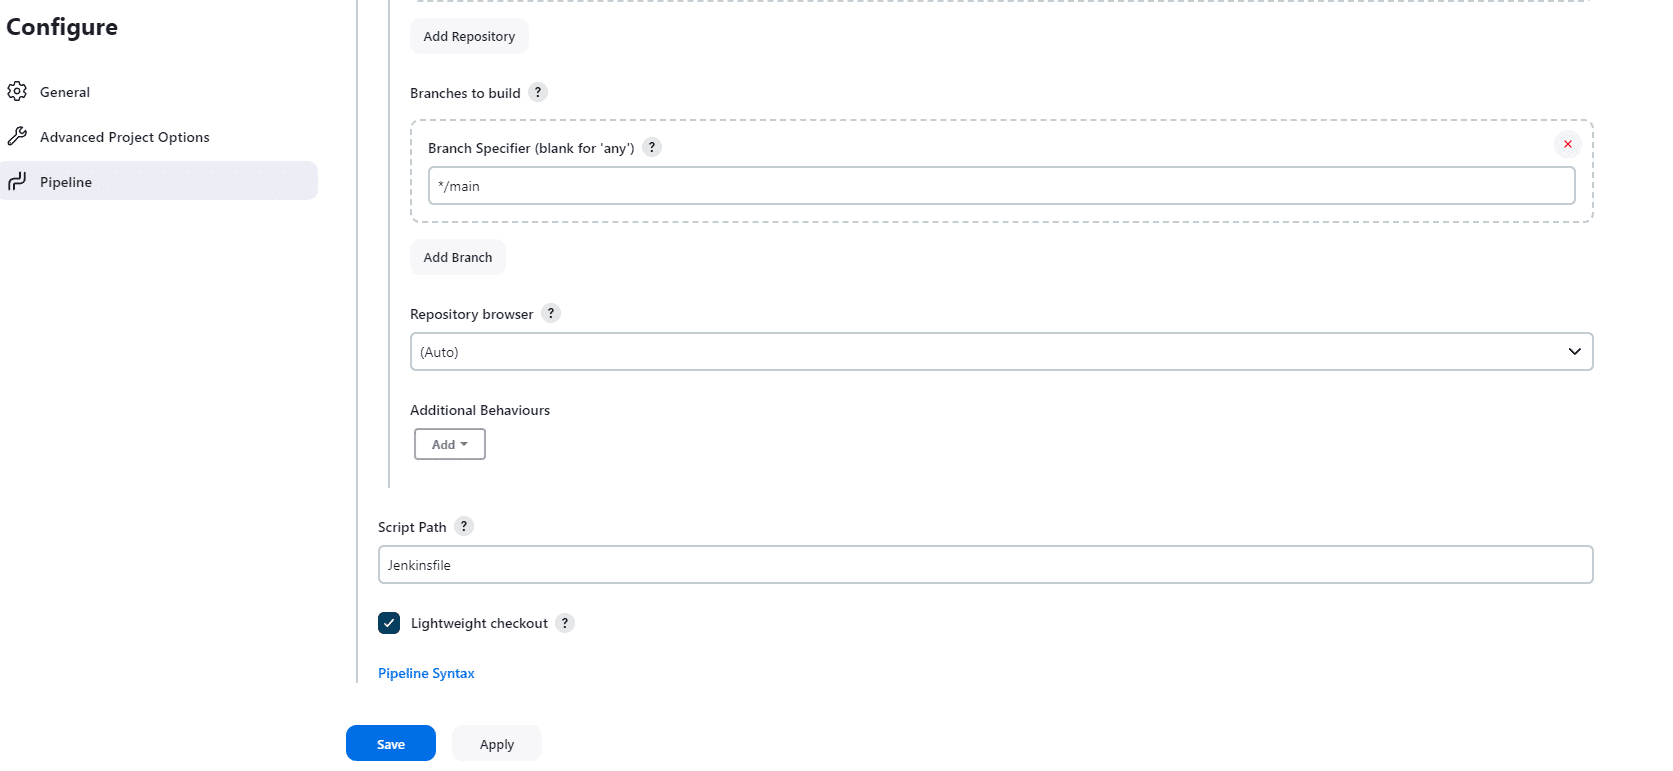
Jenkins allows us to create pipelines in several ways. We used Jenkinsfile, which we store in VCS with my code, and provided the location to the Jenkins pipeline. The second choice was a declarative approach to Jenkinsfile.
Here are two examples:
pipeline {
    agent any

    environment {
        preprod_artifact_name = "preprod_tfplan-${env.JOB_NAME}-${env.BUILD_ID}-${env.BUILD_NUMBER}"
        prod_artifact_name = "prod_tfplan-${env.JOB_NAME}-${env.BUILD_ID}-${env.BUILD_NUMBER}"
    }
Here is the beginning of the file, with the declaration of worker types and preparation of filenames for my Terraform plans.
stage('Prod Deploy') {
            steps {
                withAWS(credentials: 'jenkinstoaws', region: 'eu-central-1') {
                    sh '''
                        terraform init -reconfigure -backend-config="environments/prod_backend.hcl"
                        terraform apply ${prod_artifact_name}
                    '''
                }
            }
        }
The snippet above shows the construction of one of the stages. We use a direct execution of Terraform, but as you can see, this execution is encapsulated into withAWS, the plugin we installed earlier.
Unfortunately, Jenkinsfile is not all. We need to configure the pipeline in the Jenkins GUI. We can also automate this process.
The image above presents the configuration of the pipeline.
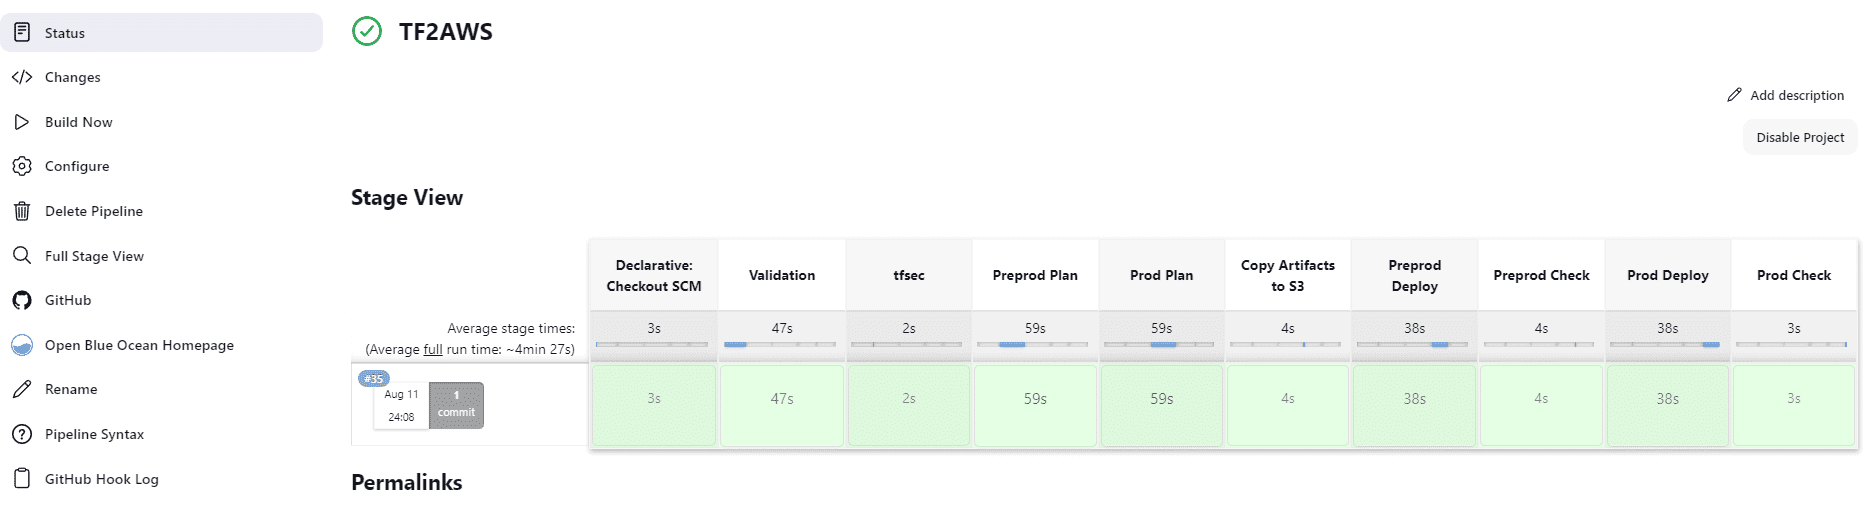
When executed successfully, we see something like the image below.
Jenkins is very powerful. We DevOps people love Jenkins for its flexibility and configurability and hate it because it requires a lot of attention. Besides this, Jenkins has all the downsides of the previously presented tools.
Limitations of using generic CI/CD tools for Terraform management
The examples featured a single execution of a single project containing automation with IaC. We have orchestration of the runs, but not orchestration between different runs. Even with predefined modules for Terraform, we have to think about proper installation, initialization, and execution.
The biggest challenge is keeping the state files in proper management. First, we need to configure a backend. Terraform offers multiple backend possibilities, but what if we work with a provider without this functionality? We have to learn another cloud vendor where we can manage our backend.
Why you shouldn’t use generic tools for Terraform deployments:
- Control of state files: This control is required not only in one pipeline, but throughout the whole system.
- State lock importance: State lock becomes crucial as the execution of the pipeline might be unaware that another pipeline is operating on the same resource at the same time, depending on the CI/CD tool configuration and its limitations on active executions.
- Responsibility for tool configuration: As CI/CD tools are unaware of the technology, we are responsible for preparing and configuring the tool within the pipeline.
- Lack of orchestration options: We can trigger one pipeline from another, but this easily breaks the chain of control and causes loss of overarching system status visibility.
- Need for multistep pipelines: It is necessary to create multistep pipelines or many pipelines to cover all cases, including commits, pull requests, drifts, and infrastructure retirement.
- Toolset for self-service infrastructure: When self-service infrastructure is applied, another toolset is needed to manage the approach.
- No infrastructure insights: CI/CD tools don’t visualize what you created or show the connections between different stacks.
Delivering an optimal Terraform management solution with Spacelift
As a DevOps tool designed specifically for infrastructure, Spacelift has none of these limitations. Let’s walk through how it overcomes them:
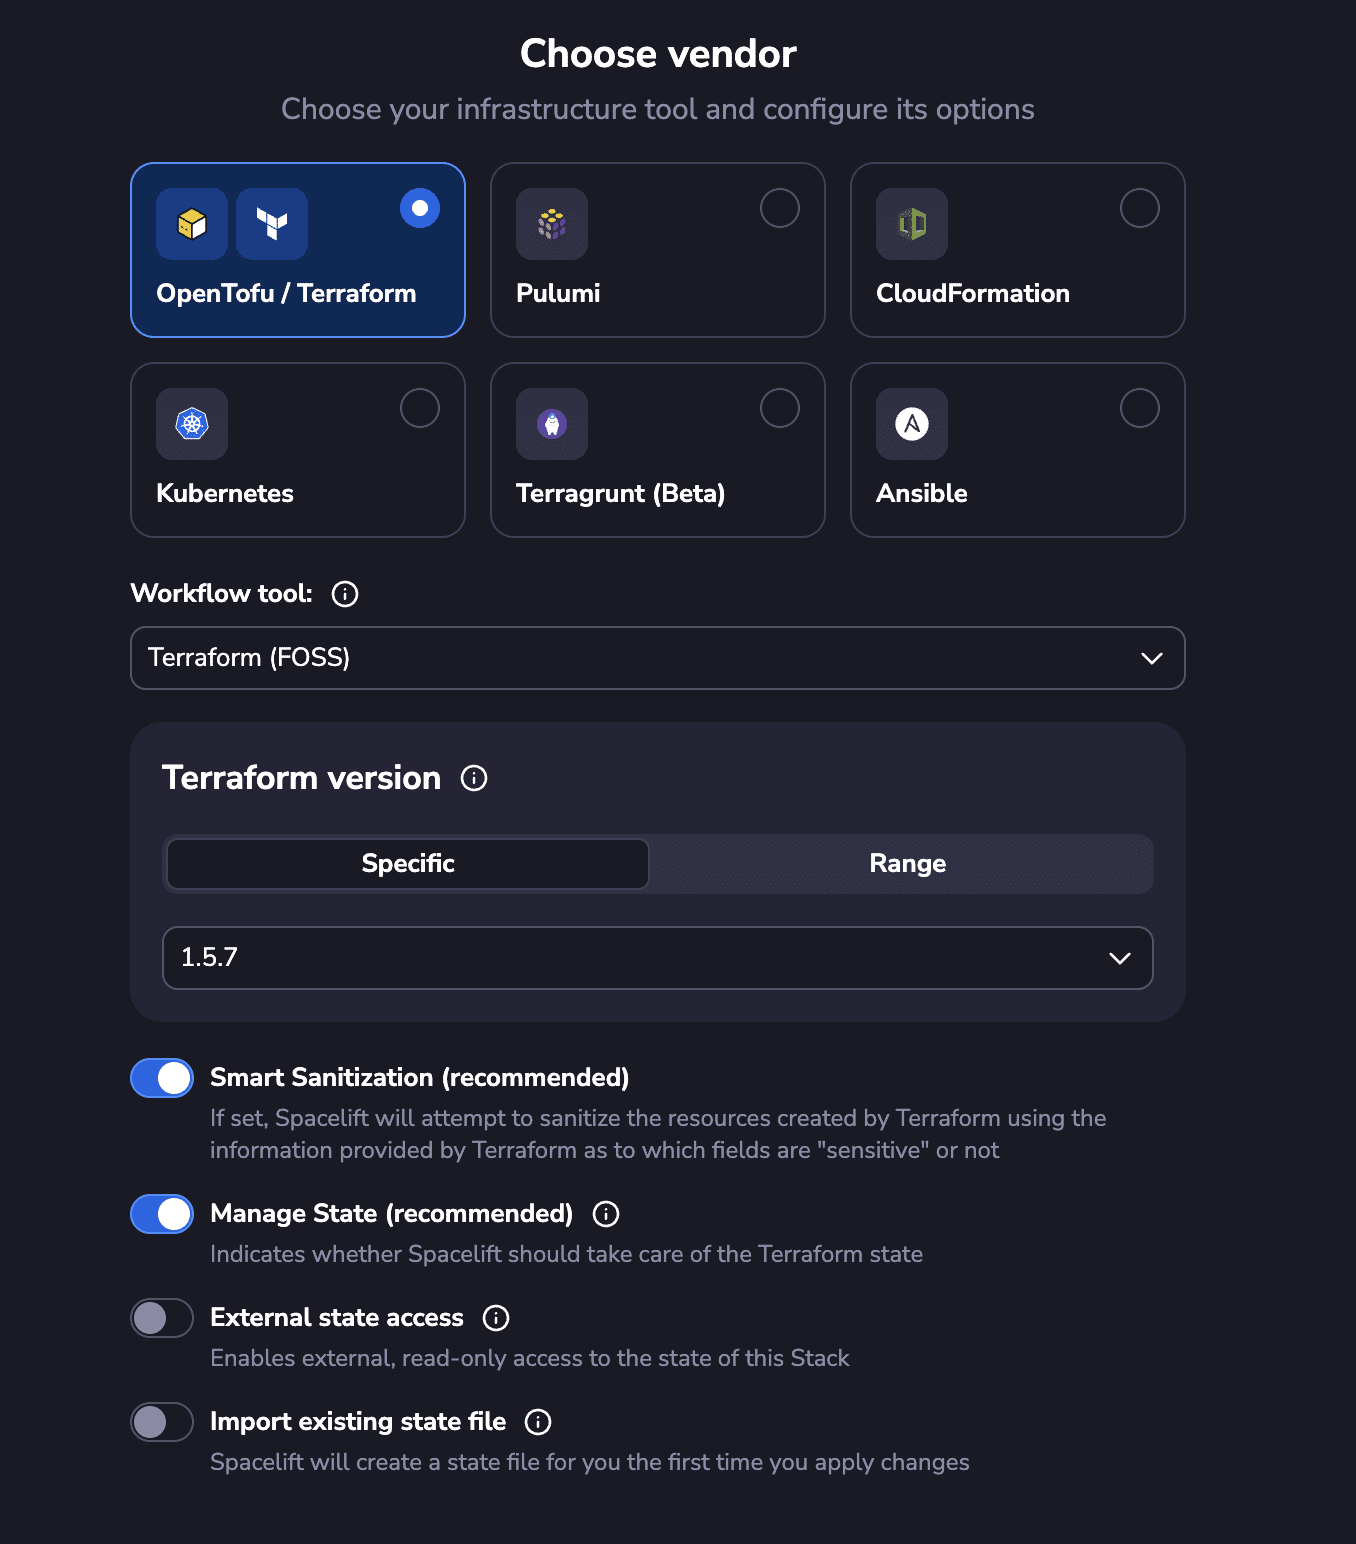
- The need to control the state files. Spacelift can manage backend and state files for you. You have to declare what technology you want to control when you create a stack.
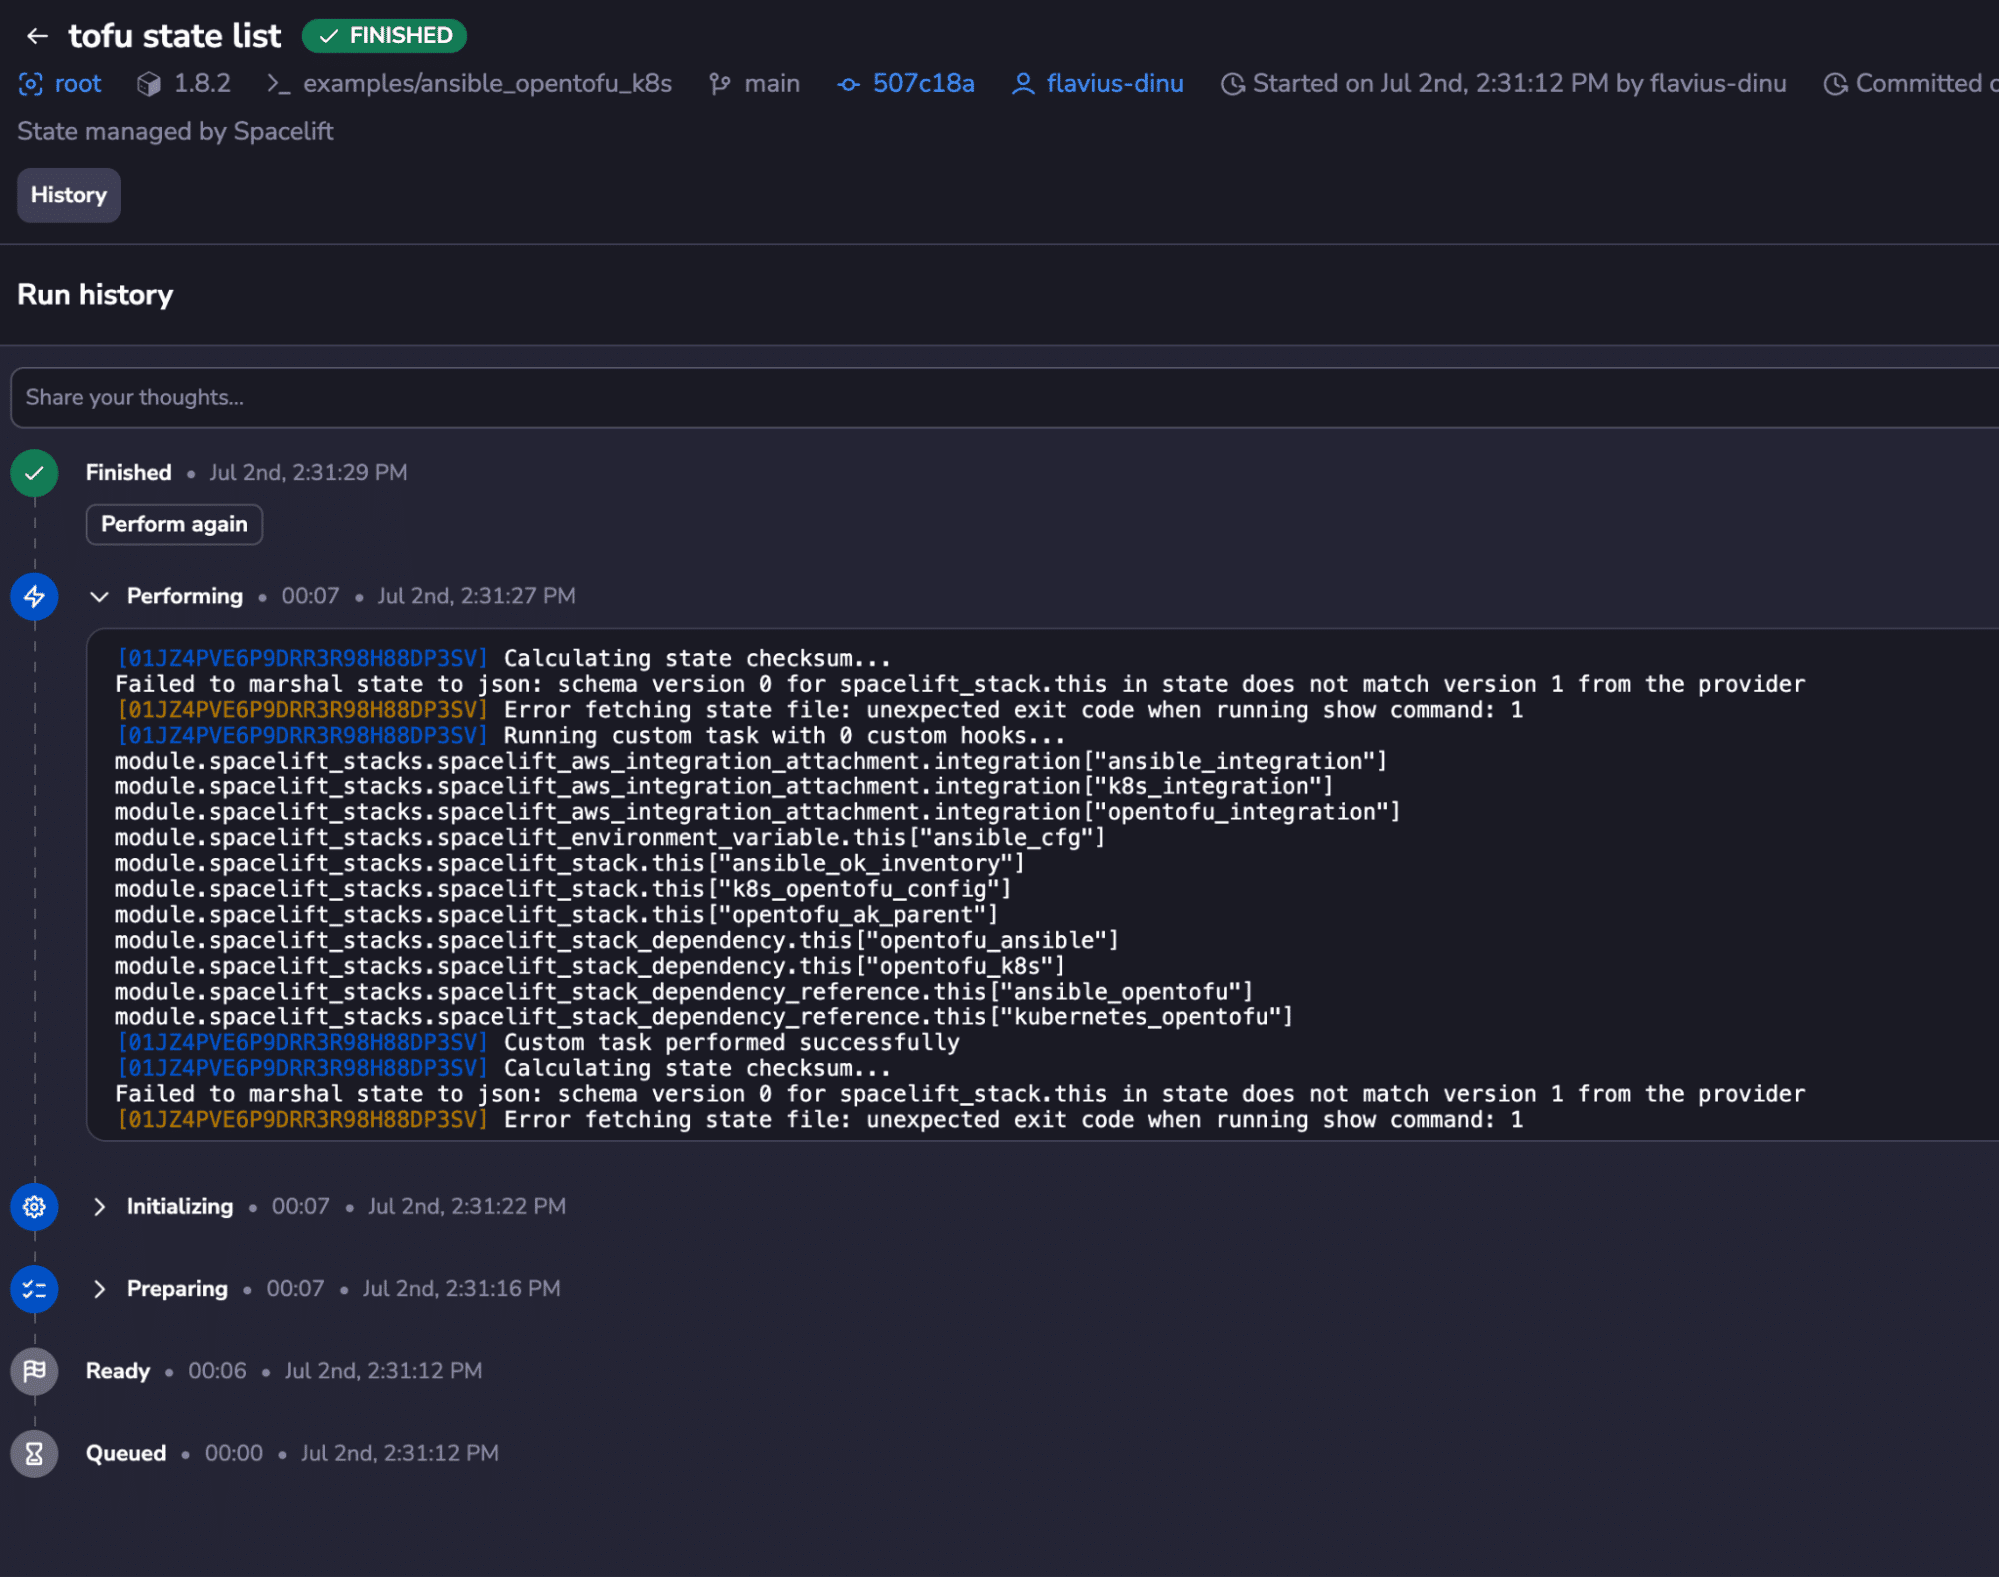
This means you no longer need to worry about it. If you still wish to manipulate the state, you can run a task as shown below.
However, manipulation of the state file is strongly discouraged and should not be done without serious reason. By manipulating the state, you risk your whole infrastructure configuration.
- State lock is also solved by Spacelift. All runs are controlled, and two runs can’t hit the same resource simultaneously.
- Management of background configurations, like state files.
- Orchestration options. Spacelift offers proper orchestration functionality.
- Spaces, where you can easily mirror your cloud environments with a clear split between teams/environments/accounts. Every Space can be subject to different policies and settings.
- Contexts give the overarching variable sets for multiple stacks.
- Resources help you to understand what you deployed and where there may be configuration drift.
- Runtime configurations might be helpful when you want to check the compatibility of a new version of an IaC tool.
- Policies are a key concept in Spacelift. This functionality helps control workflows with a specific set of checkpoints.
- Terraform registry is where you can store, manage, and control your modules and providers for Terraform. With a generic CI/CD tool, you have to introduce another tool into your chain, whereas Spacelift has this service built in.
- Stack dependencies are useful when multiple templates are dependent on other templates. With Spacelift, you can create a clear chain of execution between as many stacks as you wish. It can be helpful to differentiate and connect the creation of the infrastructure on the Preprod account and then on Prod. Or, if you have many layers, you can simply build the dependencies between Preprod Network, Preprod Database, Prod Network, and Prod Database stacks. In this way, your infrastructure stacks are connected with each other, as in real environments.
- You don’t need multistep pipelines or multiple pipelines for different use cases. If you want to utilize the pull request functionality, Spacelift has pull request management built-in. With generic CI/CD tools, you need a separate pipeline for drift detection. With Spacelift, you can detect drift easily without additional pipelines.
- The self-service approach is built into Spacelift. I have already mentioned elements such as the Terraform registry, Spaces, and Policies, but most importantly, Spacelift offers Blueprints. This is the best way to build and share templates with development teams. The Blueprints feature also integrates natively in ServiceNow.
- It is very important to know what infrastructure is deployed. Spacelift allows you to do so with the Resources view and Configuration Management views. Here, you can view everything done within Spacelift. And more importantly, if you implement drift detection, it will be visible there.
Are you looking for the best orchestration of your infrastructure? Book a demo with our engineering team to discuss your options in more detail.
Key points
Managing Terraform deployments with generic CI/CD tools like GitHub Actions, Azure DevOps, and Jenkins often leads to fragmented workflows and operational overhead.
For example:
- GitHub Actions requires separate workflows or conditionals just to handle pull requests versus main branch commits, and lacks native support for state locking or drift detection.
- Azure DevOps splits CI and CD into distinct systems, forcing teams to juggle YAML-defined build pipelines with GUI-managed release stages, making automation harder to scale.
- Jenkins offers flexibility but demands constant upkeep of plugins, infrastructure, and pipeline configuration.
Across all three, managing Terraform state, coordinating environments, and ensuring execution order require custom scripts and workarounds.
Spacelift, by contrast, eliminates this friction by offering a Terraform-native CI/CD platform with built-in state management, stack dependencies, policy enforcement, and a visual resource graph, streamlining infrastructure workflows without sacrificing control or visibility.
Solve your infrastructure challenges
Spacelift is an alternative to using homegrown solutions on top of a generic CI. It helps overcome common state management issues and adds several must-have capabilities for infrastructure management.
