
Pulumi is one of the best infrastructure-as-code (IaC) tools available today, letting you leverage different programming languages for managing your infrastructure. As with every IaC tool, you need to leverage continuous integration/continuous deployment (CI/CD) pipelines to streamline the integration and deployment workflows for your infrastructure.
We will cover:
What is Pulumi?
Pulumi is an open-source IaC tool that allows developers to define and manage cloud infrastructure using programming languages such as JavaScript, TypeScript, Python, Go, and .NET. It enables developers to apply familiar practices such as loops, functions, and classes to define cloud resources, and it supports a wide range of cloud providers, including AWS, Microsoft Azure, Google Cloud, Kubernetes, and others, facilitating the creation, deployment, and management of cloud infrastructure.
What is GitHub Actions?
GitHub Actions is a CI/CD platform that enables developers to automate their workflows directly within GitHub. With GitHub Actions, you can set up workflows to build, test, and deploy your code, based on events within your GitHub repositories, such as pull requests, merges, and even manual interventions.
Apart from defining your custom tasks, GitHub Actions leverages a vast ecosystem of reusable tasks called actions that are built and supported by the community and GitHub itself, allowing for highly customizable pipelines that can integrate with various tools and services.
Why Pulumi and GitHub Actions?
GitHub Actions is a CI/CD service that enables you to automate your build, test, and deployment pipelines within GitHub. In recent years, GitHub Actions has become increasingly popular, and many custom-made actions can be easily leveraged for several use cases. Combining it with Pulumi can significantly enhance your cloud infrastructure management, making it more automated, reproducible, and error-free.
Download the Build vs. Buy Guide to Scaling Infrastructure as Code

Key benefits of using Pulumi with GitHub Actions
Using Pulumi with GitHub Actions provides the following benefits:
- Automated Infrastructure Deployment – Automate your cloud infrastructure deployments directly from your CI/CD pipeline, reducing manual effort and the potential for error.
- Version Controlled Infrastructure – Manage your IaC, allowing you to track changes, review history, and easily revert when necessary.
- Enhanced Collaboration – Increase the collaboration inside the team by easily reviewing infrastructure changes in pull requests.
- Streamlined Workflow – Keep your infrastructure and application code in sync, ensuring that your deployments are consistent and reliable.
Check out also: How to manage Terraform with GitHub Actions
Here are some limitations when leveraging the integration:
- Complex workflow configuration – Setting up a workflow for Pulumi in GitHub Actions can be complex, and you will need to have a good understanding of both tools to build it properly.
- Concurrency and state management – Pulumi relies on state files to manage and track the state of cloud resources. When using Pulumi with GitHub Actions in a team environment, concurrent executions might lead to conflicts or race conditions if not carefully managed, especially in scenarios where multiple team members trigger deployments simultaneously.
- Hard to share secrets, files, and configurations between multiple workflows – This can be challenging and requires careful handling to avoid exposing sensitive data.
- Hard to share outputs between multiple workflows – It’s very hard to share outputs from multiple repositories defined for your Pulumi workflows.
After demonstrating how to configure Pulumi with GitHub Actions, we will present an alternative that addresses all these limitations – Spacelift. With Spacelift, you won’t need to define the workflow configuration for running Pulumi; the issue related to race conditions won’t exist due to stack locking; sharing secrets, files, and configurations will be solved with contexts; and sharing outputs between workflows will be solved easily with stack dependencies.
Setting up Pulumi with GitHub Actions
To set up Pulumi with GitHub Actions, we will need to take the following steps:
- Create a GitHub repository and clone it.
- Prepare the Pulumi code.
- Prepare the GitHub actions workflows.
- Configure the GitHub environment for manual approvals.
- Configure the GitHub secrets.
- Push the configuration to GitHub.
- Run the pipelines.
1. Create a GitHub repository and clone it
Go to your GitHub account and create a repository:
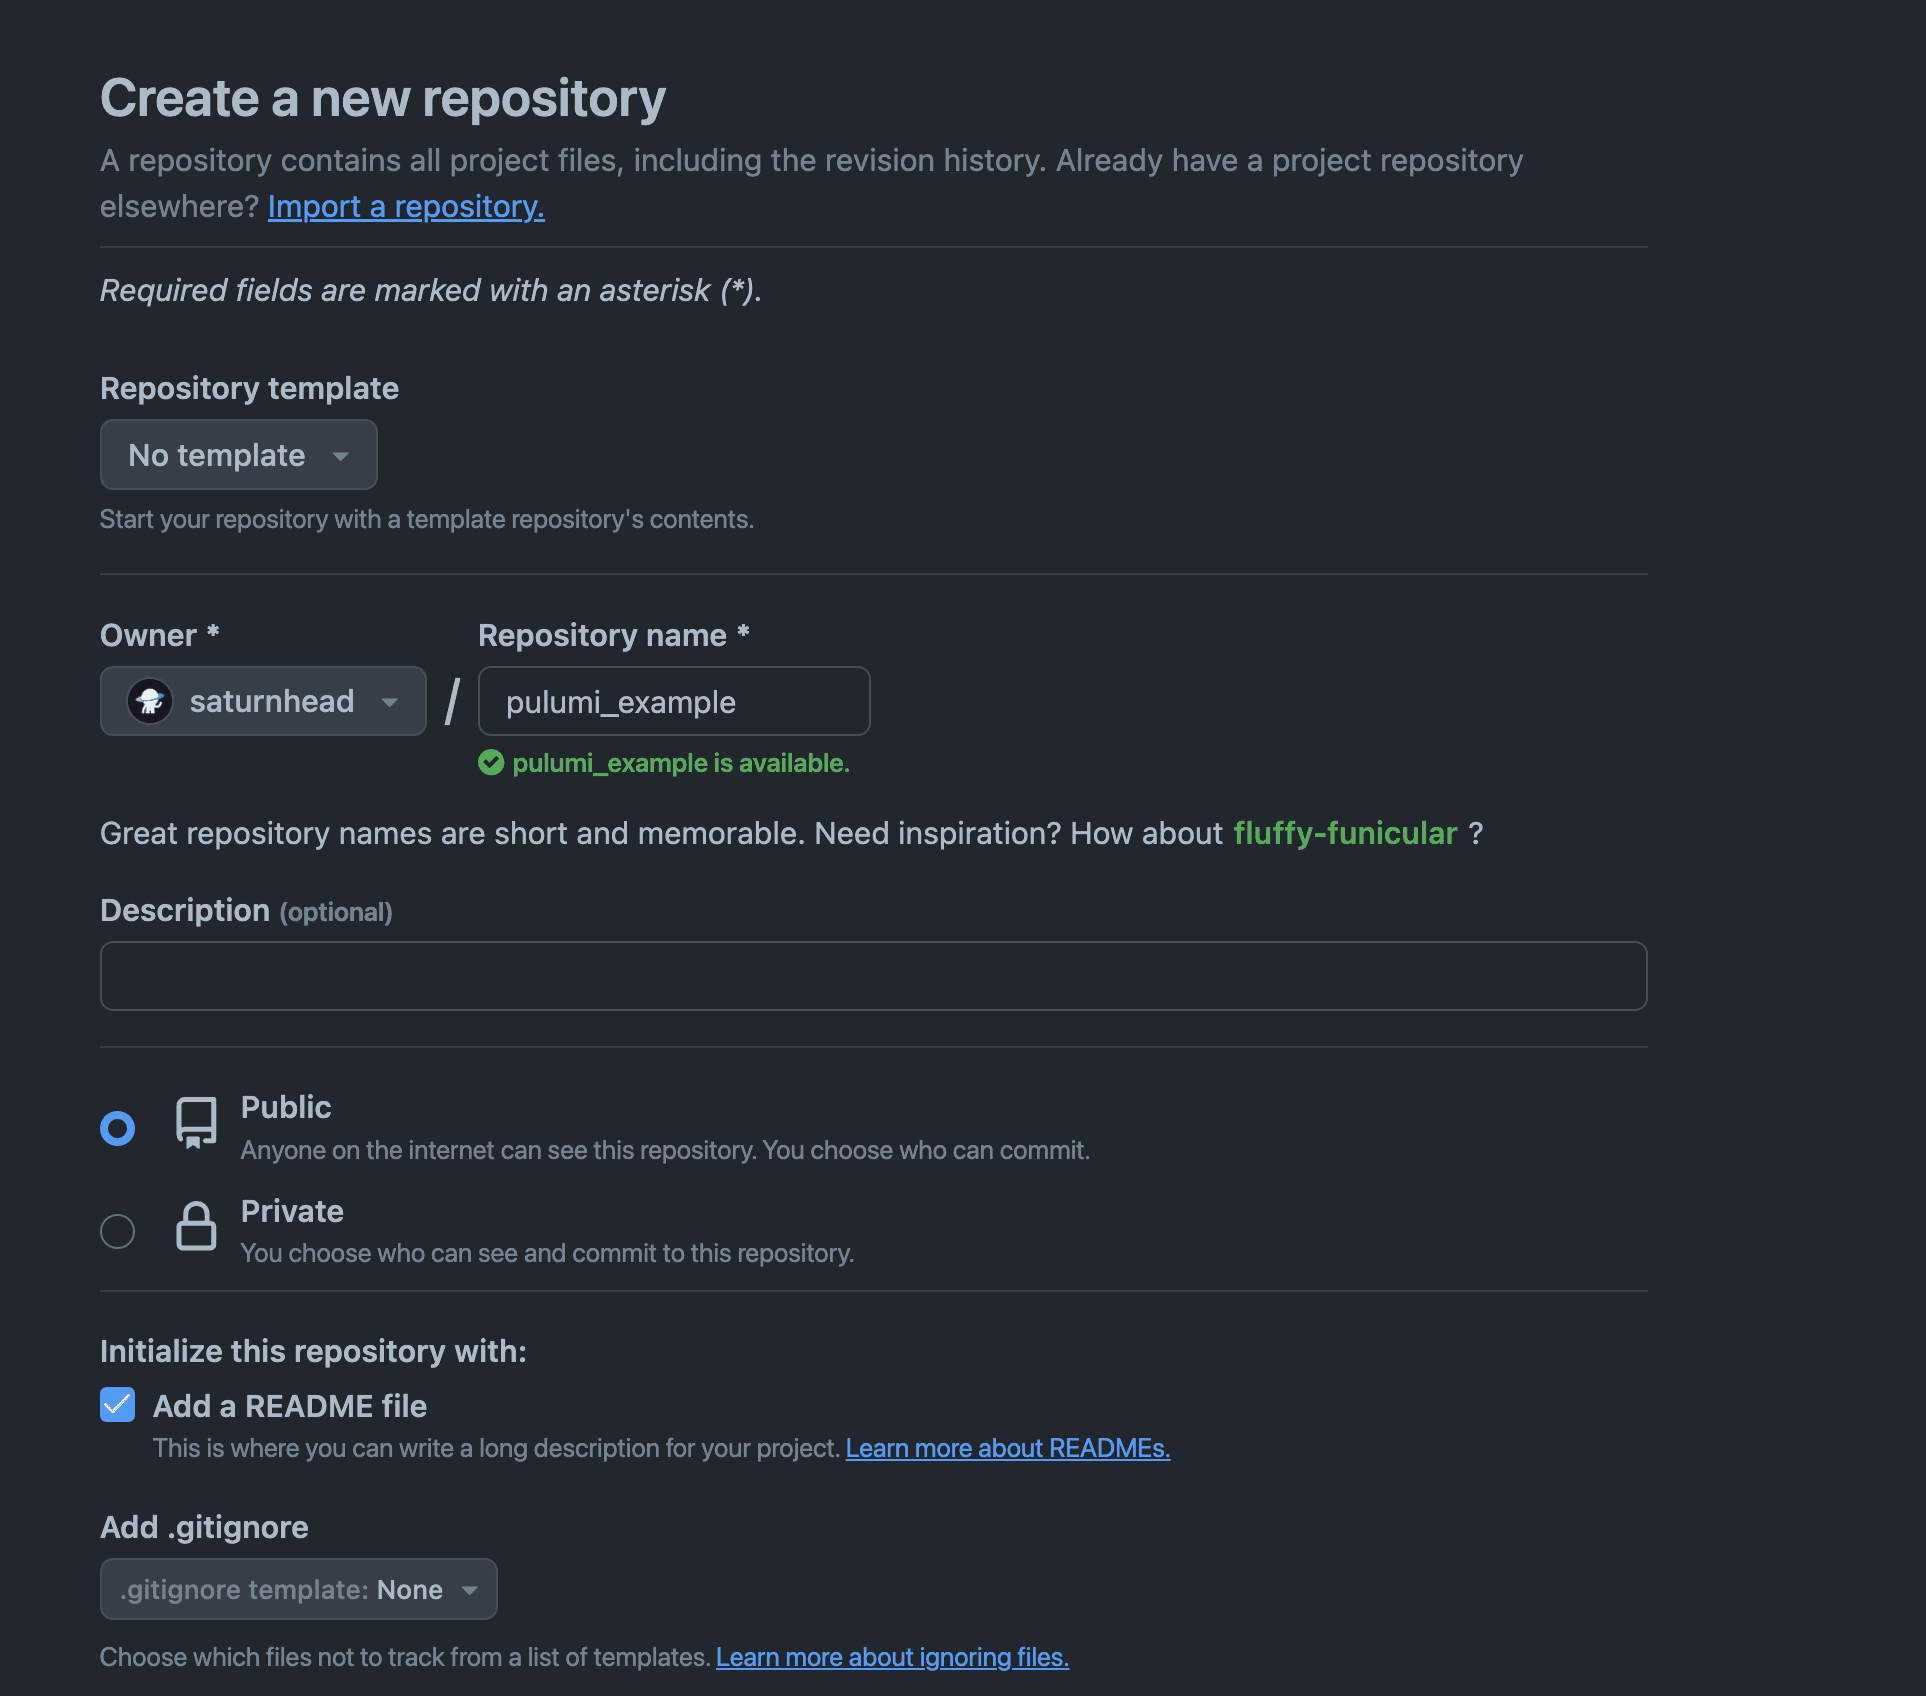
In the owner tab, you can select your account, or your organization – in my case, I’ve selected an organization, left the repository as public, and I’ve added a README.md file.
After you have selected everything, click on Create Repository.
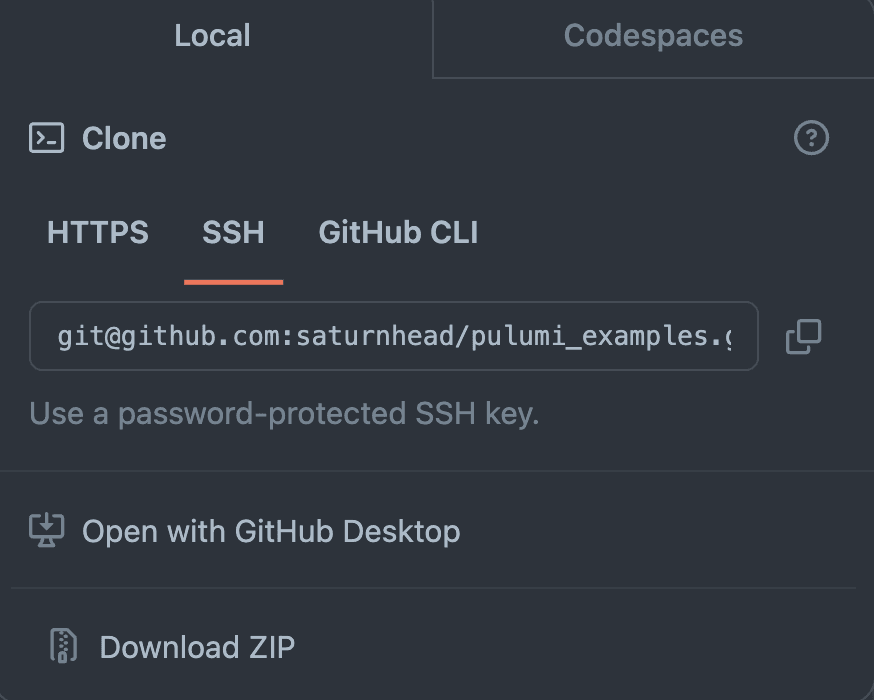
To clone the repository, you simply need to run:
git clone <repo_link>You can get the repo_link by clicking on the code tab inside your newly created repository:
2. Prepare the Pulumi code
I will create an AWS Pulumi project using Python, which will create an EC2 instance and a security group, and will attach the security group to the EC2 instance.
To generate the boilerplate files for your Pulumi configuration, run the following command inside your repository:
pulumi new aws-python

# Output
This command will walk you through creating a new Pulumi project.

Enter a value or leave blank to accept the (default), and press <ENTER>.
Press ^C at any time to quit.

project name (project): ec2_aws
project description (A minimal AWS Python Pulumi program):
Created project 'ec2_aws'

stack name (dev):
Created stack 'dev'
Enter your passphrase to protect config/secrets:
Re-enter your passphrase to confirm:

aws:region: The AWS region to deploy into (us-east-1): eu-west-1
Saved config
This will generate the following files:
ls
# Output
Pulumi.dev.yaml  Pulumi.yaml      __main__.py      requirements.txt venv
We will make changes only in the __main__.py file for now. When this file is generated, by default it will have a configuration that creates an S3 bucket and exports the bucket name and the bucket id:
"""An AWS Python Pulumi program"""

import pulumi
from pulumi_aws import s3

# Create an AWS resource (S3 Bucket)
bucket = s3.Bucket('my-bucket')

# Export the name of the bucket
pulumi.export('bucket_name', bucket.id)
As mentioned before, we want to create an EC2 instance, a security group, and an attachment. We will need to modify the code, remove the import to S3, and import the class that takes care of EC2 resources:
import pulumi
from pulumi_aws import ec2
Now that we’ve handled the imports, let’s create a security group:
# Create a new security group
security_group = ec2.SecurityGroup('my-security-group',
   description='Enable SSH access',
   ingress=[
       {'protocol': 'tcp', 'from_port': 22, 'to_port': 22, 'cidr_blocks': ['0.0.0.0/0']},
   ])
If you are accustomed to OpenTofu or Terraform, you will see the syntax doesn’t feel that much different, although we are using a programming language here.
Next, let’s create an EC2 instance with this security group attached to it:
# Create a new EC2 instance
instance = ec2.Instance('my-instance',
    instance_type='t2.micro',
    ami='ami-0905a3c97561e0b69',
    security_groups=[security_group.name])
As you can see, the resources are linked in a pretty straightforward way. You just have to specify the other object you have created and select one of its attributes.
Now, let’s export the instance ID and its public IP:
pulumi.export('instance_id', instance.id)
pulumi.export('public_ip', instance.public_ip)
The configuration is now ready, and we can go on to the next step.
3. Prepare the GitHub Actions workflows
First, we need to create a .github/workflows directory. In this folder, we will add our workflows.
For this example, we will prepare two GitHub actions workflows:
- Workflow 1: plan + manual intervention for apply
- Workflow 2: manually run destroy
Workflow 1: plan + manual intervention for apply
In the first part, we will add a name to the workflow, specify when to run it, and declare a couple of environment variables that we will need for authenticating to AWS:
# pulumi_deploy.yaml

name: Deploy EC2 Instance
on: [push]
env:
    AWS_ACCESS_KEY_ID: ${{ secrets.AWS_ACCESS_KEY_ID }}
    AWS_SECRET_ACCESS_KEY: ${{ secrets.AWS_SECRET_ACCESS_KEY }}
    AWS_SESSION_TOKEN: ${{ secrets.AWS_SESSION_TOKEN }}
    AWS_REGION: ${{ secrets.AWS_REGION }}
    PULUMI_STACK: aws_ec2
    AWS_KMS_KEY_ID: ${{ secrets.AWS_KMS_KEY_ID }}
You don’t necessarily require a session token, but I always try to use short-lived credentials, even if this requires extra work.
Next, we will define the job that takes care of the plan:
jobs:
  setup-and-preview:
    runs-on: ubuntu-latest
    defaults:
      run:
        working-directory: ./aws_ec2

    steps:
    - uses: actions/checkout@v2

    - name: Set up Python
      uses: actions/setup-python@v2
      with:
        python-version: '3.x'

    - name: Install dependencies
      run: |
        pip install pulumi pulumi_aws

    - name: Login to S3 for state management
      run: |
        pulumi login s3://pulumi-state-saturnhead

    - name: Create Pulumi Stack
      run: pulumi stack init ${PULUMI_STACK} --secrets-provider="awskms://${{ env.AWS_KMS_KEY_ID }}"
      continue-on-error: true

    - name: Select Pulumi Stack
      run: pulumi stack select ${PULUMI_STACK} --secrets-provider="awskms://${{ env.AWS_KMS_KEY_ID }}"

    - name: Run a plan
      run: |
        pulumi stack change-secrets-provider "awskms://${{ env.AWS_KMS_KEY_ID }}"
        pulumi preview
Let’s break down the above configuration:
- First, we define what will be our runner and what is the working directory we will use.
- Then we check out the code.
- After that, we install Pulumi and the Pulumi AWS provider.
- We want to leverage S3 for state management, so then we log in to the bucket (this bucket should exist in your AWS account).
- In the next step, we create the Pulumi stack if it doesn’t exist – this step can fail if the stack exists.
- Next, we select the Pulumi stack if it exists.
- Finally, we ensure that we are using AWS KMS secret provider (this KMS key has to exist) and run a Pulumi preview, which is pretty similar to a tofu/terraform plan.
Now let’s take a look at the apply job:
deploy:
    needs: setup-and-preview
    runs-on: ubuntu-latest
    defaults:
      run:
        working-directory: ./aws_ec2
    environment: production
    steps:
    - uses: actions/checkout@v2

    - name: Set up Python
      uses: actions/setup-python@v2
      with:
        python-version: '3.x'

    - name: Install dependencies
      run: |
        pip install pulumi pulumi_aws


    - name: Login to S3 for state management
      run: |
        pulumi login s3://pulumi-state-saturnhead

    - name: Select Pulumi Stack
      run: pulumi stack select ${PULUMI_STACK} --secrets-provider="awskms://${{ env.AWS_KMS_KEY_ID }}"

    - name: Deploy
      run: |
        pulumi stack change-secrets-provider "awskms://${{ env.AWS_KMS_KEY_ID }}"
        pulumi up --yes
As you can see, most of the steps are the same — installing Pulumi and Pulumi AWS, stack selection, login to the S3 bucket, and changing the secrets provider to AWS.
Here are three very important differences:
- A “needs” option ensures this job runs only if the previous job has finished successfully.
- In addition, we leverage the “environment” option for adding manual approval, only after we are happy with the plan – I’ve added the name production, but you can use any name you want.
- Finally, we’ve changed the Pulumi command to pulumi up, which is similar to a tofu/terraform apply.
This workflow is now complete, so we can take a look at the second one.
Workflow 2: manually run destroy
Whenever you are doing IaC, you need to have a method for creating your infrastructure, as well as a method for destroying your infrastructure.
# pulumi_destroy.yaml

name: Destroy EC2 Instance
on: workflow_dispatch
env:
    AWS_ACCESS_KEY_ID: ${{ secrets.AWS_ACCESS_KEY_ID }}
    AWS_SECRET_ACCESS_KEY: ${{ secrets.AWS_SECRET_ACCESS_KEY }}
    AWS_SESSION_TOKEN: ${{ secrets.AWS_SESSION_TOKEN }}
    AWS_REGION: ${{ secrets.AWS_REGION }}
    PULUMI_STACK: aws_ec2
    AWS_KMS_KEY_ID: ${{ secrets.AWS_KMS_KEY_ID }}

jobs:
  destroy:
    runs-on: ubuntu-latest
    defaults:
      run:
        working-directory: ./aws_ec2
    steps:
    - uses: actions/checkout@v2

    - name: Set up Python
      uses: actions/setup-python@v2
      with:
        python-version: '3.x'

    - name: Install dependencies
      run: |
        pip install pulumi pulumi_aws

    - name: Login to S3 for state management
      run: |
        pulumi login s3://pulumi-state-saturnhead

    - name: Select Pulumi Stack
      run: pulumi stack select ${PULUMI_STACK} --secrets-provider="awskms://${{ env.AWS_KMS_KEY_ID }}"

    - name: Destroy
      run: |
        pulumi stack change-secrets-provider "awskms://${{ env.AWS_KMS_KEY_ID }}"
        pulumi down --yes
The above workflow is pretty similar to the ones that do plan and apply, but there are two notable differences:
- This workflow will always run manually.
- The command, in the end, is a pulumi down, which is pretty similar to tofu/terraform destroy.
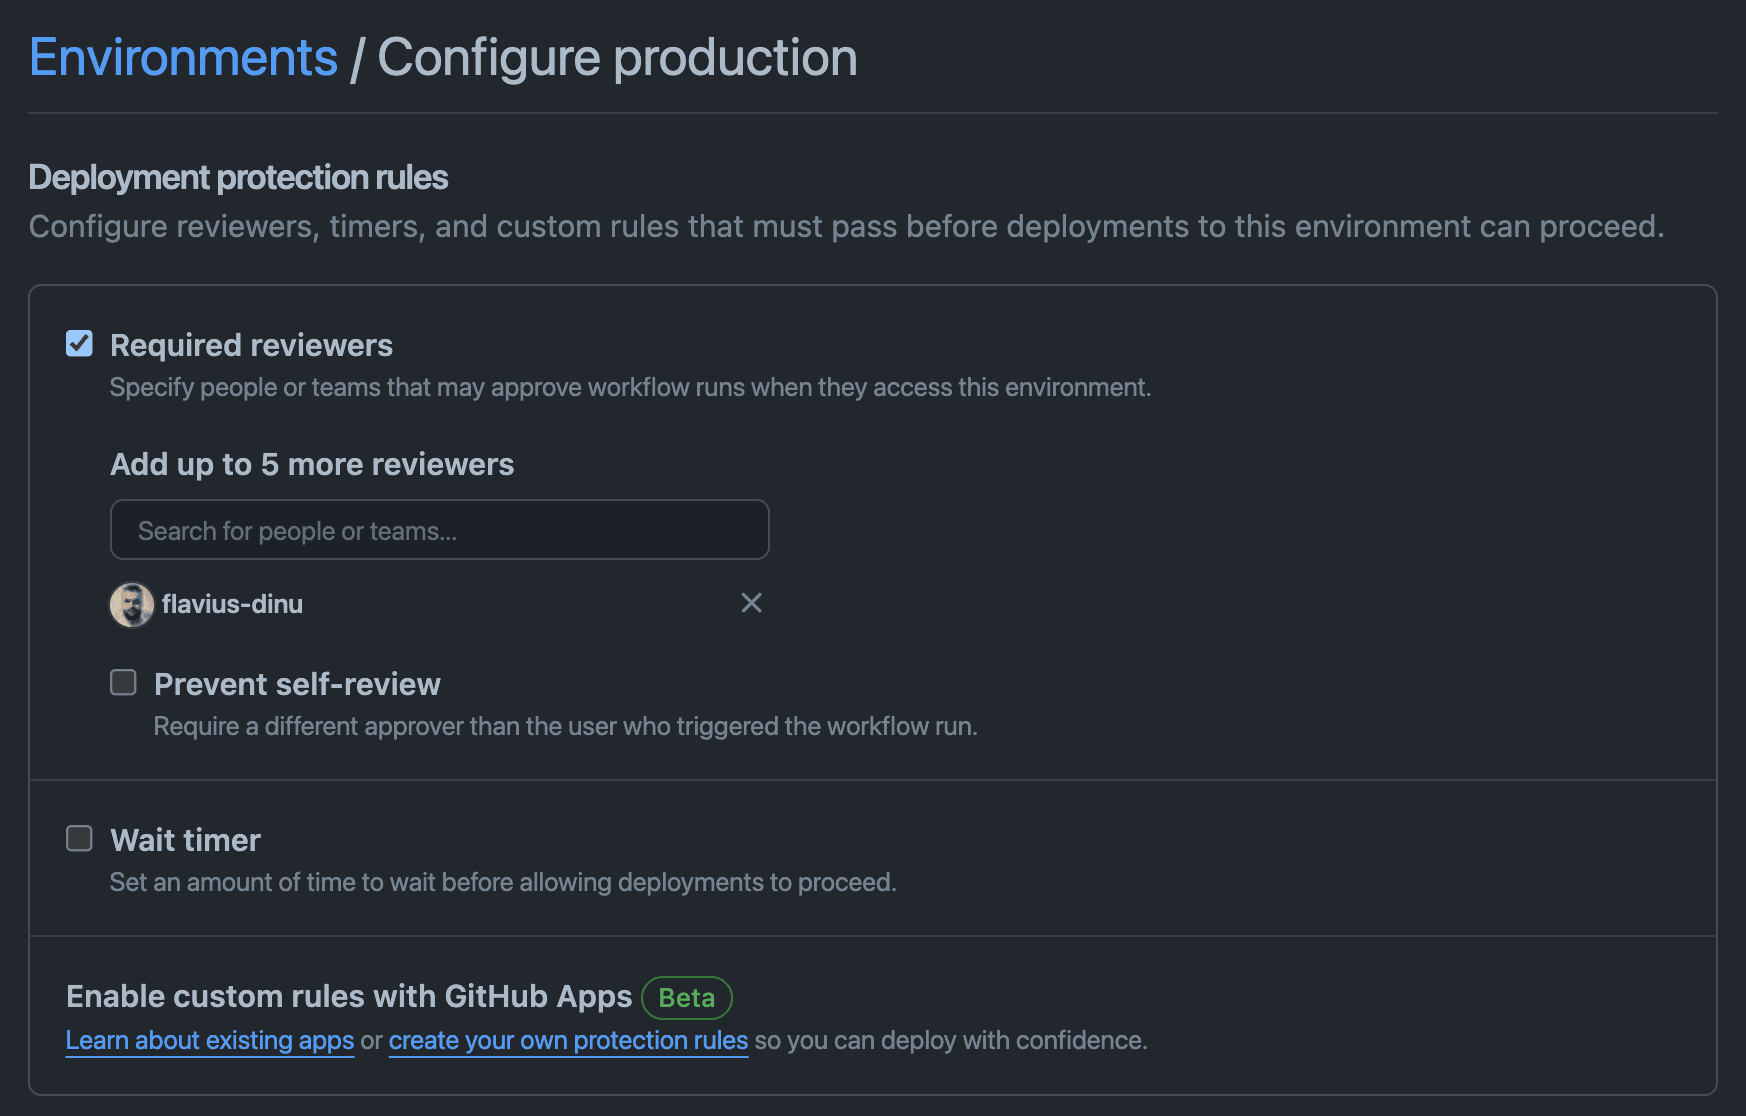
4. Configure the GitHub environment for manual approvals
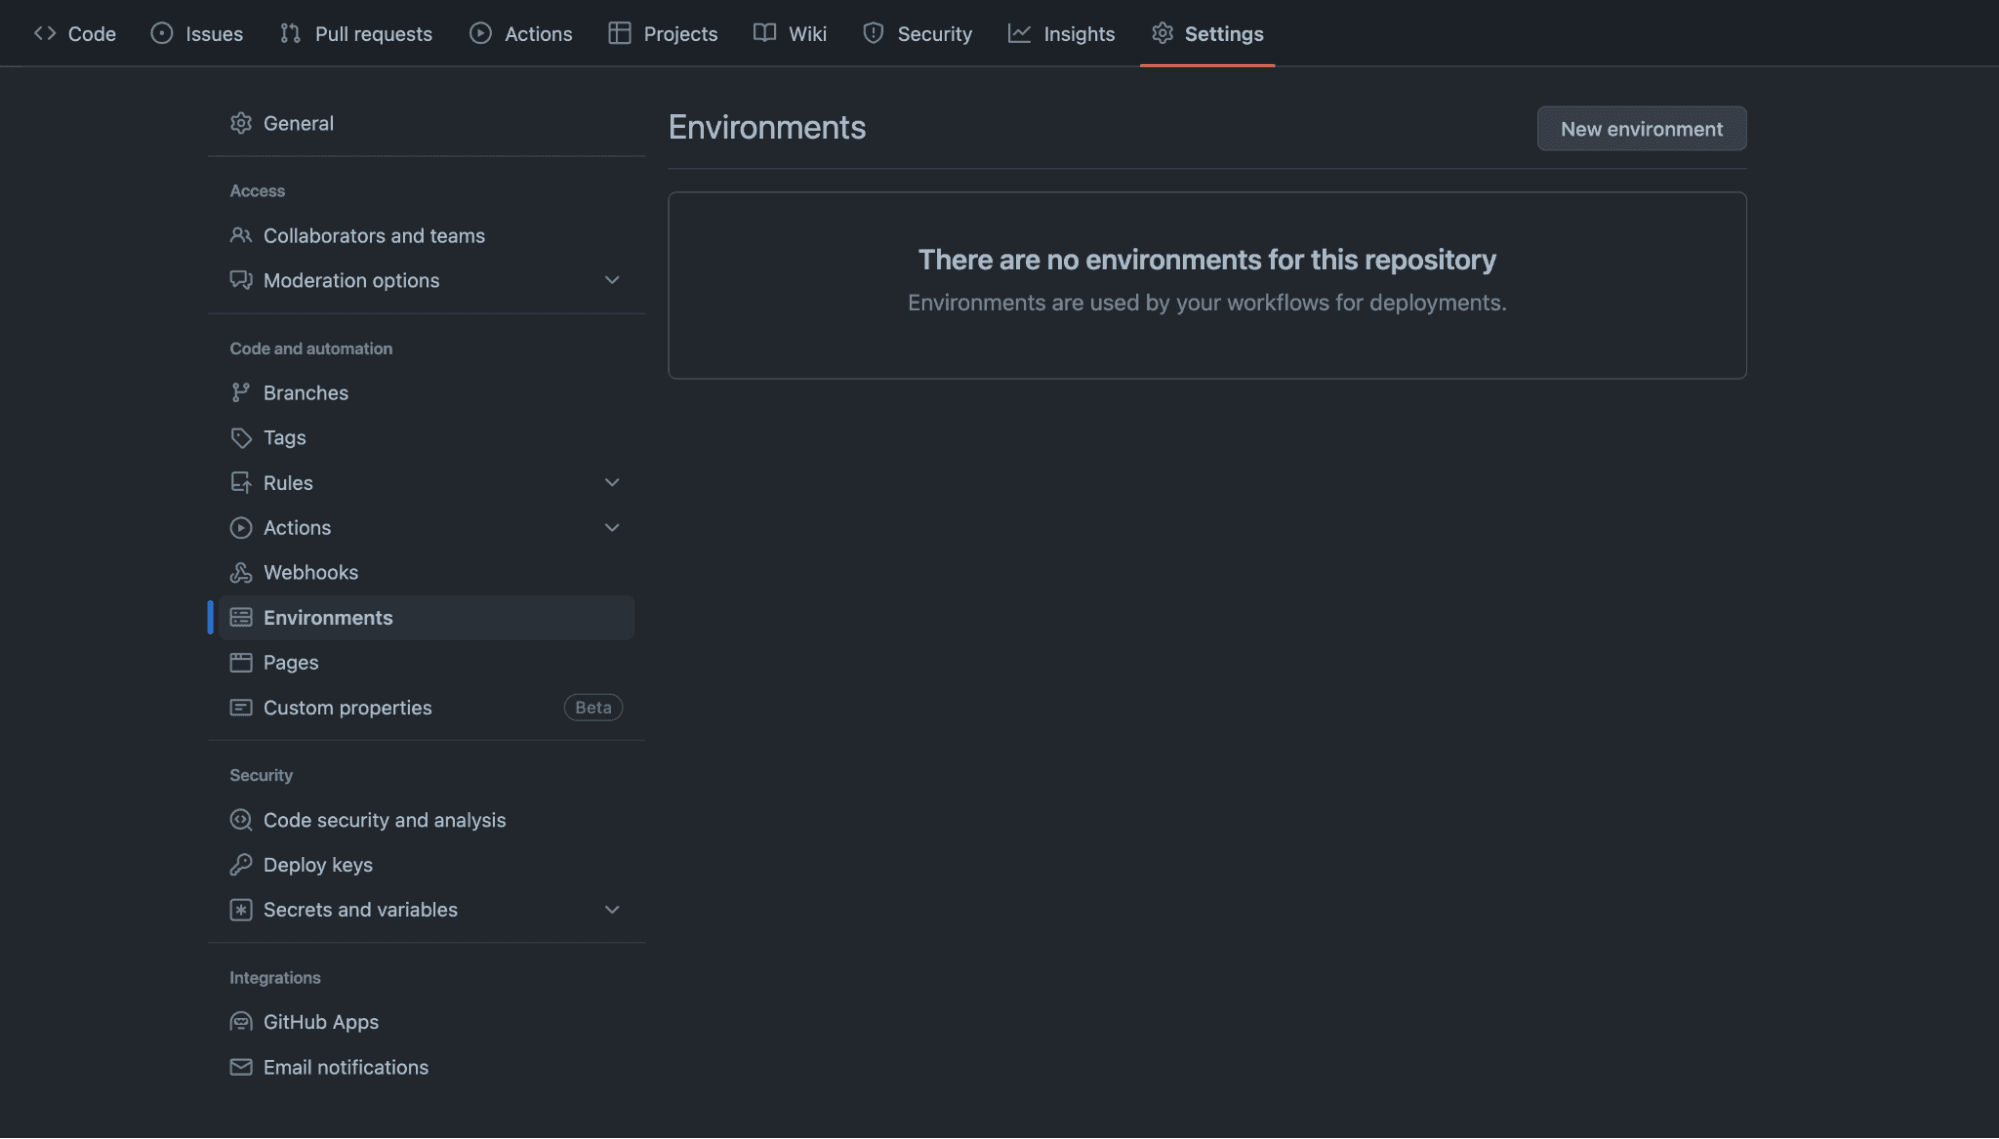
On your repository, go to Settings → Environments and select New environment.
Add a name for your environment; it should be the same one you used in the GitHub Actions workflow. In my case, this will be production.
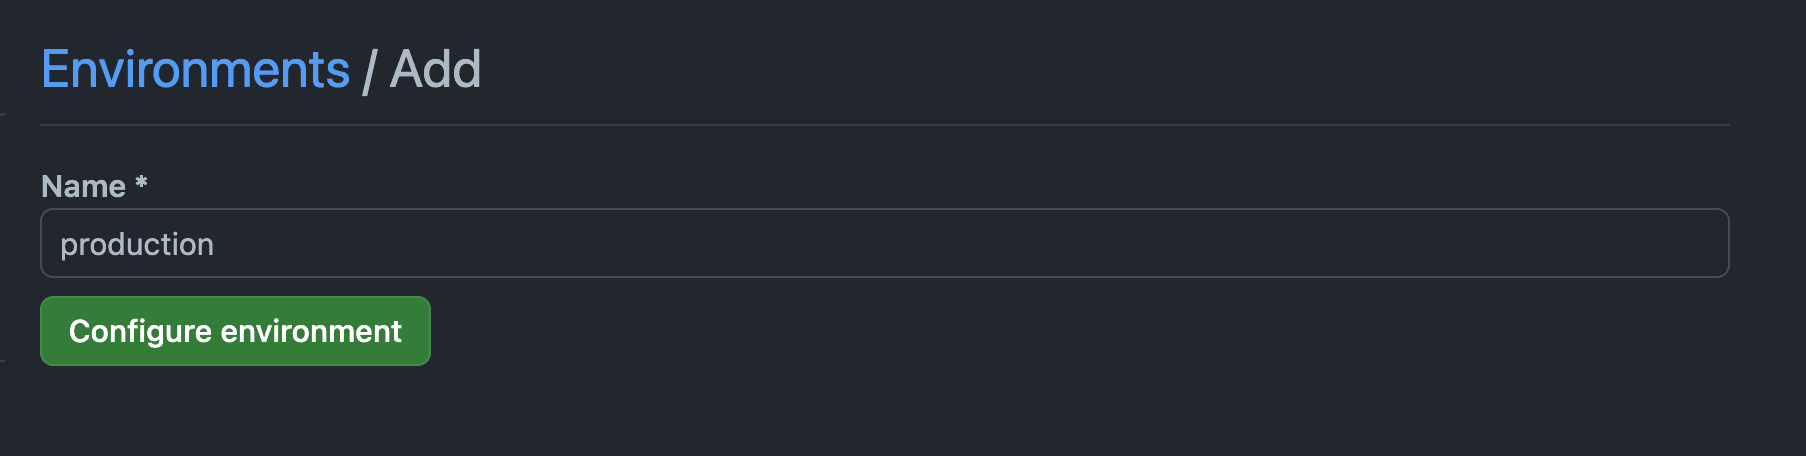
Next, click on Required reviewers, and add the person(s) that you want to be able to deploy your Pulumi code.
5. Configure the GitHub secrets
We now need to define the GitHub Actions secrets. For that, we need to go to Settings → Secrets and Variables and select Actions. Then, to add a secret you need to select the New Repository secret option and provide the values specific to your account.

6. Push the configurations to GitHub
As for any git provider, you need to add/commit/push your changes for them to be available:
git add .
git commit -m ‘Initial version of the Pulumi workflow’
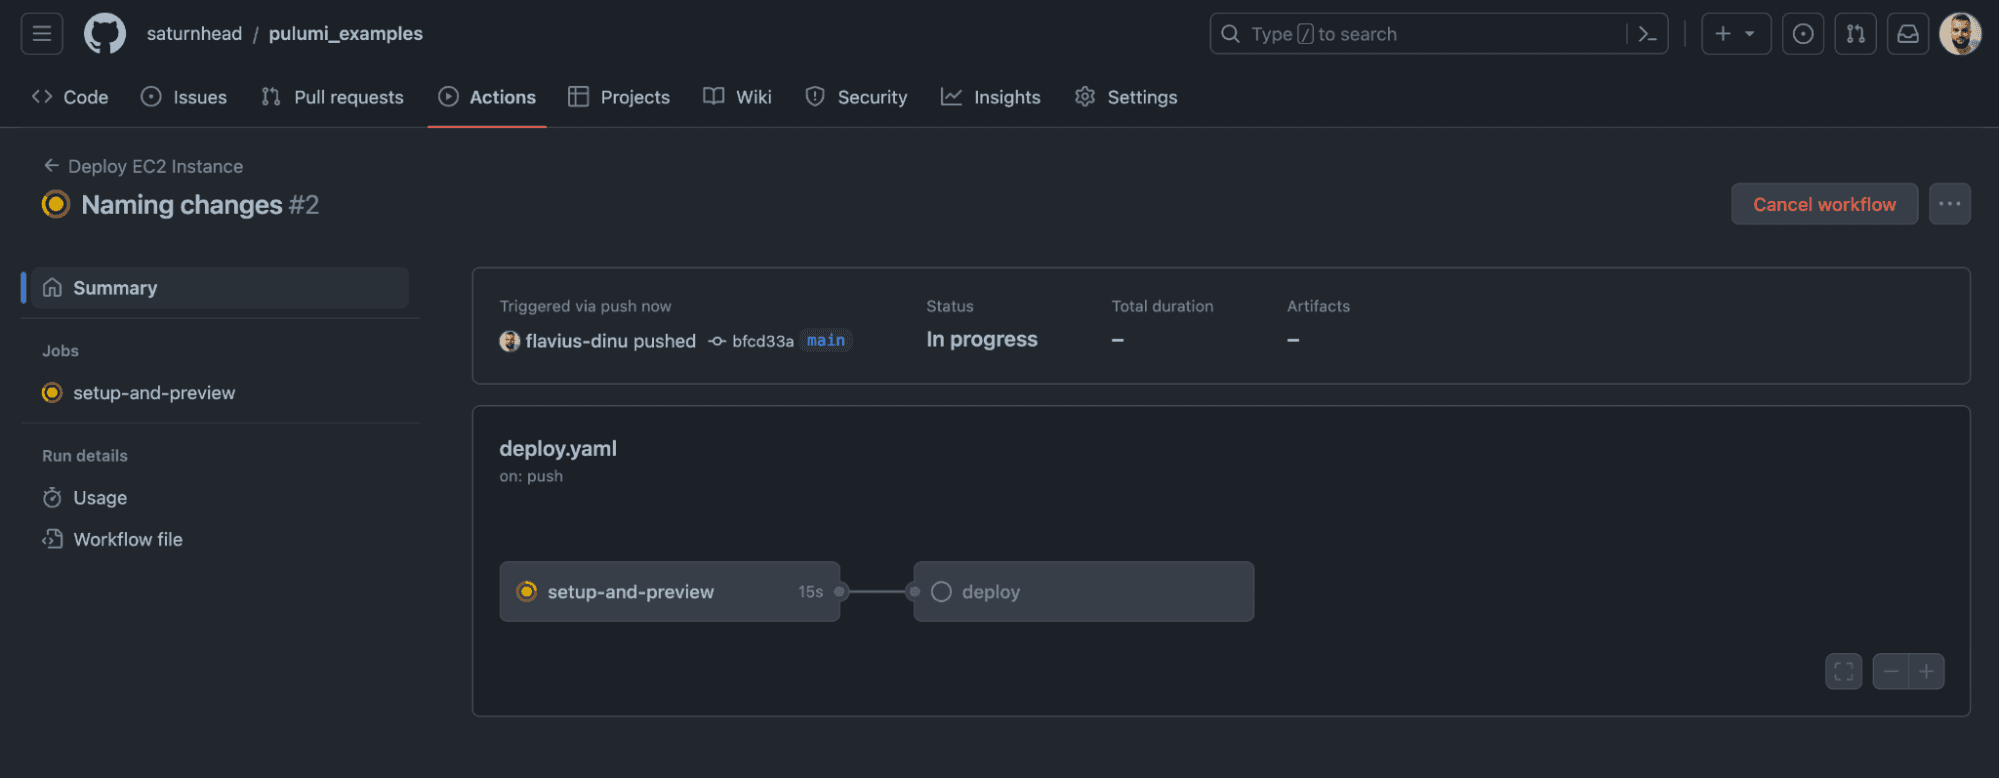
git push7. Run the pipelines
As we did the push, and the first workflow has an “on: push” option on it, the pipeline will be triggered automatically:
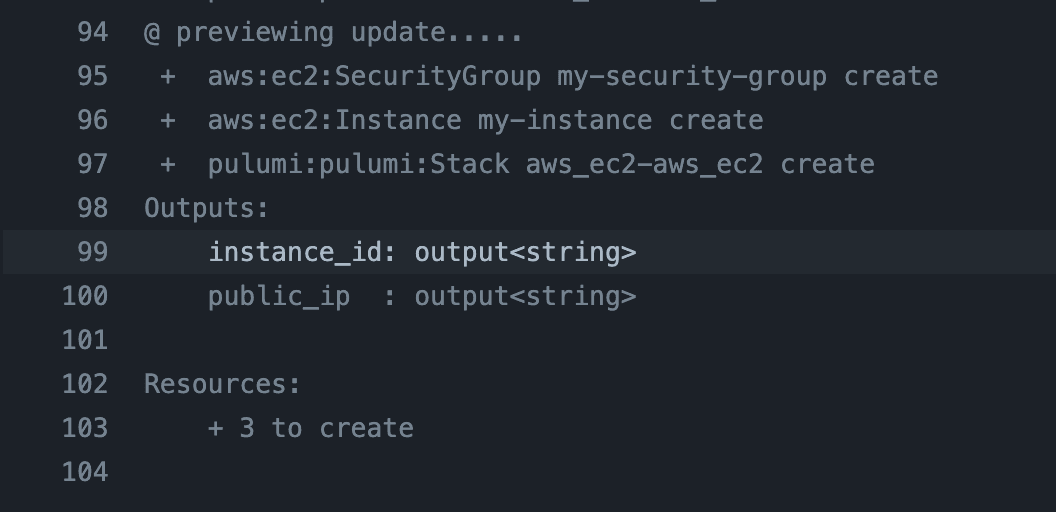
This is the plan output:
Now, we have reached the deploy job, but this cannot continue until we approve it:
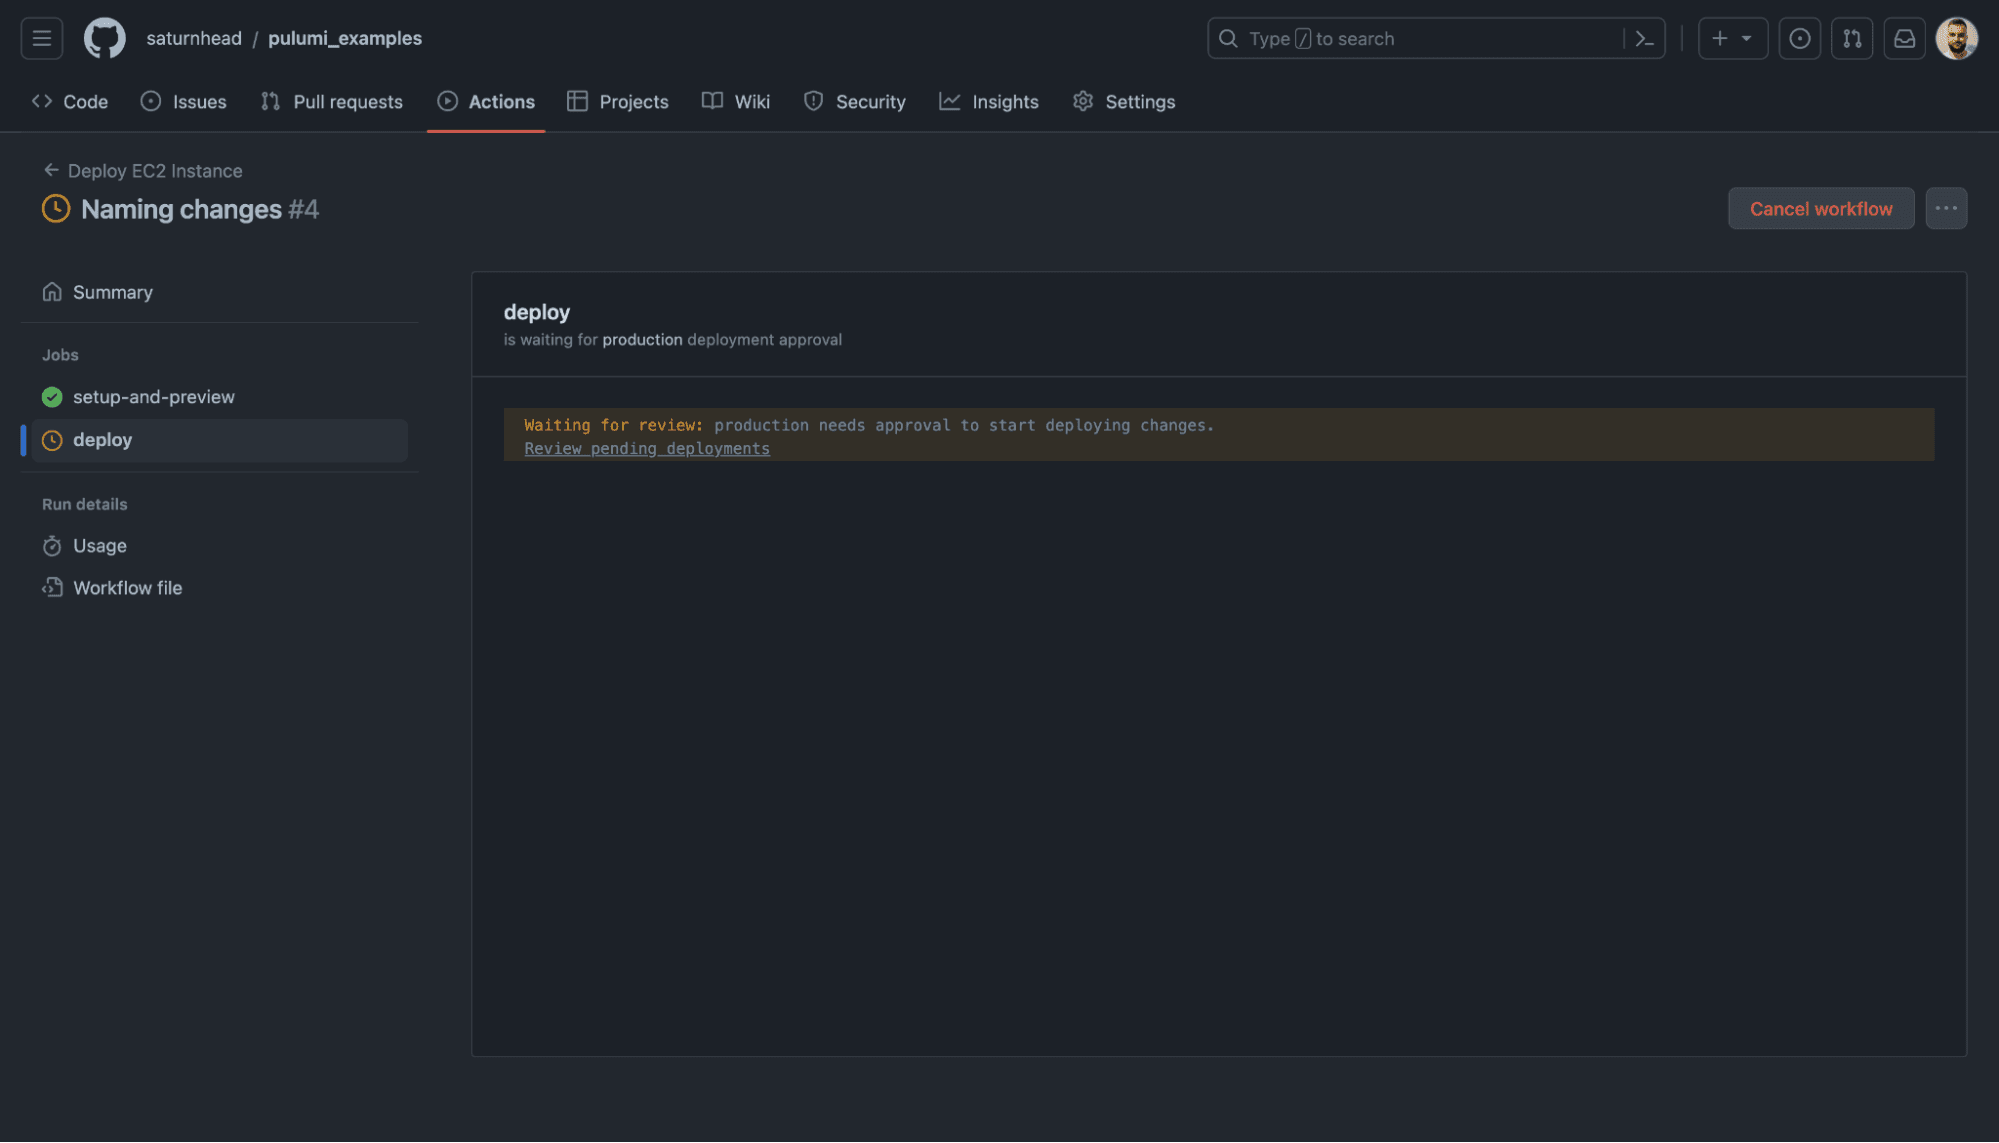
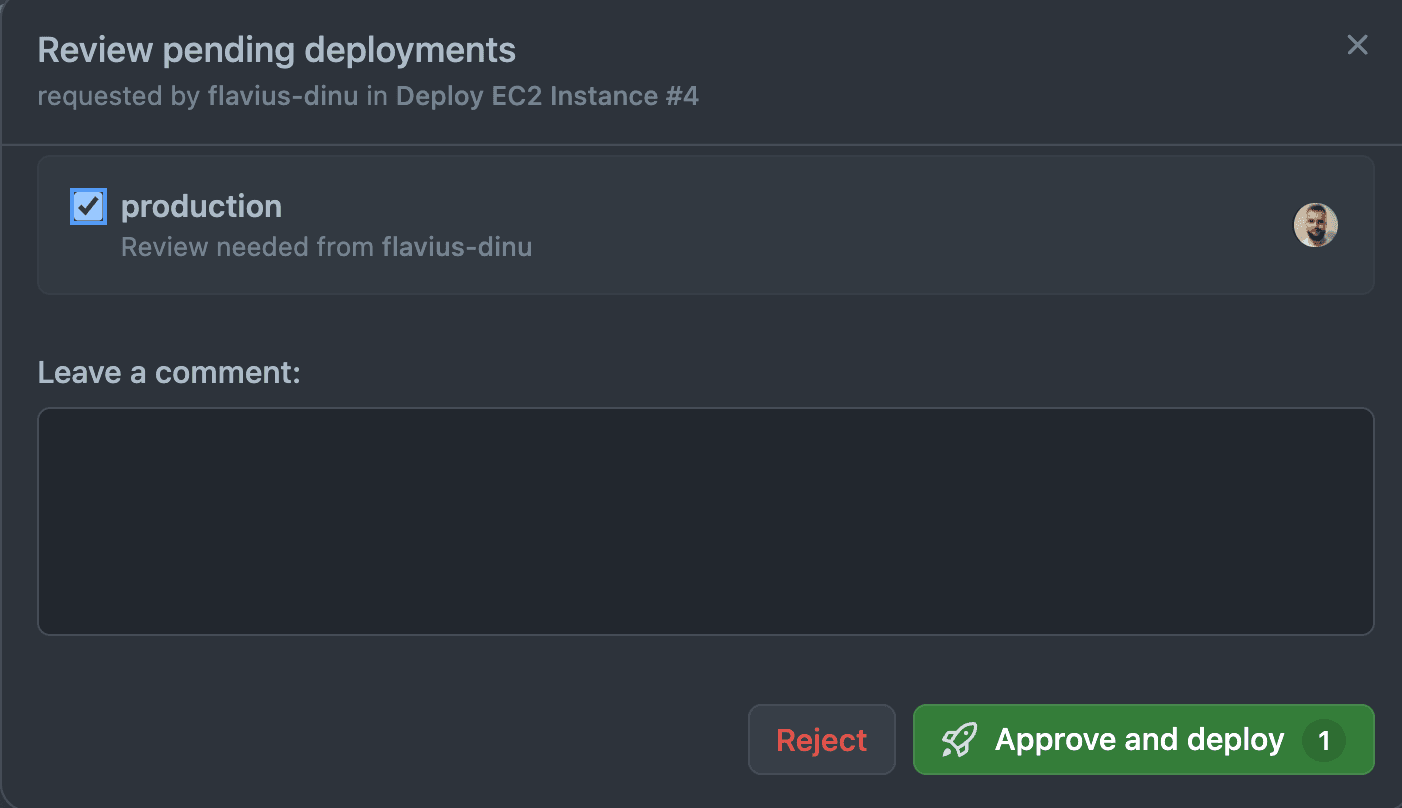
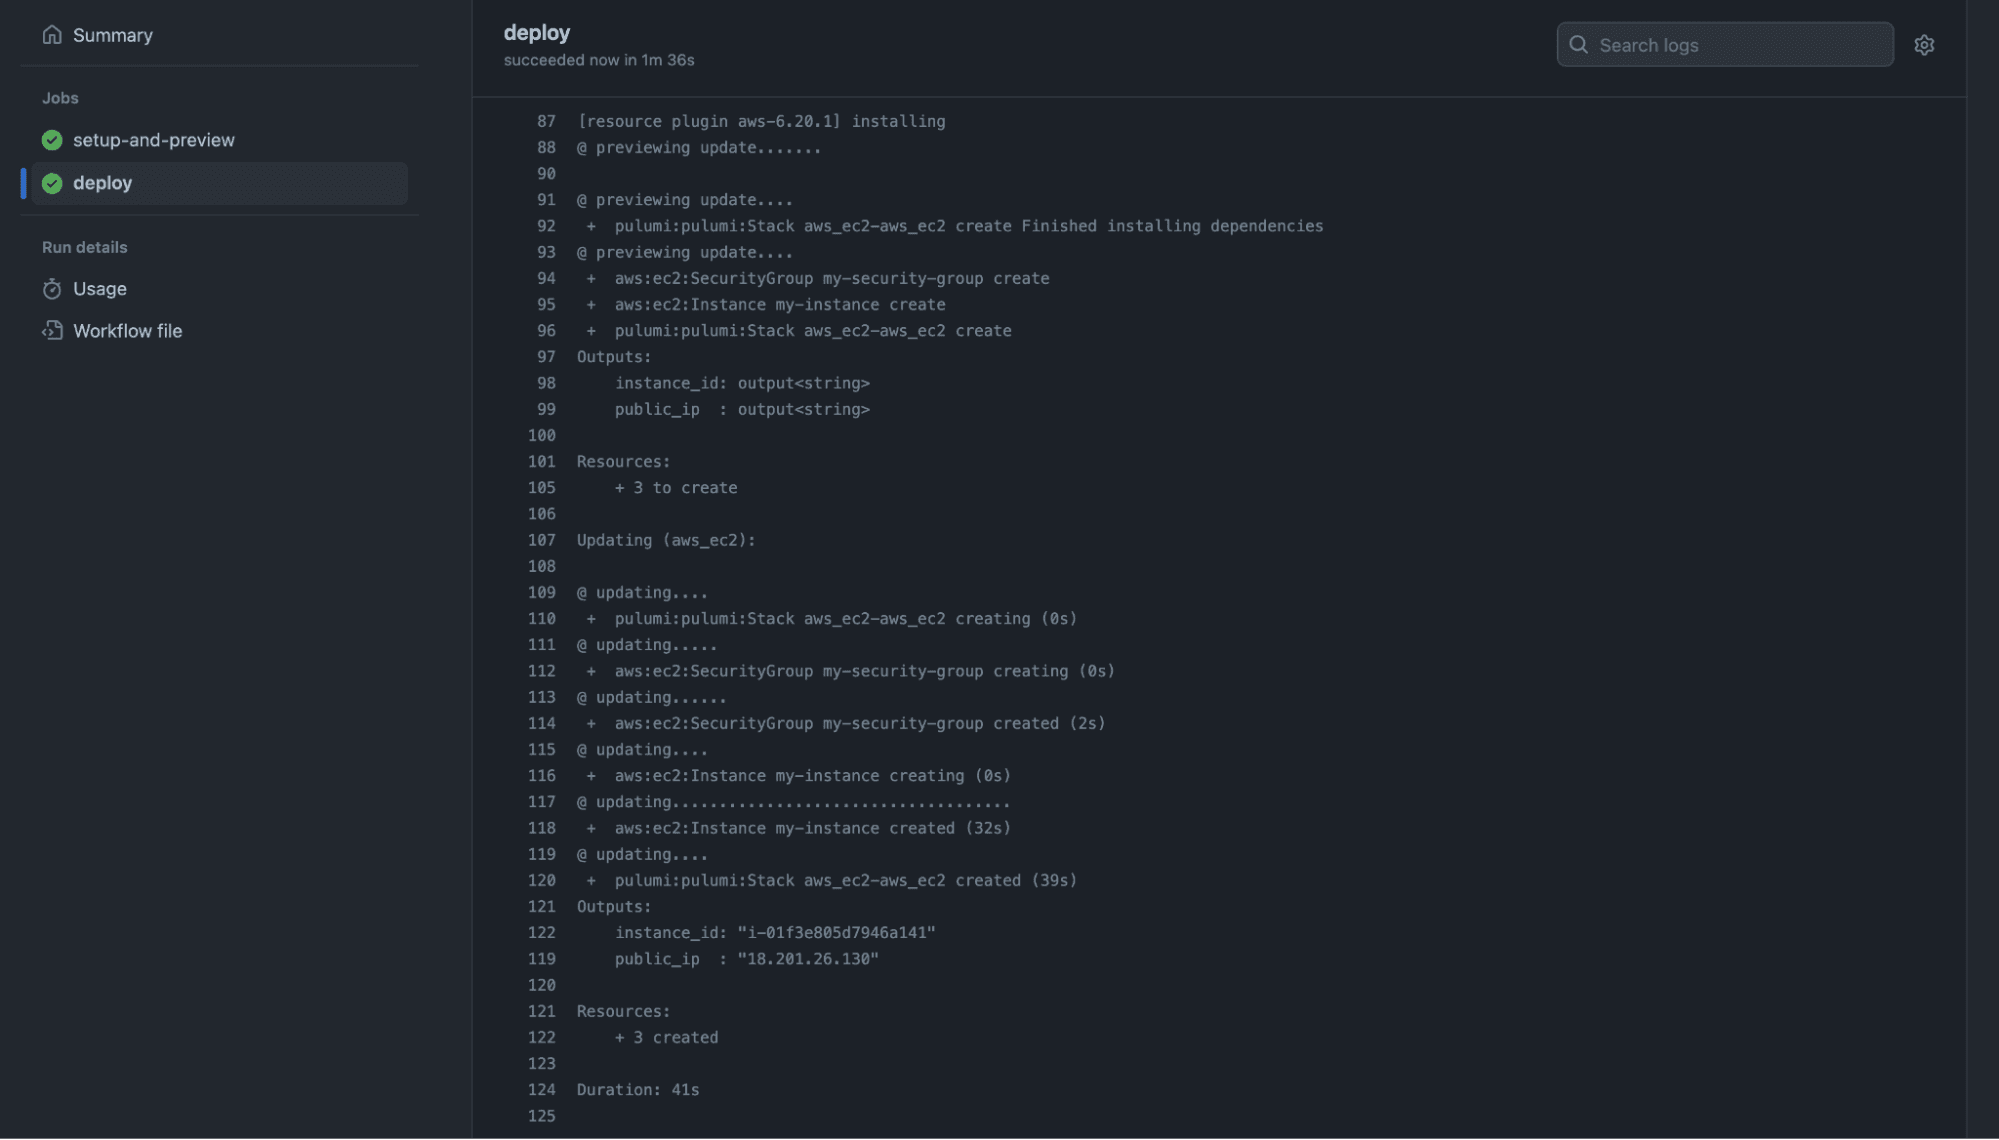
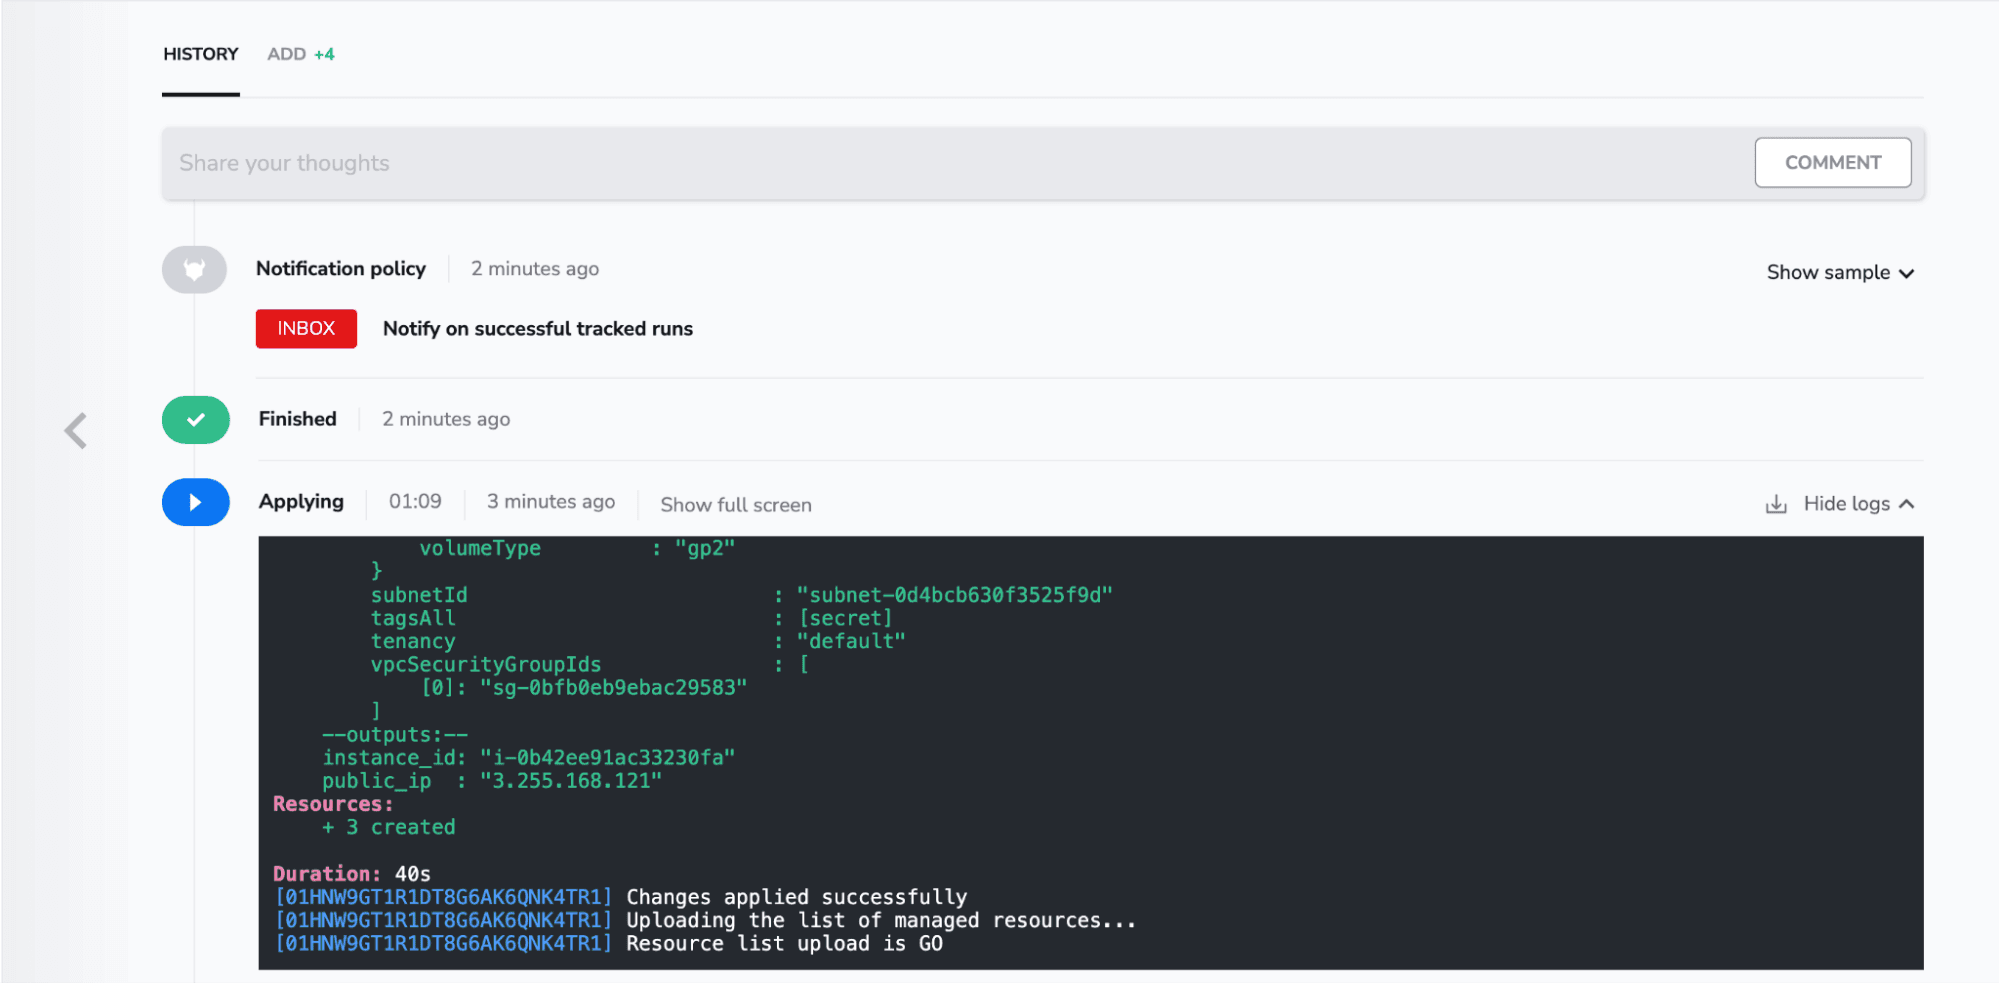
After you click on Approve and deploy, the code is applied successfully:
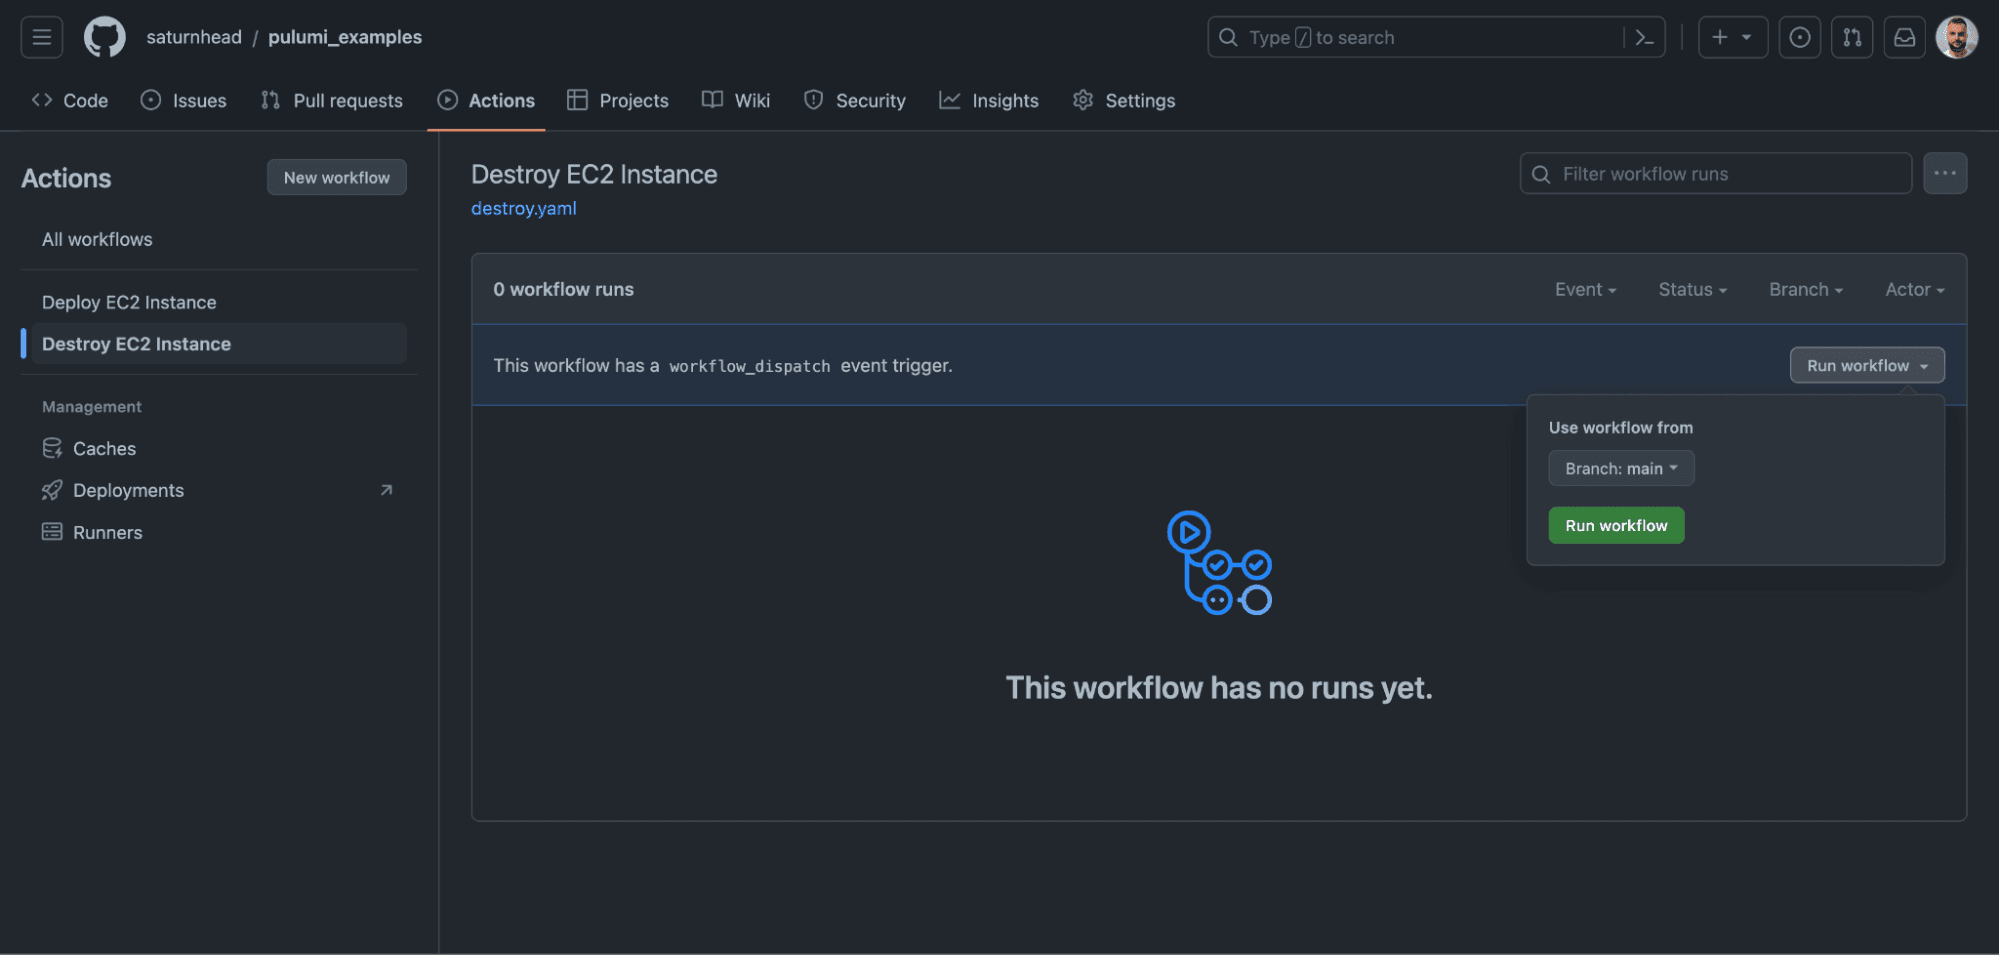
Now, let’s take a look at the destroy workflow. Because we’ve added the “on: workflow_dispatch”, this will only run when we manually invoke it. For that, we need to select the workflow and click on Run workflow.
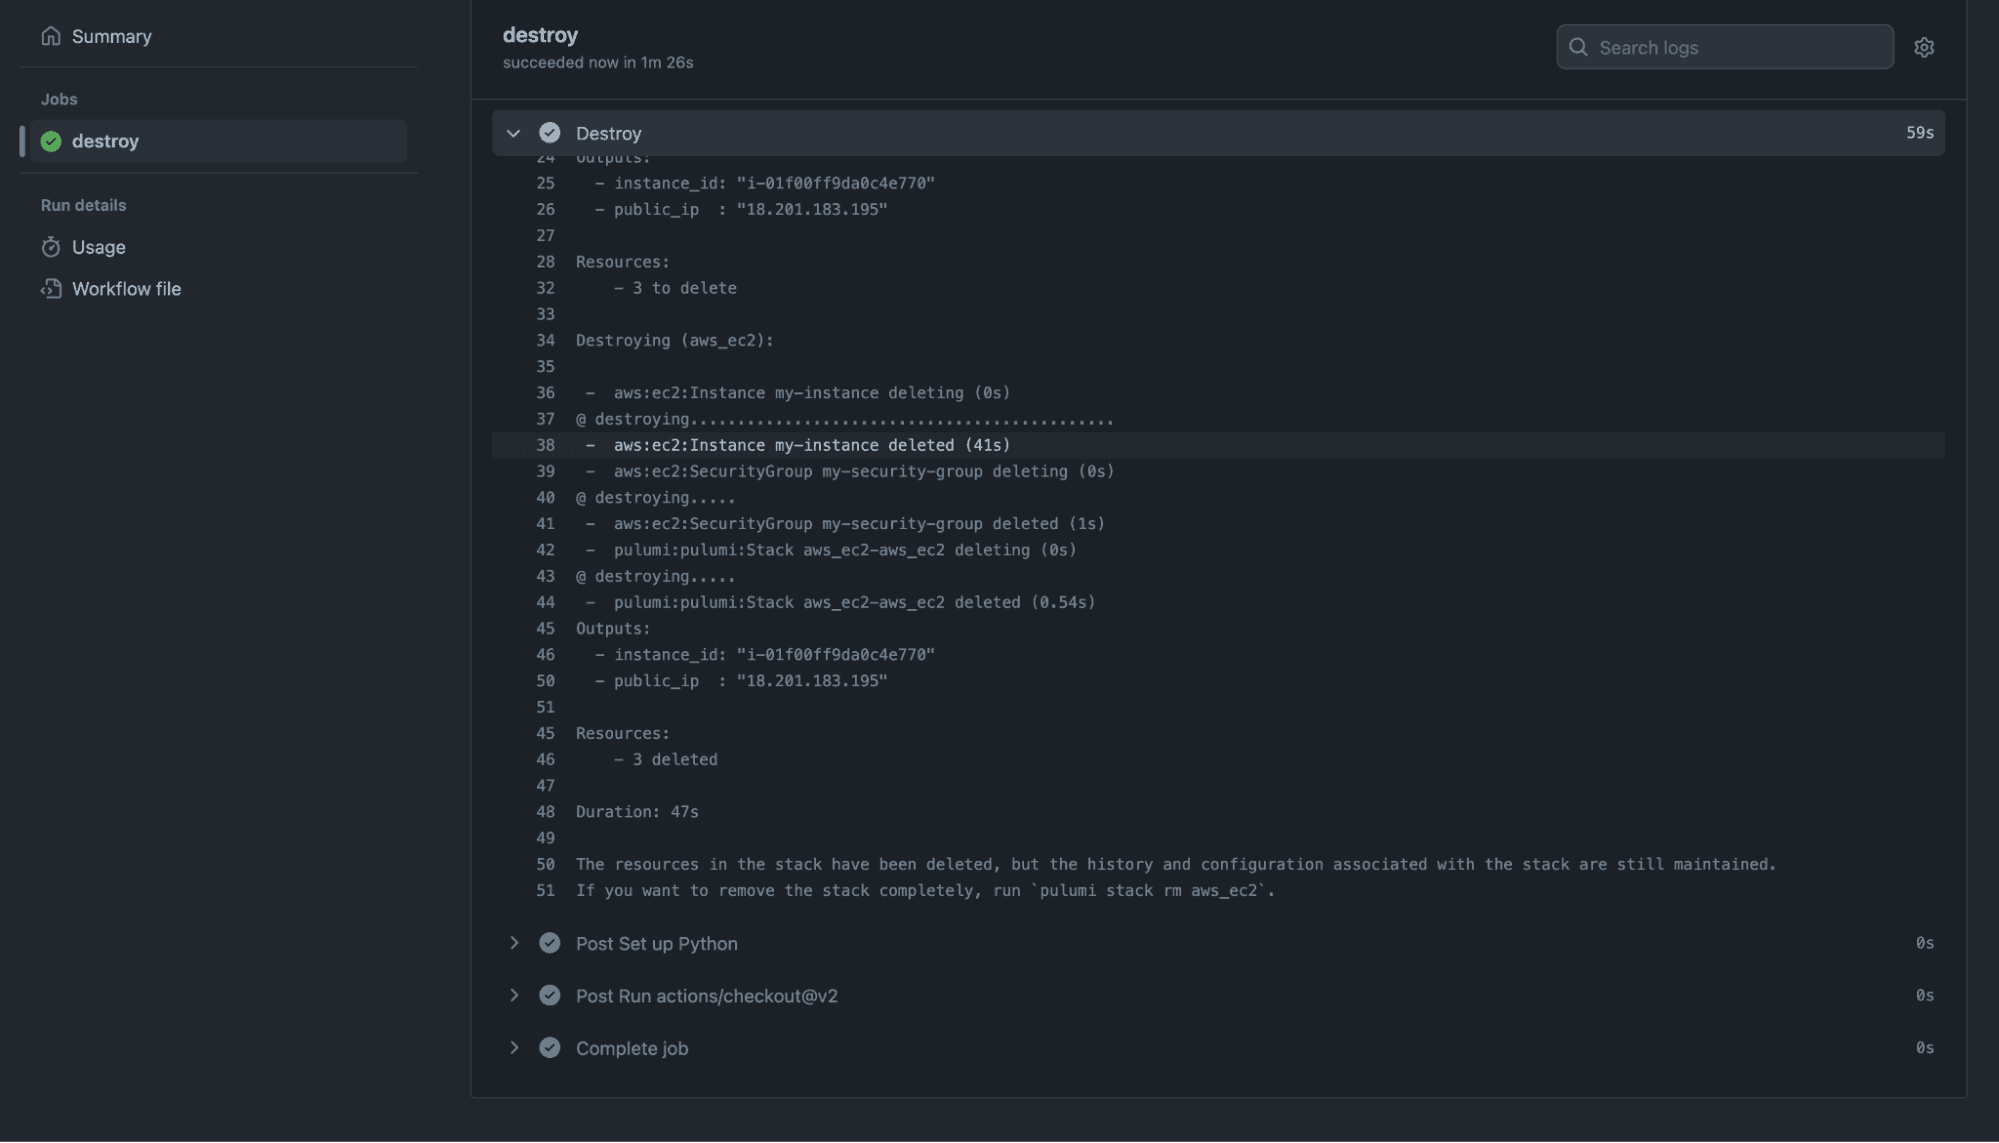
After a couple of seconds, we can see that all resources have been destroyed:
We now have a working GitHub Actions pipeline for Pulumi, and if you don’t want to follow all of these steps to configure everything, you can take the code from here, create a repo based on it, and just add your environment and environment secrets.
Now that we’ve seen the lengthy process for configuring a GitHub Actions workflow for Pulumi, let’s take a look at how simple it is with Spacelift and the advantages of leveraging it.
Building a Pulumi pipeline with Spacelift
Let’s reuse the Python code, that we’ve previously created for spawning an ec2 instance and security group. I have the repository in place, so I’ll go to my Spacelift account, and select Create a Stack:
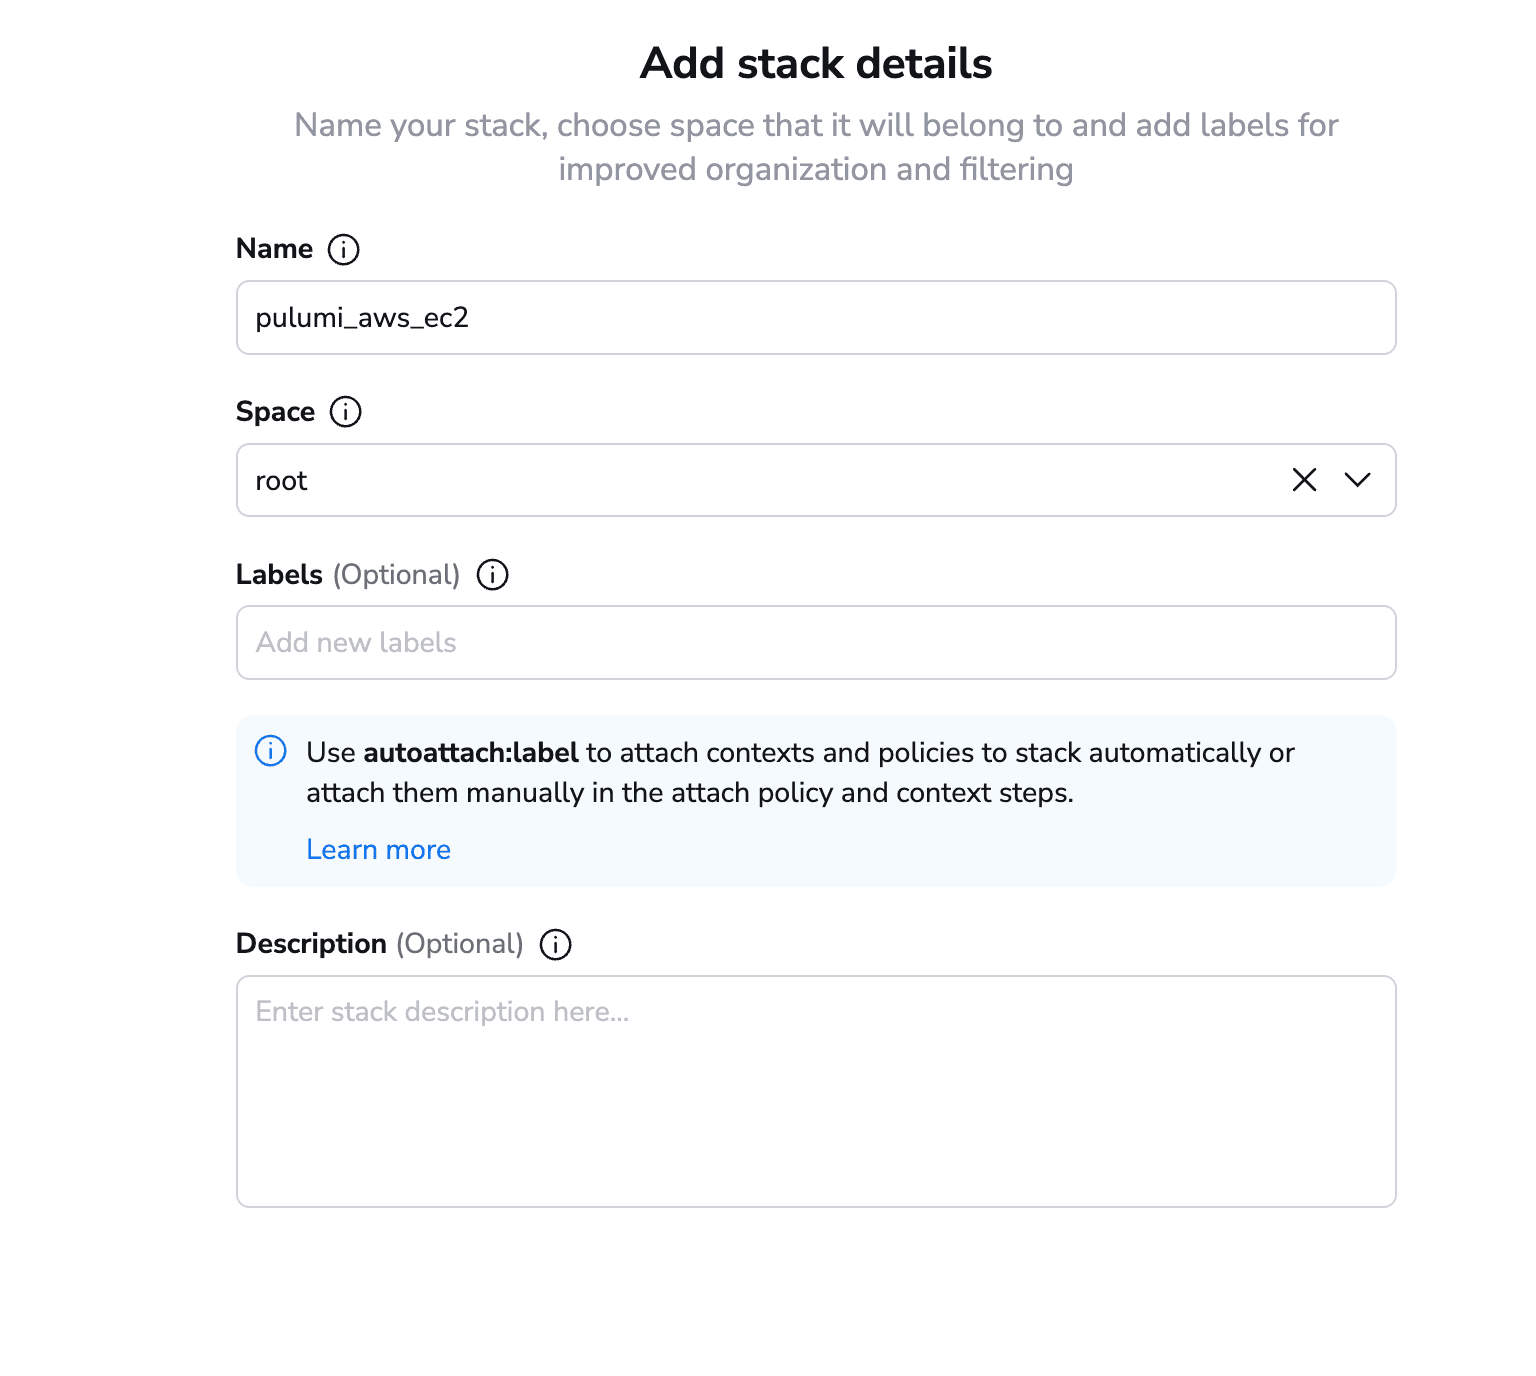
Add a name, select a space, and add labels and a description if desired.
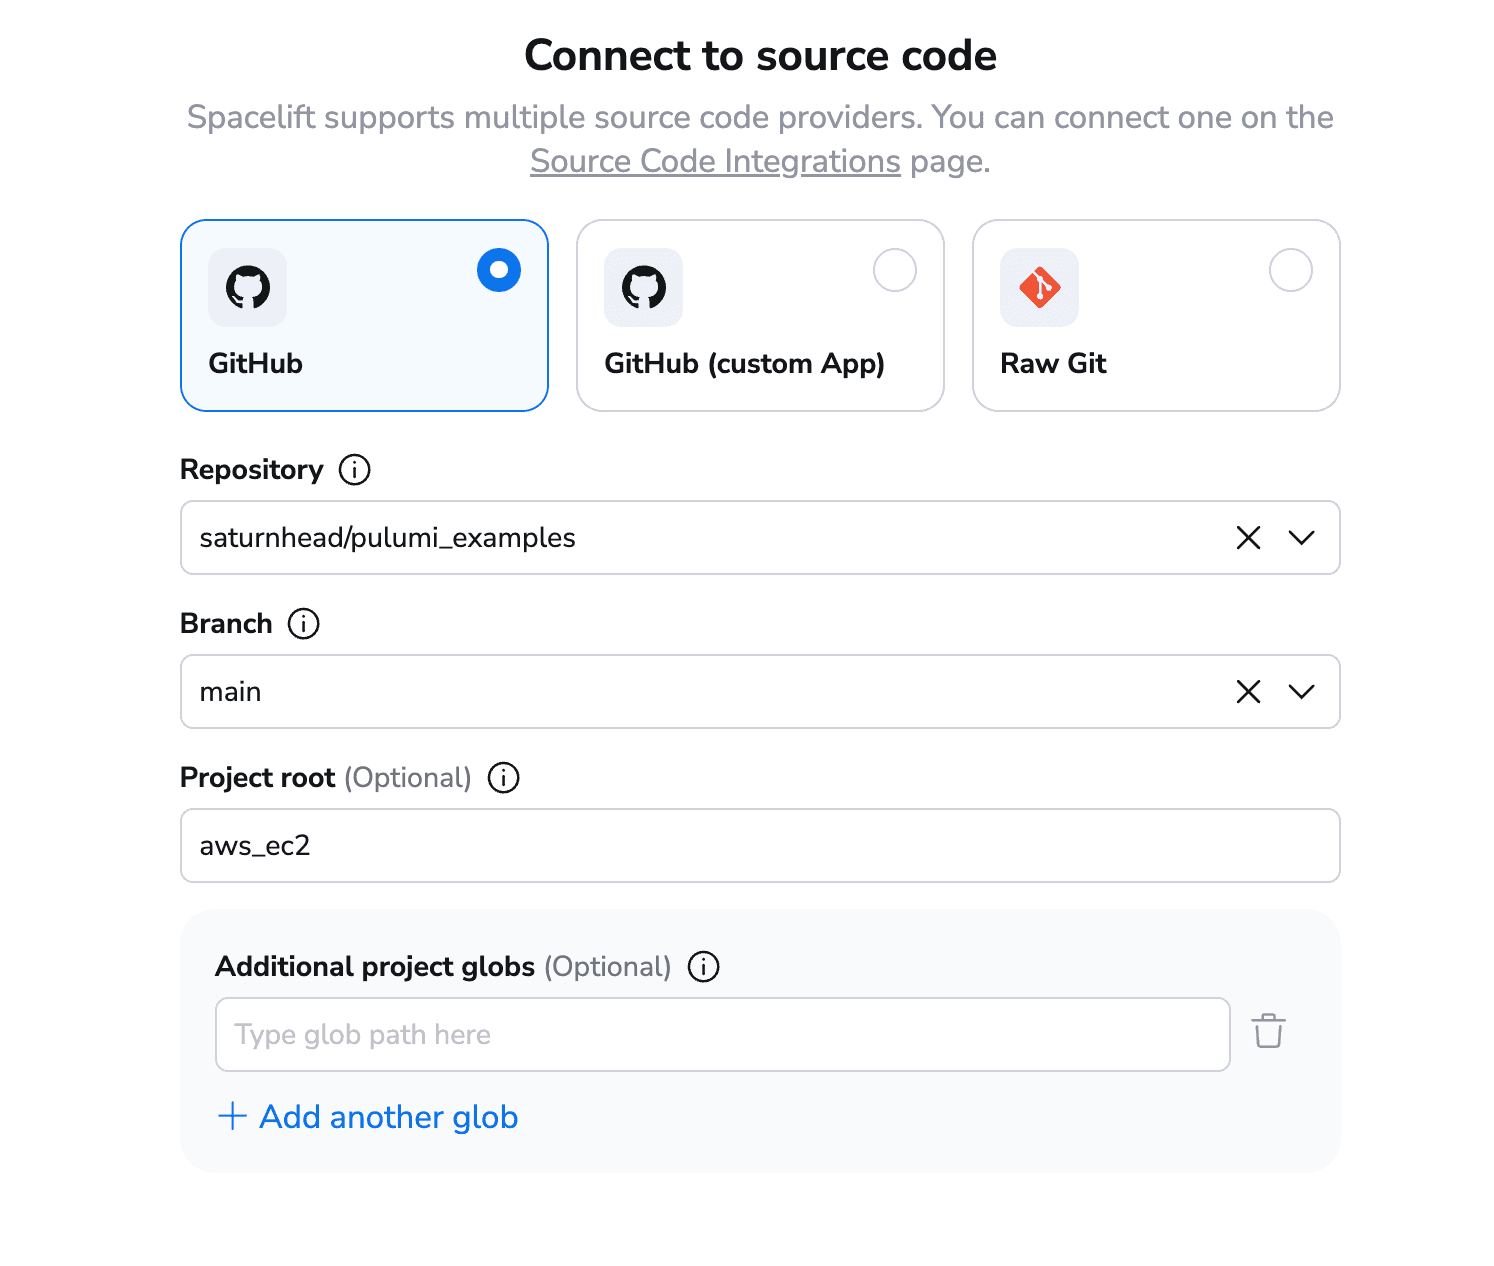
In the next step, select your VCS provider, repository, and the directory from where to run Pulumi commands:
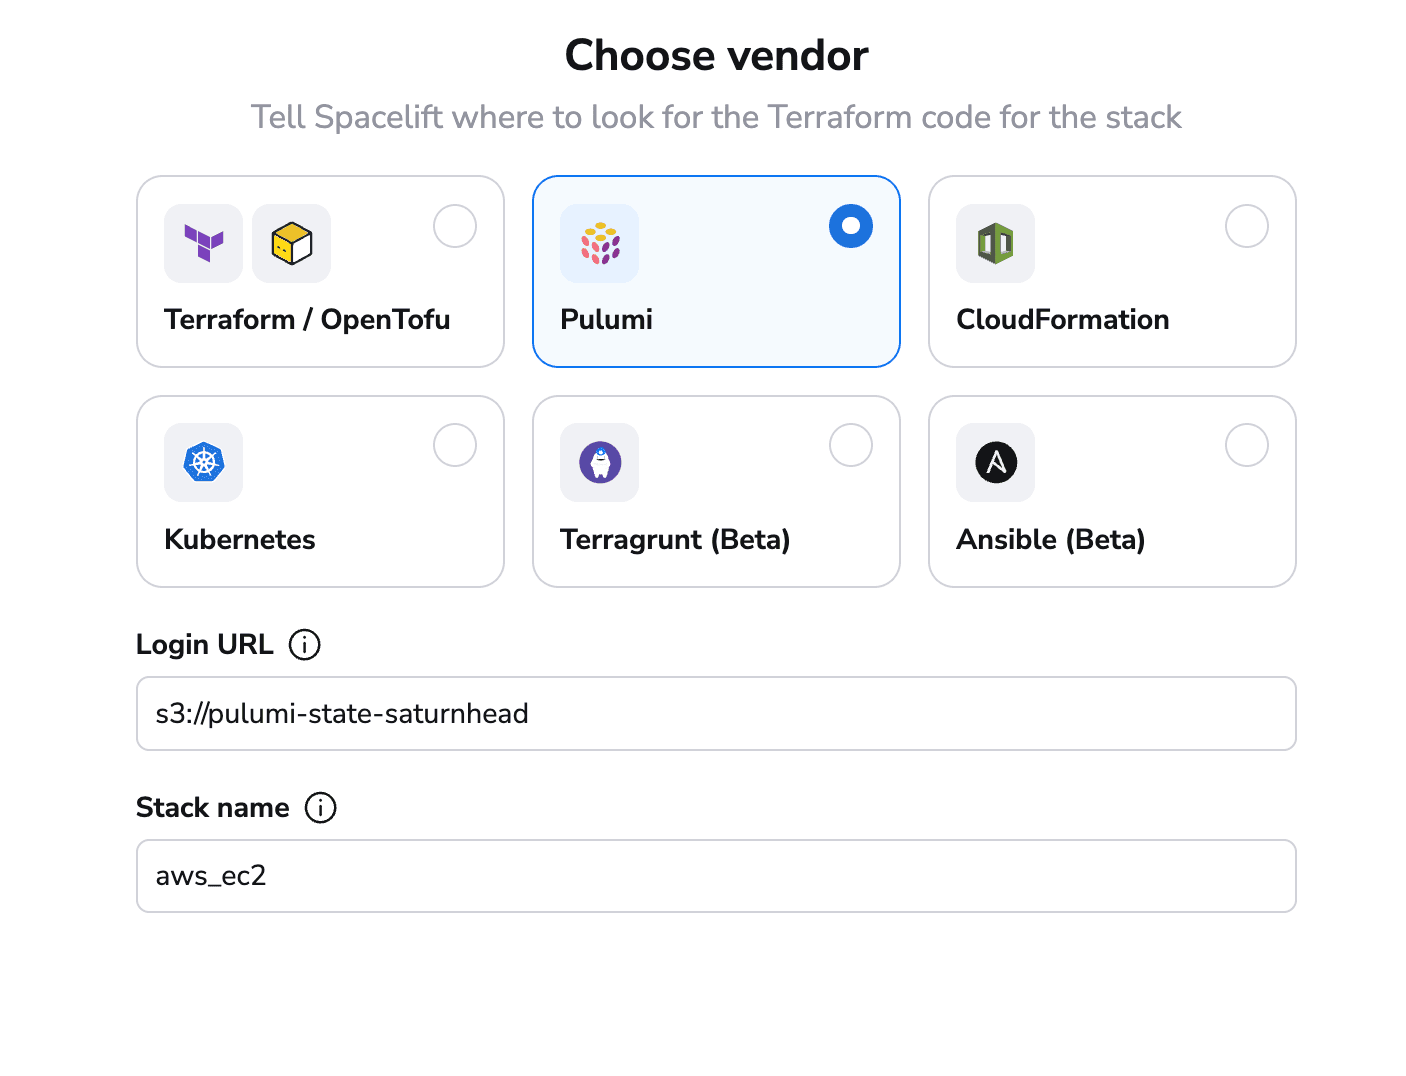
In the following step, select Pulumi as your IaC management tool and provide a Login URL (we will use the same S3 bucket we’ve previously used) and a stack name:
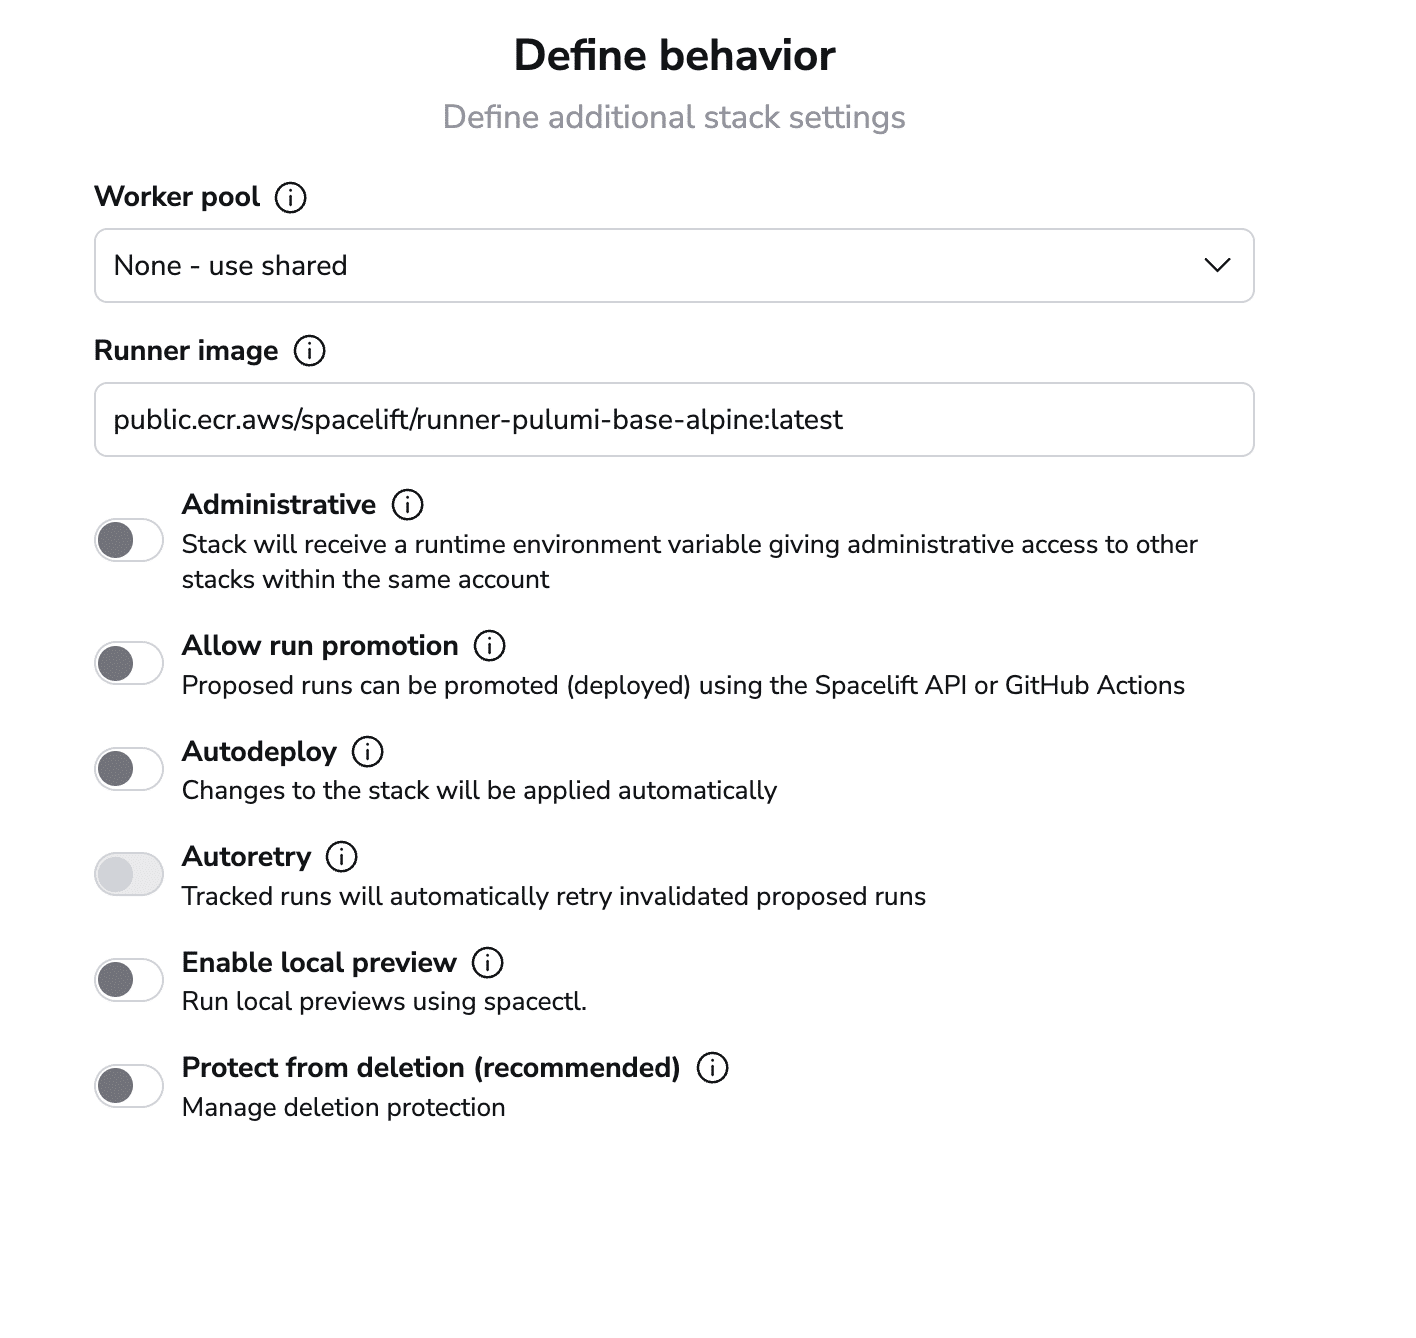
Next, you will need to select a runner image that has Pulumi installed, one example is: public.ecr.aws/spacelift/runner-pulumi-base-alpine:latest
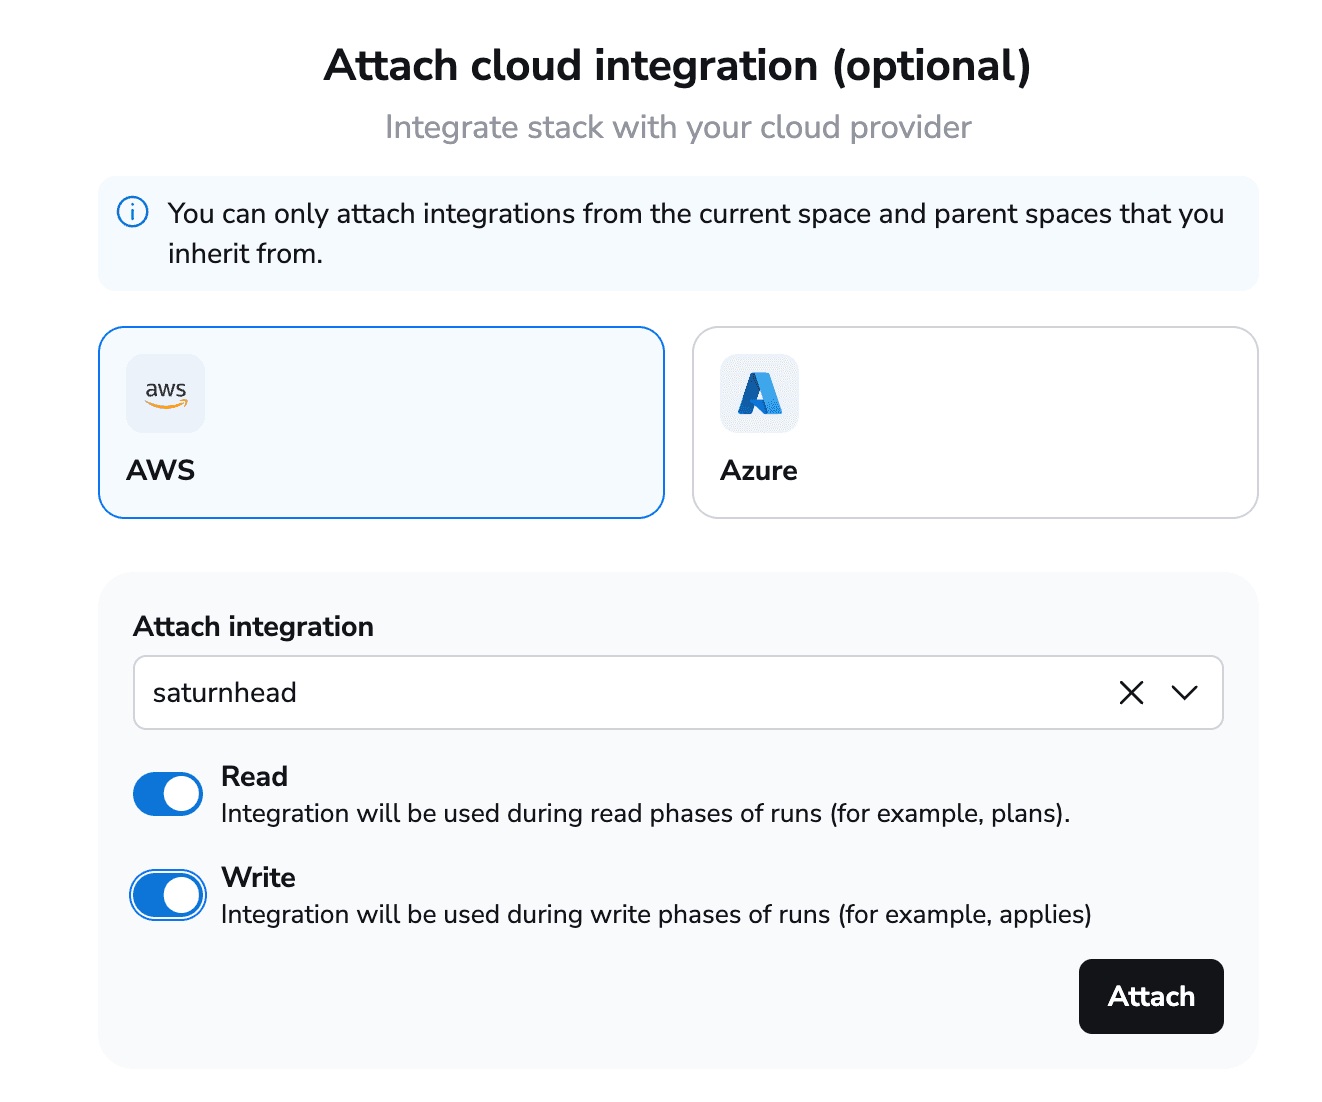
Next, I will also attach a Cloud Integration for Dynamic credentials:
Now we can simply create the stack.
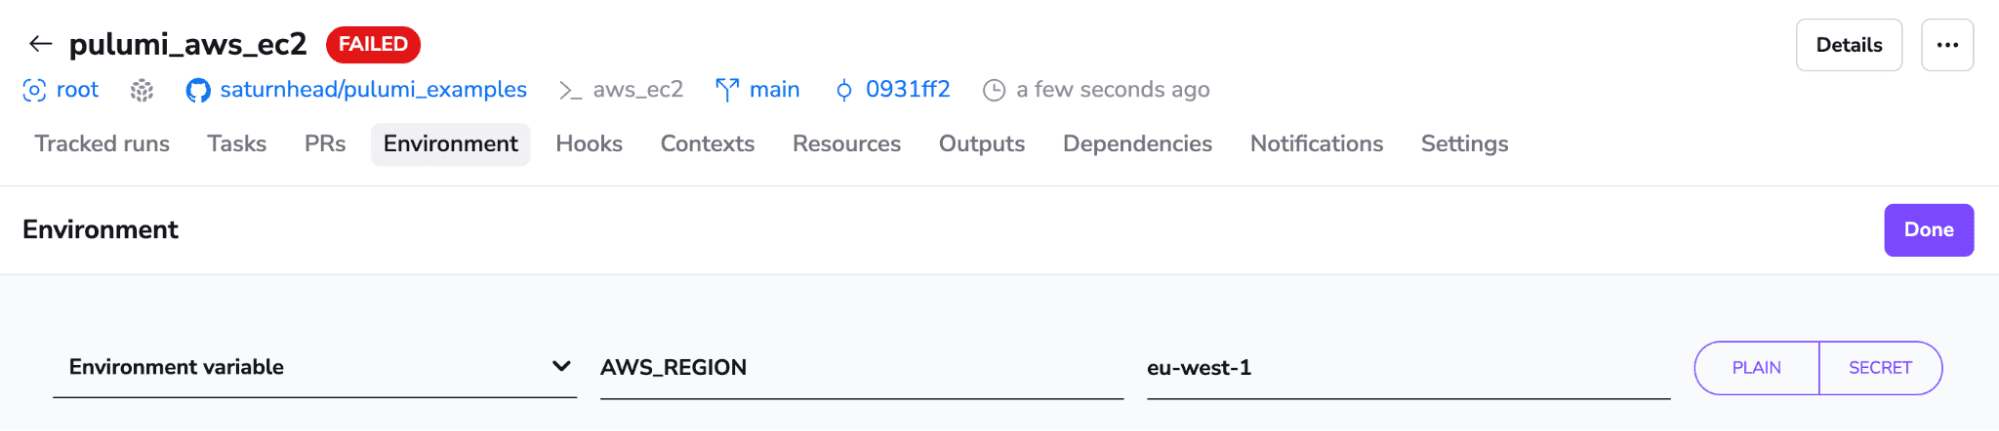
In the Environment tab, define a variable called AWS_REGION in which we will specify the region where we want our code to be deployed:
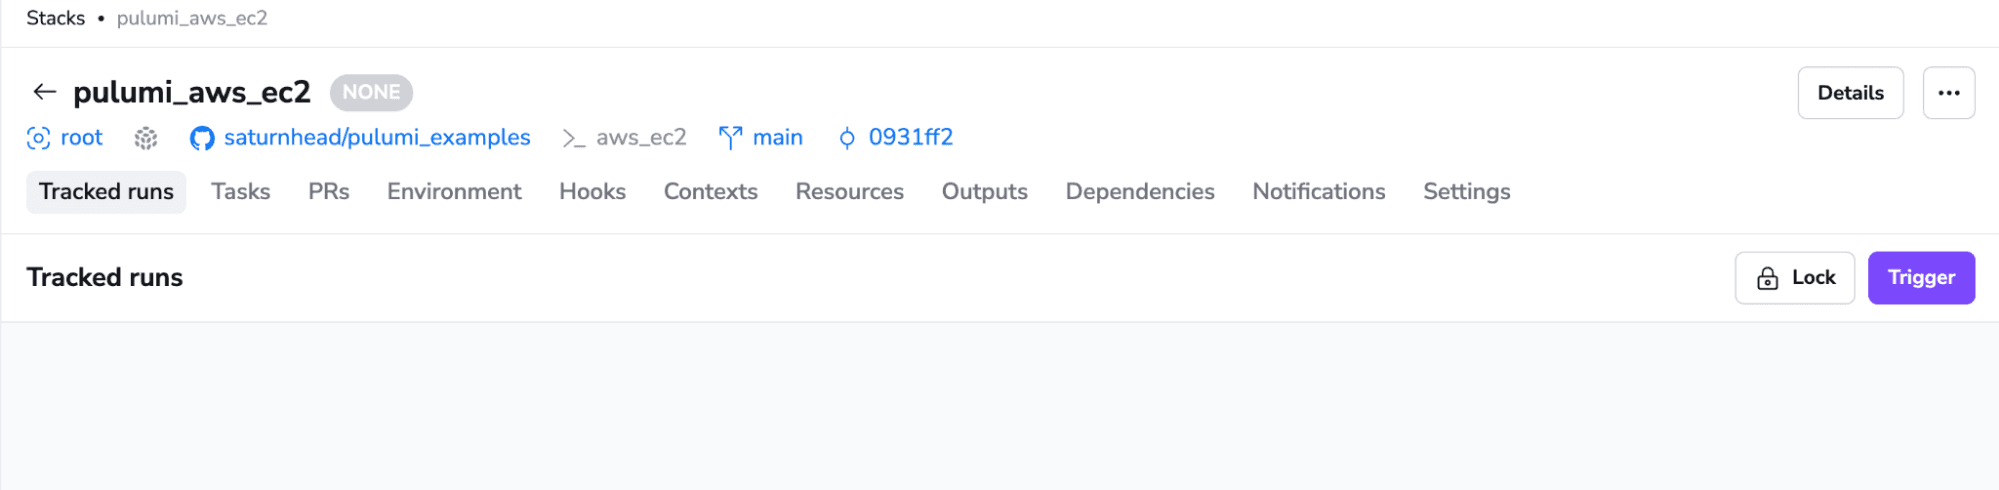
Going back to the stack view, we can trigger a run. As I didn’t select the AutoDeploy option in the view where I’ve added the runner image, this run will do a pulumi preview, then wait for my input to apply the changes:
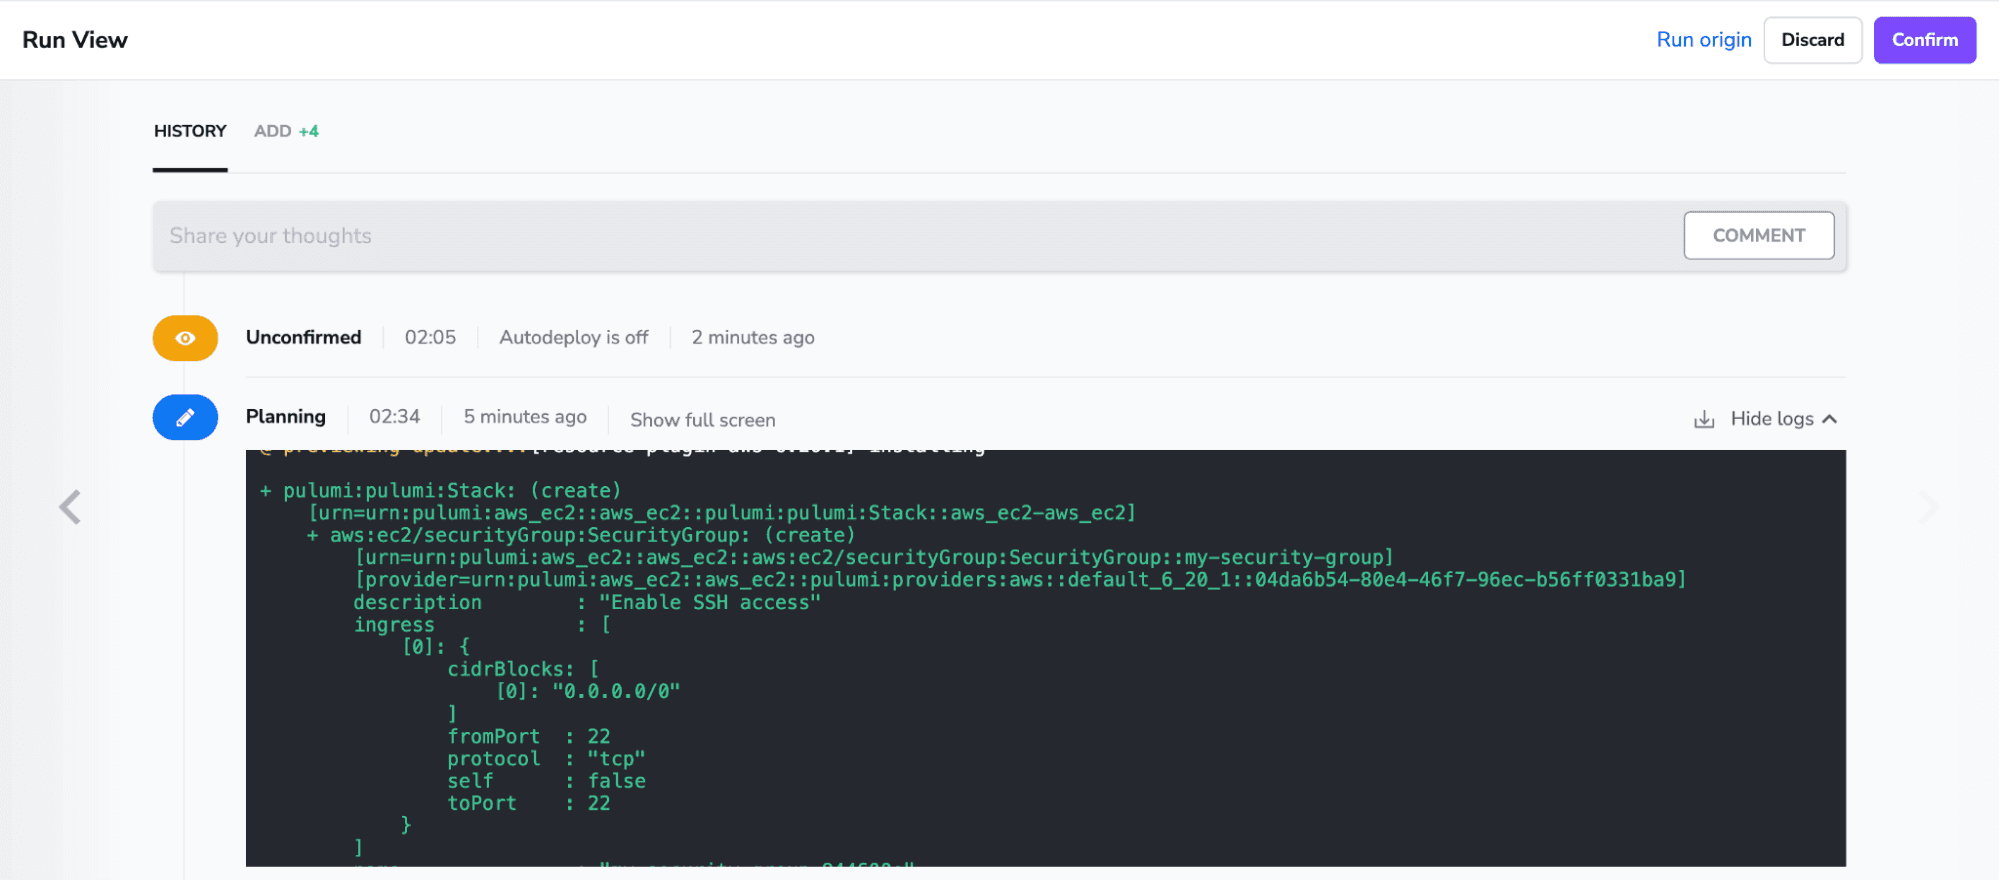
I confirmed the run, and the changes have been successfully applied.
Tearing down everything, couldn’t be simpler – you just need to go to tasks, and run a pulumi down –yes:

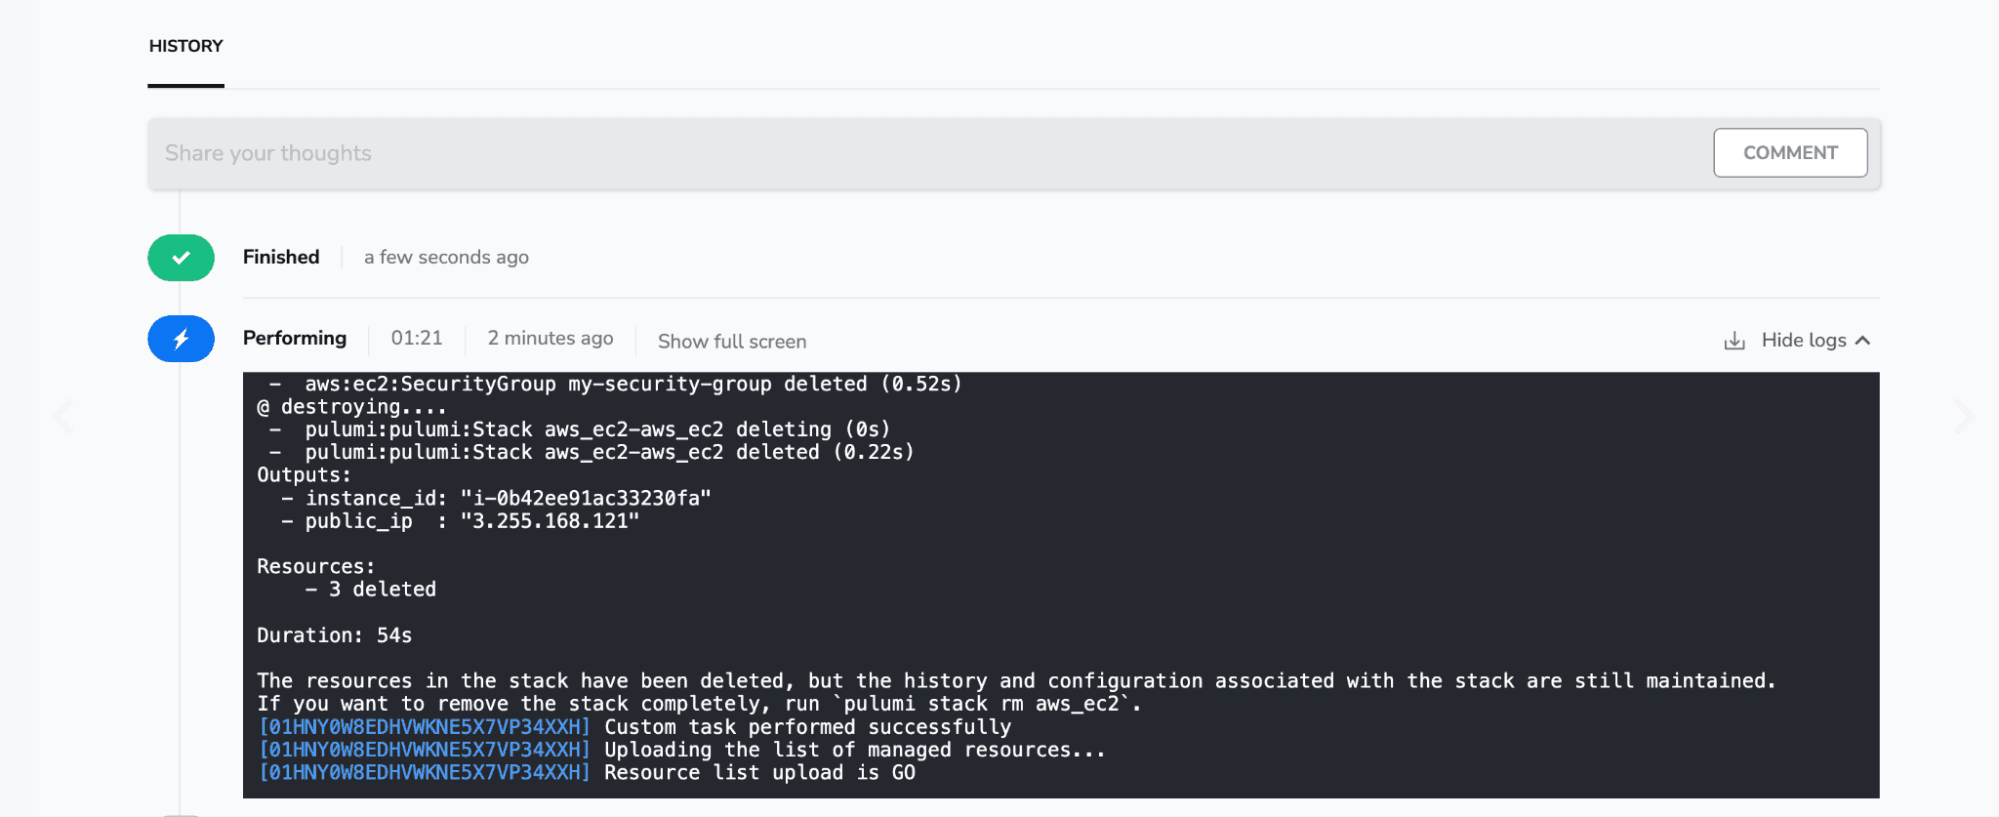
Everything was destroyed successfully.
Key points
Although GitHub Actions is very powerful for many use cases, there are simpler and less error-prone ways to manage infrastructure.
If you are searching for the right product to manage your OpenTofu, Terraform, Pulumi, Ansible, CloudFormation, Kubernetes, and Terragrunt, Spacelift is the answer.
You can create a free account today, or book a demo with one of our engineers to learn more.
Cost-effective Pulumi Cloud alternative
Spacelift is a highly cost-effective Pulumi Cloud alternative that works with Pulumi, Terraform, and many other IaC frameworks. It supports self-hosted on-prem workers, workflow customization, drift detection, and much more.
Pulumi Docs. GitHub Actions for Pulumi. Accessed: 21 October 2025
GitHub Actions Marketplace. Pulumi GitHub Actions. Accessed: 21 October 2025
