
Oracle Cloud Infrastructure (OCI) has emerged as the fifth-biggest cloud provider behind Amazon Web Services (AWS), Microsoft Azure, Google Cloud, and Alibaba. It offers a comprehensive set of services that enable businesses to run a wide range of applications in a highly available, secure, and scalable environment. OCI is designed to meet the needs of enterprises seeking to migrate their on-premise operations to the cloud, develop new cloud-native applications, or integrate with existing cloud solutions.
As with any other cloud provider, OCI resource provisioning can be automated.. You can use the CLI, any programming language sdk you want, and you can even take advantage of your favorite IaC tools, such as OpenTofu or Terraform.
In this post, I will show you how to create an OCI account, leverage the OCI adoption framework Thunder, and use OCI with Spacelift.
How to create an OCI account
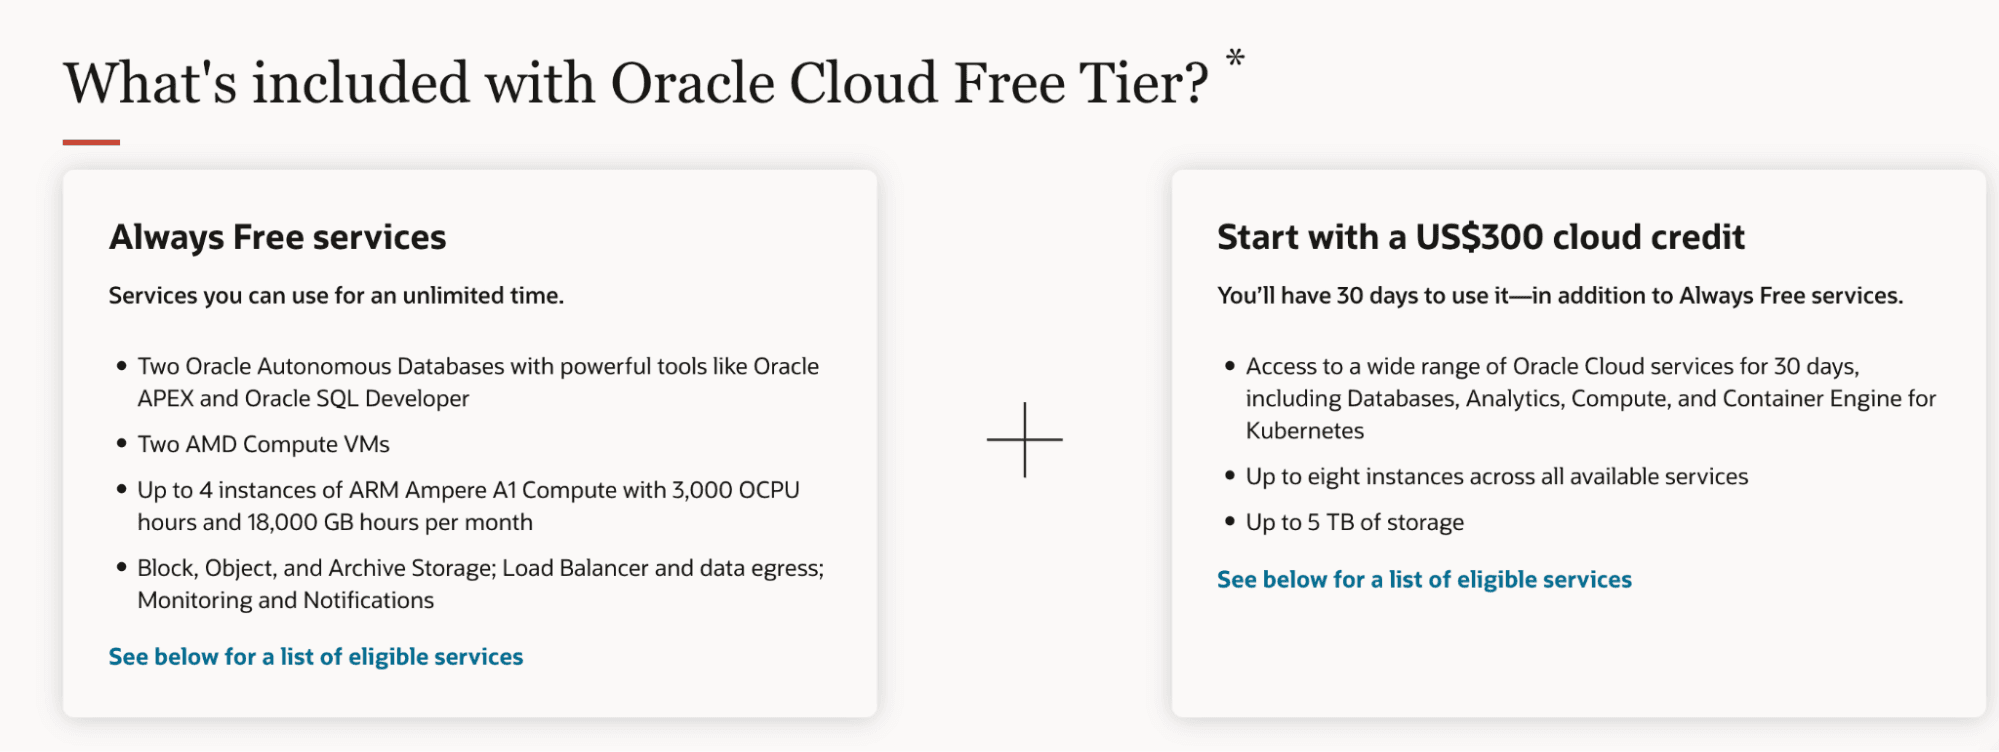
Getting started with OCI involves a few straightforward steps, and opening a trial account will give you $300 credit for 30 days. Oracle also offers an always free tier, which includes two Autonomous Databases, two AMD-powered Compute VMs, up to four instances of ARM Ampere A1, and more.
Here are the steps for creating an OCI account:
- Visit the OCI website – Navigate to the Oracle Cloud Infrastructure website and click on the Sign Up for Free Tier or Start for Free option.
- Fill in your details – Provide your email address, select your country, and follow the instructions to complete the sign-up form with your personal and business information.
- Verify your email – Check your inbox for a verification email from Oracle, and click on the link to verify your email address.
- Set up your account – Complete the setup by choosing a strong password, selecting your home region, and entering your payment information. Oracle offers a free tier with no upfront costs for trying out their services.
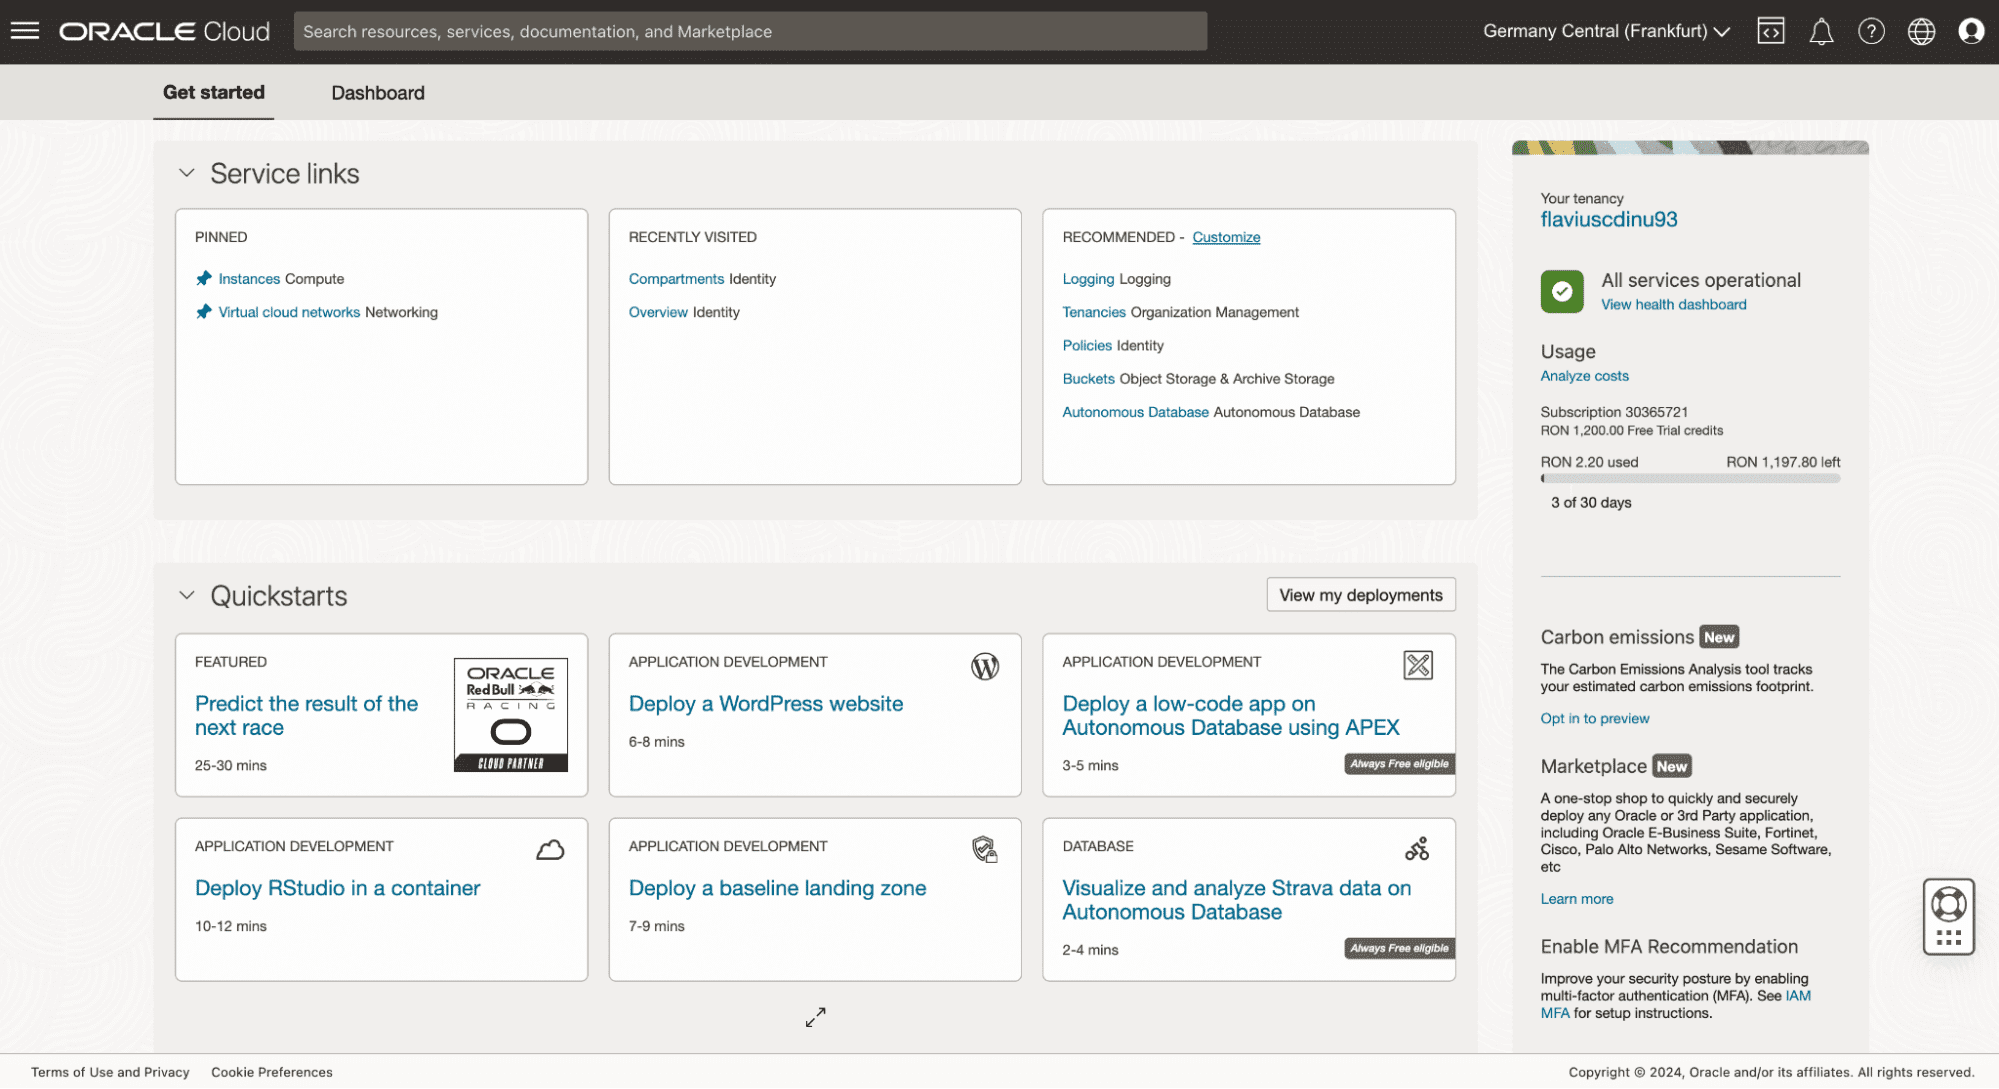
- Access your OCI Console – Once your account is set up, you can log in to the OCI Console, where you can manage your cloud resources, create instances, and explore various services offered by OCI.
How to generate an API key
Let’s generate an API key to use OpenTofu with Oracle Cloud Infrastructure.
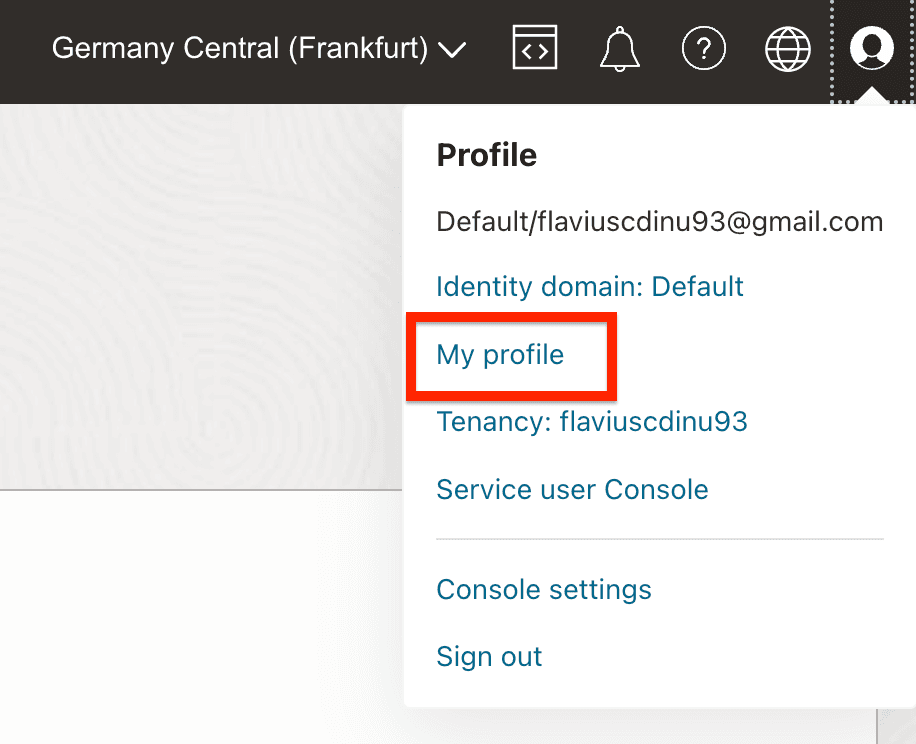
To do that, log in to the Oracle Console, click in the top right corner on your user, and select My profile.
Then, select API Key and click on Add API Key.
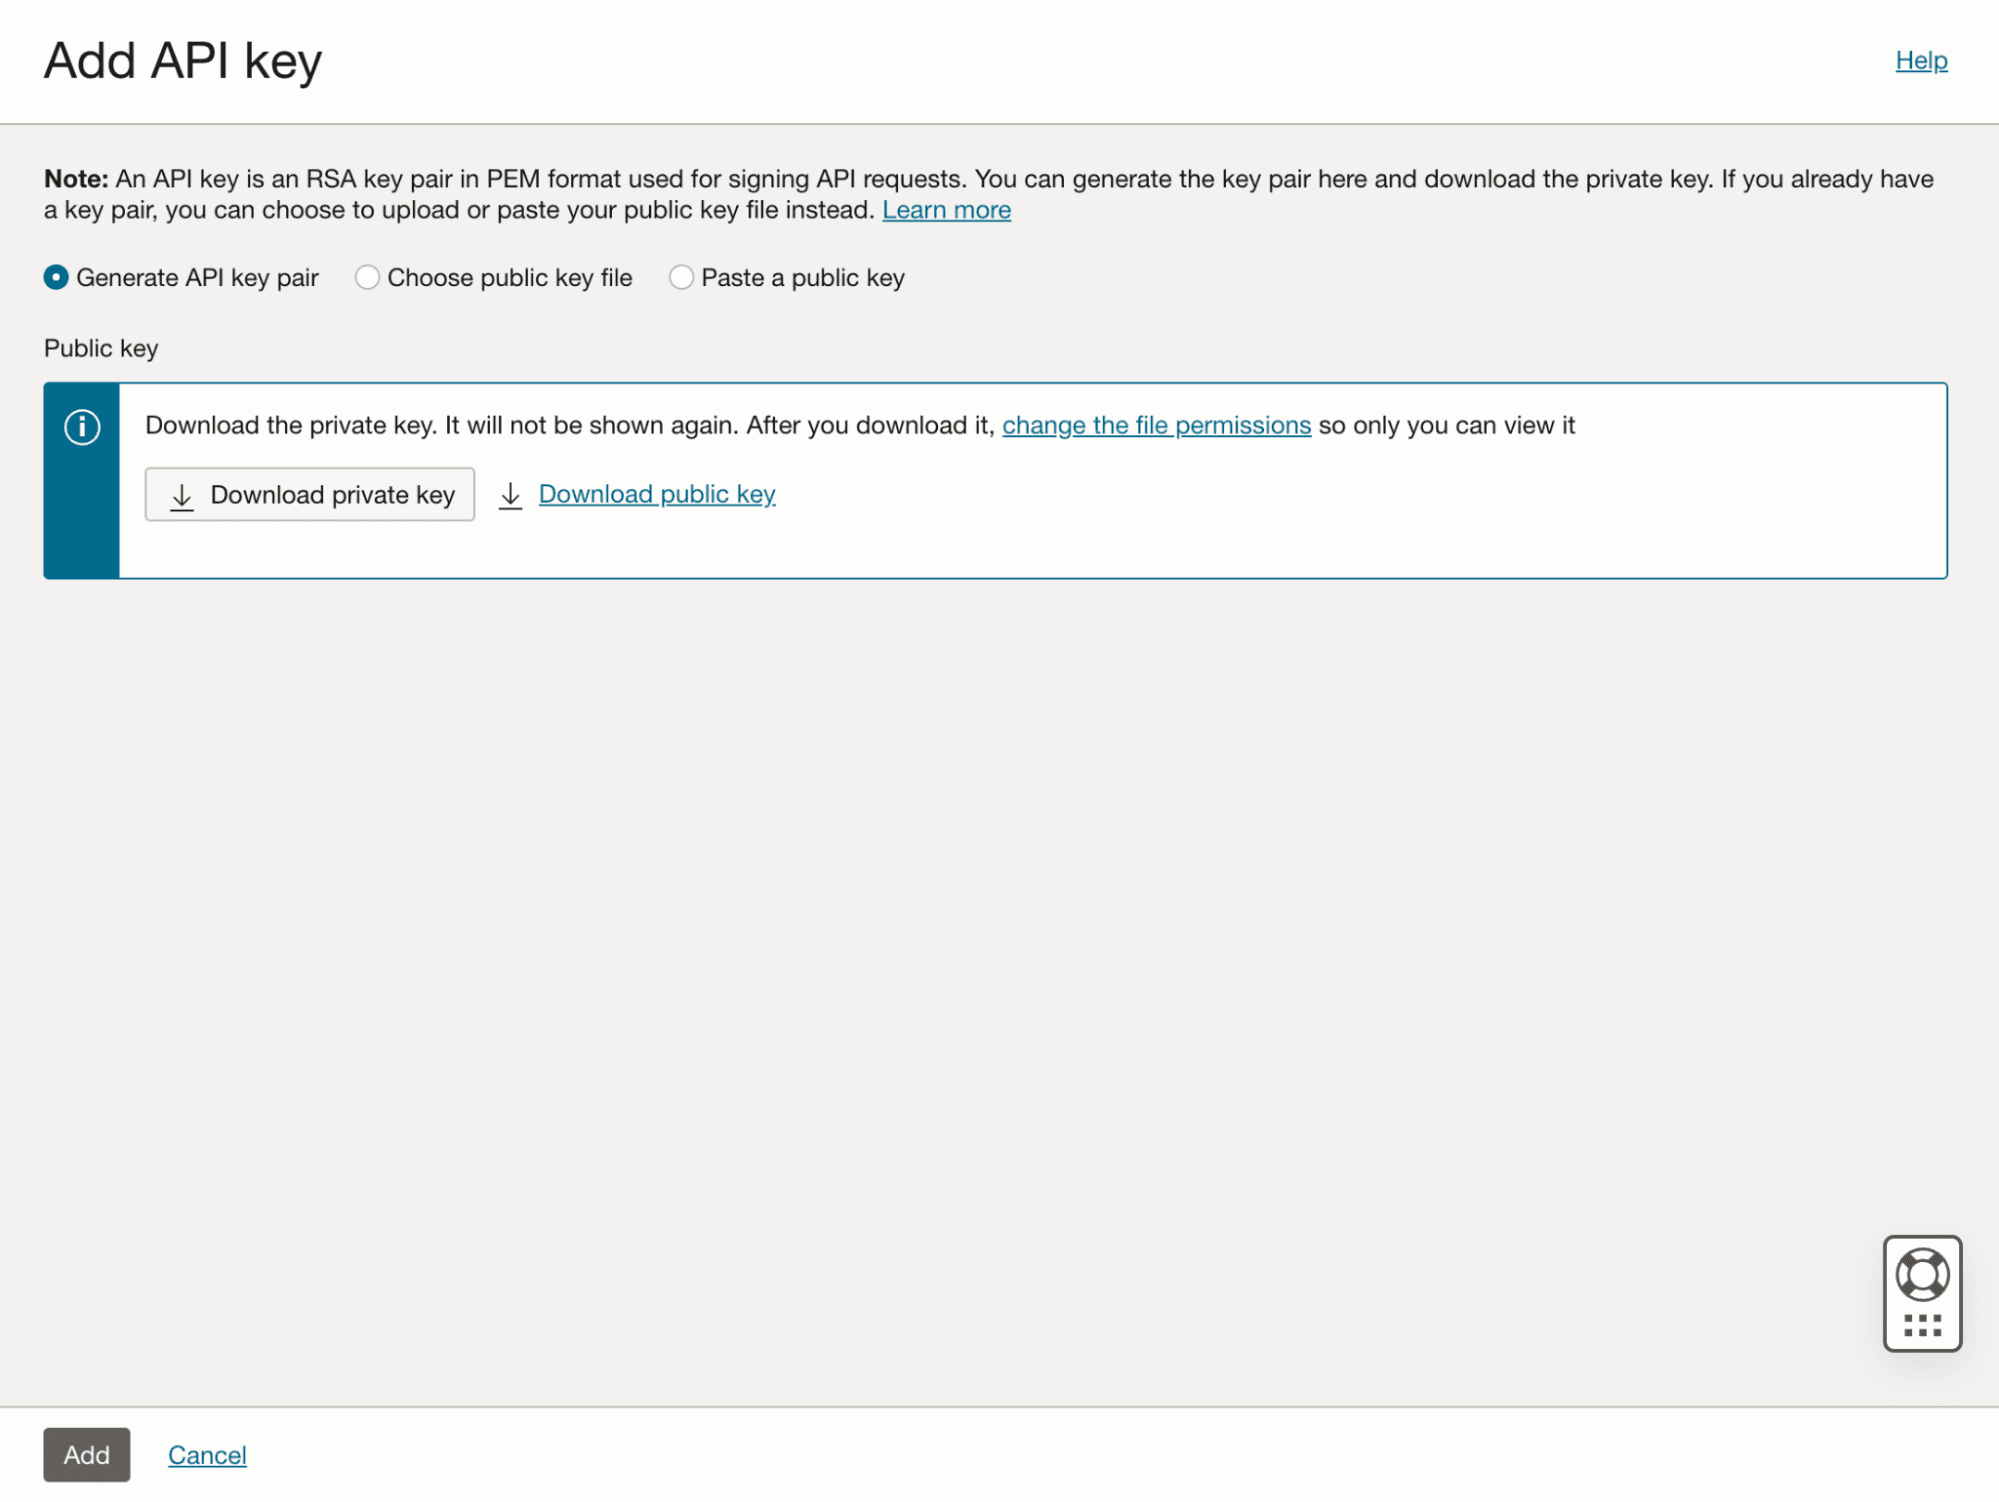
You can generate an API Key pair, choose a public key file, or paste the public key content. As I want to create a new key, I will keep the Generate API key pair selected and download the private key.
OCI Adoption Framework Thunder
The OCI Adoption Framework Thunder is an initiative I had the privilege of coordinating and implementing while working at Oracle. This framework comprises a series of modules designed to streamline the adoption and management of OCI resources using Terraform. It represents a collection of best practices, templates, and scripts that significantly simplify the process of deploying and managing OCI services.
Starting with Terraform 0.11, we started developing these modules and tried to keep pace with new versions. The adoption framework is open-source and available on GitHub. Unfortunately, there have been few updates since I left Oracle two years ago, due to time constraints and shifting priorities for all parties involved.
As we were helping many customers move to OCI, the modules had to be as generic as possible to accommodate many use cases, and that was the objective when we built them. There are 35 modules inside the repository and over 33 examples available. Most modules are still working fine, but I believe that some need tweaking to make them work properly.
Several OCI customers have successfully utilized the automations provided by the OCI Adoption Framework Thunder, witnessing tangible improvements in their cloud infrastructure management processes. These organizations, spanning various industries, have leveraged the framework to accelerate their cloud adoption, enhance security, and optimize costs. The feedback has been overwhelmingly positive, with customers appreciating the ease of use, flexibility, and comprehensive nature of the solutions provided by the framework.
Would I would write Terraform/OpenTofu modules this way today? The short answer is no, and that’s mainly because Terraform grew and introduced features that weren’t available while we were working on the modules.
For example, for variable validations, we used a hacky method with locals:
vcns = [for vcn in var.vcn_params : split("/", vcn.vcn_cidr)[1] < 16 || split("/", vcn.vcn_cidr)[1] > 30 ? file(format("\n\nERROR: The VCN Cidr %s for VCN %s is not between /16 and /30", vcn.vcn_cidr, vcn.display_name)) : null]For the above example, in case a VCN cidr wasn’t between /16 and /30, we would simply try to open a file, without actually providing a file — instead, adding an error message that stated the variable was incorrect.
Now, let’s use one of the examples from Thunder and run it with OpenTofu. To do that, I cloned the repository, went into examples → crawl → network, and filled in some details in the terraform.tfvars file.
provider_oci = {
tenancy = "ocid1.tenancy.oc1.."
user_id = "ocid1.user.ra.."
fingerprint = "1a:e8:07.."
key_file_path = "~/.ssh/oci.pem"
region = "eu-frankfurt-1"
}
compartment_ids = {
sandbox = "ocid1.compartment.oc1.."
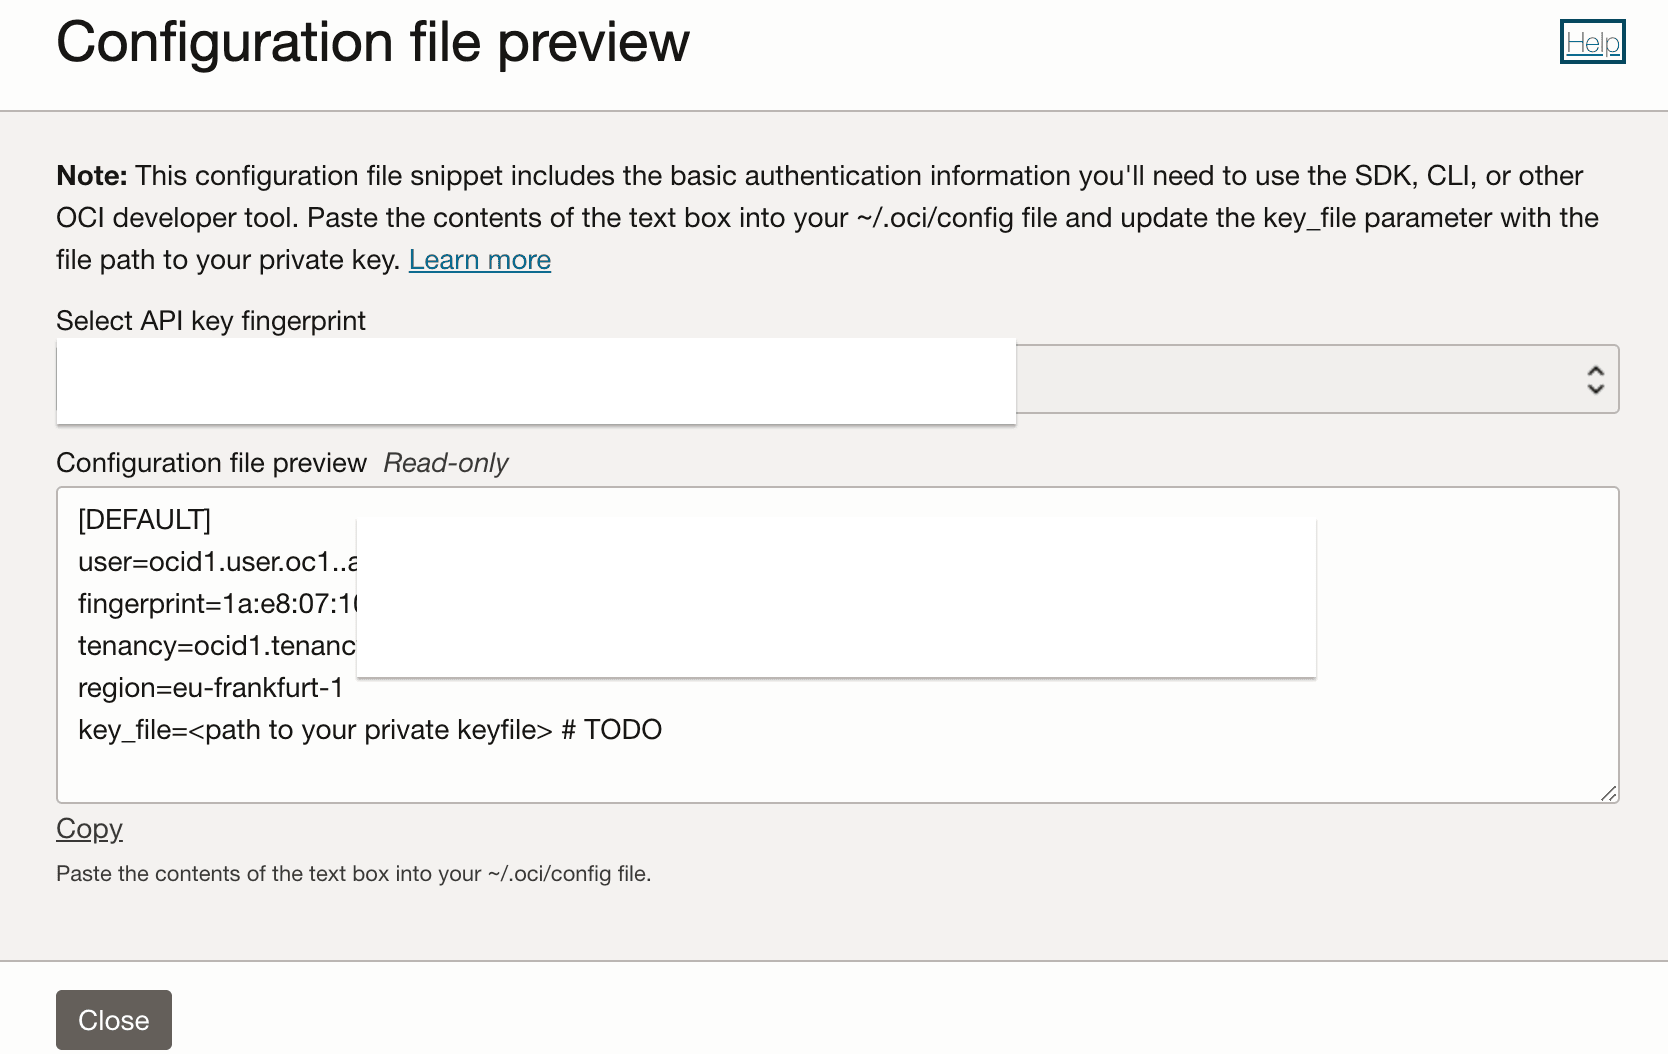
}The details for the provider can be found in the API key view by selecting the menu from your generated API key:

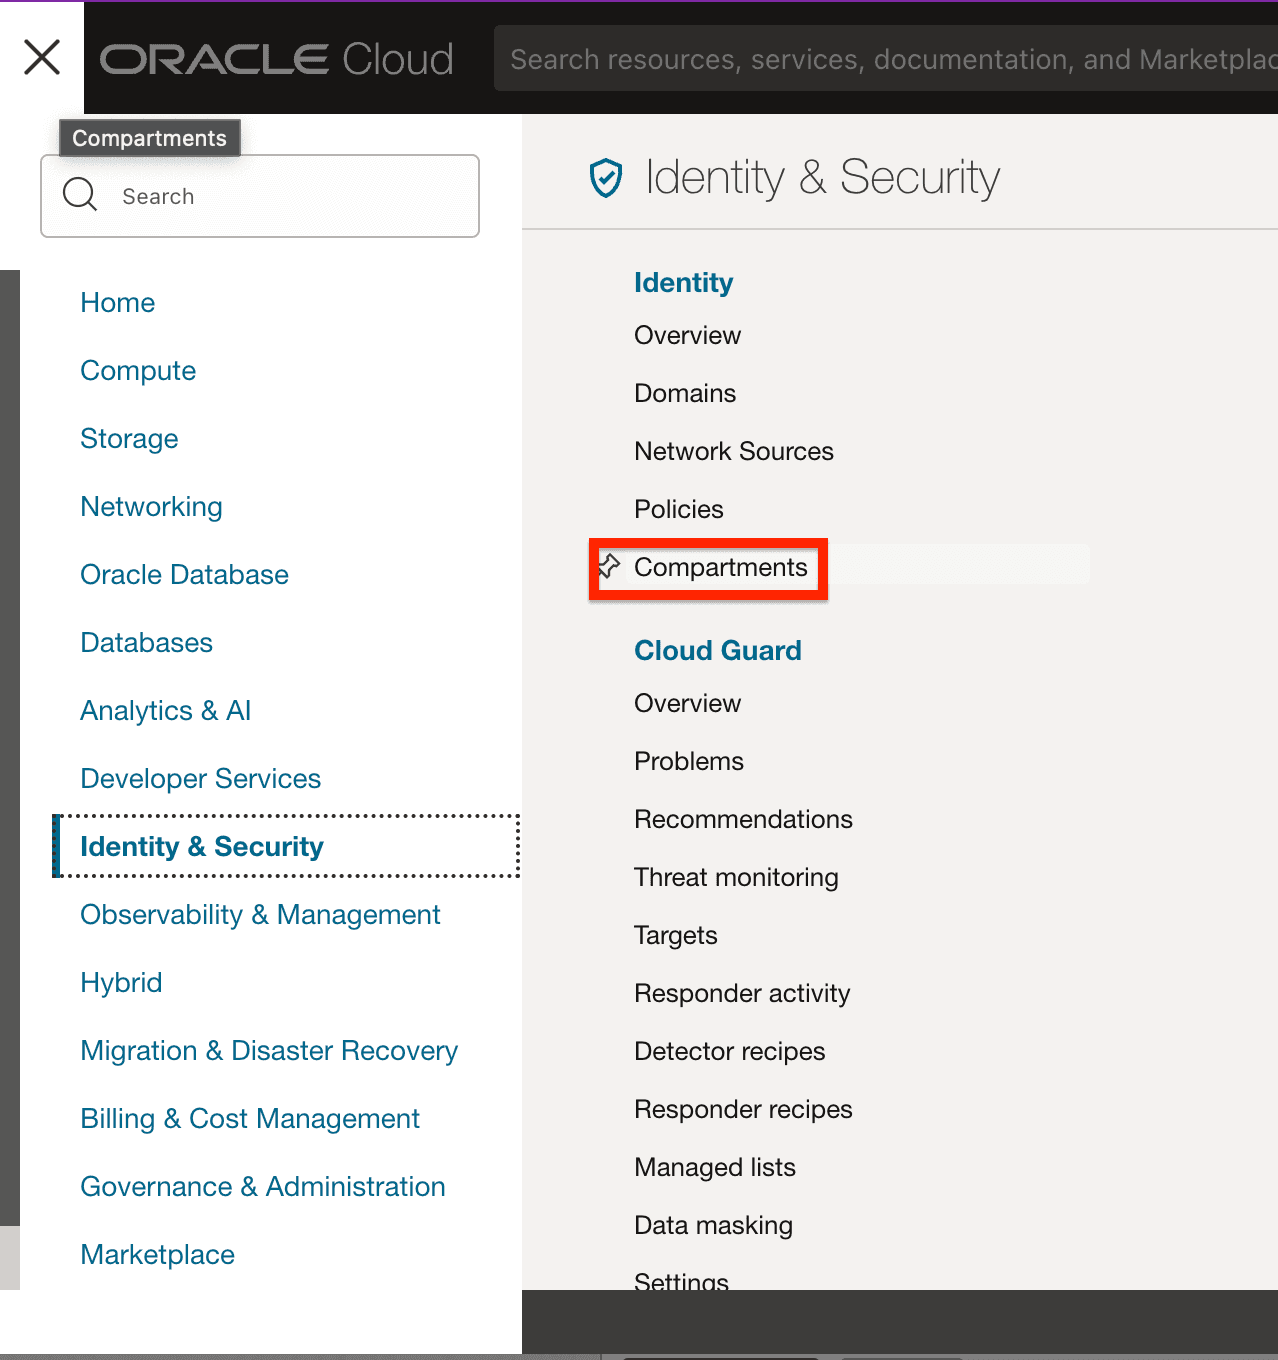
In the tfvars, I also added a compartment id; this could even be your tenancy. To see your available compartments, you can navigate to Identity → Compartments and select the compartment you want to use.
Now that we have finished with all of these, we are ready to run the code.
Note: The Terraform Registry namespace for the OCI provider is oracle/oci (and typically in the 7.x series). If you pin via the OpenTofu registry, use opentofu/oci. Your init output will reflect this (i.e., show oracle/oci v7.x instead of hashicorp/oci v5.28.0).
First, let’s run a tofu init:
tofu init

Initializing the backend...
Initializing modules...
- network in ../../../modules/network

Initializing provider plugins...
- Finding latest version of hashicorp/oci...
- Installing hashicorp/oci v5.28.0...
- Installed hashicorp/oci v5.28.0 (signed, key ID 1533A49284137CEB)

…

OpenTofu has created a lock file .terraform.lock.hcl to record the provider
selections it made above. Include this file in your version control repository
so that OpenTofu can guarantee to make the same selections by default when
you run "tofu init" in the future.

OpenTofu has been successfully initialized!

You may now begin working with OpenTofu. Try running "tofu plan" to see
any changes that are required for your infrastructure. All OpenTofu commands
should now work.

If you ever set or change modules or backend configuration for OpenTofu,
rerun this command to reinitialize your working directory. If you forget, other
commands will detect it and remind you to do so if necessary.
Now, we can plan the code:
tofu plan

Plan: 22 to add, 0 to change, 0 to destroy.

Changes to Outputs:
  + nsgs    = {
      + hurricane1 = (known after apply)
      + hurricane2 = (known after apply)
    }
  + subnets = {
      + hur1priv = {
          + cidr = "10.0.2.0/24"
          + id   = (known after apply)
        }
      + hur1pub  = {
          + cidr = "10.0.1.0/24"
          + id   = (known after apply)
        }
      + hur2priv = {
          + cidr = "11.0.2.0/24"
          + id   = (known after apply)
        }
      + hur2pub  = {
          + cidr = "11.0.1.0/24"
          + id   = (known after apply)
        }
    }
  + vcns    = {
      + hur1 = {
          + cidr = "10.0.0.0/16"
          + id   = (known after apply)
        }
      + hur2 = {
          + cidr = "11.0.0.0/16"
          + id   = (known after apply)
        }
    }
And now we can run an apply:
tofu apply -auto-approve

Apply complete! Resources: 22 added, 0 changed, 0 destroyed.
We’ve seen that everything is working properly, but of course, this wouldn’t be the correct approach if this were a production use case. We would need to use a remote state and ensure easy collaboration and updates. OCI offers an object-storage service that can be leveraged for that, but is this the best solution out there?
Integrating OCI with Spacelift
The best way to manage your OCI workflows is to leverage Spacelift. Let’s see it in action:
First, I will create a context that will automatically attach to all of my OCI stacks. In this context, I will add the necessary credentials for logging into OCI, and this can be reused for all of the stacks I will create for OCI.
To do that, I’ve logged into my Spacelift account and selected the Create Context option:
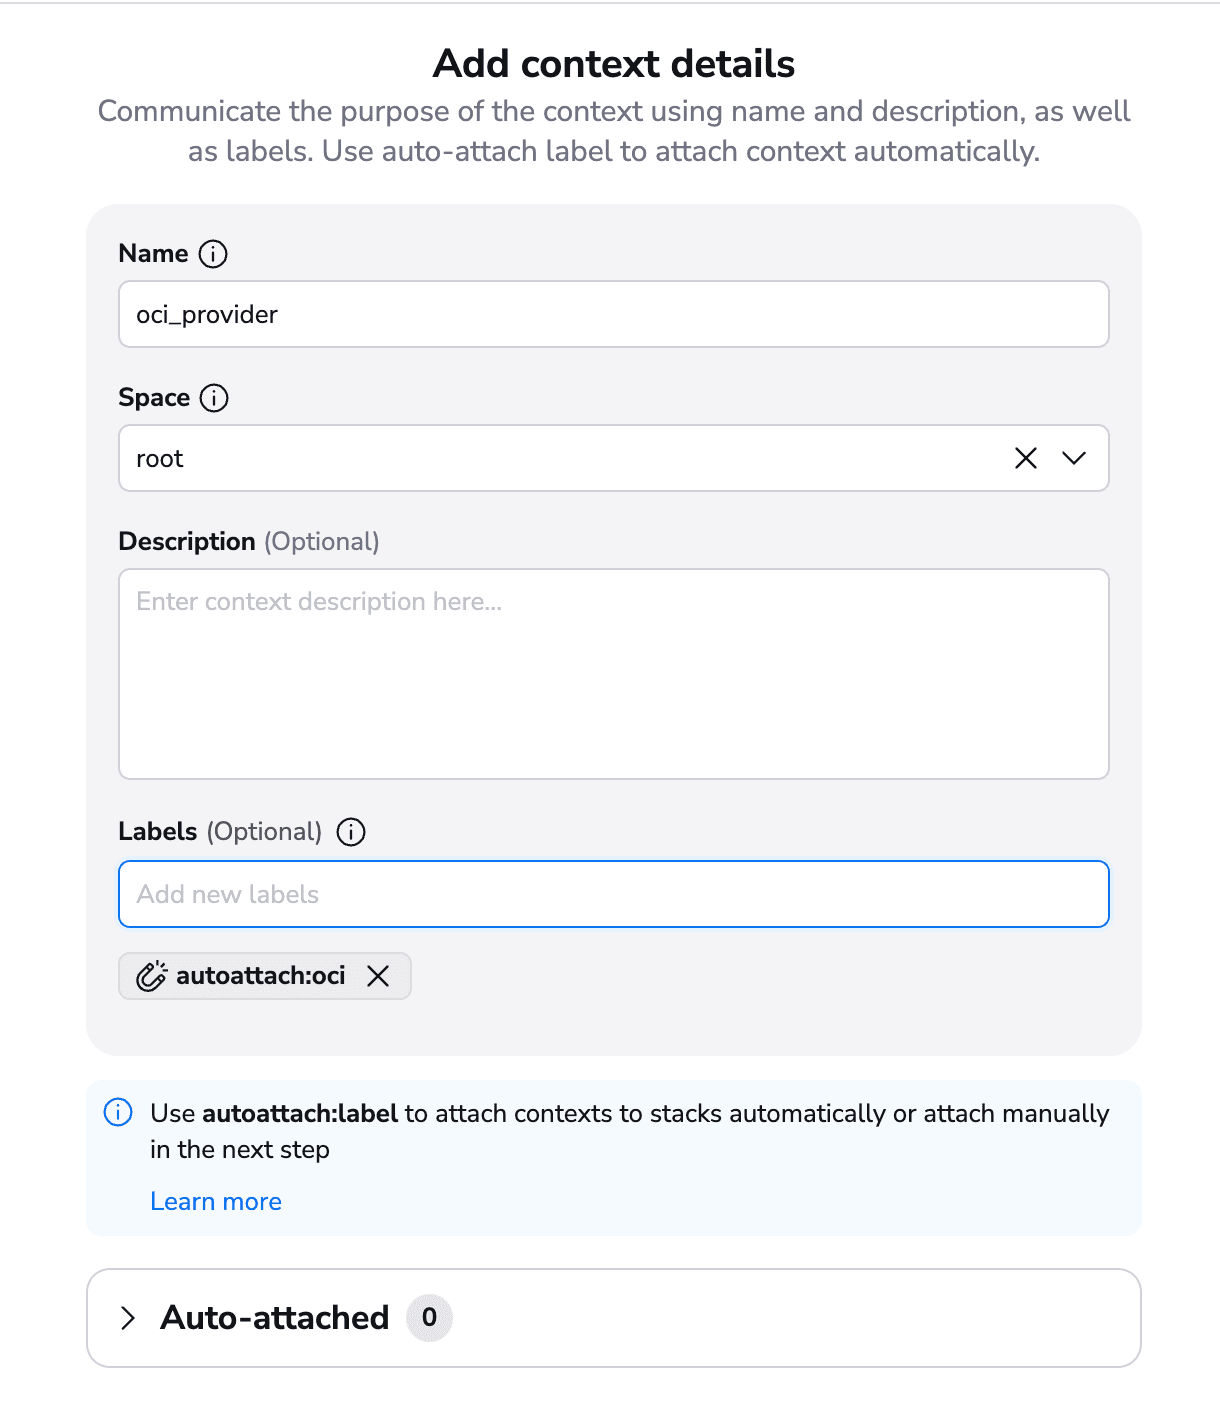
I’ve added a name to the context, and for the label’s part I’ve added “autoattach:oci” – this means that whenever I create a stack that has the oci label, this context will automatically attach to it.
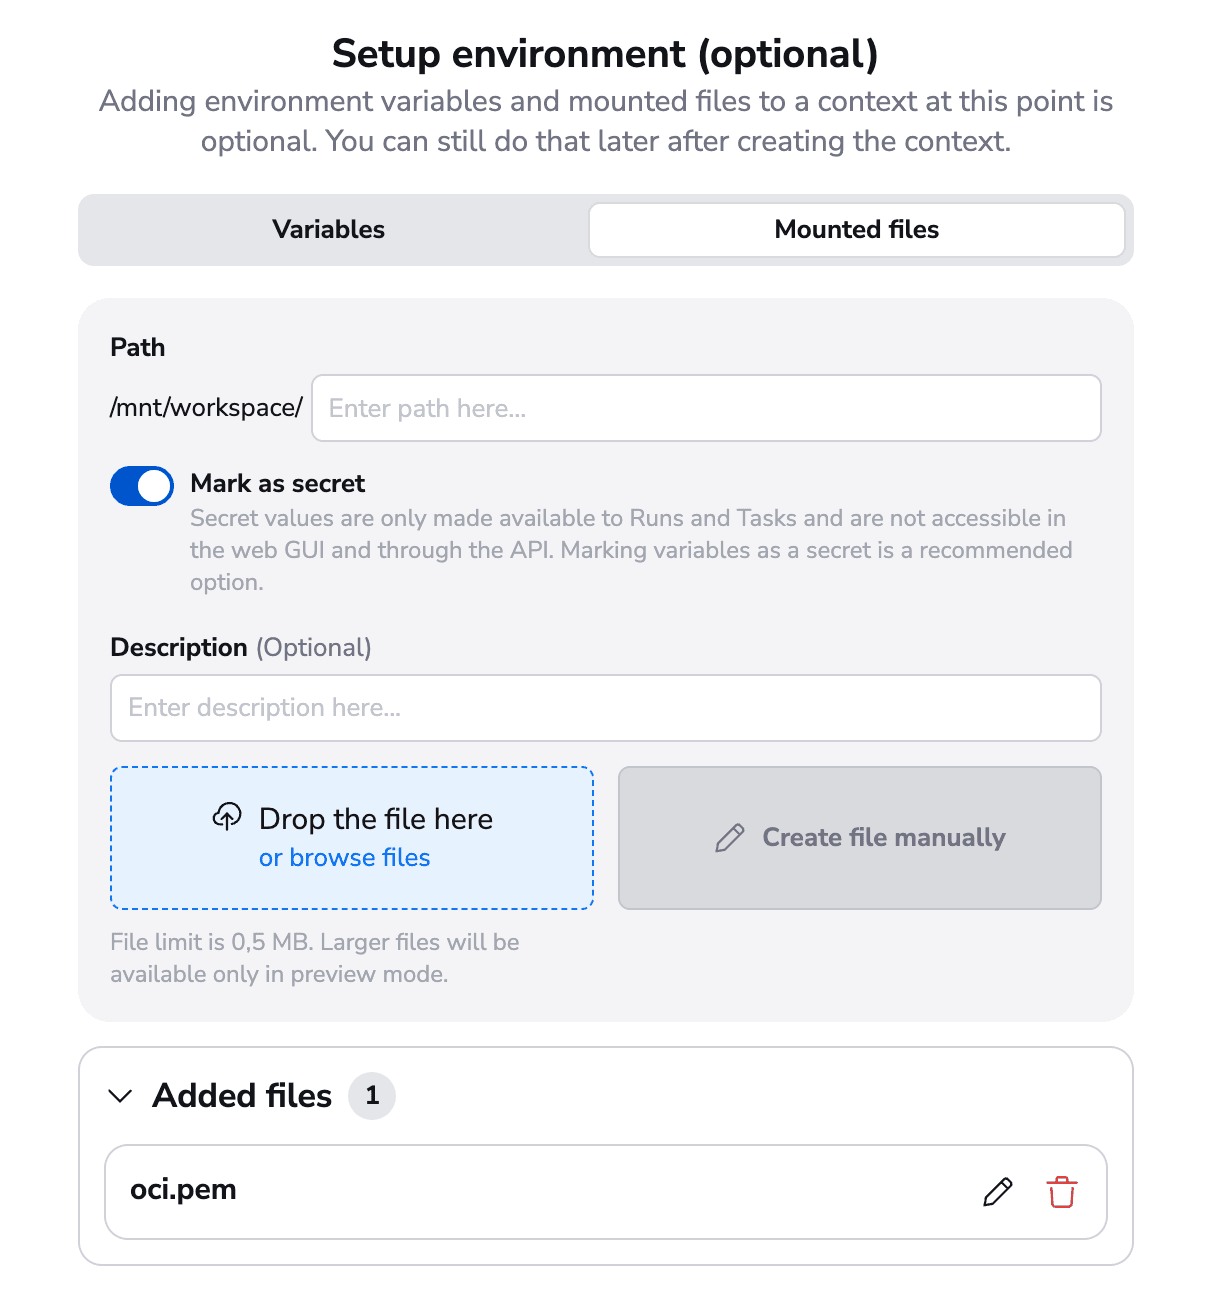
Next, I’ve added the environment variable necessary for the provider, and the compartment (in the meantime, I removed the mention of it from the tfvars), similar to what I’ve shown in the tfvars file when running the example manually, with the caveat that I changed the key_file_path to /mnt/workspace/oci.pem.
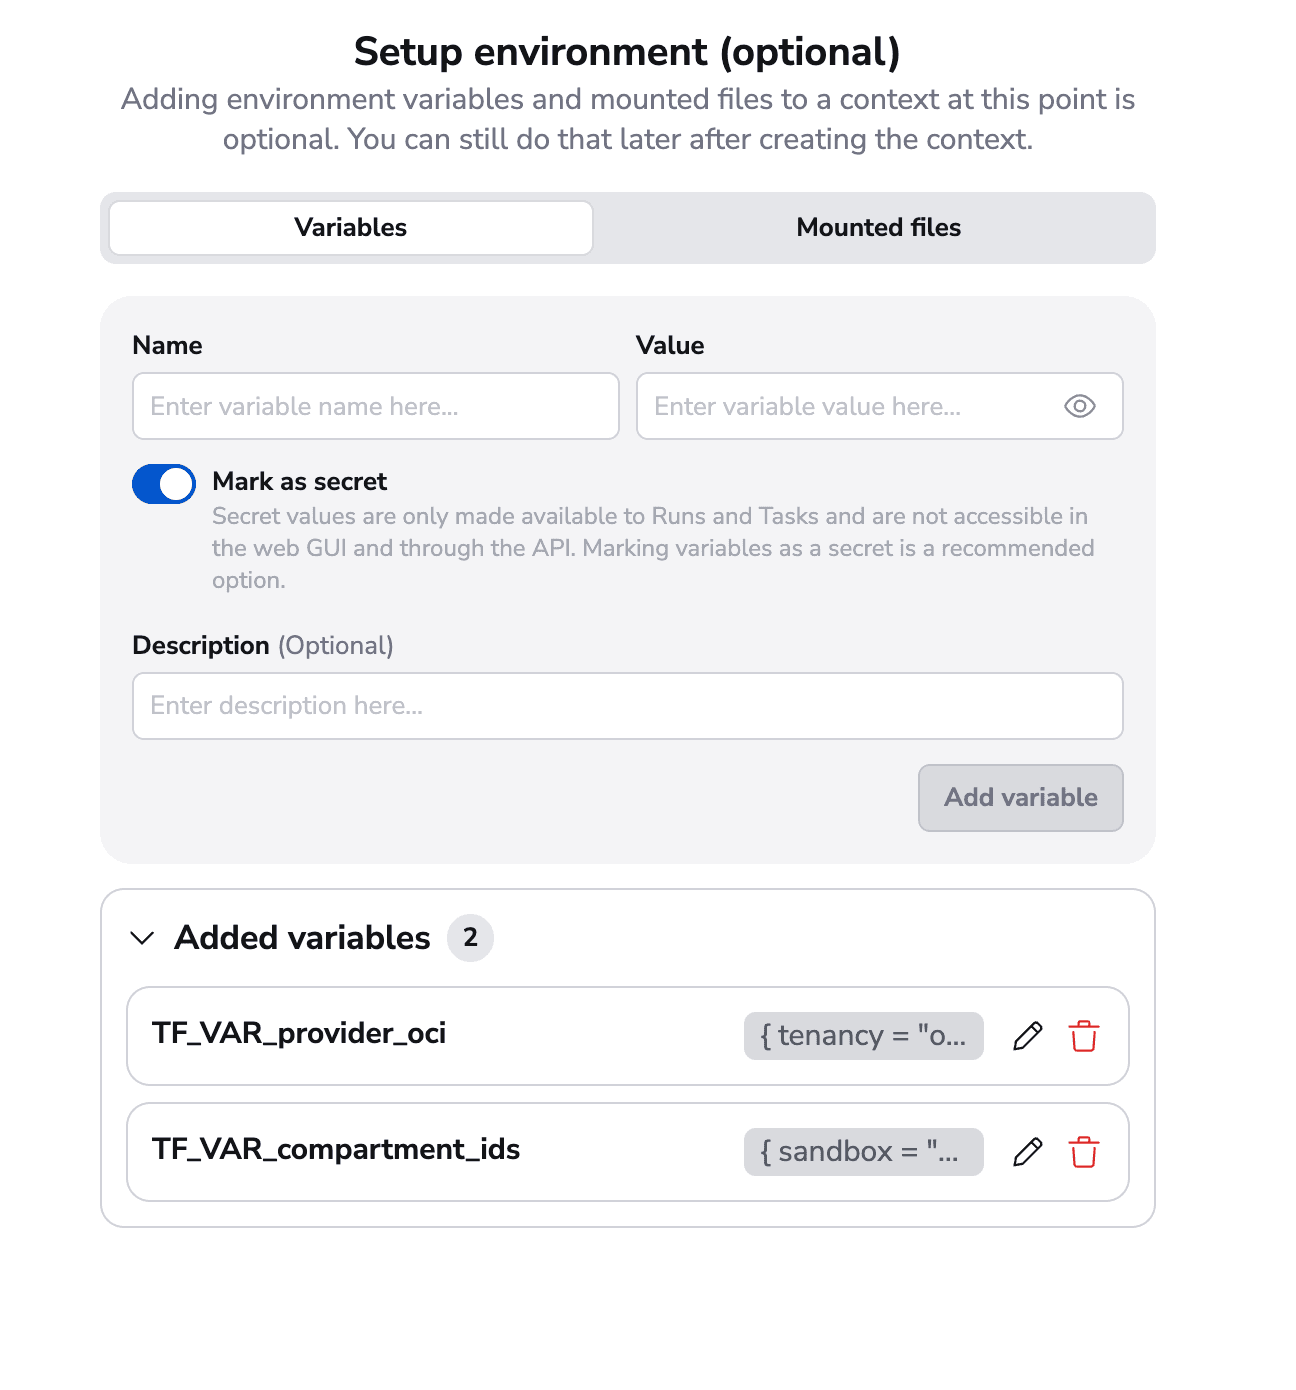
In the mounted files part, I’ve uploaded the oci.pem file, which is the private key that we generated initially:
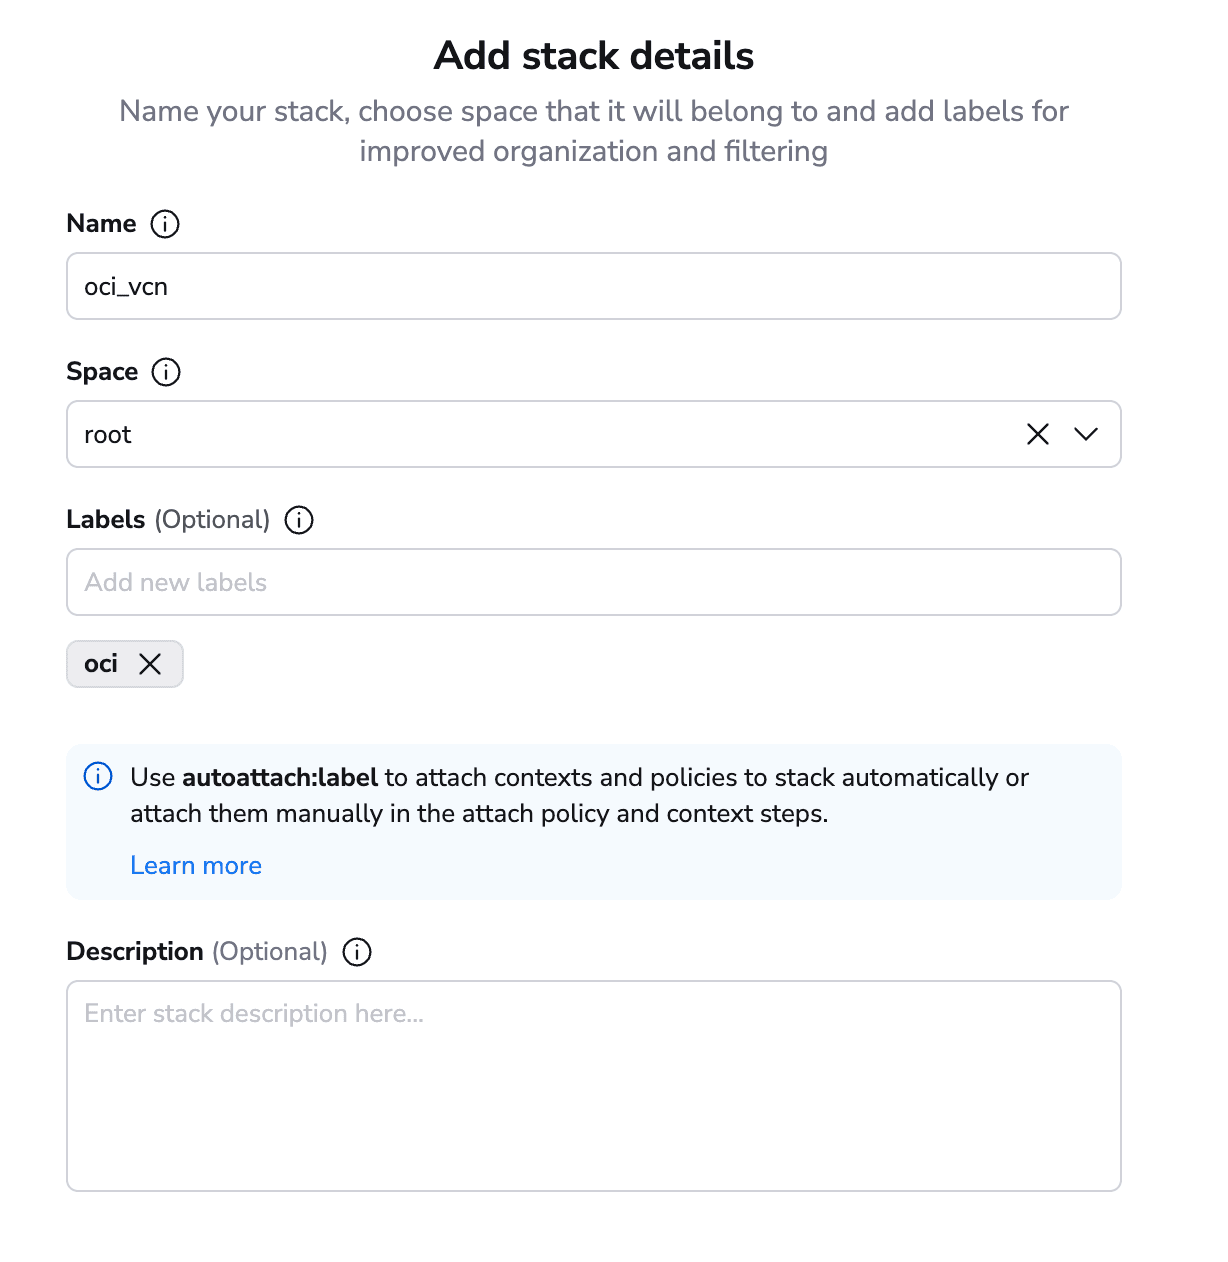
Now, let’s create a stack with an oci label:
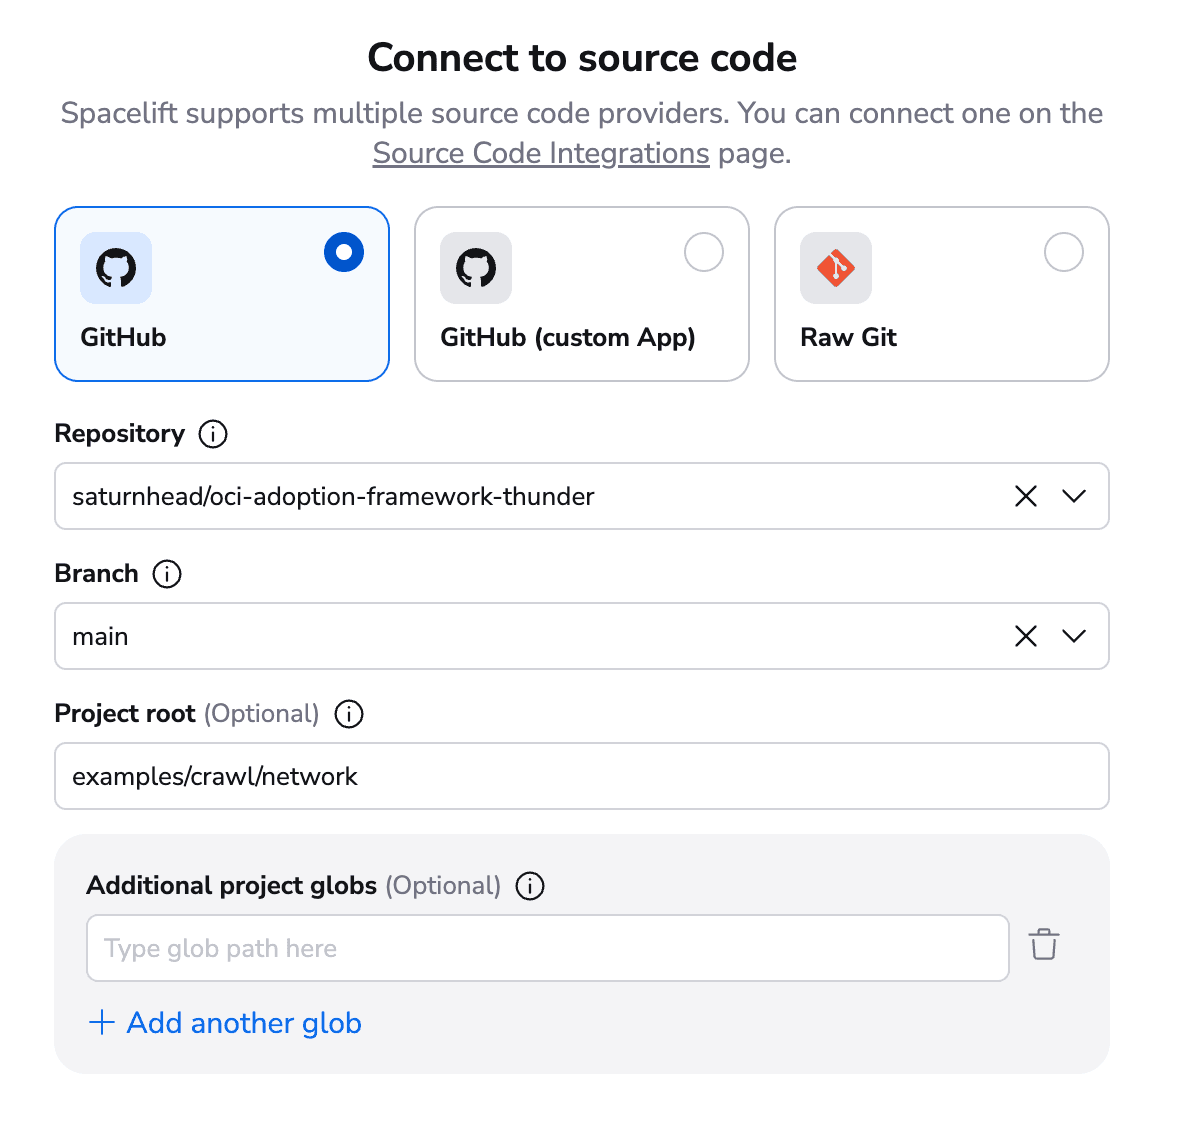
Next, select the repository and branch, and specify the folder path:
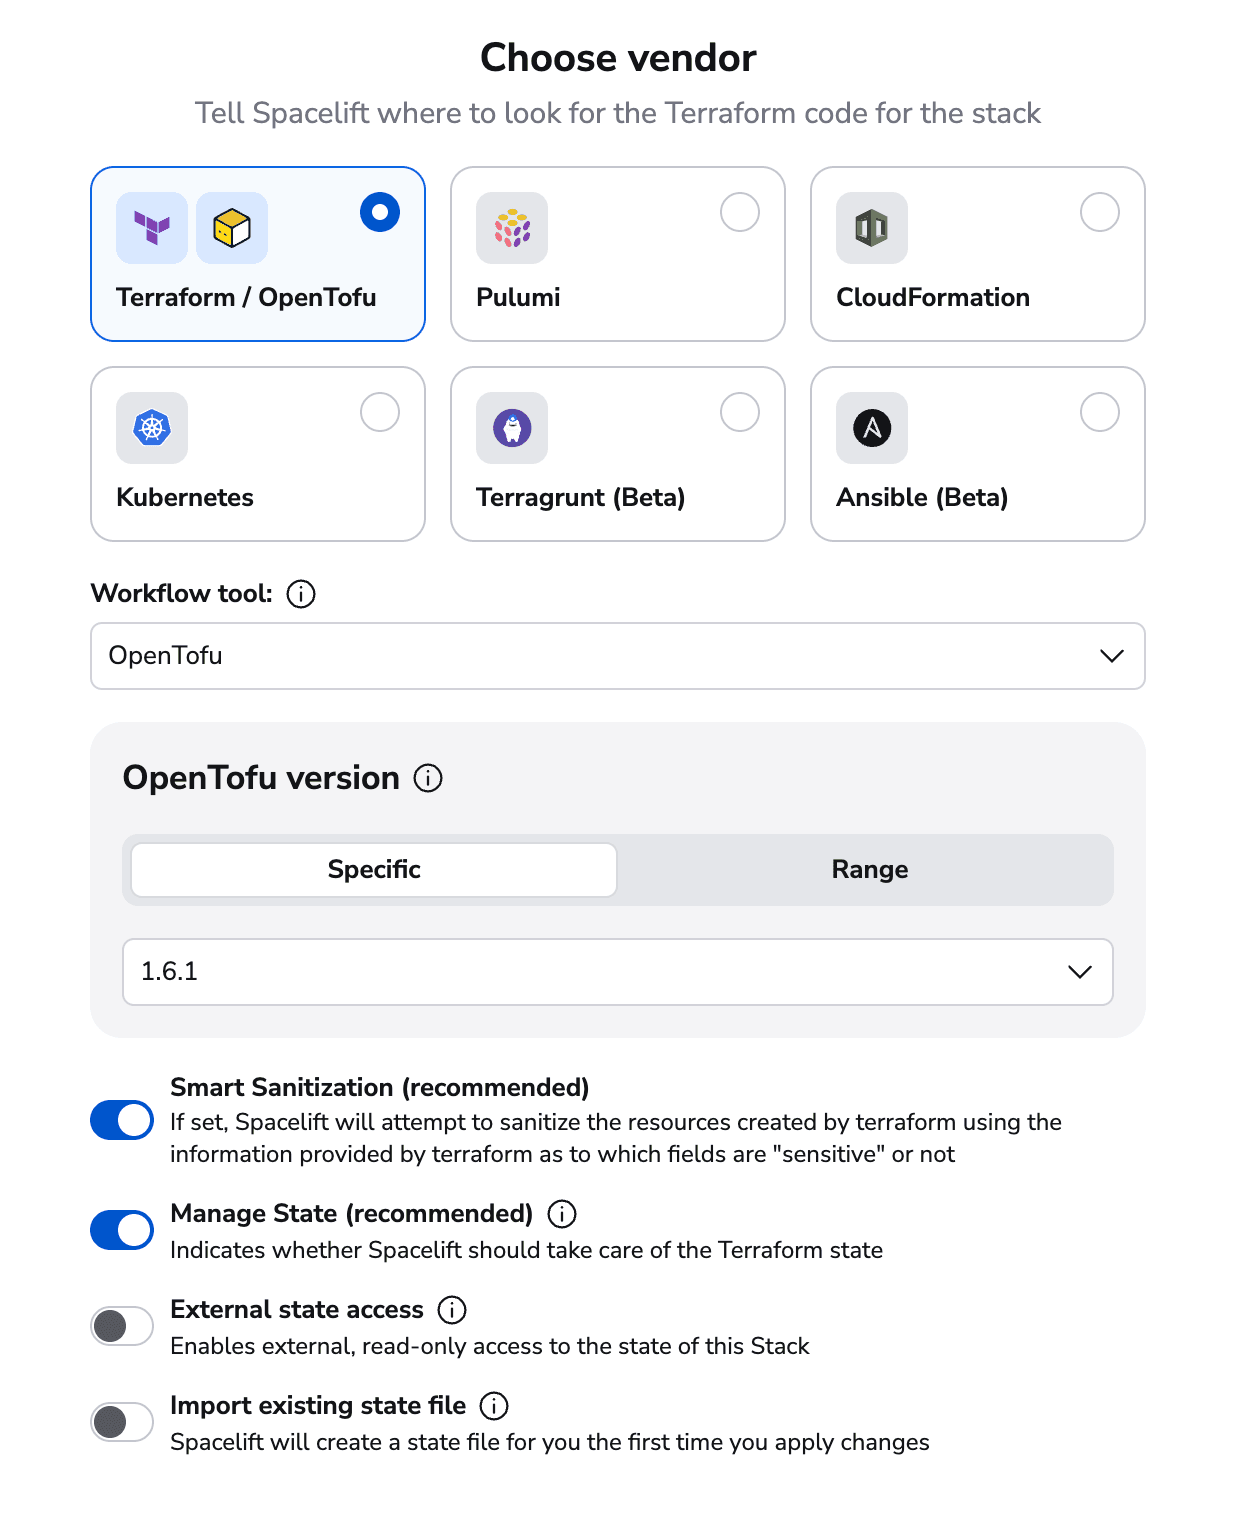
In the following step, select OpenTofu and click on Create.
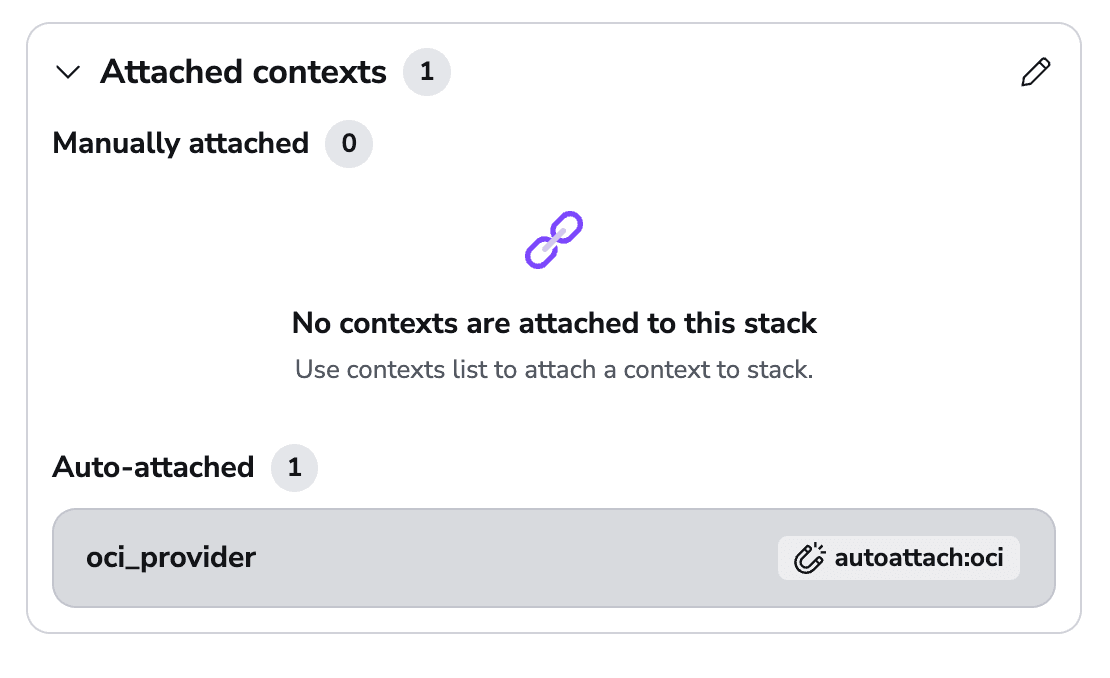
You will see in the summary that the context we created previously has been auto-attached.
Now, let’s run a plan on the stack:
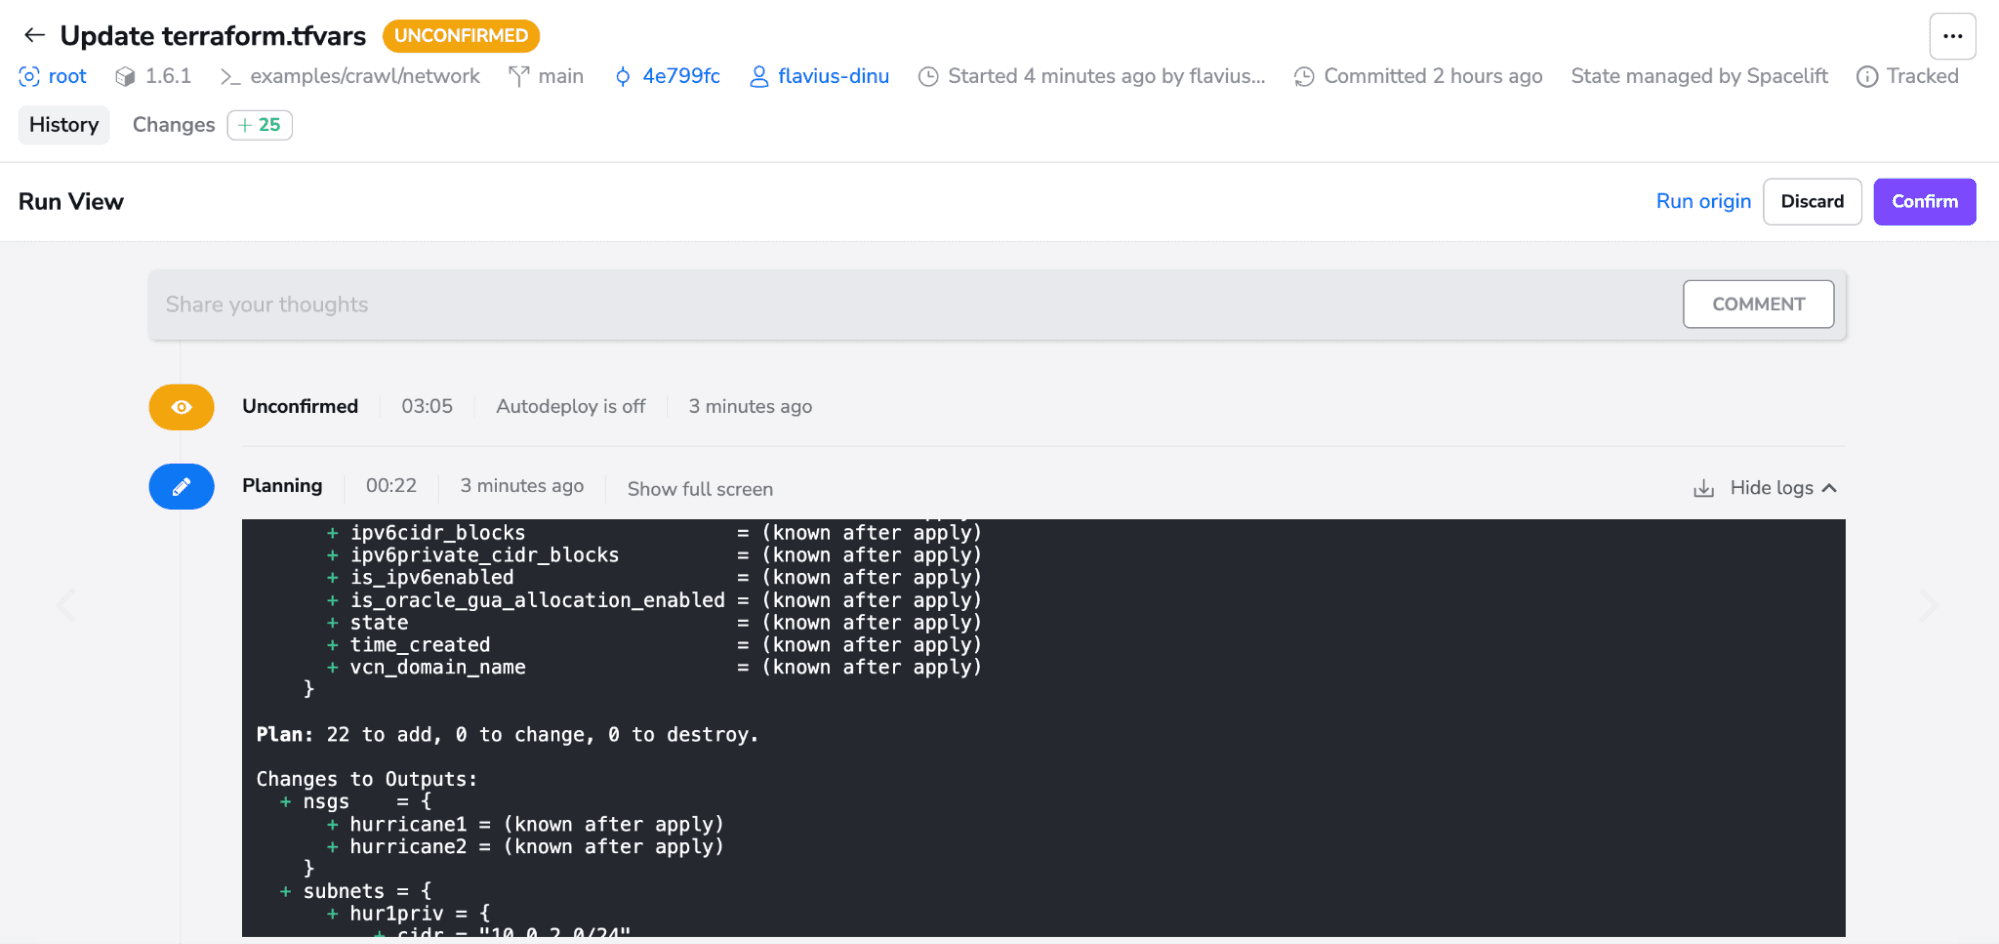
We see there are 22 resources to add, and some outputs will be created. The run reached an unconfirmed state, and we will discard it because we want to also attach a policy to it.
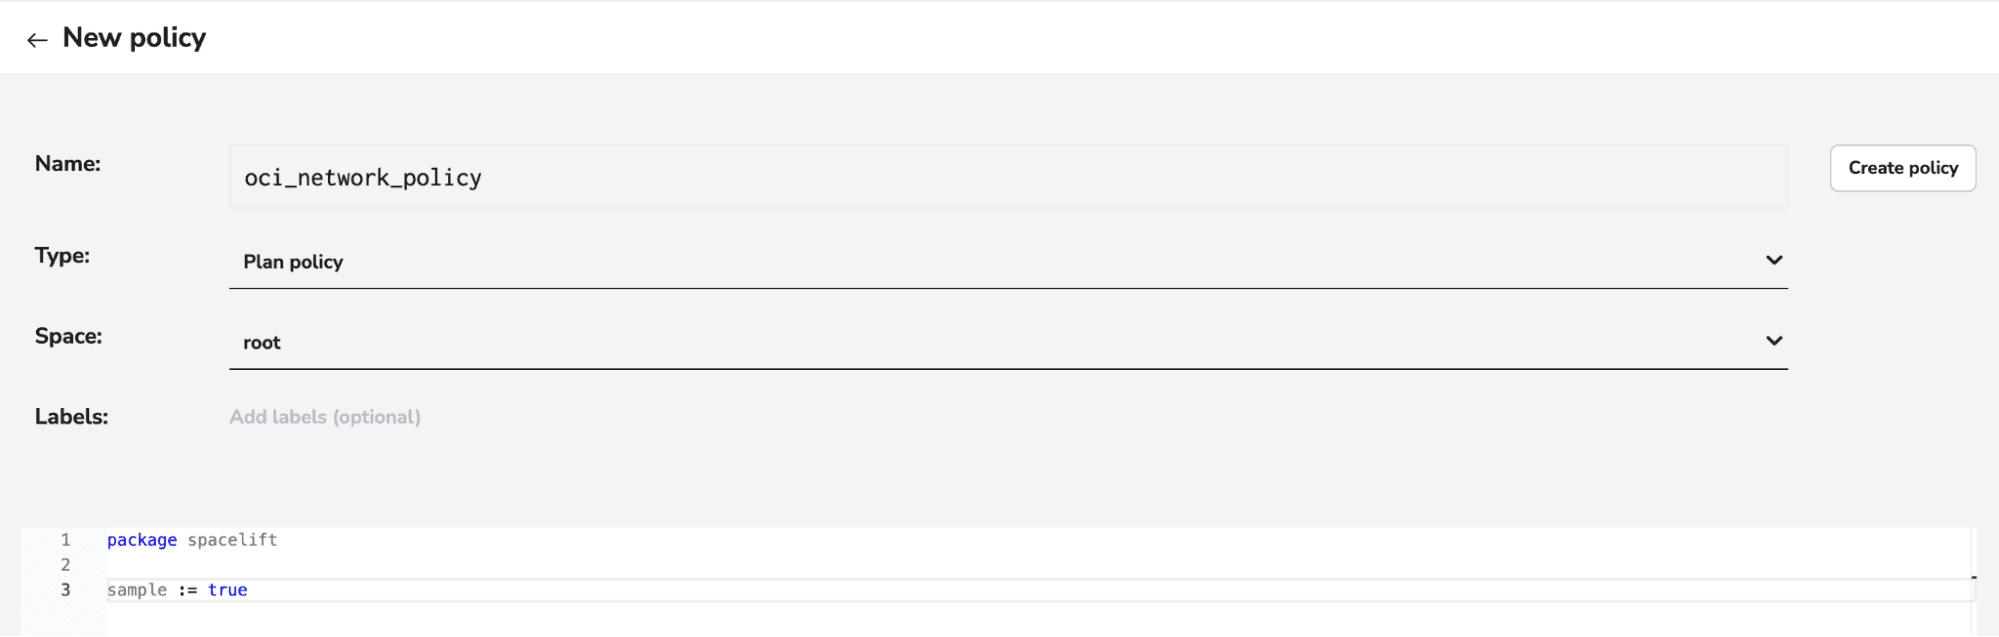
Let’s first create a plan policy that doesn’t do anything but will allow us to sample it on the input run:
Now, go to the stack settings and attach the policy:
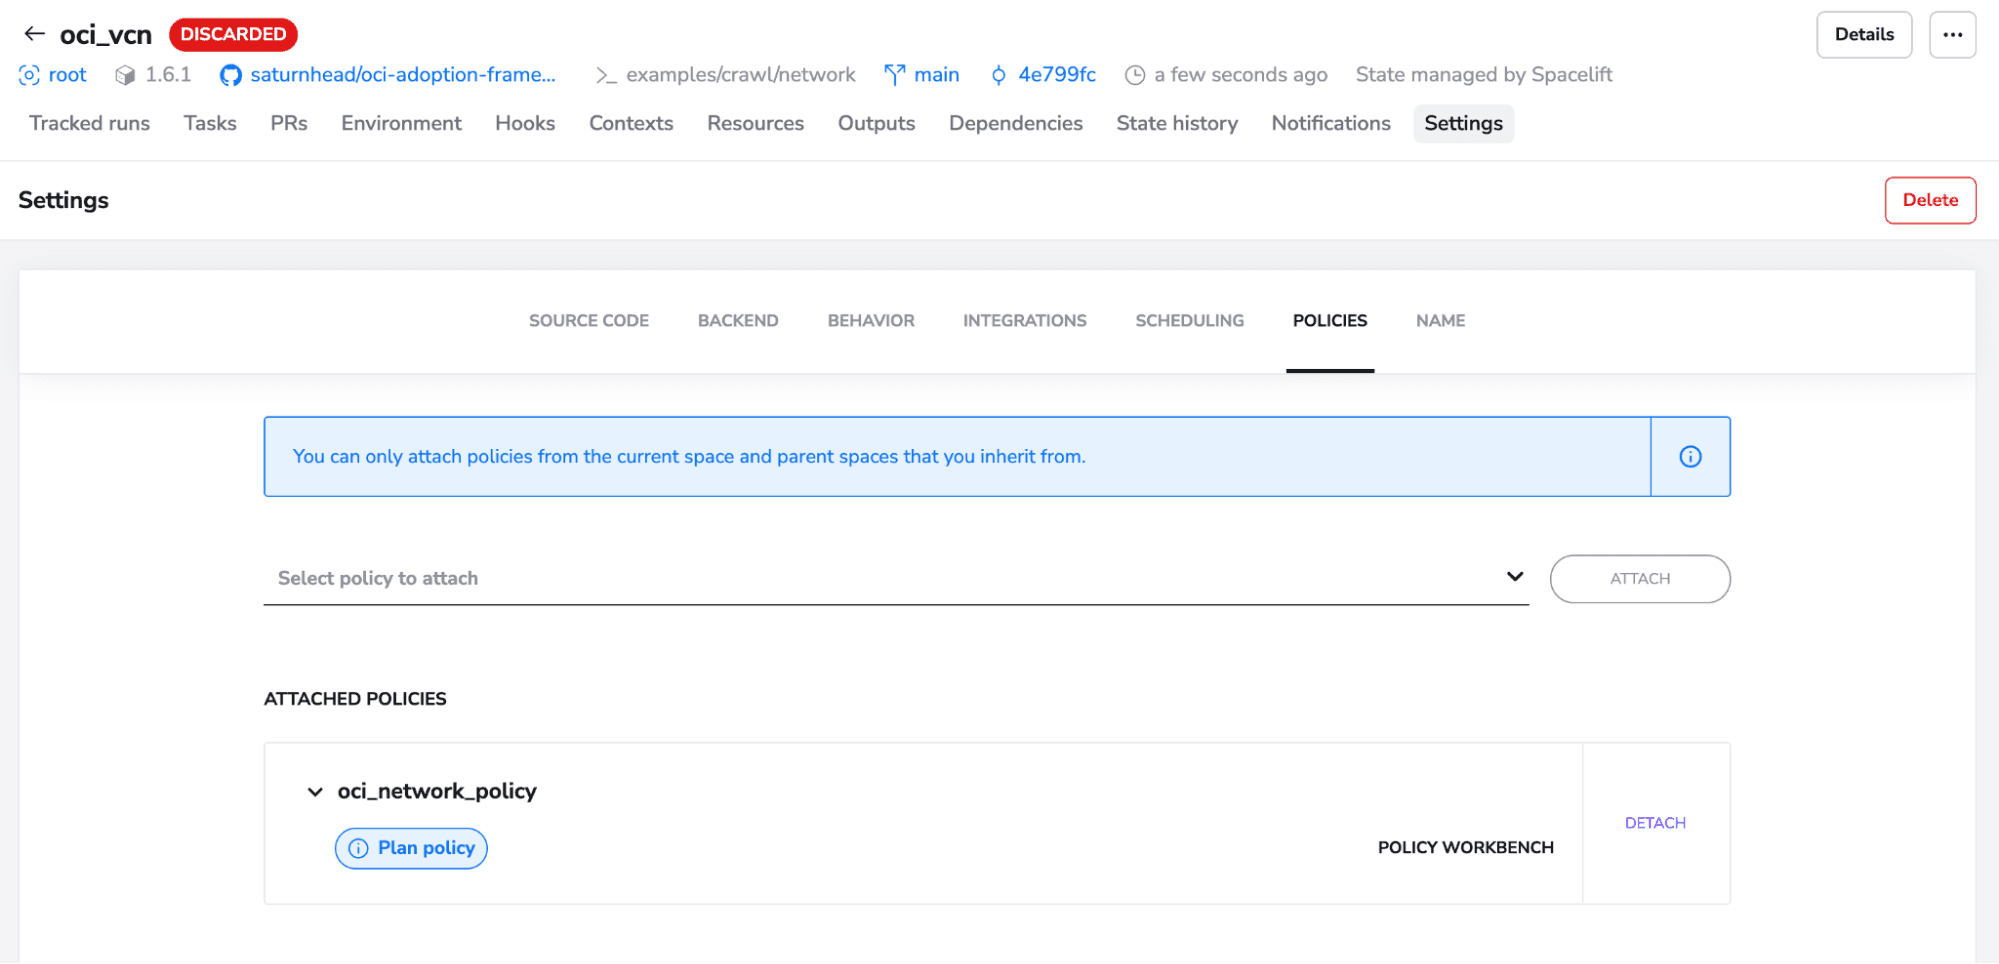
If we run the code again, we will see that our plan policy is automatically approved because it doesn’t check anything at the moment:
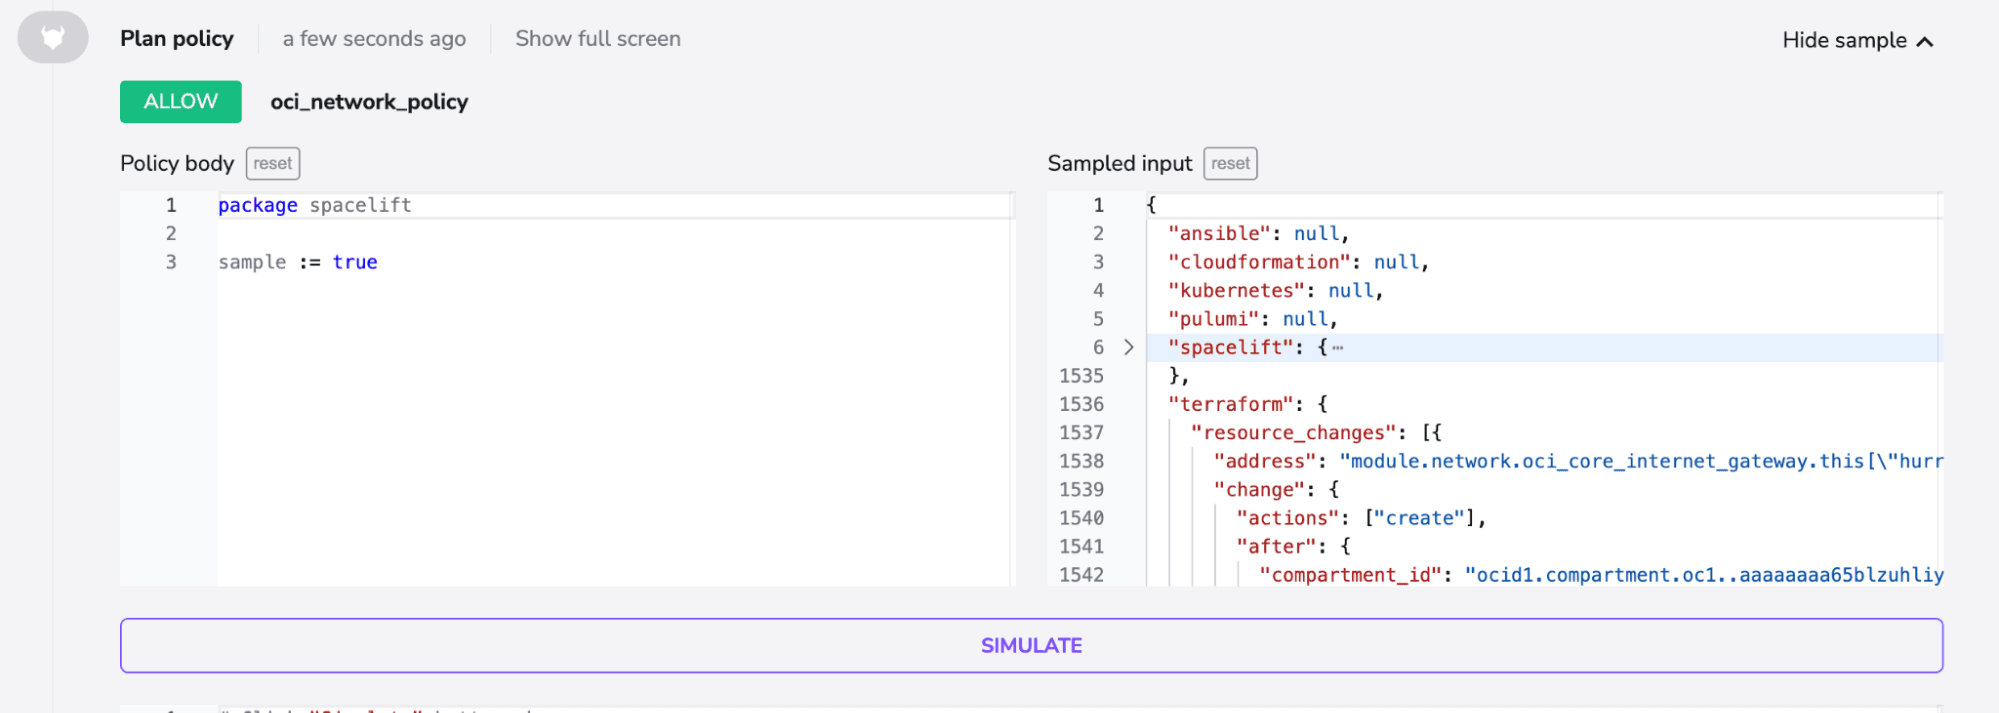
However, we now have the policy workbench enabled, and we can build a policy based on our input.
Let’s first filter for our resource_type which is “oci_core_virtual_network”. To do that, we see that in our input json, we can take all the resources from terraform.resource_changes:
package spacelift

deny[message] {
	resource := input.terraform.resource_changes[_]
	resource.type == "oci_core_virtual_network"
      message := resource
}
If you click on SIMULATE, you will now see all the details of your resource have been printed in the deny column. Let’s take it one step further and filter for the cidr_block:
package spacelift

deny[message] {
	resource := input.terraform.resource_changes[_]
	resource.type == "oci_core_virtual_network"
      vcn_cidr := resource.change.after.cidr_block
      message := vcn_cidr
}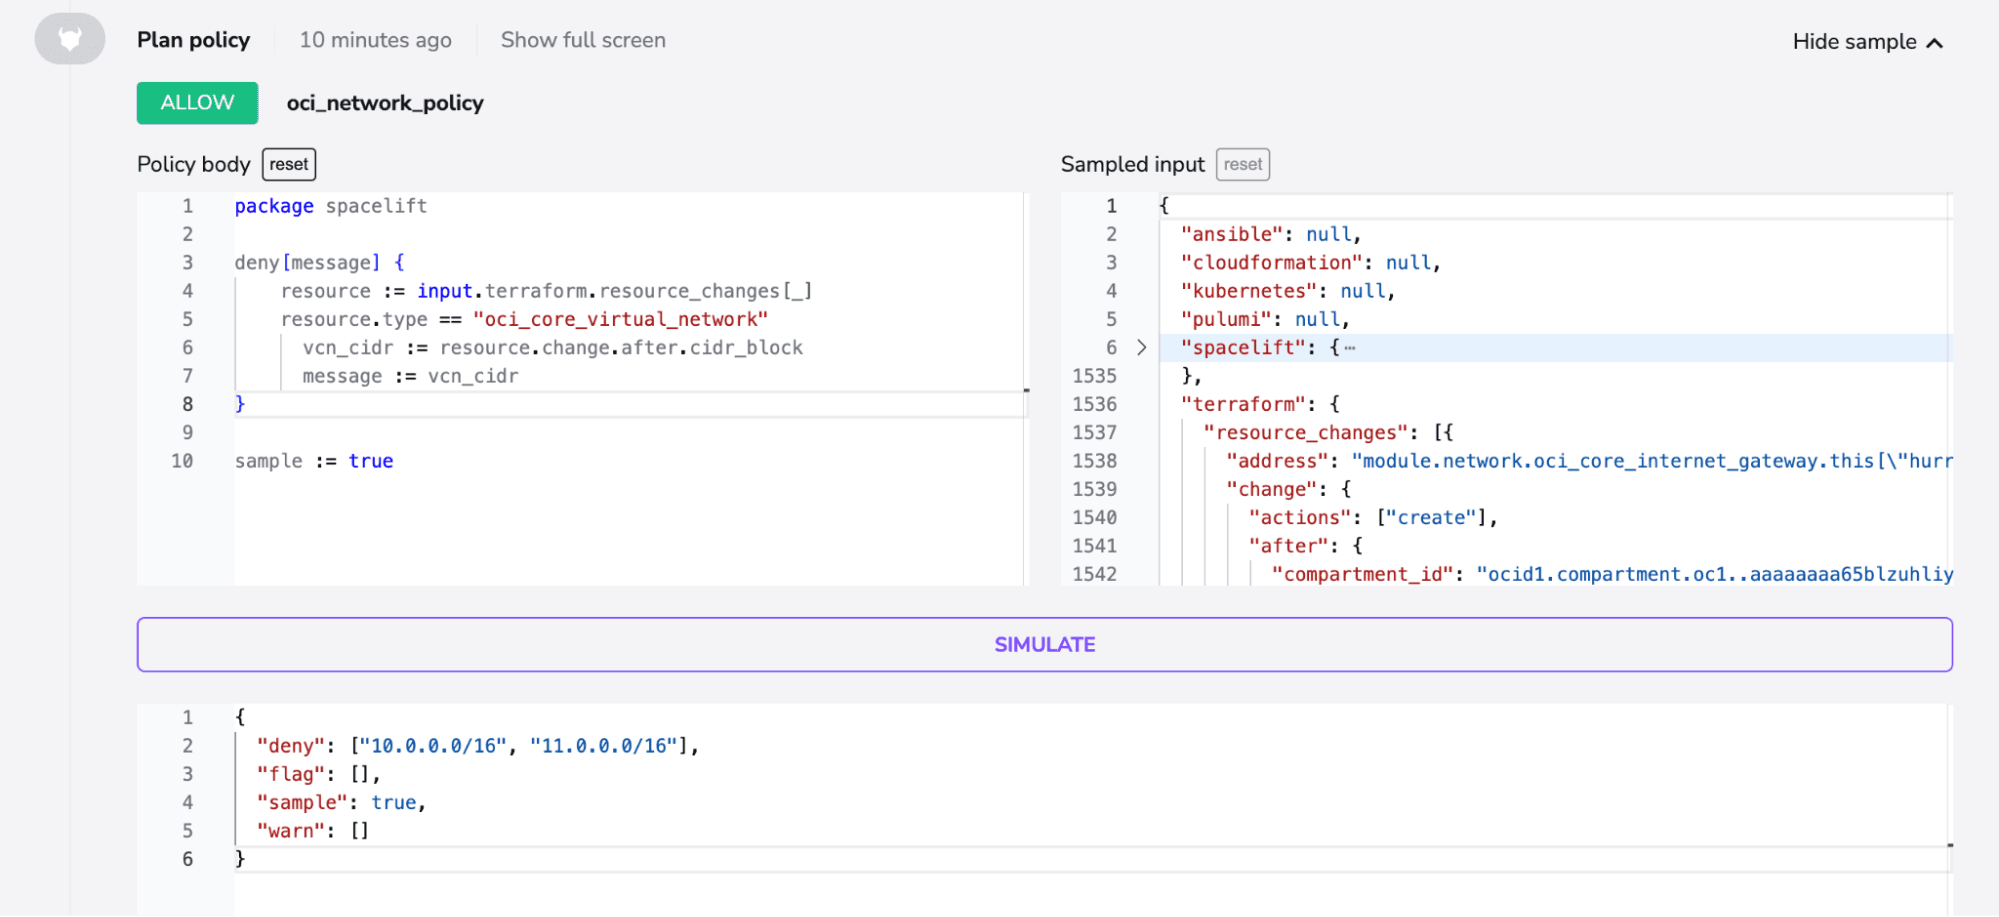
We can see we have both vcn cidrs now inside the deny message. We now want to split these strings and get the mask:
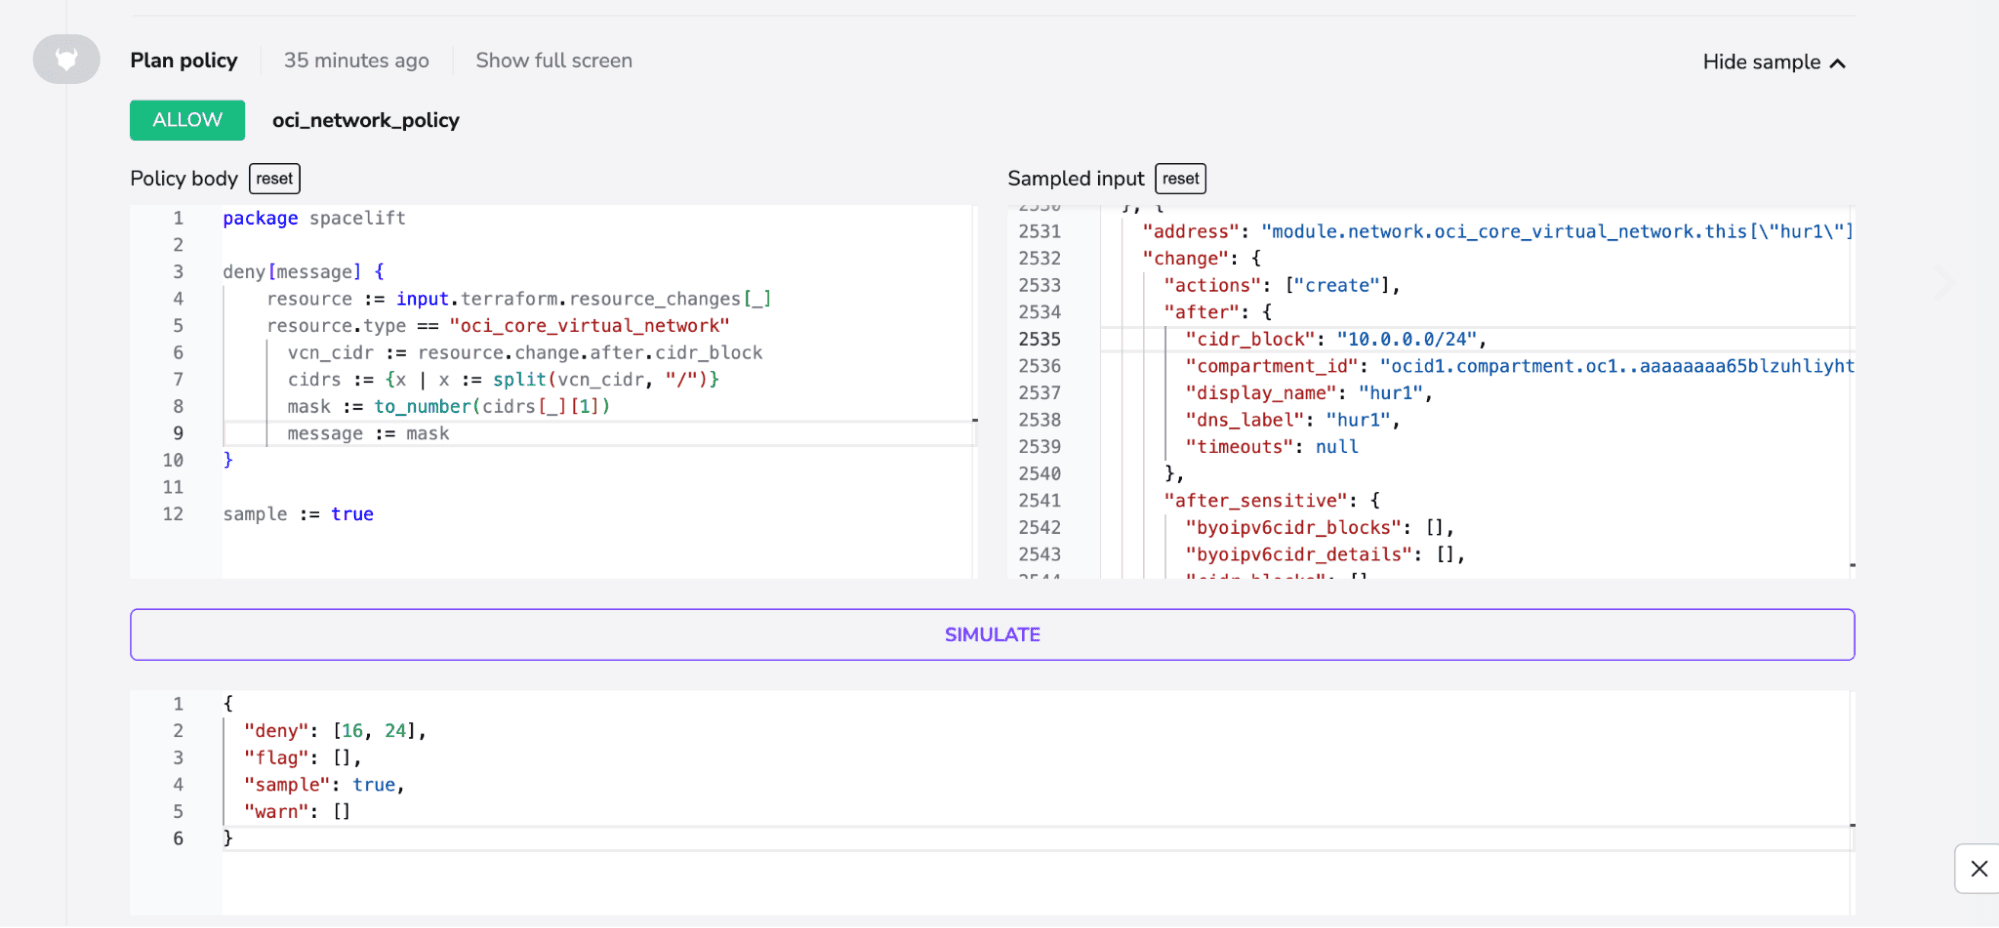
package spacelift

deny[message] {
	resource := input.terraform.resource_changes[_]
	resource.type == "oci_core_virtual_network"
      vcn_cidr := resource.change.after.cidr_block
      cidrs := {x | x := split(vcn_cidr, "/")}
      mask := to_number(cidrs[_][1])
}
As you can see, in the deny column, we only have one value because the cidrs are the same. If we tweak the input and add a /24 just as an example, you can easily see that changes:
Now, I will build a helper function that checks if my mask is between the values I require it to be:
valid_mask(mask) {
	mask >= 24
	mask <= 30
}
Now, let’s add everything together and test it out on the original input:
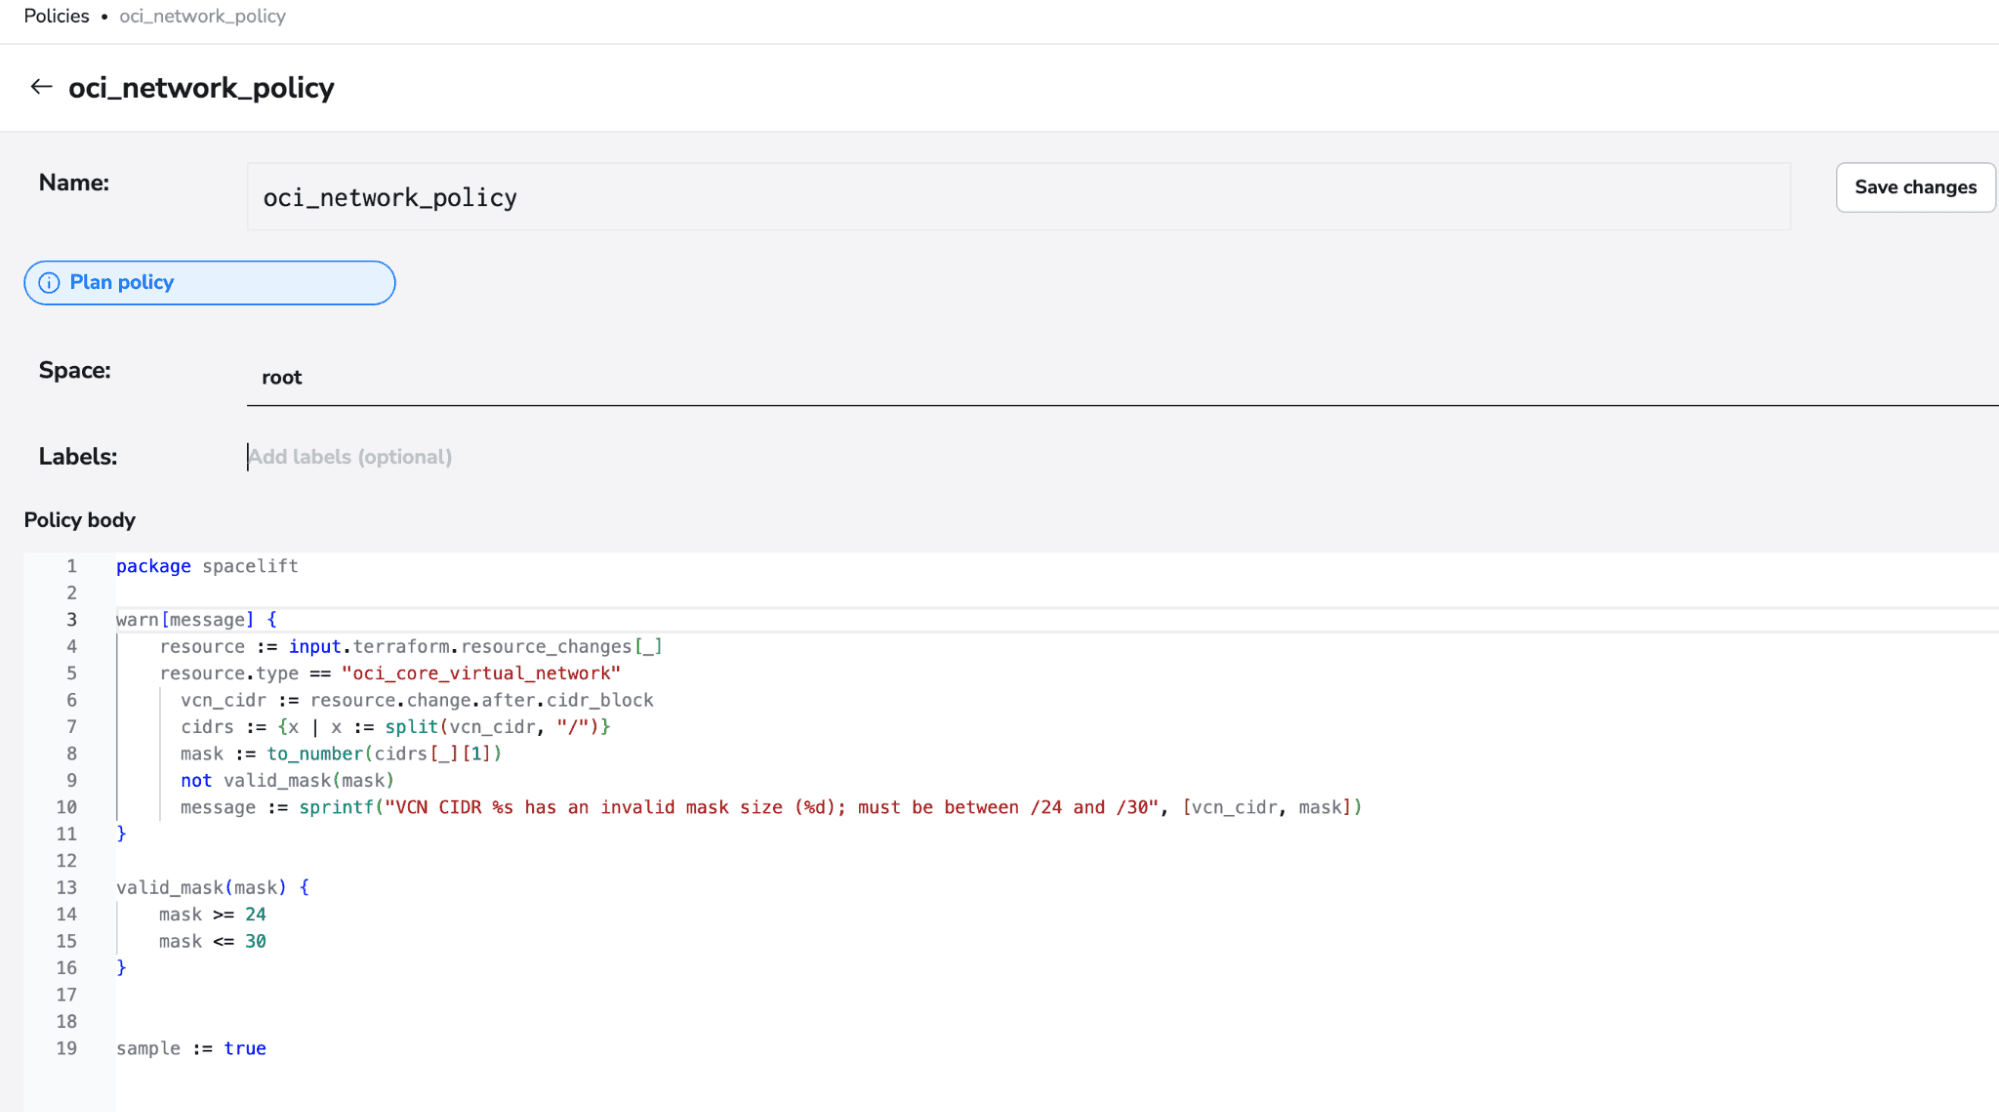
package spacelift

deny[message] {
	resource := input.terraform.resource_changes[_]
	resource.type == "oci_core_virtual_network"
      vcn_cidr := resource.change.after.cidr_block
      cidrs := {x | x := split(vcn_cidr, "/")}
      mask := to_number(cidrs[_][1])
      not valid_mask(mask)
      message := sprintf("VCN CIDR %s has an invalid mask size (%d); must be between /24 and /30", [vcn_cidr, mask])
}

valid_mask(mask) {
	mask >= 24
	mask <= 30
}

sample := true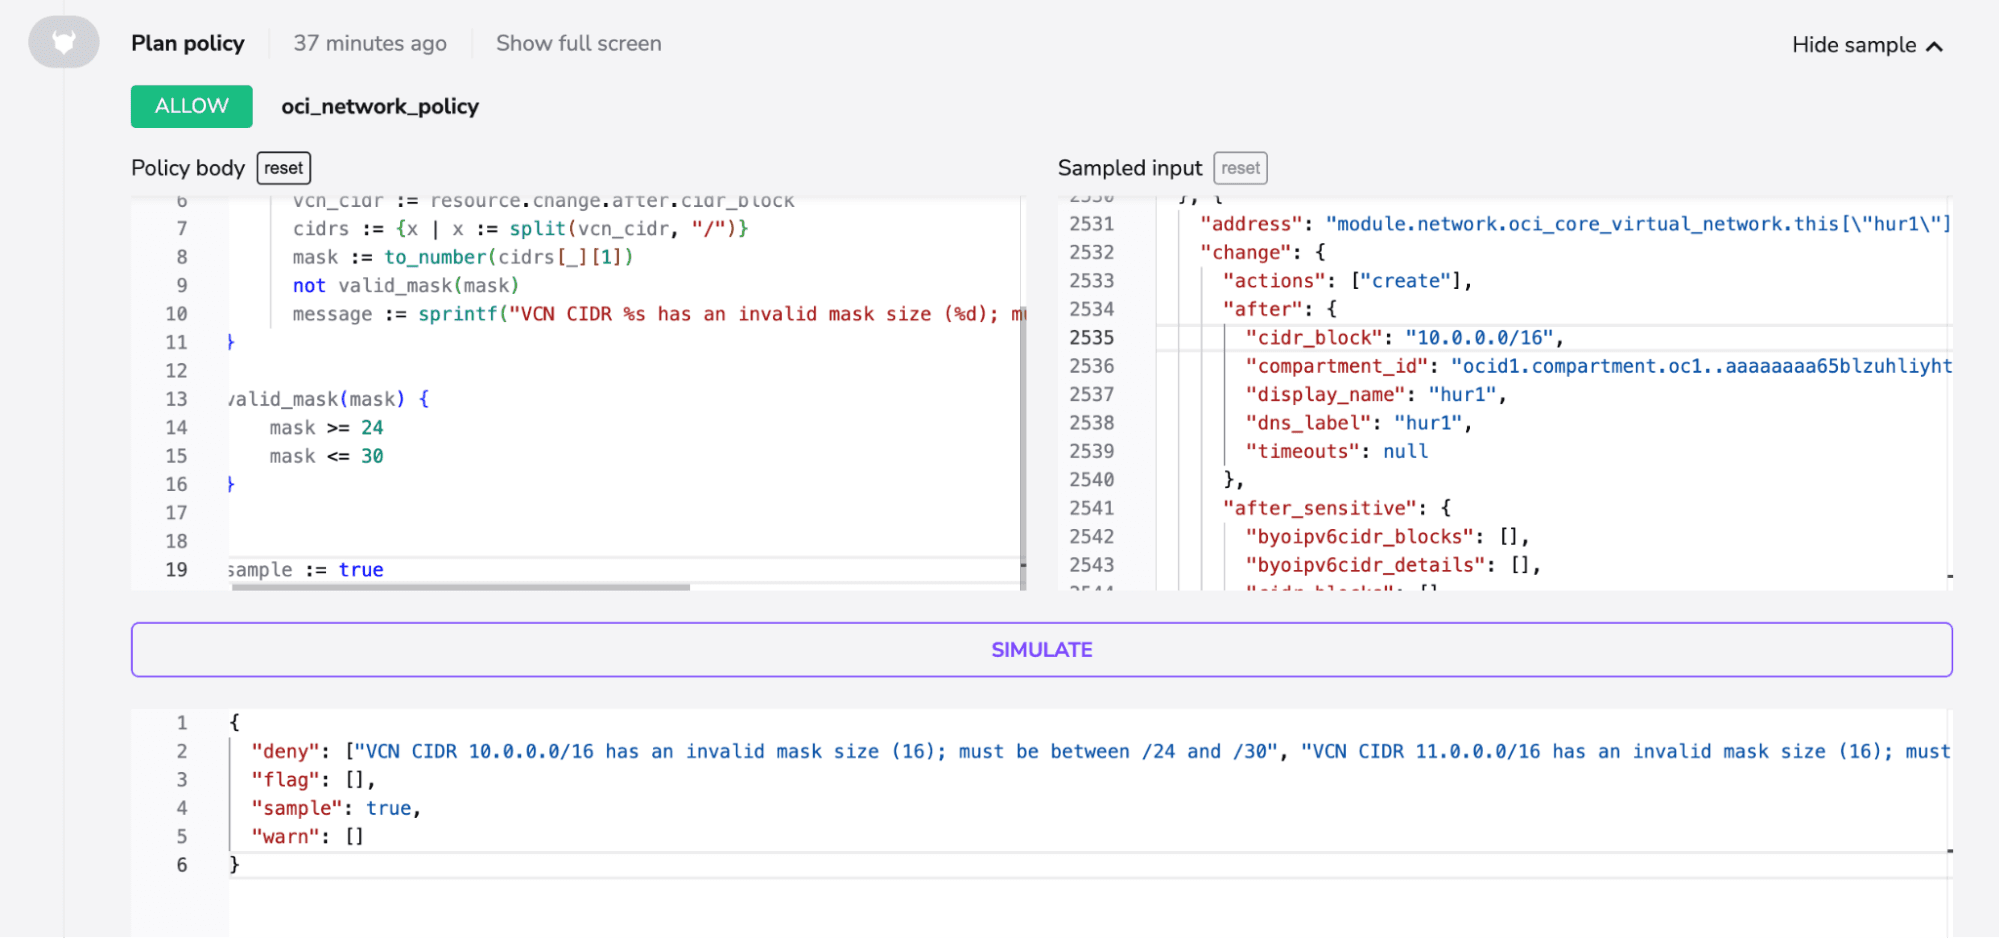
Now, let’s go back to the policy itself and paste the code, with a minor tweak – a warn block instead of a deny, to ensure we catch the error, but we are also able to bypass it and do an actual deployment:
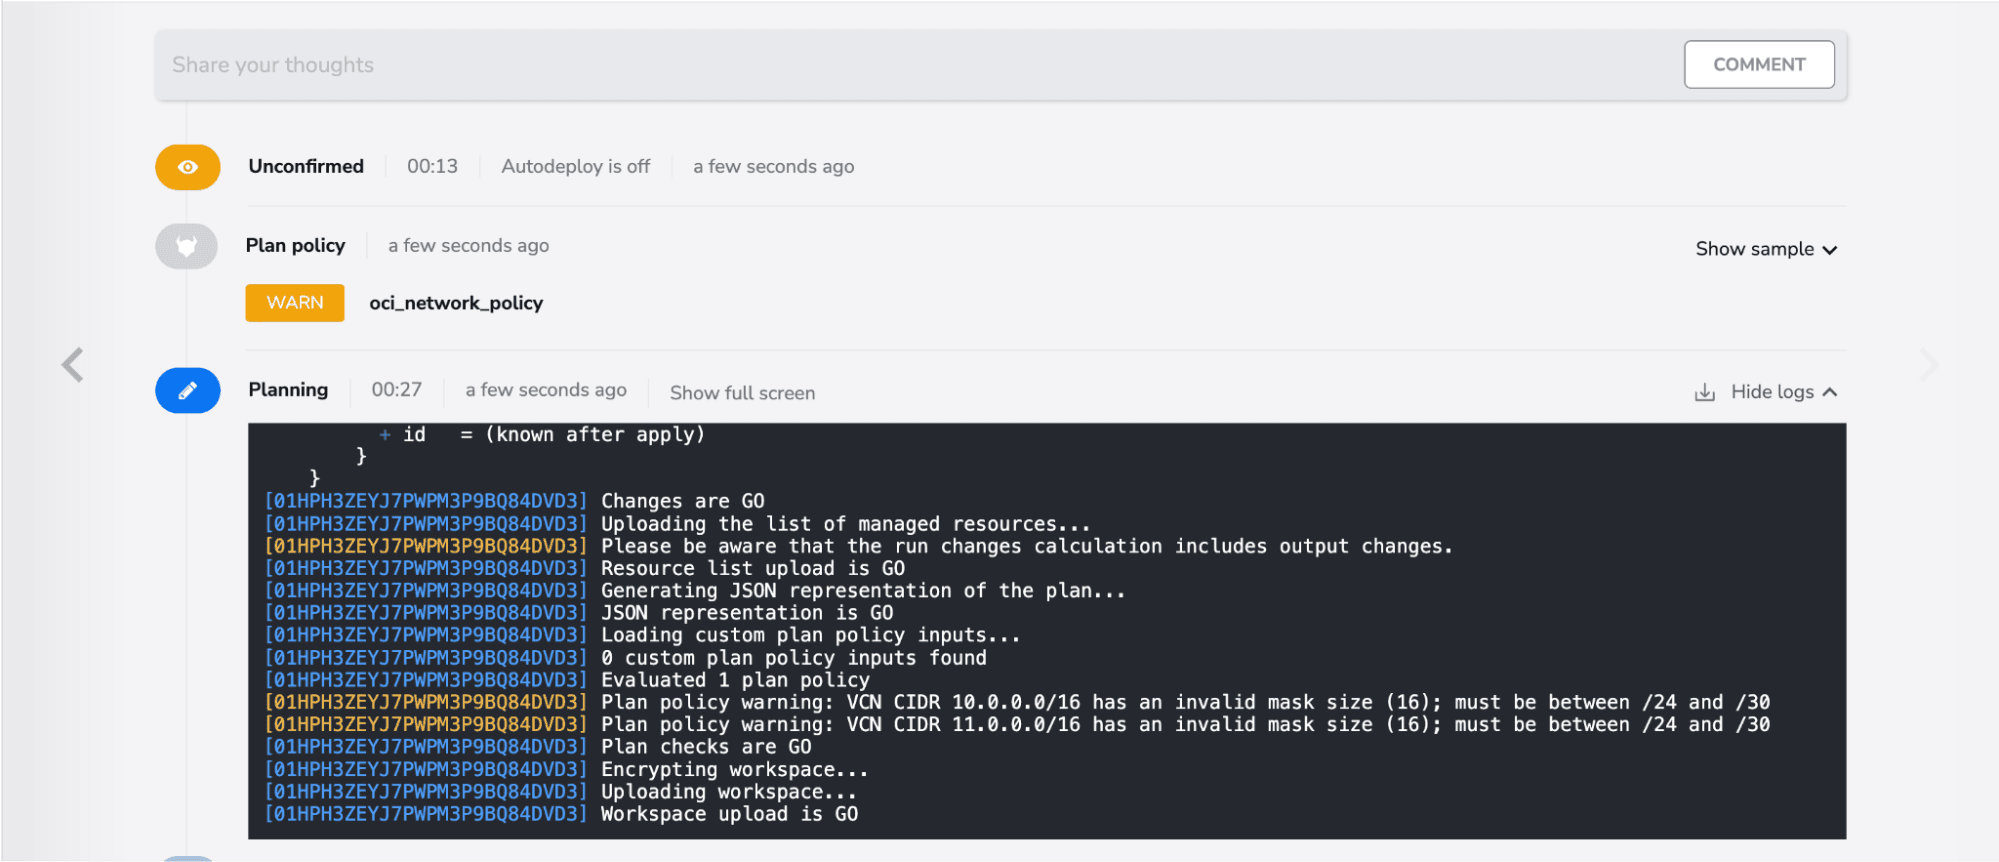
Go back to the stack and retrigger a run. We can easily see the policy catching the issue, but we are still able to do the actual deployment of the resources.

How Spacelift can further improve your workflows
We’ve seen plan policies and contexts in action but there are many other things that you do to further enhance your workflow:
- Leverage stack dependencies to build dependencies between your stacks and share outputs between them – e.g Terraform and Ansible example
- Integrate any security vulnerability tool you want inside of your workflow
- Build other policies for approvals, notifications, pr events and more
- Build self-service infrastructure
- Detect and remediate infrastructure drift
- and much more
Plans for OCI Adoption Framework Thunder
Right now, I don’t know if there are any plans for Thunder on Oracle’s side, and, judging by the fact that there have been no updates for quite some time, I guess that nothing will happen with it.
However, if people find it useful and are interested in contributing, I’m open to discussing what we can do about bringing the framework into 2024.
Key points
OCI is one of the top five cloud providers out there, and even though the adoption framework Thunder is old, with a few tweaks it can still provide considerable value.
Integrating OCI with Spacelift takes your automations to the next level, helping you implement the security guardrails you require, enhancing your deployments, and building end-to-end workflows that can share outputs.
If you want to learn more about Spacelift, create a free account today, or book a demo with one of our engineers.
The Most Flexible CI/CD Automation Tool
Spacelift is an alternative to using homegrown solutions on top of a generic CI. It helps overcome common state management issues and adds several must-have capabilities for infrastructure management.
