
If your dev team is grappling with bottlenecks because your Jenkins server is overloaded, Kubernetes can help.
As a container orchestration platform, Kubernetes supports dynamic scaling, ensuring applications run consistently in local and cloud environments. For Jenkins, this means on-demand scaling of agents, more efficient resource utilization, and smoother integration with container-based workflows.
Running Jenkins on Kubernetes combines its strengths to streamline software delivery. Jenkins provides the build and test automation engine, while Kubernetes enables deployment with far less downtime and scales far more easily than a single virtual machine or an old physical server.
This guide shows you how to run Jenkins on Kubernetes with confidence and extend it for your project pipelines.
Why run Jenkins on Kubernetes?
Jenkins on Kubernetes delivers on-demand scalability, improved reliability, and simpler resource management. Here are the core benefits of running Jenkins on Kubernetes:
- Scalability – Jenkins agents run as pods that spin up only when jobs start and disappear when they finish, so your cluster can grow during peak load and shrink again when the queue is quiet.
- Resource efficiency – Kubernetes schedules agents across available nodes and only runs them when needed, which reduces wasted compute and lets you use CPU and memory limits to stop a single build from hogging all resources.
- High availability – If the Jenkins controller pod or a node fails, Kubernetes automatically restarts it. You can run replicas for extra resilience when you design the stateful parts carefully.
- Portability – The same Jenkins deployment can run on Minikube, Docker Desktop, or any major cloud Kubernetes service, which means you can test on a laptop and promote the same setup into production with minimal changes.
- Integration with modern tools – Jenkins on Kubernetes fits neatly into container-based workflows, so pipelines that build and ship Docker images work smoothly, and you can plug in Helm charts, Kubernetes-native monitoring, and logging tools to extend the platform.
Challenges of traditional Jenkins deployments
Jenkins is an established tool that works well on virtual machines; however, traditional deployments often show limitations when workloads increase. Here are also some common challenges most developers face with traditional Jenkins deployments.
- Static agents – In older setups, Jenkins typically connects to a fixed pool of build servers. These servers run continuously regardless of whether jobs are queued or idle. This model is effective for small teams, but it quickly becomes limiting when workloads spike.
- Resource contention – Another challenge is resource contention on the Jenkins master itself. When too many jobs run in parallel, the Jenkins master node becomes overloaded with both scheduling tasks and handling jobs. This slows down the system and can sometimes cause jobs to fail.
- Maintenance overhead – Traditional Jenkins setups also require ongoing maintenance of agent nodes. Administrators must patch operating systems and install software to safeguard agents. As the number of agents grows, this task becomes increasingly time-consuming. Manual maintenance also introduces risks, as some agents have different software versions with inconsistent builds.
Generic CI/CD tools, such as Jenkins, are not designed for the complexity of infrastructure orchestration. Spacelift is an IaC management platform that provides a reliable CI/CD layer for tools like OpenTofu, Terraform, Pulumi, Kubernetes, and Ansible, enabling you to automate your IaC delivery workflows.
Understanding Jenkins and Kubernetes integration
Jenkins–Kubernetes integration is built on dynamic agent provisioning: Jenkins delegates build tasks, Kubernetes orchestrates the containerized agents, and the two communicate through well-defined APIs.
Before configuring the system, it’s useful to understand this architecture and the roles each component plays.
Key components
The key components of this integration include:
- Jenkins Master: This central server handles job scheduling and plugin management. The master itself runs as a pod inside the cluster when we deploy Jenkins in Kubernetes. It holds our configuration and pipeline definitions while also connecting to Kubernetes to request new agents when jobs need to run.
- Jenkins Agents: Agents are the worker nodes where build tasks execute. Instead of using physical machines or fixed virtual machines, these agents run as Kubernetes pods. Jenkins creates them dynamically depending on the workload. For example, Jenkins starts three pods if three jobs are triggered. It also removes the pods once those jobs are complete.
- Kubernetes Plugin: It acts as the link between Jenkins and Kubernetes. It enables Jenkins to communicate with the Kubernetes interface and request pods when needed. With this plugin, we can define pod templates that describe the structure of an agent pod. A template covers details such as the container image with resource limits and the tools required to run the builds.
- Persistent Storage: Since pods are temporary in nature, we cannot rely on the Jenkins master pod to hold all configuration and history. If the master pod restarts, everything would be lost. Kubernetes provides Persistent Volumes to avoid such situations. These volumes store Jenkins configurations and pipeline logs outside the lifecycle of pods. This means the data remains safe even when the Jenkins master pod is restarted.
Architecture overview
At a high level, Jenkins on Kubernetes operates within a master-agent architecture, where the master coordinates tasks, and the agents execute them.
We will explain the concept with the diagram below:

In this Kubernetes cluster architecture design, we have one Jenkins master pod connected to persistent storage. Whenever we trigger a job, Jenkins asks the Kubernetes plugin to provision a temporary pod, instead of running it on the master.
The plugin calls the Kubernetes interface, which schedules a new agent pod. The agent pod connects back to Jenkins master using an inbound connection and performs the job. Kubernetes removes the pod and frees resources once the job finishes.
The key point is that the Jenkins master remains lightweight and mainly focuses on container orchestration. The agents handle the heavy lifting of builds. This separation aligns perfectly with Kubernetes design because workloads are ephemeral and distributed across the cluster.
Jenkins and Kubernetes workflow
The Jenkins-Kubernetes workflow includes the following steps:
- Jenkins master receives a job request from the pipeline.
- The Kubernetes plugin sends a request to Kubernetes for an agent pod.
- Kubernetes schedules the pod on a node in the cluster.
- The agent pod starts and connects to the Jenkins master.
- The build job runs inside the agent pod.
- The pod terminates automatically and returns resources to the cluster after job completion.
This cycle ensures that we always use resources efficiently. We only consume what we need and exactly when we need it, without keeping servers running continuously.
Step-by-step guide to running Jenkins on Kubernetes
We will start by setting up a cluster and then deploy Jenkins stepwise. Each step will build upon the previous one.
We will set up the testing environment on a Windows operating system. You can set up the same configuration on other operating systems using suitable commands.
Step 1: Set up the Kubernetes cluster
The first thing we need is a Kubernetes cluster for testing the configuration setup. We can either set it up locally or use a managed cloud service.
- Use a local cluster: You can install Minikube on your Windows computer. It creates a small cluster using Docker containers. This is ideal for practicing and learning.
minikube start --driver=docker --kubernetes-version=v1.28.3 --cpus=2 --memory=4096The above command creates the local cluster using Docker Desktop.

- Use a managed cluster: If you already have access to cloud services like Google Cloud or Azure, you can create a cluster using their managed services to reduce the complexity of maintaining Kubernetes.
Once we have the cluster ready, we can verify it by running the following command:
kubectl get nodes
If you see a node listed with status “Ready,” then your cluster is active and ready to host workloads. We will continue with further configuration setup.
Step 2: Deploy Jenkins master
Now that the cluster is up, let’s deploy the Jenkins master pod using Kubernetes manifests. We will create a Deployment to run Jenkins and a Service to expose it.
Create a Namespace
First, we will create a Kubernetes Namespace called jenkins by writing a YAML file (ns.yaml) and applying it. It then verifies the creation by listing the namespace using kubectl get ns jenkins. Namespaces help isolate and organize resources within a Kubernetes cluster.

Create a PersistentVolumeClaim
Jenkins needs a place to store its job history, configuration, and plugin data. Since pods in Kubernetes are temporary, if we run Jenkins without persistent storage, all this data would be lost whenever the pod restarts.
A PersistentVolumeClaim (PVC) ensures Jenkins has stable storage that survives pod restarts. In Minikube, we use the default storage class to request this.
This ensures Jenkins data is stored outside the pod lifecycle.
@"
apiVersion: v1
kind: PersistentVolumeClaim
metadata:
  name: jenkins-pvc
  namespace: jenkins
spec:
  accessModes:
    - ReadWriteOnce
  resources:
    requests:
      storage: 10Gi
"@ | Out-File .\pvc.yaml -Encoding ascii

kubectl apply -f .\pvc.yaml
kubectl -n jenkins get pvc jenkins-pvc
This YAML defines a PersistentVolumeClaim (PVC) named jenkins-pvc in the jenkins namespace. It requests 10 Gi of storage with access mode ReadWriteOnce, which means a single pod (the Jenkins master) can mount it for read and write operations.

This claim binds to Minikube’s default storage class, ensuring that Jenkins data persists even if the pod restarts.
Create the Jenkins deployment
We now need to actually run Jenkins inside our cluster. For that, we create a Deployment. A Deployment ensures there is always one Jenkins pod running, and if the pod crashes, Kubernetes will restart it.
Here, we also mount the PVC we created earlier so Jenkins can use persistent storage for its home directory.
@"
apiVersion: apps/v1
kind: Deployment
metadata:
  name: jenkins
  namespace: jenkins
spec:
  replicas: 1
  selector:
    matchLabels:
      app: jenkins
  template:
    metadata:
      labels:
        app: jenkins
    spec:
      containers:
      - name: jenkins
        image: jenkins/jenkins:lts
        imagePullPolicy: IfNotPresent
        ports:
        - containerPort: 8080
        - containerPort: 50000
        volumeMounts:
        - name: jenkins-data
          mountPath: /var/jenkins_home
        resources:
          requests:
            cpu: "500m"
            memory: "1Gi"
          limits:
            cpu: "1"
            memory: "2Gi"
      volumes:
      - name: jenkins-data
        persistentVolumeClaim:
          claimName: jenkins-pvc
"@ | Out-File .\deploy.yaml -Encoding ascii

kubectl apply -f .\deploy.yaml
kubectl -n jenkins rollout status deploy/jenkins
kubectl -n jenkins get pods -o wide
This Deployment runs a single Jenkins pod using the LTS image. It exposes two ports: 8080 for the web UI and 50000 for inbound agent communication.
The PVC (jenkins-pvc) is mounted at /var/jenkins_home so Jenkins configuration and job data persist. Resource requests and limits ensure the pod gets a fair share of CPU and memory in the cluster.
Expose Jenkins with a service
By default, the Jenkins pod is only reachable inside the cluster.
To open the Jenkins UI from your Windows browser, you must expose it using a Service. A NodePort service is simplest in Minikube. It maps Jenkins’ port 8080 to a high port on your Minikube node (for example, 30080).
@"
apiVersion: v1
kind: Service
metadata:
  name: jenkins-service
  namespace: jenkins
spec:
  type: NodePort
  selector:
    app: jenkins
  ports:
  - name: http
    port: 8080
    targetPort: 8080
    nodePort: 30080
  - name: agent
    port: 50000
    targetPort: 50000
"@ | Out-File .\svc.yaml -Encoding ascii

kubectl apply -f .\svc.yaml
kubectl -n jenkins get svc jenkins-service
This creates a Service named jenkins-service in the jenkins namespace. It forwards port 8080 of the Jenkins pod to port 30080 on the Minikube node. It also exposes port 50000 for Jenkins agents.
Now Jenkins is reachable from outside the cluster.

Step 3: Configure the Jenkins Master
Once the Jenkins master pod is running, our next step is to configure it so we can start using it. Since we exposed Jenkins using a NodePort service, we can access it in a web browser.
To do this, run the following command:
minikube service jenkins-service -n jenkins --urlIt will output something like:

Open the first URL in your browser, which is http://127.0.0.1:56651. Open this in your browser, and you should see the Jenkins unlock page.

The page requests an initial admin password, which we retrieve from within the Jenkins pod. Run this command:
$POD = kubectl -n jenkins get pod -l app=jenkins -o jsonpath="{.items[0].metadata.name}"
kubectl -n jenkins exec -it $POD -- cat /var/jenkins_home/secrets/initialAdminPassword
Copy the password displayed and paste it into the unlock page.
After that, Jenkins will prompt us to install plugins. For simplicity, let’s select “Install suggested plugins.” Jenkins will then download and install the default set of plugins.

Once plugins are installed, you are asked to create the first admin user. Provide a username, password, and email address, then continue. Now Jenkins is fully initialized.
Jenkins will then show the instance configuration screen with a default URL (usually http://localhost:8081/).

Leave it as is and click Save and Finish. Finally, you’ll see:

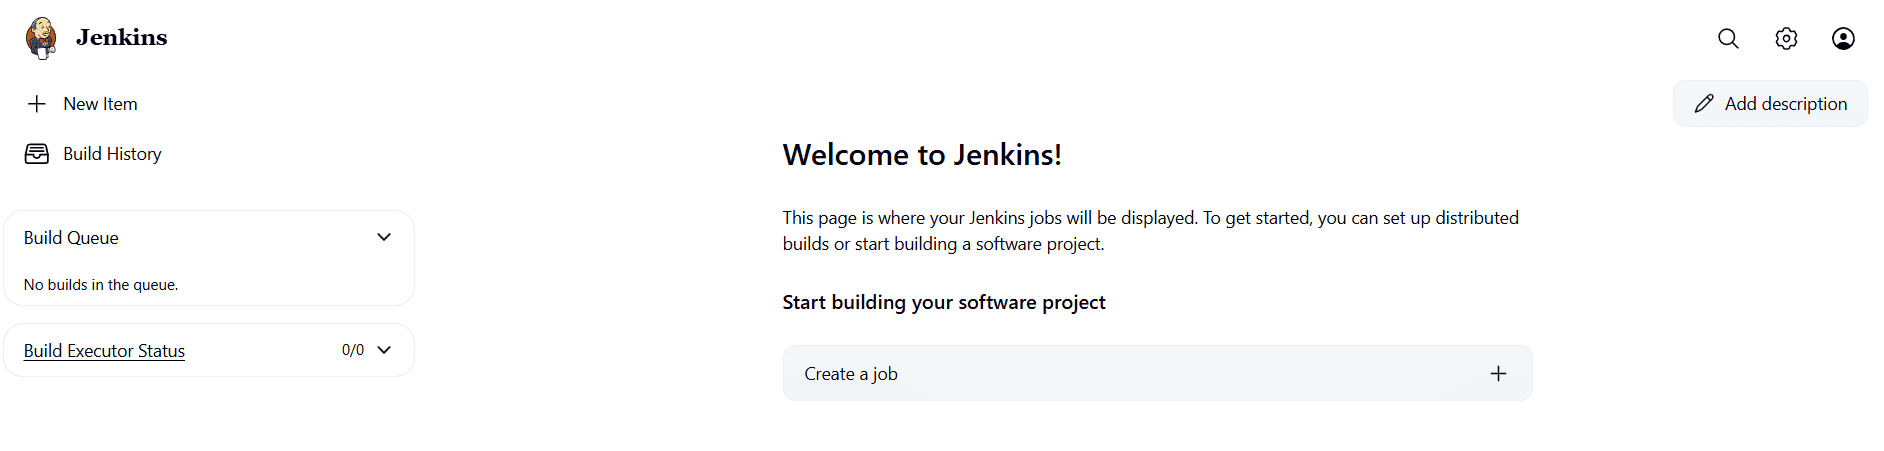
You can click the “Start using Jenkins” option. You will land on the Jenkins dashboard.
At this stage, our Jenkins master is running inside Kubernetes, but it is not yet connected to the cluster for dynamic agents. To do that, we need the Kubernetes plugin.
Step 4: Set up the Kubernetes plugin
The Kubernetes plugin is the key component that allows Jenkins to request pods from Kubernetes. Here is how we configure it step by step:
Install the Kubernetes plugin
From the Jenkins dashboard, navigate to Manage Jenkins > Plugins > Available plugins. There, you can search for the Kubernetes plugin and select it to install without restarting.

Create ServiceAccount and RBAC in the Jenkins namespace
You can run these in PowerShell inside your jenkins-k8s folder.
@"
apiVersion: v1
kind: ServiceAccount
metadata:
  name: jenkins-sa
  namespace: jenkins
---
apiVersion: rbac.authorization.k8s.io/v1
kind: ClusterRoleBinding
metadata:
  name: jenkins-sa-binding
subjects:
- kind: ServiceAccount
  name: jenkins-sa
  namespace: jenkins
roleRef:
  kind: ClusterRole
  name: cluster-admin
  apiGroup: rbac.authorization.k8s.io
"@ | Out-File .\rbac.yaml -Encoding ascii

kubectl apply -f .\rbac.yaml
kubectl -n jenkins get sa jenkins-sa
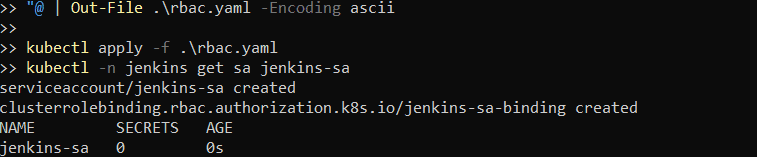
Security note: The example above uses cluster-admin to keep the demo simple, but that role effectively grants Jenkins full control over the cluster. In production, replace cluster-admin with a custom (Cluster)Role scoped to only the namespaces and resources Jenkins must manage (e.g., creating Pods in a specific namespace), and bind the ServiceAccount to that instead.
Now, make Jenkins run with that ServiceAccount.
@"
spec:
  template:
    spec:
      serviceAccountName: jenkins-sa
"@ | Out-File .\patch-sa.yaml -Encoding ascii

kubectl -n jenkins patch deploy jenkins --type merge --patch-file .\patch-sa.yaml
kubectl -n jenkins rollout status deploy/jenkins
Why does this matter? The plugin will use the token that is mounted in the Jenkins pod. This token now has the rights to communicate with the API.

Get the Kubernetes API server info
You can see the API address if you want.
kubectl cluster-infoFor in-cluster use, we will not need to paste this. The plugin can auto-discover.

Configure the plugin to connect to the cluster
This step connects Jenkins to a Kubernetes cluster, so it can dynamically manage and run build agents within the cluster. By configuring the cloud settings, Jenkins knows where to find Kubernetes and how to authenticate itself.
Navigate to Manage Jenkins > Configure Clouds and add a new cloud by selecting Kubernetes.

In the Kubernetes URL field, you can put the following details:
- Name:
kubernetes - Kubernetes URL: leave blank to use in cluster, or set
https://kubernetes.default.svc - Kubernetes Namespace: jenkins
- Credentials: leave empty so Jenkins uses the in-cluster token from
jenkins-sa - Jenkins URL:
http://jenkins-service.jenkins.svc.cluster.local:8080 - Jenkins tunnel: leave empty
- WebSocket: enable Checked
You can click Test Connection. It should show Connected to Kubernetes.
Now, save the entire configuration to see the image below.

5. Add a Pod Template for agents
Jenkins requires a template that defines the structure of an agent pod to Kubernetes. We will use the inbound agent image. We keep resource requests small, so it starts fast on Minikube. This is where we describe how the build agents should look.
In Jenkins System, find your Kubernetes cloud and click the “Add Pod Template” option.

You can add the following details to configure the template and click “create”.
- Name:
jenkins-agent - Labels:
jenkins-agent - Namespace:
jenkins - Container image:
jenkins/inbound-agent

The cloud configuration now shows one pod template named jenkins-agent. Jenkins can request it on demand.

Step 5: Create a sample pipeline to verify dynamic agents
Now, let’s test our configuration with a simple pipeline. We will write a Jenkinsfile that runs inside a Kubernetes agent.
We will run one job that instructs Jenkins to create an agent pod to prove the plugin and template work end-to-end.
From the Jenkins web dashboard, click the “New Item” option and enter the name as “k8s-agent-smoke”. Then choose Pipeline and click OK.

In the following form, scroll down to the Pipeline segment and paste the code below:
pipeline {
  agent none
  stages {
    stage('Run on K8s') {
      agent {
        kubernetes {
          // Use inline pod definition so we bypass any UI mismatch
          yaml """
apiVersion: v1
kind: Pod
metadata:
  labels:
    jenkins/label: jnlp-inline
spec:
  restartPolicy: Never
  containers:
    - name: jnlp
      image: jenkins/inbound-agent:latest
      imagePullPolicy: IfNotPresent
      env:
        - name: JENKINS_URL
          value: http://jenkins-service.jenkins.svc.cluster.local:8080/
      resources:
        requests:
          cpu: "200m"
          memory: "256Mi"
        limits:
          cpu: "1"
          memory: "1Gi"
"""
          defaultContainer 'jnlp'
          // WebSocket is used by the cloud; no tunnel needed
        }
      }
      steps {
        echo 'Hello from a Kubernetes agent'
        sh 'uname -a || ver'
      }
    }
  }
}Now, click Save and choose “Build Now” to start the process. If it is successful, you can check the status as shown below:

You can check the Jenkins console logs to confirm if the pipeline build actually worked:

You should see a new pod with a random suffix appear in the Jenkins namespace. It will go to Running. The pipeline prints the echo line and the system info. When the job finishes, the agent pod terminates.
In PowerShell, you can also watch pods when the build processes:
kubectl -n jenkins get pods -wAs shown below, the new pod transitioned from “pending” to “containercreating” to “running” state, which means the pipeline executed successfully!

Using Helm to run Jenkins on Kubernetes
While the manual method enables complete control, using Helm accelerates the deployment process. Helm is the package manager for Kubernetes. It installs apps with versioned charts.
We will use the official Jenkins chart.
Step 1: Install Helm and add the Jenkins chart repository
With Winget, run the following command to complete Helm installation.
winget install --id Helm.Helm -e
Helm needs a repository reference. The Jenkins project publishes an official chart.
helm repo add jenkins https://charts.jenkins.io
helm repo update
helm search repo jenkins
As you can see, the jenkins/jenkins is listed in the output, which means the repo is ready.
Step 2: Deploy Jenkins with helm install
We will install this Helm release into a separate namespace, so it remains independent from the manual setup. We will also use a different NodePort (30081) to avoid conflicts.
Create the namespace and values.yaml:
kubectl create namespace jenkins-helmInside your working folder, create a values.yaml with persistence, resources, admin credentials, and NodePort configuration:
controller:
  image:
    registry: docker.io
    repository: jenkins/jenkins
    tag: lts
    pullPolicy: IfNotPresent

  admin:
    create: true
    username: admin
    password: "ChangeMe_12345!"   # replace with your own password

  serviceType: NodePort
  nodePort: 30081

  resources:
    requests:
      cpu: "500m"
      memory: "1Gi"
    limits:
      cpu: "1"
      memory: "2Gi"

persistence:
  enabled: true
  size: 10Gi
Security note: The example above uses a plain-text password for demonstration purposes. In production, you should never place passwords or other sensitive data directly in values.yaml. Use a Kubernetes Secret (e.g., kubectl create secret generic jenkins-admin-credentials …) and configure the Helm chart to load admin credentials from that Secret instead of from the file.
Install Jenkins using the chart:
helm install jh jenkins/jenkins -n jenkins-helm -f .\values.yamlThis creates a Deployment, Service, PersistentVolumeClaim, and supporting resources in the jenkins-helm namespace.

Step 3: Access Jenkins
You can confirm that the rollout is complete by checking:
kubectl -n jenkins-helm rollout status deploy/jh-jenkins
kubectl -n jenkins-helm get svc jh-jenkins
If you prefer NodePort, open Jenkins at:
http://<minikube-ip>:30081/Alternatively, you can use port-forwarding from your local machine:
kubectl -n jenkins-helm port-forward svc/jh-jenkins 8082:8080
Then open your browser and go to:
http://localhost:8082/See: How to Use Kubectl Port-forward in Kubernetes Applications
Step 4: Log in with the admin credentials
Helm created an admin user for you. The password is either the one you set in values.yaml or, if you didn’t set one, you can retrieve it with:
kubectl exec -n jenkins-helm -it svc/jh-jenkins -c jenkins -- /bin/cat /run/secrets/additional/chart-admin-password
Log in with the Username as “admin” and Password (value retrieved above or your chosen one). At this point, you are inside the Jenkins dashboard of your Helm-deployed instance.
Advanced options for Jenkins with Kubernetes configuration
Once Jenkins is running, we can progress beyond the basics.
Advanced configuration is necessary because production workloads often require more than the default setup. Teams may need custom agent images with specific tools to ensure higher availability of the controller or secure handling of sensitive credentials.
With these enhancements, Jenkins can scale more effectively and integrate smoothly with other systems to remain reliable in long-term use.
1. Customizing Jenkins agents
Sometimes, you need agents with specific tools, such as Python, Gradle, or Node.js. You can build custom Docker images that include these tools and use them as agent images.
For example, create a Dockerfile with Python installed and push it to Docker Hub. Then reference it in the Jenkins Kubernetes plugin as the container image so all builds can have consistent environments.
2. Scaling Jenkins
You can scale Jenkins master replicas to support larger workloads during high demand. However, you must manage the shared storage of Jenkins due to its stateful nature. The Kubernetes Horizontal Pod Autoscaler provides the perfect solution for automatically scaling agent pods based on demand. This means Kubernetes continuously adds the necessary agent pods when many jobs are waiting in the queue.
3. Persistent Storage
Persistent volumes are essential for Jenkins’ job history and configuration. For cloud providers, we can utilize storage backends such as Amazon Elastic Block Store or Azure Disks. This ensures data is safe even if the master pod is recreated. Without persistent volumes, all job history would vanish after a restart.
4. Security best practices
Running Jenkins in Kubernetes requires proper security:
- Use Role-Based Access Control to limit access instead of using the cluster administrator role on Jenkins service accounts in production.
- Store sensitive information, such as credentials and Application Programming Interface tokens, as Kubernetes Secrets and then mount them directly into pods whenever required.
- Set up Ingress with Transport Layer Security to provide continuous HTTPS access to Jenkins and protect the User Interface from being exposed in plain text.
5. Monitoring and logging
For long-term maintenance, integrate Jenkins with monitoring tools. You can expose metrics and scrape them using Prometheus, then visualize them in Grafana. Tools like Fluentd or Loki enable the collection of logs from Jenkins master and agents. This makes debugging easier and provides insight into how Jenkins is performing over time.
Alternative to Jenkins - Spacelift
When it comes to infrastructure orchestration, generic CI/CD platforms like Jenkins or CircleCI are not specialized enough to manage all the components you might need in your workflows. That’s where Spacelift shines.
Spacelift is an IaC management platform that helps you implement DevOps best practices. It provides a dependable CI/CD layer for infrastructure tools, including OpenTofu, Terraform, Pulumi, Kubernetes, Ansible, and more, letting you automate your IaC delivery workflows.
Spacelift is designed for your whole team. Everyone works in the same space, supported by robust policies that enforce access controls, security guardrails, and compliance standards. This means you can manage your DevOps infrastructure far more efficiently without compromising on safety.
Let’s see how Spacelift avoids the limitations of generic CI/CD tools:
- Policies to control what kind of resources engineers can create, what parameters they can have, how many approvals you need for a run, what kind of task you execute, what happens when a pull request is open, and where to send your notifications
- Stack dependencies to build multi-infrastructure automation workflows with dependencies, having the ability to build a workflow that, for example, generates your EC2 instances using Terraform and combines it with Ansible to configure them
- Self-service infrastructure via Blueprints, enabling your developers to do what matters – developing application code while not sacrificing control
- Creature comforts such as contexts (reusable containers for your environment variables, files, and hooks), and the ability to run arbitrary code
- Drift detection and optional remediation
To learn more about Spacelift, create a free account today or book a demo with one of our engineers.
Key points
We have now completed the entire process of running Jenkins on Kubernetes. Starting from the motivation behind it, we set up a cluster, deployed the Jenkins master, configured the Kubernetes plugin, and created a pipeline that dynamically provisions agents. We also saw how Helm can simplify deployments and looked at advanced configurations for scaling, persistence, and security.
Solve your infrastructure challenges
Spacelift is a flexible orchestration solution for IaC development. It delivers enhanced collaboration, automation, and controls to simplify and accelerate the provisioning of cloud-based infrastructures.
Frequently asked questions
What is the difference between Jenkins, Docker, and Kubernetes?
Jenkins automates processes such as code integration and delivery, triggering builds when code changes occur. Docker provides a consistent runtime environment, solving issues related to environment differences. Kubernetes ensures that containers run reliably across distributed systems, handling service discovery, load balancing, and self-healing.
Together, they often form a pipeline: Jenkins triggers Docker builds, which are then deployed and managed by Kubernetes in production environments.
What is the difference between Jenkins Operator and Helm for Kubernetes deployments?
Jenkins Operator manages Jenkins on Kubernetes using native CRDs, automating tasks such as configuration and upgrades. Helm deploys templated Kubernetes resources but lacks built-in Jenkins-specific lifecycle management.
How do I add Kubernetes to Jenkins?
To add Kubernetes to Jenkins, install the Kubernetes plugin in Jenkins, then configure a Kubernetes cloud under Manage Jenkins > Configure Clouds. Provide the Kubernetes API URL (or leave blank if Jenkins runs inside the cluster), add credentials if needed, and define pod templates for dynamic agents.
Why is Jenkins outdated?
Jenkins is considered outdated primarily due to its reliance on legacy architecture and the manual maintenance overhead required. It lacks native container support, modern pipeline-as-code features are clunky, and its plugin ecosystem often causes dependency conflicts.
