

Automating your processes is a key best practice when working with Terraform, OpenTofu, and similar tools for infrastructure as code. This gives you a consistent workflow for all changes to the infrastructure you manage using these tools. Two common approaches are:
- Use a dedicated infrastructure automation platform such as Spacelift or HCP Terraform
- Use a generalized automation tool where you can build your own automation workflows.
The second option often involves using features available on a version control and collaboration platform such as GitHub, GitLab, or Bitbucket. In this blog post, we will cover an option in the second category of automation tools: how to run Terraform in Bitbucket Pipelines.
Note that this blog post covers how to run Terraform in Bitbucket Pipelines, but the steps are also applicable to OpenTofu with minor changes (e.g., use the OpenTofu binary instead of the Terraform binary).
TL;DR
To run Terraform in Bitbucket Pipelines, you define your pipelines in a single bitbucket-pipelines.yml file at the root of your repository. Bitbucket Pipelines is Bitbucket Cloud’s built-in CI/CD service, and every step runs in a fresh Docker container, so you choose an image such as hashicorp/terraform and script the Terraform commands yourself.
What are Bitbucket Pipelines?
Bitbucket Cloud, or simply Bitbucket, is a software-as-a-service (SaaS) collaboration platform for source code. Bitbucket is part of the Atlassian suite of products and integrates well with Jira and Confluence, which many organizations use for project management and documentation.
Bitbucket was previously available as a single-instance, self-hosted product called Bitbucket Server, but Atlassian discontinued support for it in February 2024. If you want to host Bitbucket yourself, an alternative product called Bitbucket Data Center continues to be supported. Bitbucket Data Center is designed for high availability and is intended for larger deployments.
One of Bitbucket’s features is the built-in continuous integration and continuous delivery (CI/CD) service, Bitbucket Pipelines.
With Bitbucket Pipelines, you can define pipelines that should run when you push code to branches, when you open or update a pull-request, on a schedule, manually, and more. Your pipelines can include arbitrary scripts that perform steps such as building an application, migrating a database, scaling up a virtual machine, provisioning infrastructure with Terraform, and much more.
Pipelines are defined as code in a file named bitbucket-pipelines.yml, and each pipeline step is executed in a fresh Docker container. You can use an existing Docker image from a container registry or use your own custom images.
Bitbucket Pipelines is a natural choice for automation if your source code is hosted on Bitbucket.
How to run Terraform in Bitbucket Pipelines
In this section, we will describe how to enable and run Terraform in Bitbucket Pipelines for an existing Bitbucket repository. The prerequisites for following this walkthrough are:
- Access to a Bitbucket Cloud workspace
- Access to at least one repository where you can configure a pipeline and run Terraform
- Administrator access to an AWS account and an S3 bucket for state storage
If you don’t have these prerequisites in place, visit bitbucket.org to create a Bitbucket Cloud workspace for free, and visit aws.amazon.com to create an AWS account.
In the following sections, we will build a few basic pipelines for running Terraform, with the aim of achieving the following:
- Provision infrastructure on AWS.
- Use an AWS S3 state backend.
- Use OIDC workload identity to authenticate to AWS for state management and provisioning.
- Run init, fmt, validate, and plan commands for every push to a feature branch and every pull request targeting the main branch.
- Run
init,planandapplyfor every commit to the main branch.
You can easily modify the pipelines to include additional steps for your environment.
Enable Bitbucket Pipelines for a repository
First, we need to enable Bitbucket Pipelines. Bitbucket Pipelines are disabled by default. You enable pipelines by manually committing a file named bitbucket-pipelines.yml or using the wizard in the UI. See the next section for details of what goes into this pipeline definition file.
Your first pipeline run must be triggered manually. After committing the bitbucket-pipelines.yml file to the repository, go to the “Pipelines” section of your repository and you will see the following view:
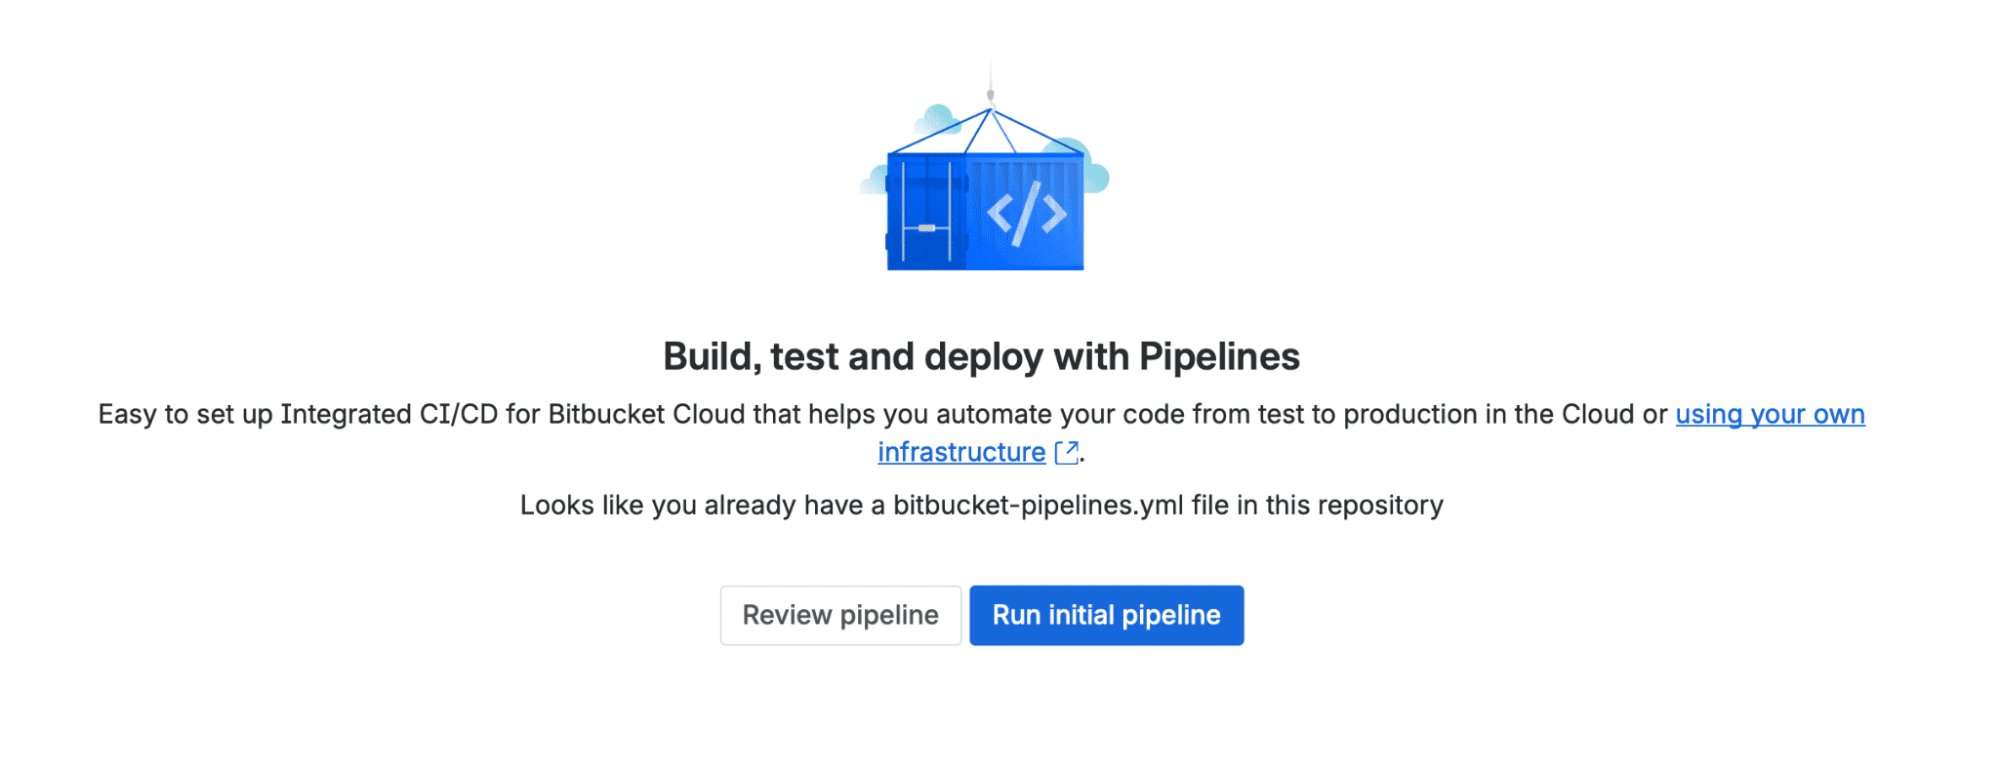
Click on “Run initial pipeline” to get started. The following runs will be triggered automatically based on the trigger events you have defined in your pipelines.
Define your pipelines in bitbucket-pipelines.yml
You can configure one or more pipelines for your Bitbucket repository using YAML configuration in a file named bitbucket-pipelines.yml. The file must have this exact name, and it must be placed in the root of your repository. You can only have one pipeline file per repository.
The directory structure in the following walkthrough looks like this:
$ tree .
.
├── backend.tf
├── bitbucket-pipelines.yml
├── main.tf
├── outputs.tf
├── providers.tf
├── README.md
├── variables.tf
└── versions.tf
The details of the Terraform configuration (the *.tf files) are not important for understanding Bitbucket Pipelines, so we will not focus on them. However, you need to be aware of where in your repository your Terraform configuration lives. In the repository structure shown above the Terraform configuration is located in the root of the repository along with the bitbucket-pipelines.yml file.
If it is not in the root, you need to make sure to change to the correct directory in your pipeline steps.
The next step is to define our pipelines.
We begin by specifying which Docker image we want to use for the steps of our pipelines. You can specify an image at the pipeline level (applicable to all the steps in all pipelines), or you can specify an image for each specific step.
In this case, we use the same image for all pipelines and steps:
image: hashicorp/terraform:1.15.7The image is fetched from Docker Hub unless you specify a registry address. You could also use a custom image from a private registry.
Next, we define reusable steps for fmt, validate, plan and apply that we can include in the pipelines we will define later. We add these steps under definitions.steps:
definitions:
  steps:
    - step: &fmt
        name: Format
        script:
          - terraform fmt -check -recursive -diff
    - step: &validate
        name: Validate
        script:
          - terraform init -backend=false -input=false
          - terraform validate
    - step: &plan
        name: Plan
        script:
          - terraform init
          - terraform plan -input=false -out=tfplan
        artifacts:
          - tfplan
    - step: &apply
        name: Apply
        script:
          - terraform init
          - terraform apply -input=false -auto-approve tfplan
We define the reusable steps using YAML anchors. A YAML anchor is a code block you can reuse in other parts of your YAML code. Anchors are defined using the syntax &name, and you reference them using the syntax *name.
The step definitions above show four different steps we will use to build pipelines from. We omitted some details regarding authentication and backend configuration that we will return to in the following two sections.
Note that the plan step specifies an output artifact named tfplan. This is the Terraform plan file output that is made available to the following apply step, making sure we apply the same plan we produced in the plan step.
Next, we define pipelines referencing the steps we defined above:
pipelines:
  branches:
    main:
      - step: *validate
      - step: *plan
      - step: *apply
    'feature/**':
      - step: *fmt
      - step: *validate
      - step: *plan
  default:
    - step: *fmt
    - step: *validate
    - step: *plan
This code defines three pipelines:
- The first pipeline defined in
pipelines.branches.mainrunsvalidate,planandapplyfor any push to the main branch. - The second pipeline defined in
pipelines.branches.'feature/**'runsfmt,validateandplanfor any push to a feature branch (i.e., any branch name starting withfeature/) - The third pipeline defined in
pipelines.defaultruns for any other event that is not captured by the other, more specific pipelines.
We also want to trigger a pipeline when a pull request targeting the main branch is created or updated. We can’t define this exact condition in a simple way as for the pipelines above. Instead, we configure the following (the previous code is omitted):
pipelines:
  custom:
    pr-validation:
      - step: *fmt
      - step: *validate
      - step: *plan
triggers:
  pullrequest-push:
    - condition: BITBUCKET_PR_DESTINATION_BRANCH == "main"
      pipelines:
        - pr-validation
The triggers property allows you to configure specific conditions for when a pipeline should be triggered. It can also trigger multiple pipelines on the same event.
Configuring the S3 Terraform backend
A detail that we glossed over in the previous section was configuring the AWS S3 state backend. To do this, we will add the following code under the definitions section of our pipeline:
definitions:
  scripts:
    - &tf-init >
      terraform init -input=false
        -backend-config="bucket=${TF_STATE_BUCKET}"
        -backend-config="key=${TF_STATE_KEY}"
        -backend-config="region=${AWS_DEFAULT_REGION}"
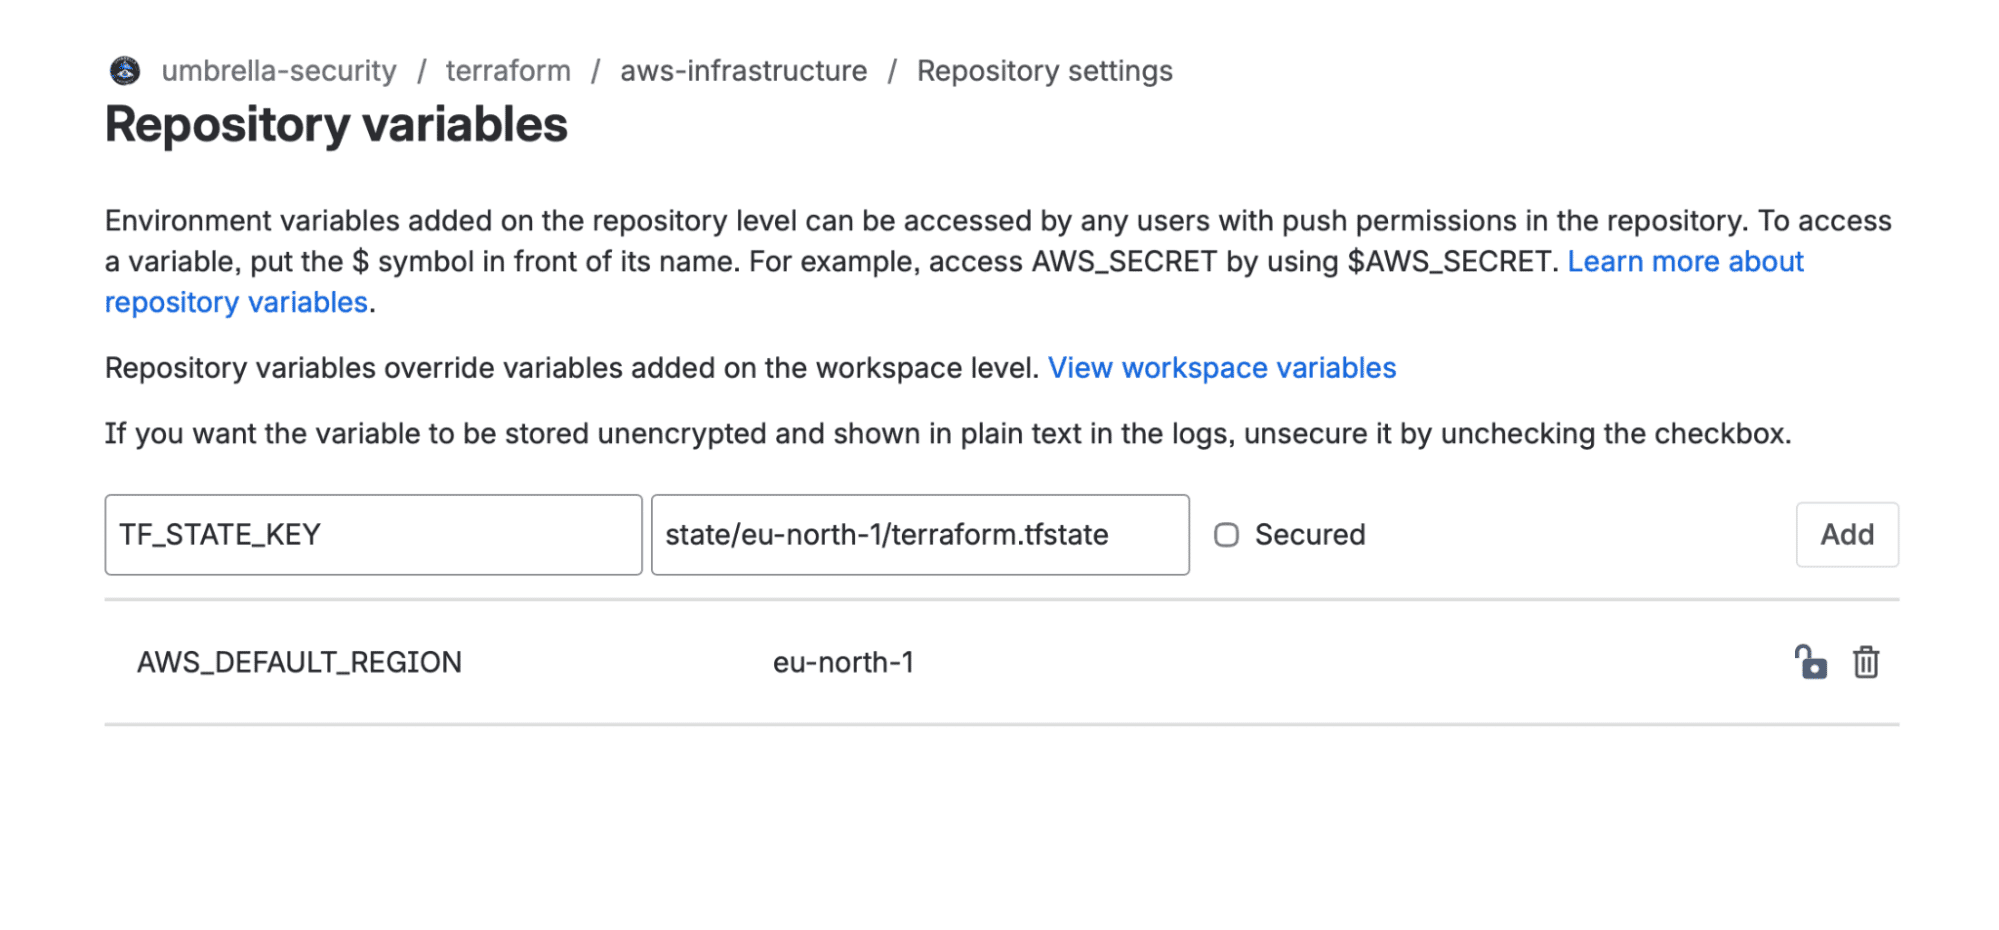
This code defines a reusable script as a YAML anchor similar to what we did for reusable steps. It references three variables that have to be configured in your repository. Go to your repository settings and click on “Repository variables”, then configure TF_STATE_BUCKET, TF_STATE_KEY, and AWS_DEFAULT_REGION with values corresponding to your bucket and requirements:
Next we update the plan and apply steps to run the reusable terraform init script:
definitions:
  steps:
    - # ... previous code omitted
    - step: &plan
        name: Plan
        script:
          - *tf-init
          - terraform plan -input=false -out=tfplan
        artifacts:
          - tfplan
    - step: &apply
        name: Apply
        script:
          - *tf-init
          - terraform apply -input=false -auto-approve tfplan
Configuring AWS OIDC authentication
Another detail we skipped initially was authentication to the AWS platform. We want to use the OIDC workload identity federation feature to achieve this. The benefit of this authentication mechanism is that we do not have to deal with long-lived credentials.
OIDC workload identity federation requires some upfront setup. You need to configure an AWS IAM OIDC identity provider for Bitbucket Cloud and create an IAM role that your pipeline can assume.
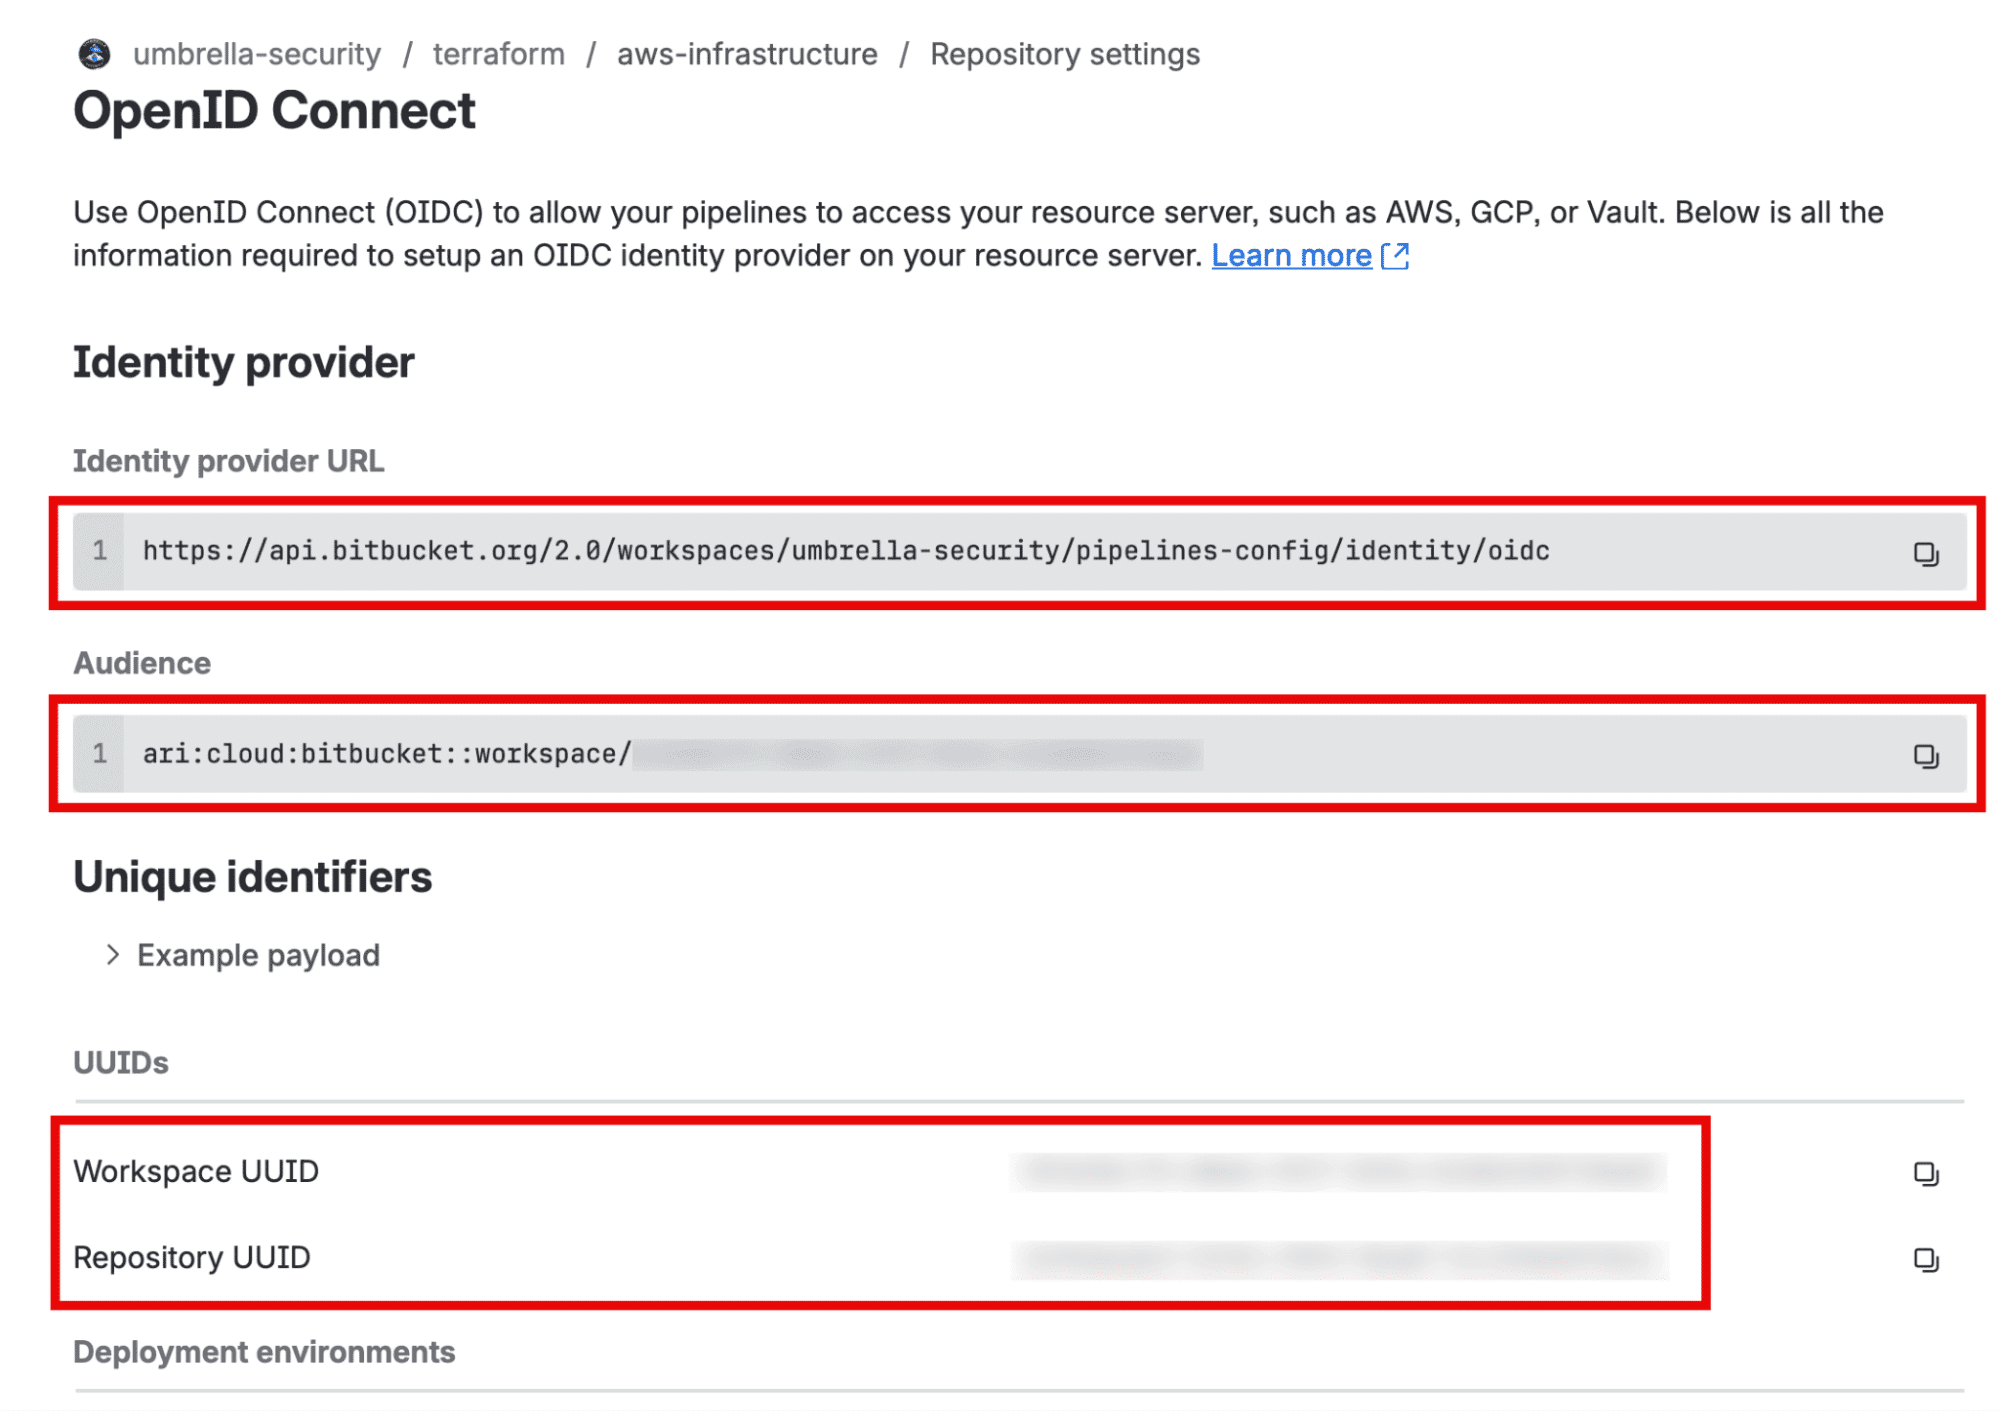
The first step is to go to your repository settings and click on “OpenID Connect”. From this page, copy the values for:
- Identity provider URL (e.g. h
ttps://api.bitbucket.org/2.0/workspaces/<your workspace name>/pipelines-config/identity/oidc) - Audience (e.g.
ari:cloud:bitbucket::workspace/<unique guid>) - Workspace UUID (e.g.
{<unique guid>}) - Repository UUID (e.g.
{<unique guid>})
See the following image for an example:
The following Terraform configuration can be used as inspiration for how to configure the AWS IAM OIDC identity provider and IAM role resources. This should generally be configured upfront through some other pipeline.
variable "workspace_name" {
  type = string
}

variable "workspace_uuid" {
  type = string
}

variable "repository_uuid" {
  type = string
}

locals {
  oidc_provider_url   = "https://api.bitbucket.org/2.0/workspaces/${var.workspace_name}/pipelines-config/identity/oidc"
  workspace_uuid_bare = replace(replace(var.workspace_uuid, "{", ""), "}", "")
  oidc_audience       = "ari:cloud:bitbucket::workspace/${local.workspace_uuid_bare}"
}

resource "aws_iam_openid_connect_provider" "bitbucket" {
  url            = local.oidc_provider_url
  client_id_list = [local.oidc_audience]
}

data "aws_iam_policy_document" "assume_role" {
  statement {
    sid     = "BitbucketPipelinesOIDC"
    effect  = "Allow"
    actions = ["sts:AssumeRoleWithWebIdentity"]

    principals {
      type        = "Federated"
      identifiers = [aws_iam_openid_connect_provider.bitbucket.arn]
    }

    condition {
      test     = "StringEquals"
      variable = "${replace(local.oidc_provider_url, "https://", "")}:aud"
      values   = [local.oidc_audience]
    }

    condition {
      test     = "StringLike"
      variable = "${replace(local.oidc_provider_url, "https://", "")}:sub"
      values   = ["${var.repository_uuid}:*"]
    }
  }
}

resource "aws_iam_role" "pipeline" {
  name               = "bitbucket-terraform-demo"
  assume_role_policy = data.aws_iam_policy_document.assume_role.json
}

resource "aws_iam_role_policy_attachment" "administrator" {
  role       = aws_iam_role.pipeline.id
  policy_arn = "arn:aws:iam::aws:policy/AdministratorAccess"
}

output "role_arn" {
  value       = aws_iam_role.pipeline.arn
}
After provisioning these resources, copy the role_arn output.
In the bitbucket-pipelines.yml file, add another reusable script definition for OIDC:
definitions:
  scripts:
    - &oidc-setup >
      echo "$BITBUCKET_STEP_OIDC_TOKEN" > /tmp/web-identity-token &&
      export AWS_ROLE_ARN="$AWS_ROLE_ARN" &&
      export AWS_WEB_IDENTITY_TOKEN_FILE=/tmp/web-identity-token
This script definition references the built-in variable BITBUCKET_STEP_OIDC_TOKEN and a variable named AWS_ROLE_ARN that we have to configure as a repository variable. Create a new repository variable named AWS_ROLE_ARN with the value you copied for the IAM role ARN earlier.
Update the plan and apply steps to use OIDC for authentication:
definitions:
  steps:
    - step: &plan
        name: Plan
        oidc: true
        script:
          - *oidc-setup
          - *tf-init
          - terraform plan -input=false -out=tfplan
        artifacts:
          - tfplan
    - step: &apply
        name: Apply
        oidc: true
        script:
          - *oidc-setup
          - *tf-init
          - terraform apply -input=false -auto-approve tfplan
For each step, we specify oidc: true to tell Bitbucket Pipelines to inject an OIDC token into this step. The value of the OIDC token is populated into the BITBUCKET_STEP_OIDC_TOKEN variable.
Putting it all together
We end up with the following bitbucket-pipelines.yml file that fulfills our desired use cases:
image: hashicorp/terraform:1.15.7

definitions:
  scripts:
    - &oidc-setup >
      echo "$BITBUCKET_STEP_OIDC_TOKEN" > /tmp/web-identity-token &&
      export AWS_ROLE_ARN="$AWS_ROLE_ARN" &&
      export AWS_WEB_IDENTITY_TOKEN_FILE=/tmp/web-identity-token
    - &tf-init >
      terraform init -input=false
      -backend-config="bucket=${TF_STATE_BUCKET}"
      -backend-config="key=${TF_STATE_KEY}"
      -backend-config="region=${AWS_DEFAULT_REGION}"
  steps:
    - step: &fmt
        name: Format
        script:
          - terraform fmt -check -recursive -diff
    - step: &validate
        name: Validate
        script:
          - terraform init -backend=false -input=false
          - terraform validate
    - step: &plan
        name: Plan
        oidc: true
        script:
          - *oidc-setup
          - *tf-init
          - terraform plan -input=false -out=tfplan
        artifacts:
          - tfplan
    - step: &apply
        name: Apply
        oidc: true
        script:
          - *oidc-setup
          - *tf-init
          - terraform apply -input=false -auto-approve tfplan
pipelines:
  custom:
    pr-validation:
      - step: *fmt
      - step: *validate
      - step: *plan
  branches:
    main:
      - step: *validate
      - step: *plan
      - step: *apply
    'feature/**':
      - step: *fmt
      - step: *validate
      - step: *plan
  default:
    - step: *fmt
    - step: *validate
    - step: *plan
triggers:
  pullrequest-push:
    - condition: BITBUCKET_PR_DESTINATION_BRANCH == "main"
      pipelines:
- pr-validationAlternatives to Bitbucket Pipelines
If you are hosting your version control repositories on Bitbucket your first option for automation should be Bitbucket Pipelines. However, there are many alternatives available for running Terraform. Some are similar to Bitbucket Pipelines and some are more full-fledged infrastructure automation platforms.
In the following sections, we’ll encounter a few of the popular alternatives on the market.
GitHub Actions
GitHub is a direct competitor to Bitbucket, and both platforms provide much of the same functionality.
GitHub Actions is the direct equivalent of Bitbucket Pipelines. Similar to Bitbucket Pipelines, you define a pipeline, or workflow, in GitHub Actions using YAML syntax. A workflow consists of one or more jobs, each job containing one or more steps.
GitLab CI/CD
GitLab is similar to both Bitbucket and GitHub and provides its own CI/CD automation built into the platform. On GitLab, you define your automation workflows in a file named .gitlab-ci.yml and it supports many of the same features as both Bitbucket Pipelines and GitHub Actions.
Spacelift
Spacelift is an infrastructure orchestration platform intended to run infrastructure as code tools at scale. Spacelift supports running Terraform, Terragrunt, OpenTofu, CloudFormation, Pulumi, Kubernetes and Ansible. You can set up guardrails using a powerful policy integration with Open Policy Agent (OPA).
Spacelift supports Bitbucket Cloud as the code source for your stacks and modules. You can set up multiple Space-level and one default Bitbucket Cloud integration per account.
HCP Terraform
HCP Terraform (previously known as Terraform Cloud) is a dedicated Terraform SaaS product to run Terraform at scale in an organization. It is similar to Spacelift but only works with Terraform. You can run individual Terraform configurations in workspaces or manage Terraform environments at scale in a declarative way using Terraform Stacks.
Best practices for running Terraform in Bitbucket Pipelines
Keep the following best practices in mind when running Terraform in Bitbucket Pipelines:
1. Use OIDC authentication if your Terraform provider supports it
If your target platform (e.g., AWS, Microsoft Azure or Google Cloud) supports authentication with OIDC workload identity federation, you should always use this method of authentication. The primary benefit is that you avoid having to manage long-lived credentials.
Instead, Bitbucket Pipelines generates an identity token when needed and this token is exchanged for short-lived provider credentials that are not exposed to the user running the pipeline.
2. Use the built-in secrets management feature
The walkthrough in this blog post showed how to manage repository variables and reference these in our pipelines. You can manage secrets the same way by marking a variable as sensitive. Sensitive variables will not be exposed in the pipeline logs.
If the built-in secrets management system is not sufficient for your needs you can integrate your pipeline with an external secrets management system.
3. Define reusable steps and scripts
YAML anchors allow you to easily build reusable steps and scripts for composing your pipelines. This makes it easy to get a consistent experience for your pipelines and simplifies pipeline administration. In this blog post, we showed how to build reusable steps for common Terraform operations we could reuse in multiple pipelines.
4. Add concurrency control
If you have one or more steps that should not be able to run at the same time, you can add them to a concurrency-group:
pipelines:
  branches:
    main:
      - step:
          name: "My step …"
          concurrency-group: "terraform-${BITBUCKET_BRANCH}"
          script:
            - echo "Running my step..."
This could avoid issues such as a step failing because it encounters a locked Terraform state file.
5. Use pipeline deployments for multiple environments
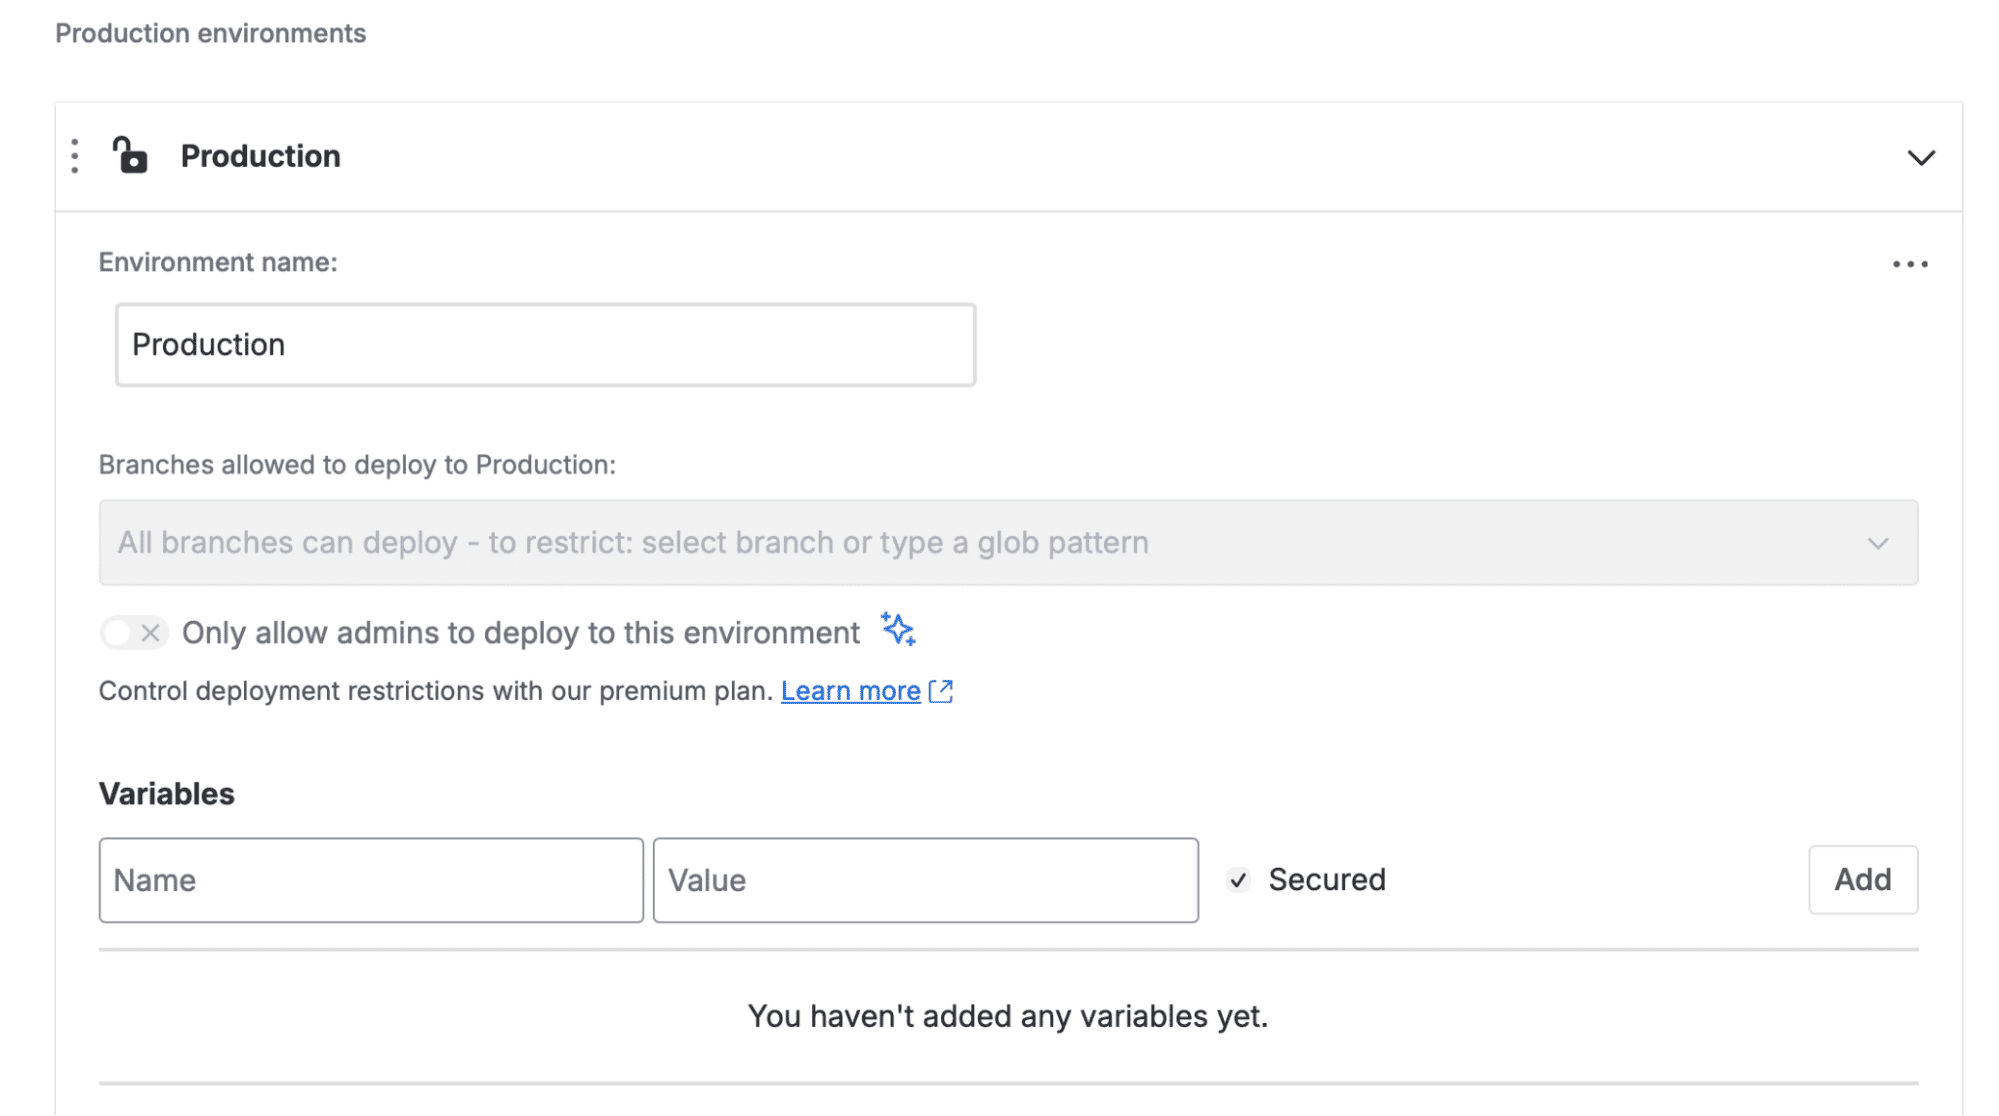
For Terraform configurations you want to deploy across multiple environments, you can use deployments. You can configure each deployment with unique variable values, allowing you to use different Terraform state backend configurations and authentication details for each environment.
You configure deployments for specific steps in a pipeline, e.g.:
pipelines:
  branches:
    main:
      - step:
          name: "My step …"
          deployment: Production
          script:
            - echo "Running my step..."
In your repository settings, you can configure variables and other settings for a given deployment environment:
How Spacelift simplifies Terraform CI/CD workflows
Terraform is really powerful, but to achieve an end-to-end secure GitOps approach, you need to use a product that can run your Terraform workflows. Spacelift takes managing Terraform to the next level by giving you access to a powerful CI/CD workflow and unlocking features such as:
- Policies (based on Open Policy Agent) – You can control how many approvals you need for runs, what kind of resources you can create, and what kind of parameters these resources can have, and you can also control the behavior when a pull request is open or merged.
- Multi-IaC workflows – Combine Terraform with Kubernetes, Ansible, and other infrastructure-as-code (IaC) tools such as OpenTofu, Pulumi, and CloudFormation, create dependencies among them, and share outputs
- Build self-service infrastructure – You can use Blueprints to build self-service infrastructure; simply complete a form to provision infrastructure based on Terraform and other supported tools.
- Integrations with any third-party tools – You can integrate with your favorite third-party tools and even build policies for them. For example, see how to integrate security tools in your workflows using Custom Inputs.
- Secure state management and locking – Because Terraform and OpenTofu state is shared, preventing concurrent writes is essential. With a Spacelift-managed state, Spacelift injects a backend configuration for each run using one-time credentials, restricts state access to active runs and tasks, and stores state encrypted in Amazon S3. You also get state history and a break-glass rollback for rare cases of state corruption, such as after provider upgrades.
Spacelift enables you to create private workers inside your infrastructure, which helps you execute Spacelift-related workflows on your end. Read the documentation for more information on configuring private workers.
Watch the video below to learn how to manage Terraform at scale with Spacelift:

Key takeaways
Bitbucket Pipelines is a flexible and powerful feature for CI/CD and infrastructure automation with Terraform built into the Bitbucket platform. You define one or more pipelines in a file named bitbucket-pipelines.yml placed in the root of your repository.
Pipelines are composed of one or more steps, each running as a separate Docker container. You can define reusable steps and scripts and compose these into multiple pipelines. You can trigger pipelines based on events in your repository.
Bitbucket Pipelines supports OIDC workload identity federation, and in this blog post we saw how to configure it to securely provision infrastructure on the AWS platform.
Similar alternatives to Bitbucket Pipelines include GitHub Actions and GitLab CI/CD, or full-fledged infrastructure orchestration platforms such as Spacelift and HCP Terraform.
Manage Terraform better with Spacelift
Build more complex workflows based on Terraform using policy as code, programmatic configuration, context sharing, drift detection, resource visualization and many more.
Frequently asked questions
Why use Bitbucket Pipelines for Terraform?
Bitbucket Pipelines runs Terraform builds directly inside Bitbucket Cloud, so teams already using Jira and Confluence avoid adopting a separate CI/CD tool. It supports Docker-based runners, deployment environments for scoped secrets, and manual approval steps that fit naturally into plan-and-apply workflows.
How do I authenticate to AWS from Bitbucket Pipelines?
Use OpenID Connect (OIDC): register Bitbucket as an identity provider in AWS IAM, create a role with a trust policy scoped to your workspace or repository, then set oidc: true on the step so STS exchanges BITBUCKET_STEP_OIDC_TOKEN for short-lived credentials, eliminating stored access keys.
What's the difference between Bitbucket Pipelines and GitHub Actions for Terraform?
Bitbucket Pipelines is Atlassian’s built-in CI/CD tied to Bitbucket Cloud, while GitHub Actions is a marketplace-driven workflow engine native to GitHub. For Terraform, GitHub Actions offers a larger catalog of community and HashiCorp-maintained actions, whereas Bitbucket relies on Docker images and Atlassian Pipes but integrates more tightly with Jira and deployment environments.
Is Bitbucket Pipelines free for Terraform workflows?
A free tier is available with 50 build minutes per workspace each month, enough for light experimentation but not sustained Terraform use. Paid Bitbucket Cloud plans include larger pooled allocations (2,500 minutes on Standard, 3,500 on Premium), with overage sold at roughly $10 per 1,000 minutes.