
Spacelift wouldn’t be the leading Infrastructure as Code automation platform if you couldn’t manage it using code. Coding your deployment tools is just as important as coding the infrastructure they’re deploying because, after all, tools are infrastructure!
This article will cover a basic Spacelift deployment using the Spacelift Terraform Provider. If you’d like to follow along, you will need some Terraform code of your own and will want to update variables and other configuration items to fit your deployment.
Create the Repository
Create the repository and a branch for your Terraform code. You will need it to set up your initial stack. I imagine if you have a reason to read this blog, you’re probably relatively comfortable with Git.
Configuring the Administrative Stack
The first step to deploying your Spacelift resources using Spacelift is creating an administrative stack. You can code this out in Terraform, run it externally, and manage the state remotely, but we’ll resort to lowly clickops instead. I know clickops are the worst, but this is the only time you’ll have to do it. I promise!
- After signing into your account, click on “Add Stack” at the top right:

- Select your provider, repository, branch, and root (if necessary).
If your VCS provider is shown as GitHub (Custom App) or another VCS, check the provider documentation for your implementation. The github_enterprise block in Terraform is only required when you use a custom GitHub App. If you use the default GitHub integration, omit that block.

- Continue to the
Configure Backendsection. Choose the appropriate settings or leave the defaults.
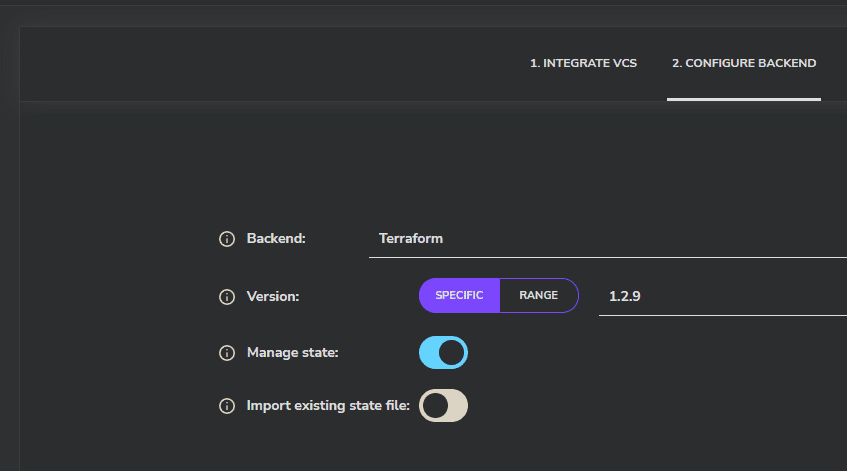
- 4. On the
Define Behaviorsection, toggleAdministrative. You may also want to display the advanced options and chooseProtect from deletion. This stack will be the stack that controls all other stacks, so I’d say it’s relatively important!Administrative stacks get a short lived API token that the provider uses. The effective permissions are scoped to the stack’s space. Plan for this if you intend to manage resources across multiple spaces.

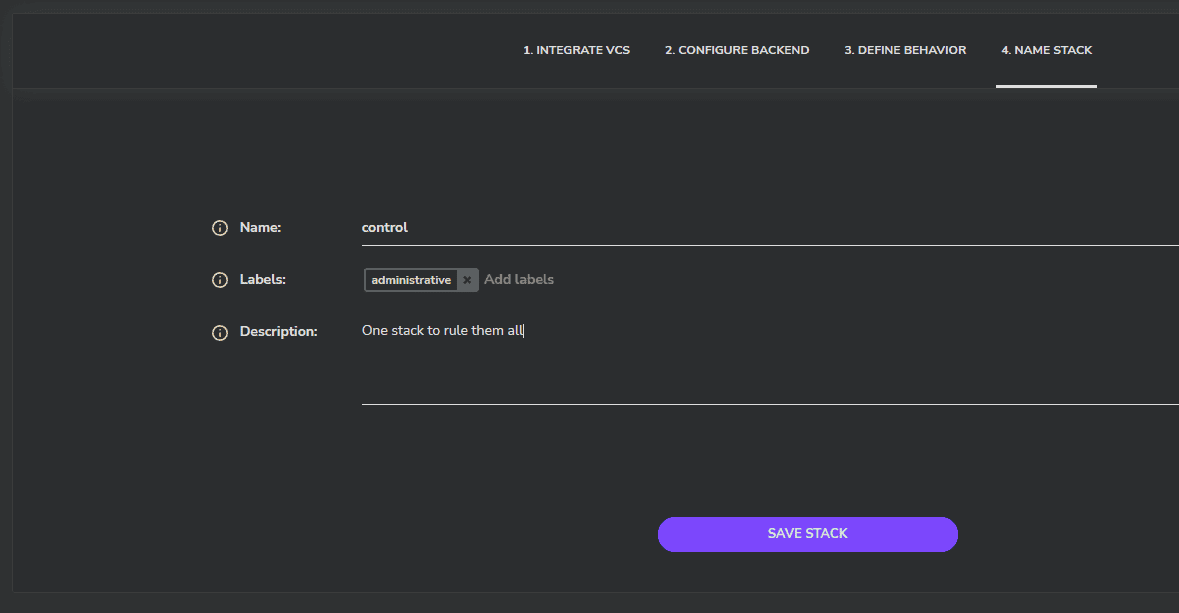
- 5. Continue and name your stack. You may also want to add an
administrativelabel to your stack as well. Save your stack, and let’s rock!
Let's Code
We will show minimal examples. For production, prefer Cloud Integrations for credentials and set your Terraform runtime version on the stack or in code as appropriate.
provider.tf
terraform {
  required_providers {
    spacelift = {
      source = "spacelift-io/spacelift"
    }
  }
}

provider "spacelift" {}
As you can see, there’s not much to it.
main.tf
resource "spacelift_stack" "ec2-stack" {

  github_enterprise {
    namespace = "saturnhead"
  }

  autodeploy   = false
  branch       = "main"
  description  = "AWS EC2 Instance and Networking"
  name         = "development-stack"
  repository   = "aws-ec2"
  terraform_version = "1.2.9"
}
Note: Only include the github_enterprise block when you use a custom GitHub App. If you use the default GitHub integration, remove that block.
Use a recent Terraform version for terraform_version, or manage the runtime version at the stack level if you prefer not to pin it here.
Again, pretty straightforward. You should recognize most of the settings from the settings page. The Spacelift API and Provider are incredibly intuitive and well-documented. You should definitely check it out for all of the options available.
Deploy the Stack!
- Commit the code to your repo. Once you’ve done that, your stack should kick off the build as expected.
- Confirm the deployment and check out your shiny new stack!
Add Some Contexts
Now that you have deployed your stack, it’s time to add a context file. Although you can add environment variables directly to the stack, the context file makes them modular and capable of being consumed by multiple stacks.
- Create your contexts. We will assign the variables later. You can also append random IDs to your contexts as well if you anticipate overlap:
resource "spacelift_context" "dev_context" {
  description = "Configuration variables for the dev environment."
  name        = "dev-context"
}

resource "spacelift_context" "prod_context" {
  description = "Configuration variables for the prod environment."
  name        = "prod-context"
}- Attach the contexts to the stack. You can, of course, attach them as you need them or modify the priority as you see fit:
resource "spacelift_context_attachment" "dev_attachment" {
  context_id = spacelift_context.dev_context.id
  stack_id   = spacelift_stack.ec2-stack.id
  priority   = 0
}

resource "spacelift_context_attachment" "prod_attachment" {
  context_id = spacelift_context.prod_context.id
  stack_id   = spacelift_stack.ec2-stack.id
  priority   = 1
}- Create some variables! To make this deployment a little more DRY, we will use
for_eachto add variables to the context. First, we’ll define our variables in alocalsblock. This block allows us to append variables and use other dynamic elements to construct our values if needed:
context_values.tf
locals {
  dev_context_vars = {
    AWS_ACCESS_KEY_ID     = { value = var.dev_aws_key,    write_only = true }
    AWS_SECRET_ACCESS_KEY = { value = var.dev_aws_secret, write_only = true }
    TF_VAR_aws_region     = { value = "us-east-1",        write_only = false }
    TF_VAR_node_name      = { value = "dev-node",         write_only = false }
  }
  prod_context_vars = {
    AWS_ACCESS_KEY_ID     = { value = var.prod_aws_key,    write_only = true }
    AWS_SECRET_ACCESS_KEY = { value = var.prod_aws_secret, write_only = true }
    TF_VAR_aws_region     = { value = "us-west-1",         write_only = false }
    TF_VAR_node_name      = { value = "prod-node",         write_only = false }
  }
}
In production, prefer Cloud Integrations which provide short lived credentials at run time, rather than storing static cloud keys as variables.
- Add those variables to your contexts using
for_each
resource "spacelift_environment_variable" "dev_vars" {
  for_each   = local.dev_context_vars
  context_id = spacelift_context.dev_context.id
  name       = each.key
  value      = each.value.value
  write_only = each.value.write
}

resource "spacelift_environment_variable" "prod_vars" {
  for_each   = local.prod_context_vars
  context_id = spacelift_context.prod_context.id
  name       = each.key
  value      = each.value.value
  write_only = each.value.write
}
Once you push the new code to your repository, confirm the deployment:

Then, check out your new contexts, all ready to go!

Key Points
That’s a quick primer on using the Spacelift Terraform provider to deploy Spacelift resources using Spacelift!
To make this process easier, use the spacectl local-preview command to run local previews without pushing your code and to confirm stack deployments. Remember that administrative privileges are scoped to the space, so plan your structure accordingly. For production, favor Cloud Integrations for credentials management.
Automation and Collaboration Layer for Infrastructure as Code
Spacelift is a flexible orchestration solution for IaC development. It delivers enhanced collaboration, automation and controls to simplify and accelerate the provisioning of cloud based infrastructures.
