
In this blog post, we’ll explore the Cloud Development Kit for Terraform (CDKTF) and how it allows developers to use familiar languages to define their Terraform infrastructure, making it easier to manage and maintain.
If you are new to Terraform, check out the numerous Terraform articles and guides hosted on the Spacelift tech blog.
Terraform is one of the most popular tools to manage Infrastructure as Code and automate and streamline operations.
Although Terraform is an excellent tool for this job, it forces users to learn and use the Hashicorp Configuration Language (HCL) to define their infrastructure. What if developers could use the same programming languages to build their applications to define our infrastructure?
Enter CDKTF, which allows users to use programming languages that they already know to define their Terraform infrastructure. It supports TypeScript, JavaScript, Python, and C# and provides an object-oriented approach to Terraform, which makes it easier to manage and maintain your infrastructure.
Using CDKTF, you build your infrastructure resources based on familiar programming concepts such as classes and objects. Later, CDKTF translates your code to the HCL format required by Terraform to create and manage those resources. The generated HCL code can then be used to provision resources like you would with Terraform.
CDKTF also integrates with existing Terraform modules and plugins you might have, so you can continue using them without any issues. It automatically extracts the schema from Terraform providers and modules to generate the necessary classes for your application.
The core advantage of using CDKTF is that it allows users to use their existing skills and tools to manage infrastructure.
Suppose you are working with teams of developers familiar with any of the supported languages, and they need to gain Terraform experience. In that case, it might be a great choice to adopt CDKTF.
Another benefit is that CDKTF provides a set of high-level constructs that abstract away Terraform’s lower-level resource management. This allows engineers to define infrastructure in a more understandable, readable, and composable way.
By leveraging CDKTF, we end up with the same programming language for both application and Infrastructure Code. This makes it easier for users to understand the environments end-to-end, manage them more effectively, and maintain them over time.
As mentioned, CDK for Terraform translates your code to the HCL format by borrowing concepts and libraries from the AWS CDK.
Similar to the Terraform workflow, we have to create a project, define infrastructure components in one of the supported languages, and use the cdktf specific command line interface (CLI) commands to deploy the infrastructure or produce the JSON manifests to be deployed via Terraform. It contains two main components that enable its workflow; the CD for Terraform library (CDKTF lib) and the cdktf CLI.
The CDKTF lib contains all the pre-built components, or “constructs”, used to define infrastructure using the CDK for Terraform framework. These constructs simplify the process of defining resources and provide a high-level and abstract representation of infrastructure. The CDKFT lib is designed to be extensible, so developers can build their own custom constructs and leverage them across different projects.
The CDKTF command line tool provides a set of commands for managing the lifecycle of CDK for Terraform applications, including commands for scaffolding a new project, synthesizing code into Terraform configuration files, and managing the provisioning of infrastructure.
CDKTF applications are composed of constructs, classes used as building blocks allowing users to define common infrastructure patterns and components without having to write Terraform code. Constructs define a part of the whole system and can be grouped and combined to build complex environments.
The App class is used as a parent container for an application and groups all relevant resources. Each App can contain different Stack classes representing different Terraform configurations. It is similar to a Terraform working directory and allows you to have a separate state for components within the application. This is typically the case for separating the state of different development environments of the same application, but it can also be leveraged for other use cases. The Resource class is the foundational block used to define one or more infrastructure objects.
If you plan to develop your own custom constructs, it is recommended to use TypeScript. Using TypeScript allows you to use the cdktf constructs package generator to build and publish your constructs in multiple languages.
In this part, we will go through a hands-on demo using cdktf with Python to provision infrastructure resources on AWS. For this demo, we will initialize a new CDK for Terraform application that defines all the necessary resources to create a web server behind a load balancer on AWS, including networking and security groups.
To follow along, you should first:
- Install CDK for Terraform v0.15+
- Install Terraform v1.2+
- Create an AWS account
- Set AWS Credentials configured for use with Terraform
- Recent version of Python v3.7+
- Install pipenv v2021.5.29+
First, let’s create a directory for our new project:
mkdir cdktf-aws-python-webserver
cd cdktf-aws-python-webserver
We start by initializing our project with the cdktf init command and specifying our preferred language and Terraform’s AWS provider. We won’t use any remote state for this demo by setting the flag --local.
cdktf init --template="python" –local --providers="aws@~>4.0"When prompted, select your project name and a short description.
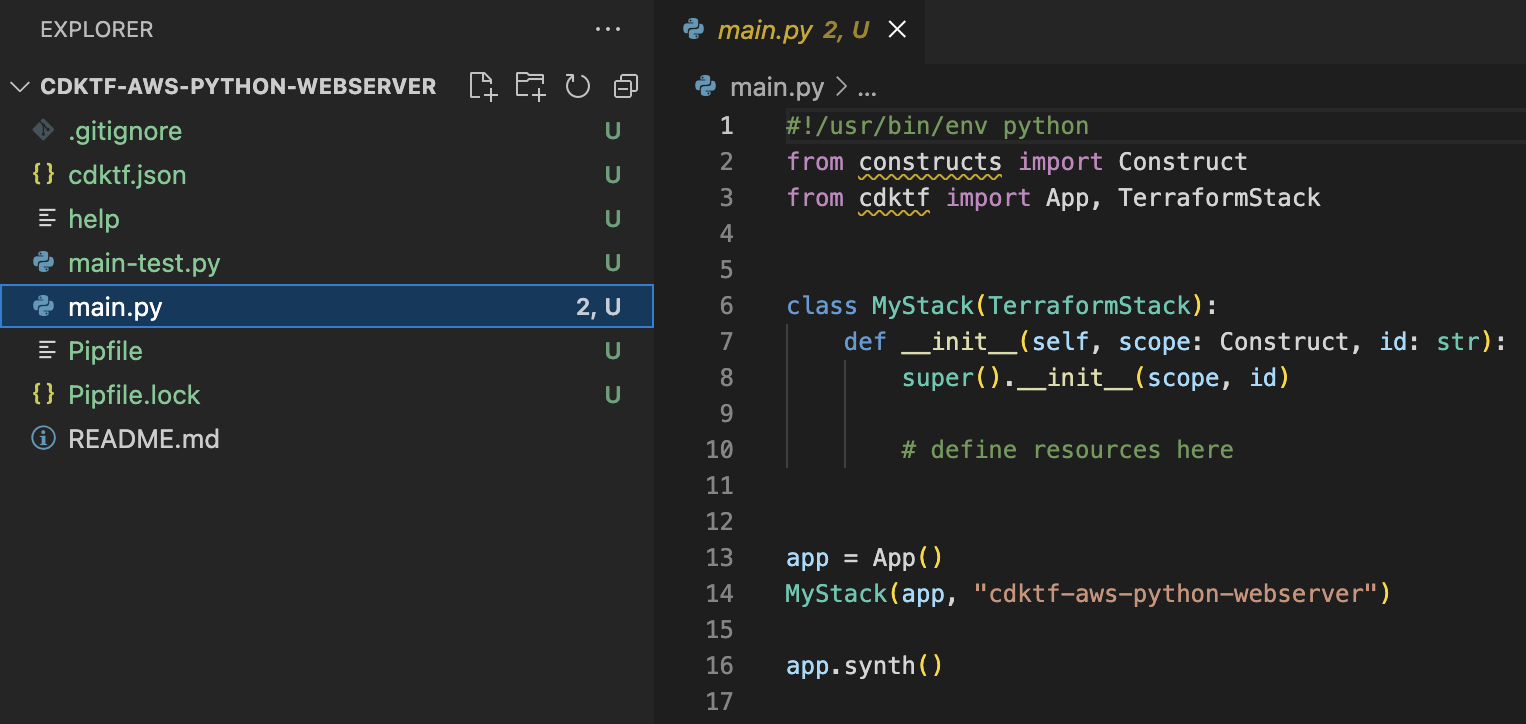
This will generate the template for your project. Your project should look like this now:
It generates a virtual environment with the help of pipenv for our project and updates the Pipfile with the required packages we need.
The cdktf.json file contains the cdktf specific configuration for the project, including Terraform modules needed.
The main.py file has been scaffolded as a starter point. We will update the contents of this file to define our resources. Go ahead and replace it with this code:
main.py
Let’s unpack what we have implemented here. In the first part of the main.py file, we explicitly import any classes needed from the cdktf library.
We define a new stack with the MyStack class containing all the providers and resources. Next, we configure the AWS provider and the target region.
Continuing, we define two variables, image_id and instance_type, that we will use later to provision our instance. We won’t be setting variables for all the resources to keep this demo short. Ideally, we should define variables for all the parameters and preferably set them in a separate file, but you get the idea. Here’s more information on setting variables with CDK for Terraform.
After the variables, we define the various AWS resources needed to create a VPC with public and private subnets, an application load balancer, an ec2 instance, and the required security groups.
In different parts of the code, we use Tokens to represent values that are unknown until Terraform executes the code. For example, this is the case for the vpc_id of the security groups and the subnet_id of the ec2 instance.
For the subnet_id, we select the first of the three created subnets by leveraging the Fn.element function. Check the Functions section to learn more about them and how to use them.
During our ec2 instance creation, we add a user data script to install an Apache HTTP server.
Finally, after we have defined all the required resources, we use the stack we have created and call app.synth to generate the Terraform configuration.
As mentioned, we can use modules from the Terraform Registry and other sources, similarly to Terraform. In the above example, we are using the AWS VPC module. Before continuing the deployment, we must update the cdktf.json file and add the required information.
Update the cdktf.json file:
cdktf.json
{
  "language": "python",
  "app": "pipenv run python main.py",
  "projectId": "ec6738d5-5da2-4f77-9bc4-42480495df6d",
  "sendCrashReports": "false",
  "terraformProviders": [],
  "terraformModules": [
    {
      "name": "vpc",
      "source": "terraform-aws-modules/vpc/aws",
      "version": "3.19.0"
    }
  ],
  "codeMakerOutput": "imports",
  "context": {
    "excludeStackIdFromLogicalIds": "true",
    "allowSepCharsInLogicalIds": "true"
  }
}
And execute:
cdktf getThis command fetches the defined modules and constructs the imports directory with any necessary files.
Next, use the synth command to generate the JSON manifest with our Infrastructure as Code resources.
cdktf synthThis will create a new cdktf.out directory with the different stacks and JSON files. If you prefer, you can use this file to deploy the resources with Terraform.
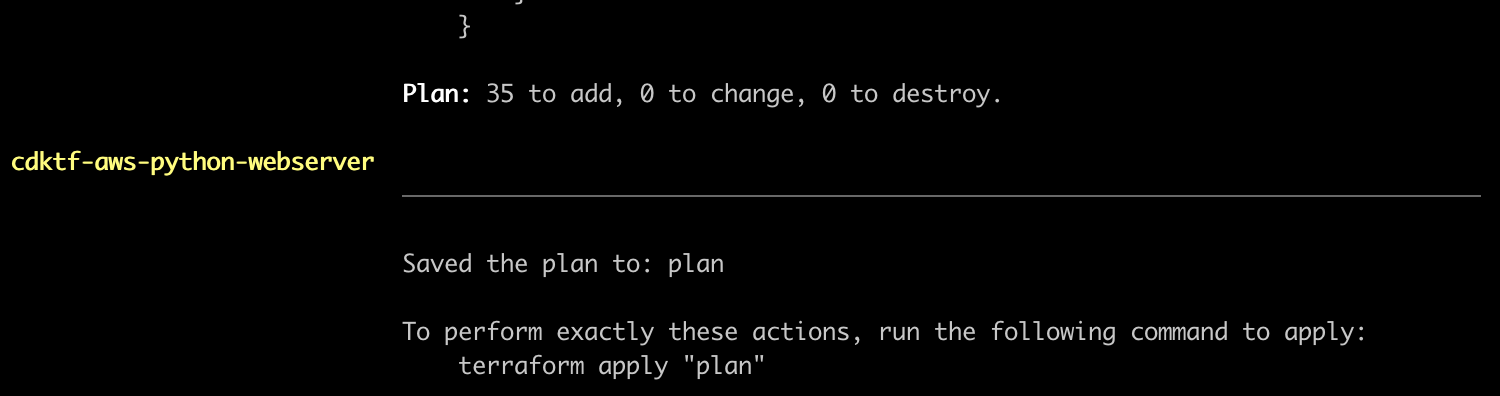
Moving on, let’s execute our familiar plan command to look into the suggested changes.
cdktf planThe above command generates a typical Terraform plan that explains ithe changes in detail. You can scroll through all the changes to verify them.
Everything looks ok, so we move to the last step, deploy our resources!
cdktf deployOnce again, we are presented with the plan and must approve the deployment.
To verify that we have deployed everything correctly, get the application load balancer’s public DNS name that we have defined as a Terraform output value from the command line, copy-paste it on the browser, and you should see this message:

Have a look at the Examples and Guides page for more tutorials and examples in the various supported languages.
In this blog post, we delved into the CDK for Terraform, discussed its characteristics, and analyzed its prominent use cases. We went over its main concepts and explained when it makes sense to use it. Finally, we deep-dived into a hands-on demo of creating various AWS resources with CDK for Terraform in Python.
We encourage you also to explore how Spacelift makes it easy to work with Terraform and Cloud Development Kit for Terraform. If you need any help managing your Terraform infrastructure, building more complex workflows based on Terraform, and managing AWS credentials per run, instead of using a static pair on your local machine, Spacelift is a fantastic tool for this.
Note: New versions of Terraform will be placed under the BUSL license, but everything created before version 1.5.x stays open-source. OpenTofu is an open-source version of Terraform that will expand on Terraform’s existing concepts and offerings. It is a viable alternative to HashiCorp’s Terraform, being forked from Terraform version 1.5.6. OpenTofu retained all the features and functionalities that had made Terraform popular among developers while also introducing improvements and enhancements. OpenTofu is not going to have its own providers and modules, but it is going to use its own registry for them.
Thank you for reading, and I hope you enjoyed this as much as I did!
Manage Terraform Better with Spacelift
Build more complex workflows based on Terraform using policy as code, programmatic configuration, context sharing, drift detection, resource visualization and many more.


Terraform CLI Commands Cheatsheet
Initialize/ plan/ apply your IaC, manage modules, state, and more.